Table of Contents

Create and Manage Vendors in Distribution Settings

Create and Manage Vendors. Flourish Vendors are the sources/distributors from whom you receive inventory (cannabis or non-cannabis). For METRC customers, vendors will match those vendors in your METR…

Table of Contents

Create and Manage Vendors

Flourish Vendors are the sources/distributors from whom you receive inventory (cannabis or non-cannabis). For METRC customers, vendors will match those vendors in your METRC setup for license-to-license cannabis transfers. These vendors are also synced for those customers integrated with an accounting system (e.g., Quickbooks Online).

You can use "Bulk Update Vendors" to update existing Vendors or create new ones.

Tutorial: Adding Vendors

  1. Open Flourish Software and click the gearbox icon to navigate to Manage Settings.
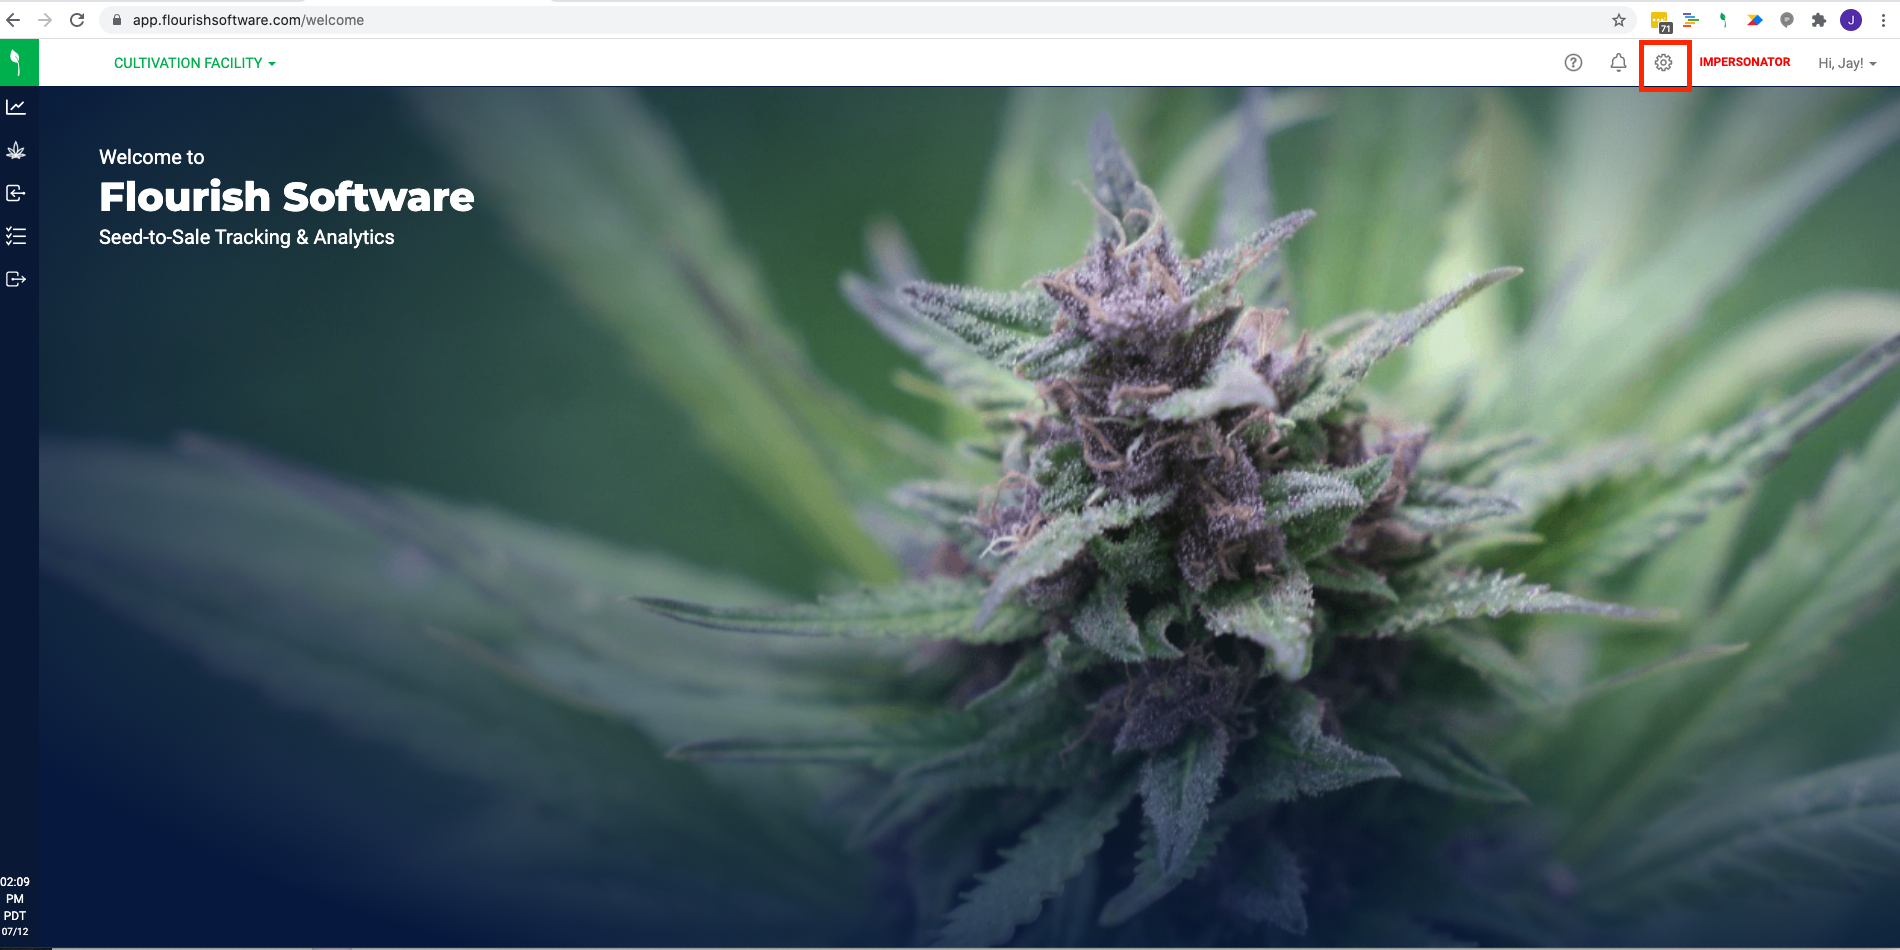
The Flourish Software welcome screen at app.flourishsoftware.com, showing the "Seed-to-Sale Tracking & Analytics" homepage with a cannabis plant image in the background and a…

  1. Click Distribution from the left side menu
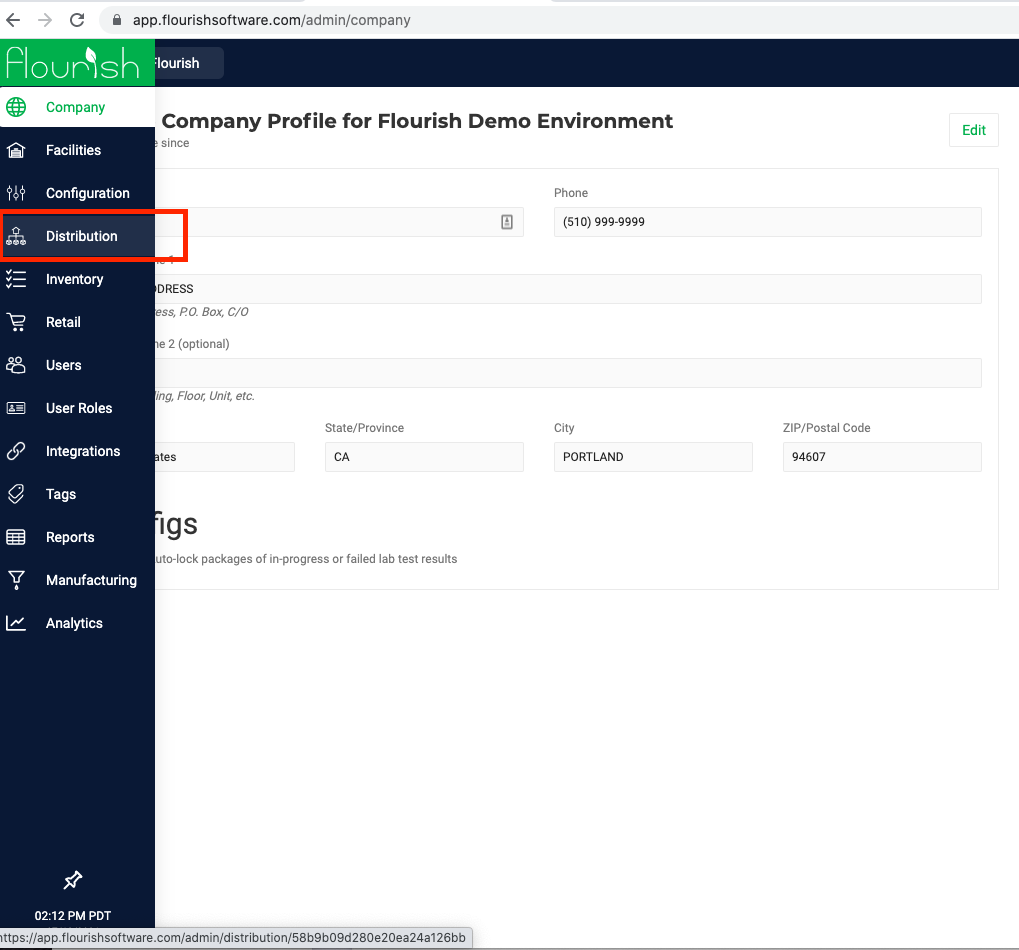
Screenshot of the Flourish Software admin interface showing the Company Profile page for a demo environment, with the left-side navigation menu visible.
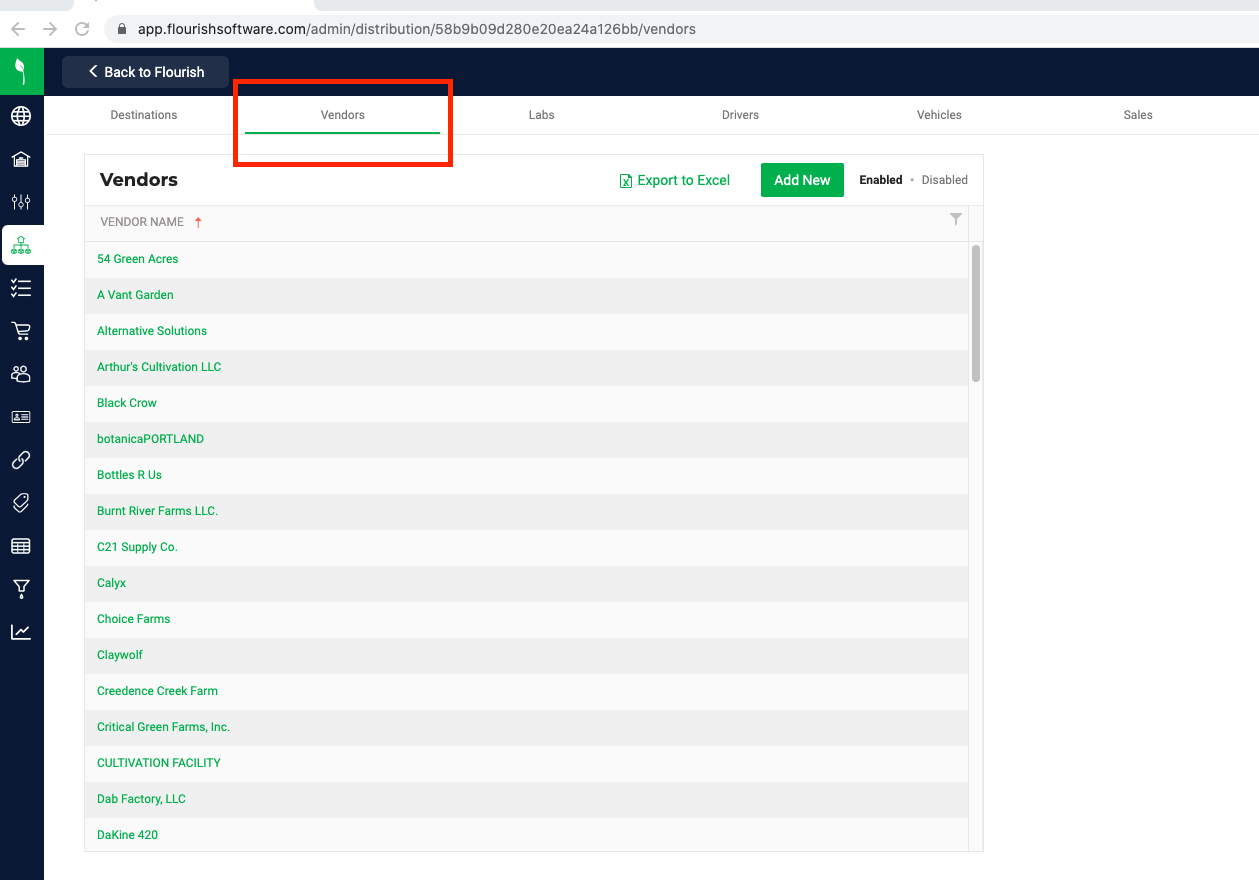
  1. Click Vendors
The Flourish Software Vendors list page within the Distribution section of Manage Settings, showing a scrollable list of vendor names (such as 54 Green Acres, Black Crow, and…
  • Tip: To search, Click on the Filter icon to search for Vendors by name
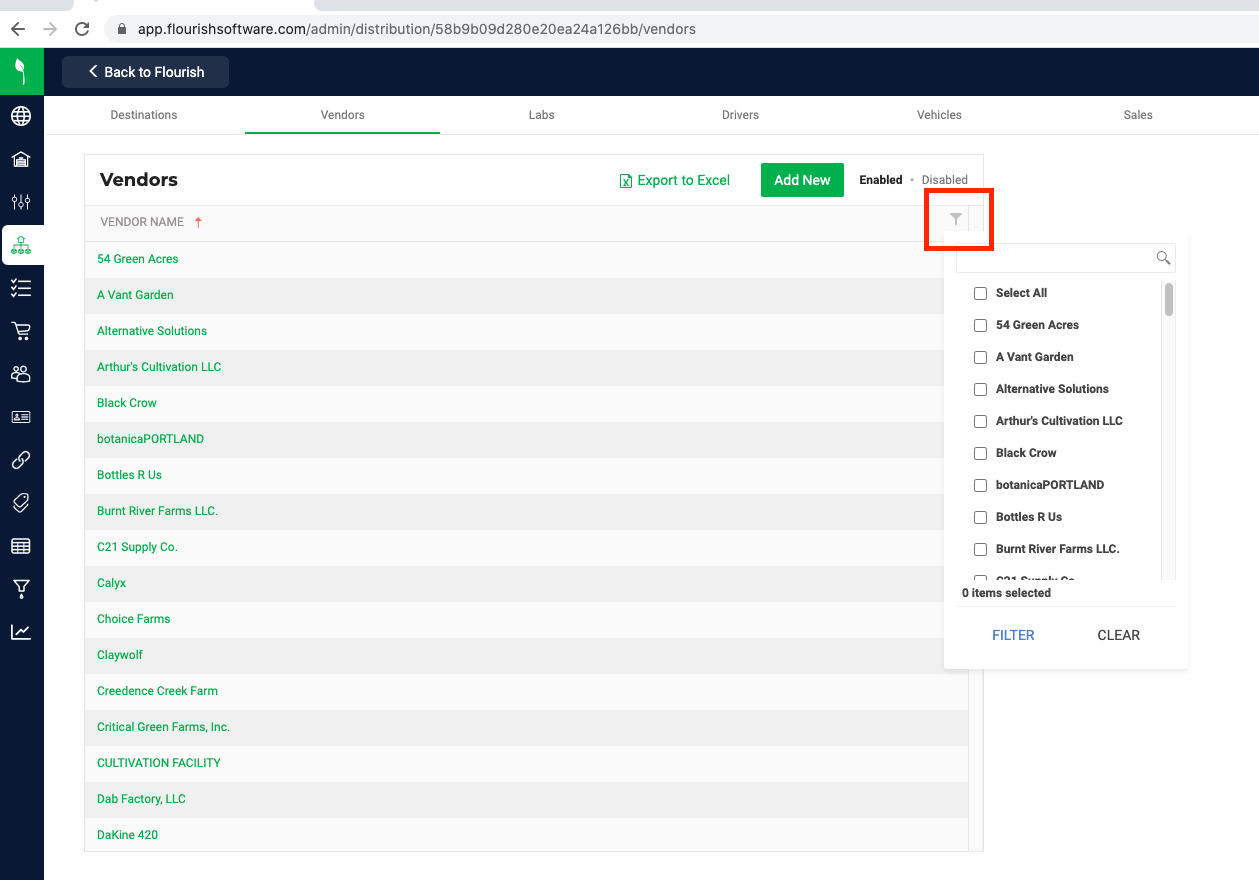
The screenshot shows the Vendors list page within Flourish Software's Distribution settings, displaying an alphabetical list of vendor names such as "54 Green Acres," "Black Crow,"…
  1. Click on a Vendor Name to edit a Vendor
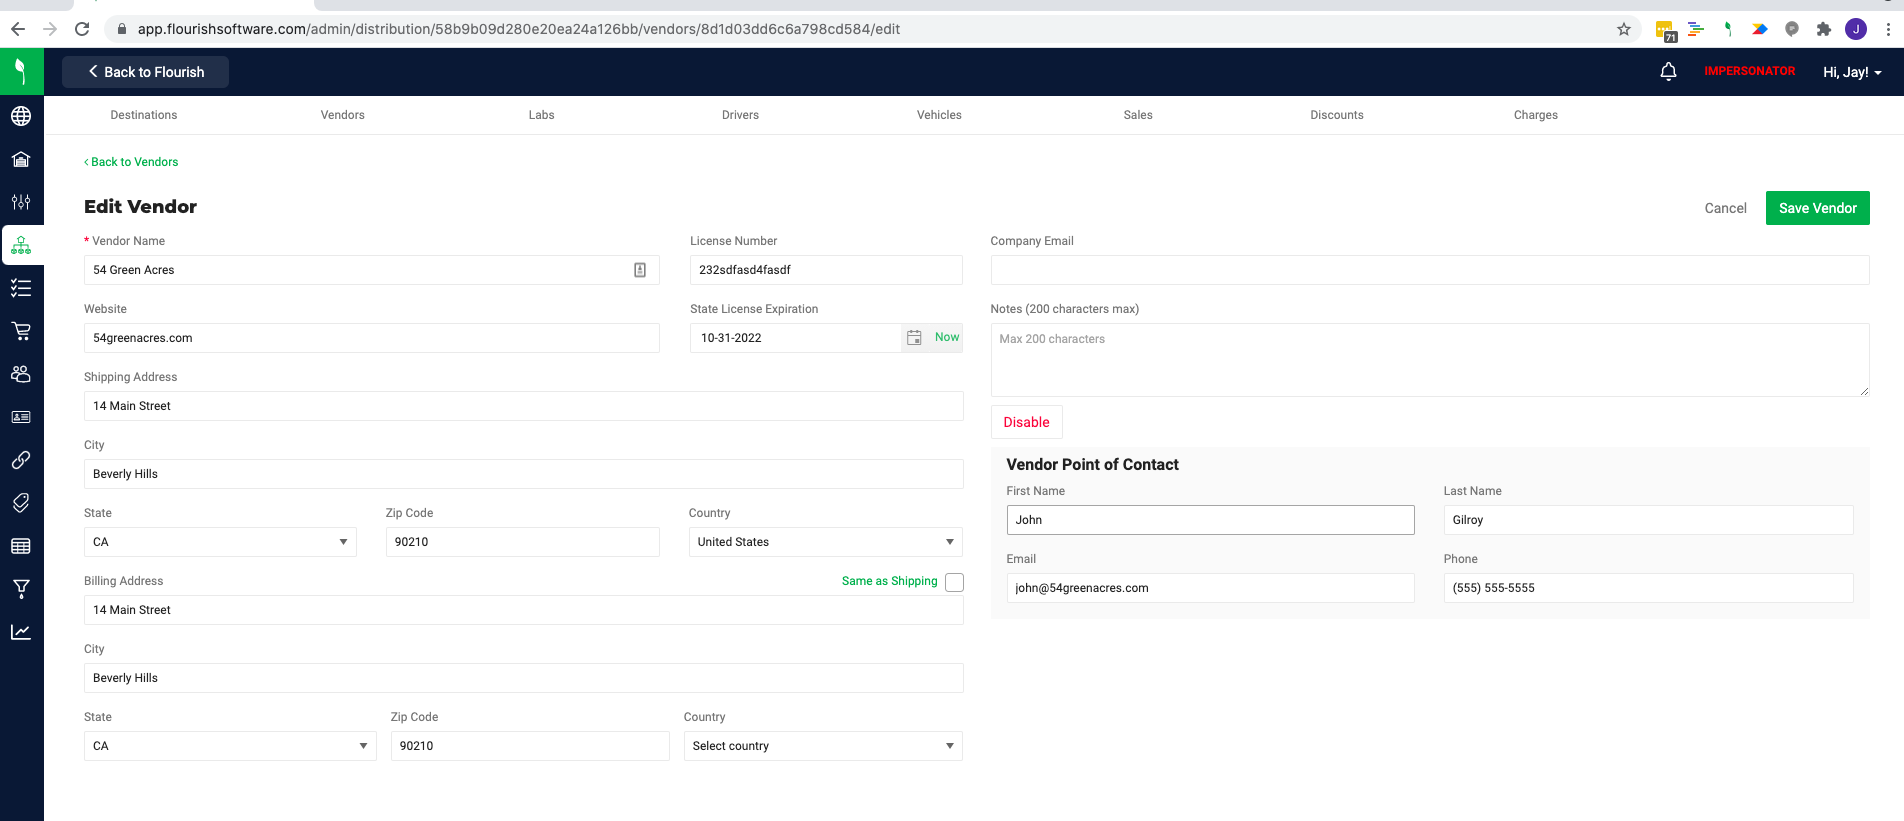
The screenshot shows the Edit Vendor form in Flourish Software's Distribution settings, displaying fields for an example vendor ("54 Green Acres"), including Vendor Name, License…
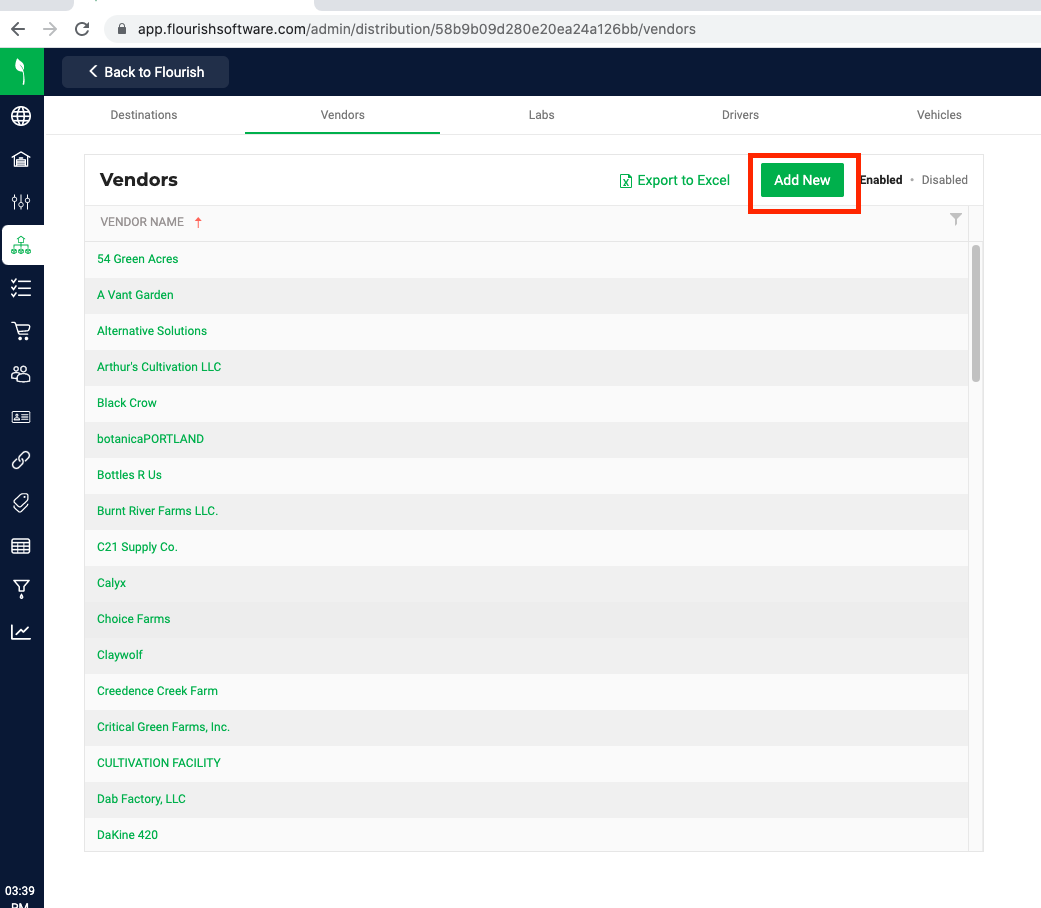
  1. To add a new Vendor, click Add New
The image shows the Vendors list page within Flourish Software's Distribution settings, displaying an alphabetical list of existing vendor names (such as "54 Green Acres,"…
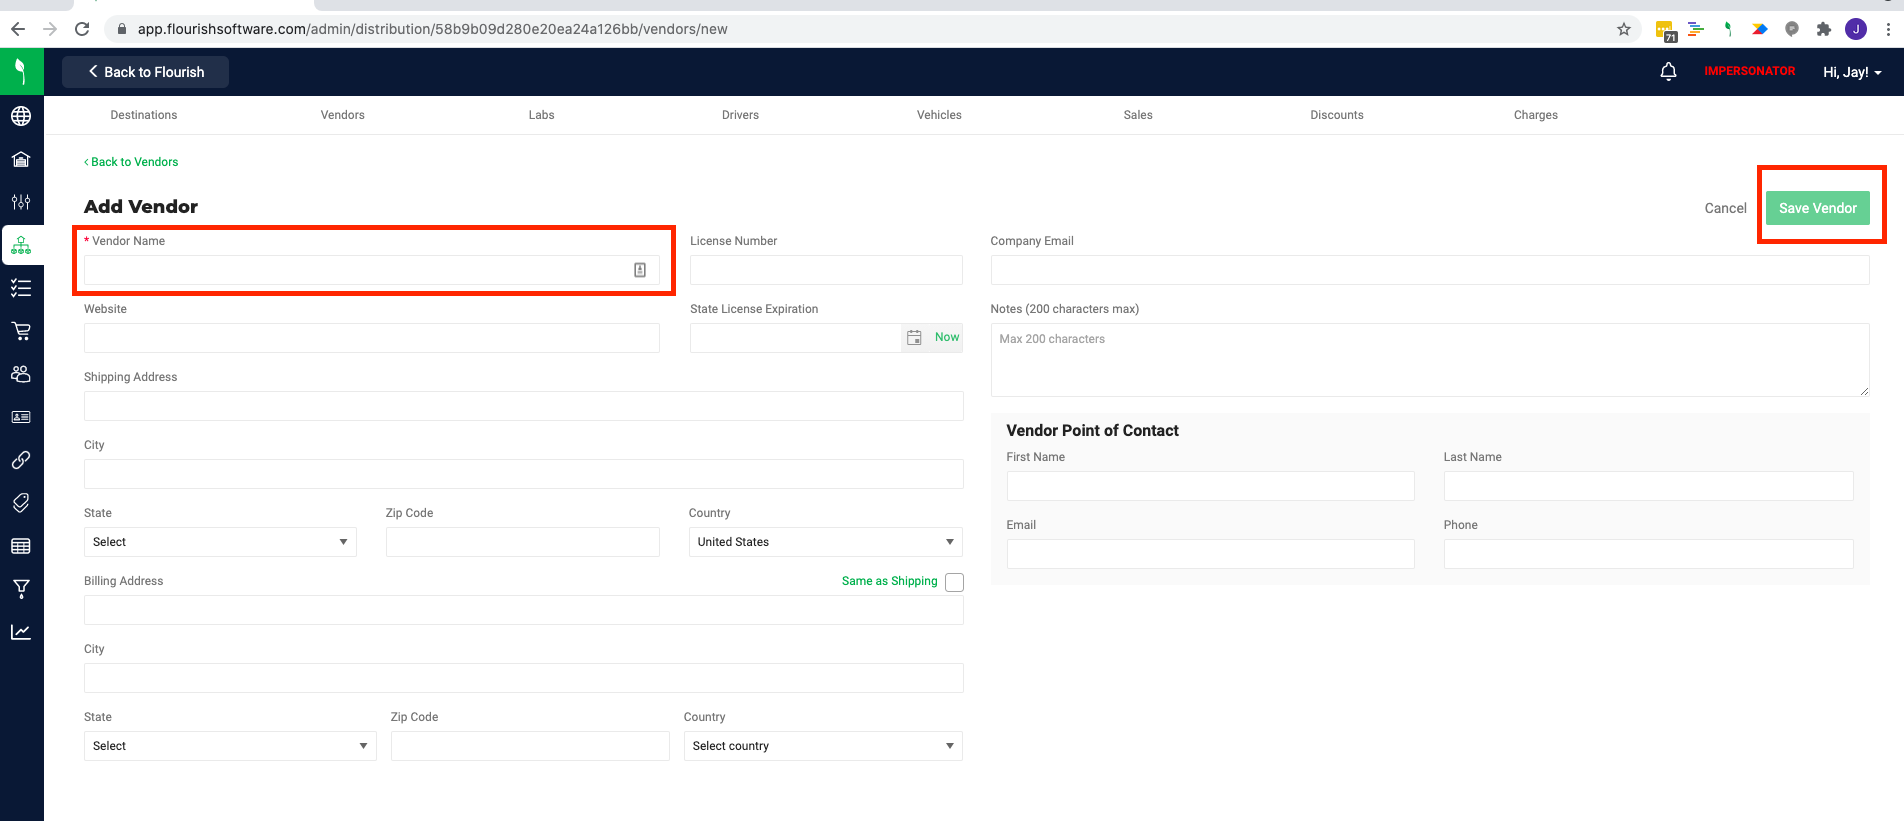
  1. Enter the new Vendor Name and other optional information
  2. Select the Vendor State under Shipping Address. *This is a required field.
  3. Click Save Vendor
The screenshot shows the Add Vendor form in Flourish Software's Distribution settings, where users can enter details for a new vendor including Vendor Name (highlighted with a red…

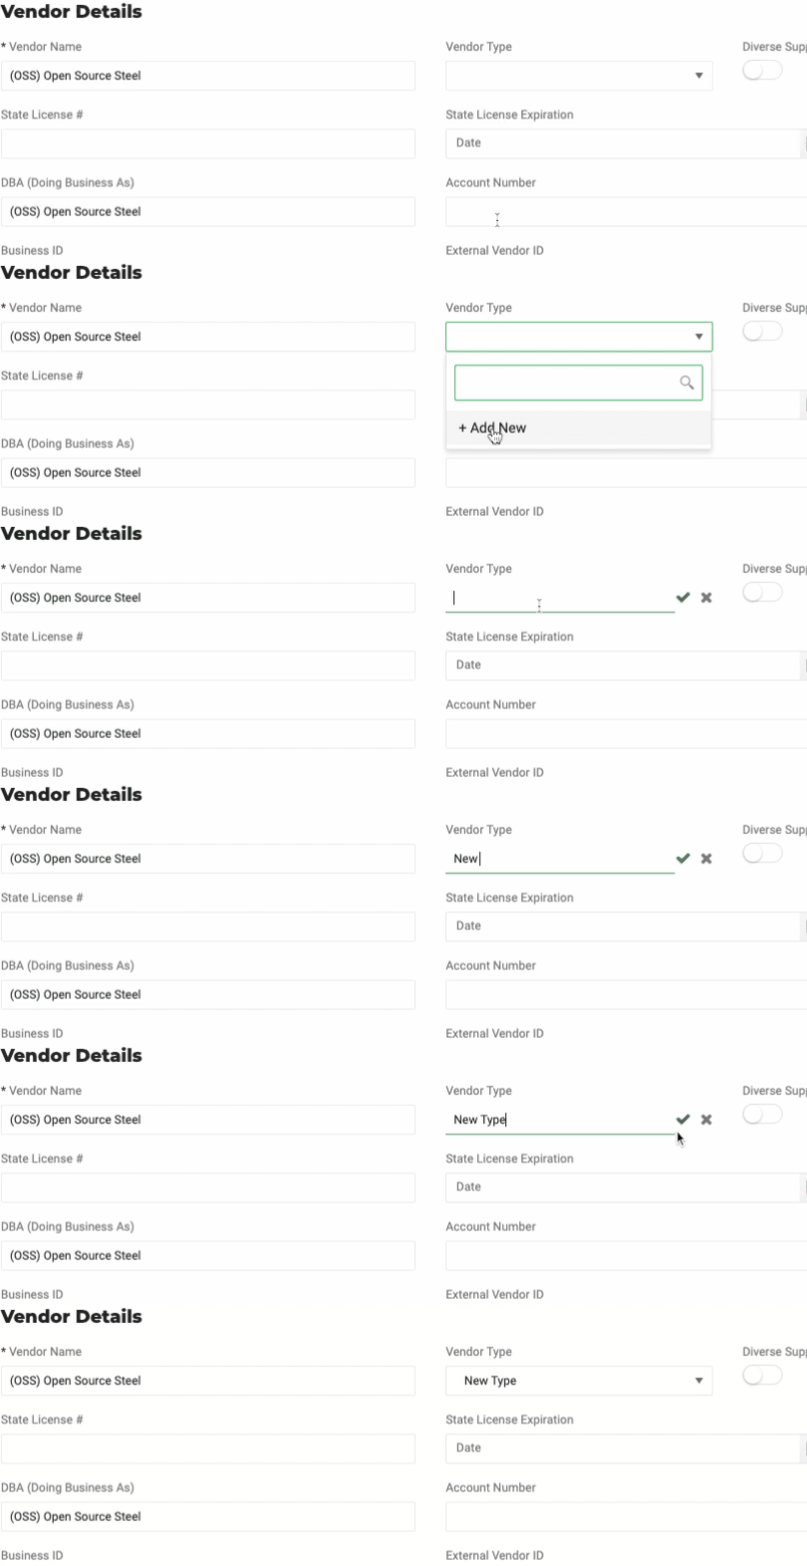
Adding Vendor Types

The image shows the Vendor Details form in Flourish Software, displaying fields for entering vendor information including Vendor Name (populated with "Open Source Steel"), Vendor…
Make sure to click the checkmark icon next to the newly entered Vendor before clicking Save.
Don't forget to click The image shows a green "Save Vendor" button, which is the final step in the vendor creation or editing workflow within Flourish Software's Manage Settings area.

How did we do?

Create and Update Destinations In Bulk

Create And Update Vendors In Bulk

Contact