Create and Update Strains in Bulk

Use "Bulk update strains" to update existing strains and create new ones.
Continue reading and check out the video below to learn how to update and create new strains in bulk.
Prerequisite
Your User Role must have the "Bulk Update Strains (update company strain master)" toggled 'On.'
To do that:
- Click
 Settings.
 - Select User Roles.
- Make sure to select the facility you need.
- Click the
 icon to CONFIGURE.
 - Locate the Admin Card.
- Next to the Inventory line in the Admin Card, click
 to enter the Actions for Admin Inventory modal.
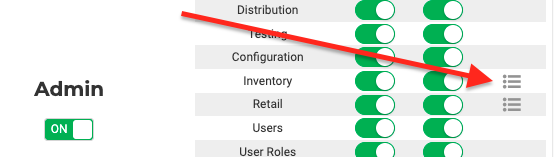
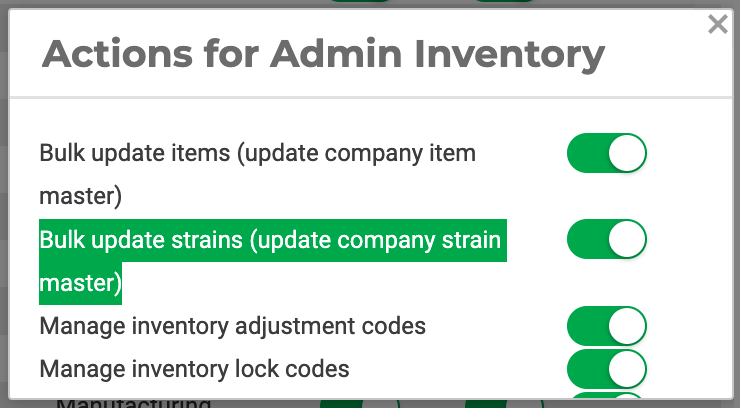
- Toggle 'On' Bulk Update Strains (update company strain master).
- Close the modal.
- Click Save.
Log in and log out to see the setting updates take effect.
Video
Bulk update strains
- Click
 Settings.
 - Select Inventory.
- Select Strains / All strains.
- Click Bulk Update Strains

- Follow the instructions on the page:

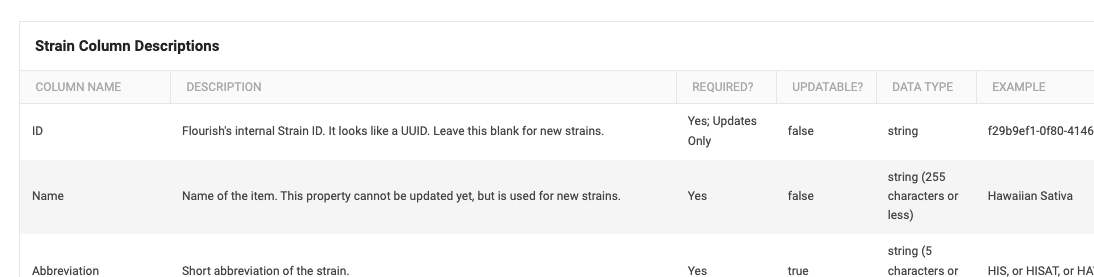
- The Strain Column Descriptions part of the page describes the information on the CSV file and how to handle it
Good to know
Disabling items or strains via Bulk Import/Update will not trigger the deactivation of those items/strains in any external system.
On the CSV file, do not make any updates to the ID column information.
- The currently supported fields are listed on the Bulk Item Update page in the Item Column Descriptions grid. Any fields listed there will also appear in an export.
- This feature does not delete strains.
- You cannot update the name of a strain.
- Do not edit the data in the ID column.
- If you want to create a new strain, fill in all the details and leave the ID column empty.
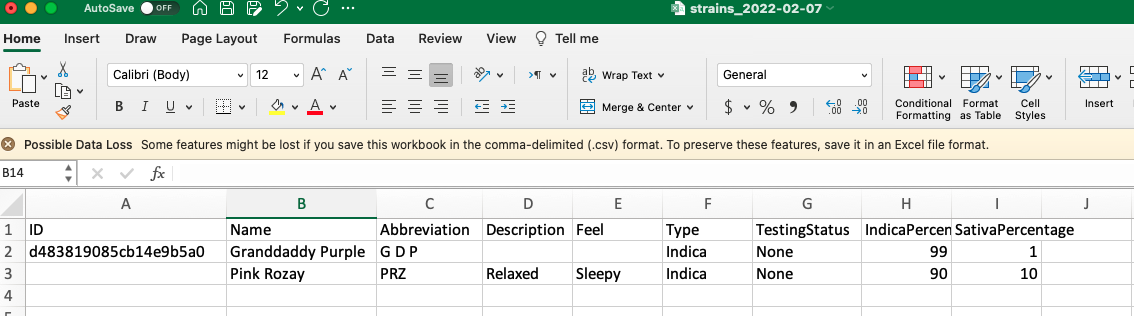
Example
Uploading a CSV file that looks like the one below will:
- Update any details you filled for the Granddaddy Purple strain.
- Create a new Pink Rozay strain with the details you filled in.
- Since the lines you see here are the only ones in the file, no other strain is updated.