Destinations: Company and Delivery Information
Destination: Company and Delivery Information. Purpose. Delivery notes, scheduling links, and delivery windows are separate from the destination's general business hours and destination notes fields.…
Destination: Company and Delivery Information
Purpose
Delivery notes, scheduling links, and delivery windows are separate from the destination's general business hours and destination notes fields. This company and delivery information is currently available in-app only and is not exposed through the External API.
Add a Company Name
- Navigate to the destination record.
- Locate the Company Name field below DBA.
- Enter the company name.
- Click Save destination.
Add Delivery Information
Add a Company Name
- Navigate to the destination record.
- Locate the Company Name field below DBA.
- Enter the company name.
- Click Save destination.
Add a Delivery Note
- Navigate to the destination record.
- Scroll to the Delivery Information section.
- Click the Delivery note field.
- Enter delivery-specific instructions (for example, dock location, check-in process, or pallet requirements).
- Click Save destination.
Add a Delivery Scheduling Link
- Navigate to the destination record.
- Scroll to the Delivery Information section.
- Click the Delivery scheduling link field.
- Enter the scheduling URL. Flourish automatically adds
https://if no protocol is included. - Click Save destination.
The link renders as a clickable hyperlink and opens in a new tab.
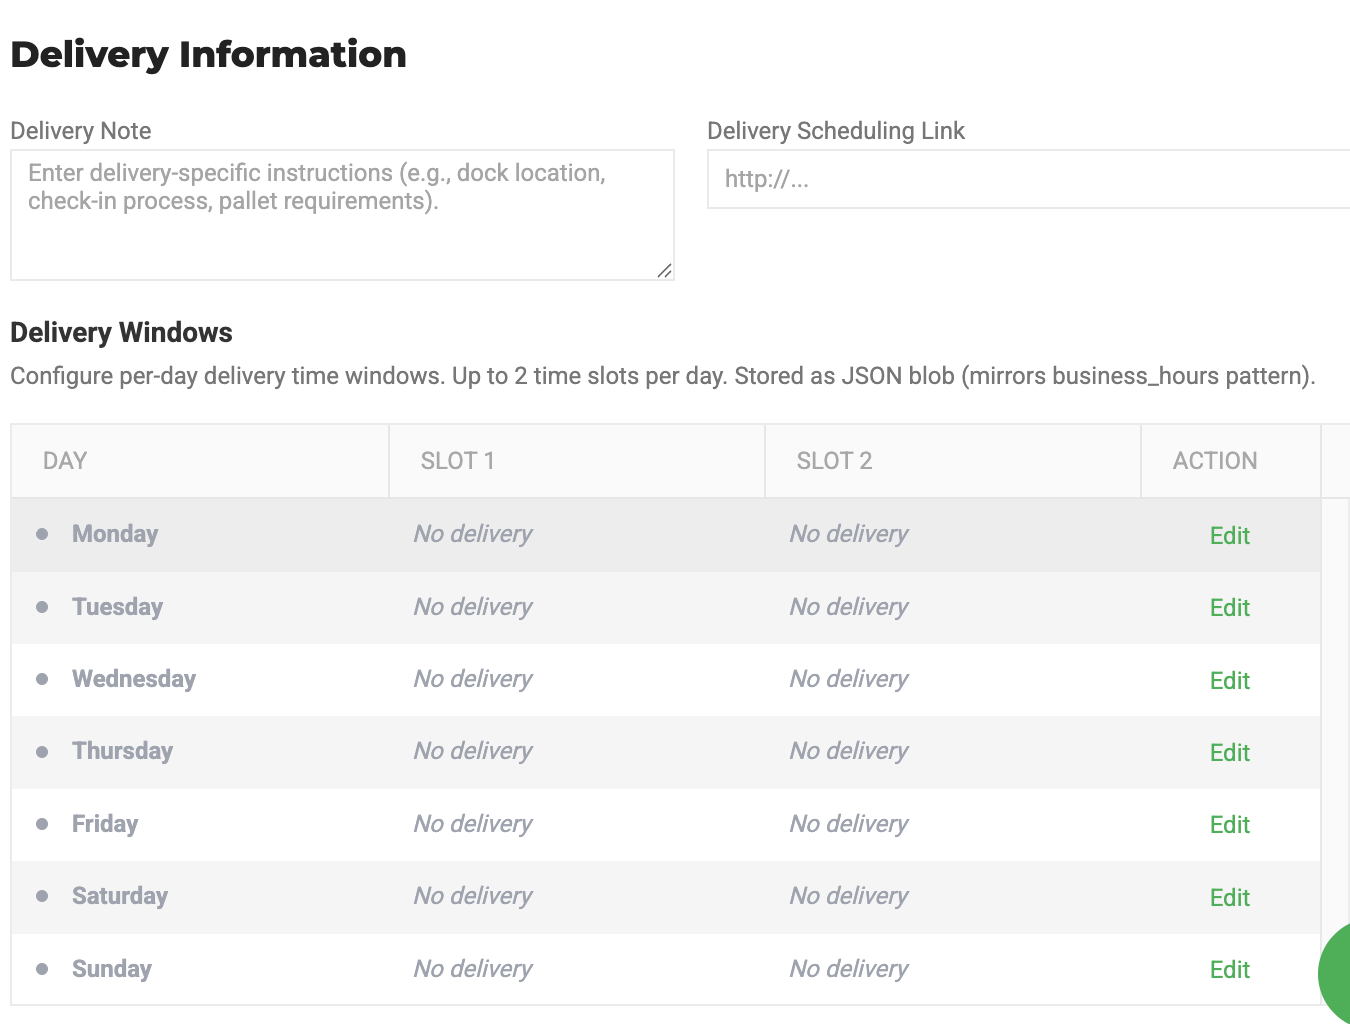
Configure Delivery Windows
Delivery windows define the time slots available for delivery on each day of the week. Each day supports up to two time slots.
Add a Delivery Window
- Navigate to the destination record.
- Scroll to the Delivery Information section.
- Click + Add delivery window.
- Select the day row to configure.
- Toggle the day Enabled.
- Set the Start and End times for Slot 1.
- To add a second slot, click + Add slot and set the Start and End times for Slot 2.
- Click Save.
- Click Save destination.
Active days display a green indicator and the configured time ranges. Inactive days display as dimmed with No delivery.
Edit a Delivery Window
- Navigate to the destination record.
- Scroll to the Delivery Information section.
- Click Edit on the day row you want to change.
- Update the Start and End times as needed.
- Click Save.
- Click Save destination.
Remove a Time Slot
- Navigate to the destination record.
- Scroll to the Delivery Information section.
- Click Edit on the day row.
- Click Remove slot next to the slot you want to delete.
- Click Save.
- Click Save destination.
Disable a Delivery Window
- Navigate to the destination record.
- Scroll to the Delivery Information section.
- Click Edit on the day row.
- Toggle the day Disabled.
- Click Save.
- Click Save destination.
Disabling a day preserves any saved time slots for future use.
Delivery Window Validation
Flourish enforces the following rules when saving delivery windows:
- Start time must be before End time within a slot.
- When two slots are configured on the same day, Slot 1's end time must be before Slot 2's start time. Slots cannot overlap.
- An enabled day must have at least one time slot configured.
Times are stored in 24-hour format and displayed in 12-hour AM/PM format.
How did we do?
Managing Destination Contact and Job Titles
Managing Sales Reps