Table of Contents

Connect Flourish to BarTender for Cannabis Label Printing

Flourish Bartender Integration for cannabis label printing. Pass item, inventory, testing/COA, and other data dynamically to Bartender to print plant, package, and product labels, including Metrc Retail ID labels.

Table of Contents

BarTender® software is trusted by organizations worldwide to improve safety, security, efficiency, and compliance by optimizing their labeling, marking, and printing processes.

Flourish Software offers seamless integration with BarTender® to enable efficient and accurate label printing for packages and plants.

Prerequisites

  1. Before you begin, ensure you have an active BarTender® account. This account is required to activate and manage the integration.
To get a BarTender® account, please contact sales@flourishsoftware.com or the support team.
  1. Once you are signed into BarTender, you will need to connect your printer. You will be prompted to Install the BarTender Print Gateway.
Windows 10 or 11 is required to install the Print Gateway

Activate the BarTender® Integration

To integrate Flourish Software with BarTender™, you must register the Flourish application in BarTender™ to generate the necessary authentication codes, then input those codes into Flourish Software.

This is a two-step process:

  1. Register Flourish in BarTender™
  2. Connect to BarTender™ in Flourish Software

Register Flourish in BarTender™

  1. Log in to your BarTender™ account.
  2. Click on API Keys under Administration in the side navigation.
  3. Click Register Application for OAuth Access.
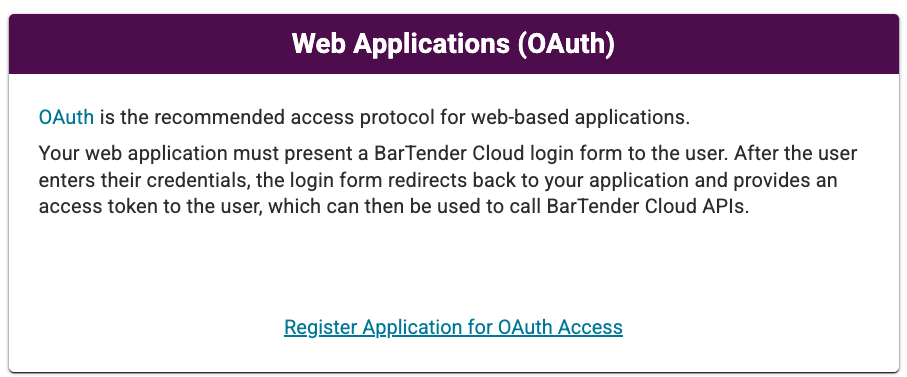
    The image shows the BarTender Cloud "Web Applications (OAuth)" panel, which explains that OAuth is the recommended access protocol for web-based applications and describes how the…
  4. Fill out the registration form with the required information (copy from here):

    Field Name

    Field Content (copy from here and paste in BarTender™ )

    Name

    Flourish Web App

    Description

    BarTender Cloud integration from Flourish Software web application

    Login URL

    https://app.flourishsoftware.com/admin/integrations/bartender/settings?auth=success

    Callback List

    https://app.flourishsoftware.com/v1/api/companies/integrations/bartender/callback

    Logout URLs

    https://app.flourishsoftware.com/admin/integrations/bartender/settings?auth=logout&error=&error_description=

    Allowed Origins (CORS)

    leave this field blank

    Allowed Web Origins

    leave this field blank

  5. Click Register. BarTender™ will show you the Application ID and Secret for the key you just created, and will add a new application entry at the bottom of the API Keys list.
  6. If you need to retrieve the Application ID and Secret again, you can click the three dots (⋮) on the far right of the new entry and choose View ID & Secret.
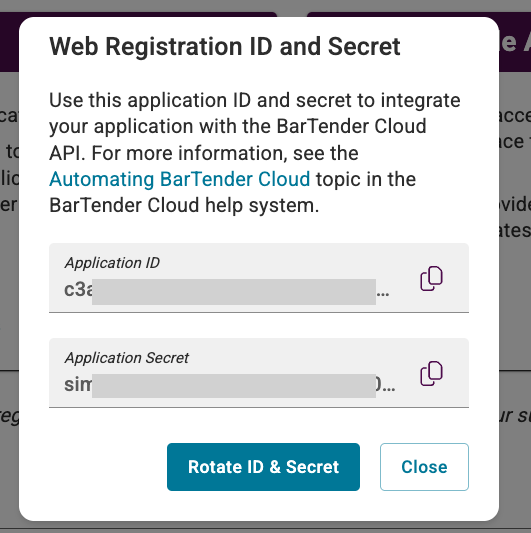
    The image shows the BarTender Cloud "Web Registration ID and Secret" modal dialog, which displays the partially masked Application ID and Application Secret fields generated after…
  7. Copy both the Application ID and Application Secret.

Connect to BarTender™ in Flourish Software

  1. Open Flourish Software.
  2. Navigate to Settings.
  3. Select Integrations from the menu.
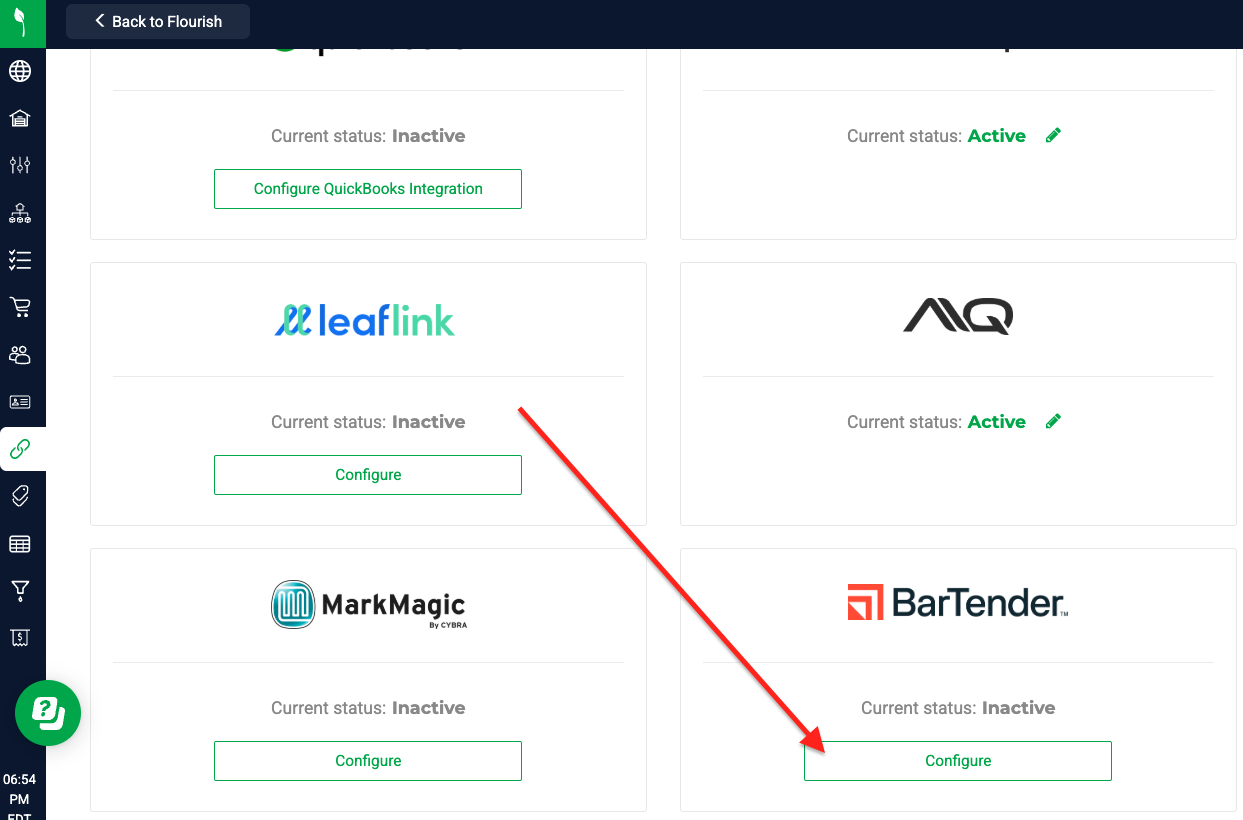
  4. Locate the BarTender™ card.
  5. Click Configure.
The screenshot shows the Flourish Software Integrations settings page, displaying a grid of available third-party integration cards including QuickBooks, LeafLink, MQ, MarkMagic,…
  1. Paste the copied credentials from BarTender™ into the corresponding fields.
    1. Client ID → Paste the Application ID
    2. Client Secret → Paste the Application Secret
  2. Click Connect.
    Flourish Software will then authenticate to your BarTender™ Cloud instance and complete the connection securely.
  3. Click Setup Reference Data. This creates a folder named Flourish Template Data Sources with both package_label.json and plant_label.json files to BarTender for field mapping in the designer.
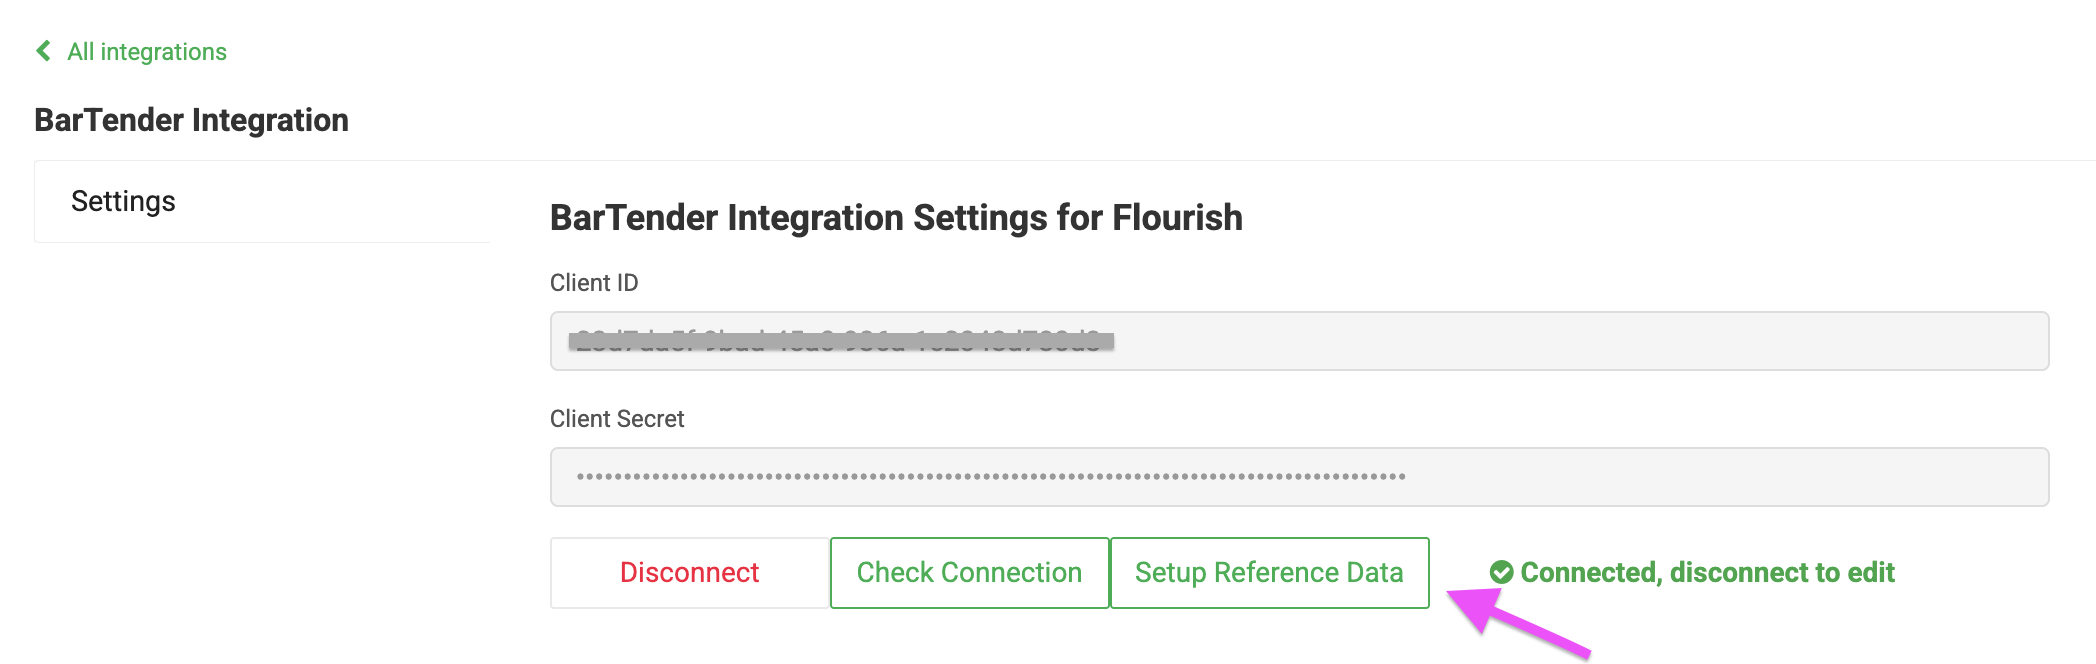
The image shows the BarTender Integration Settings page within Flourish Software, displaying two credential fields — Client ID (partially redacted) and Client Secret (masked) —…
Note: You can disable the BarTender integration at any time by clicking the Disconnect button.
  1. Navigate to your BarTender Librarian to confirm the Reference Data has been populated. We will use this later for Database Connection Setup and configuring your label templates.
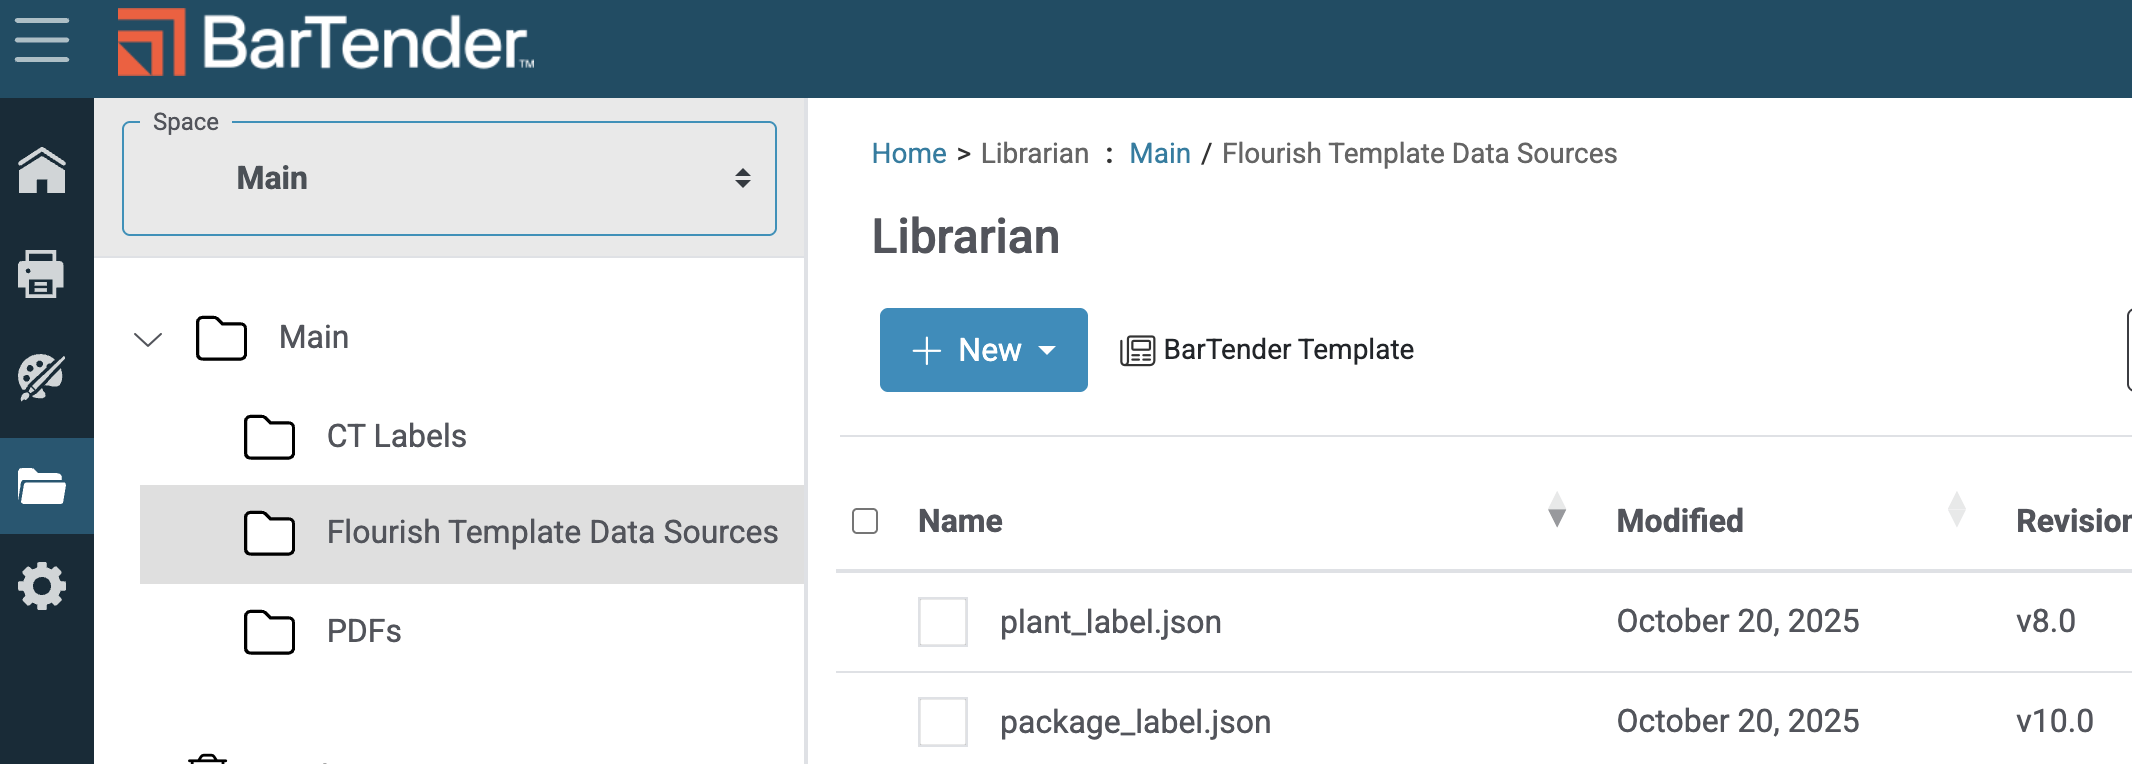
Screenshot of the BarTender Librarian interface showing the "Flourish Template Data Sources" folder selected within the Main space, with two Flourish-generated reference data files…

Using BarTender Template Designer

The template designer is what you will use to create and print labels from Flourish. We will first create the template file, then we will configure the label.

  1. Create the template File
  2. Connect the template file to the Flourish database File.
  3. Design the label

Creating the Template File

  1. To start with a new template, navigate to the BarTender Librarian. You can access from either the home screen's "quick access" page or on the left navigation menu (folder icon).
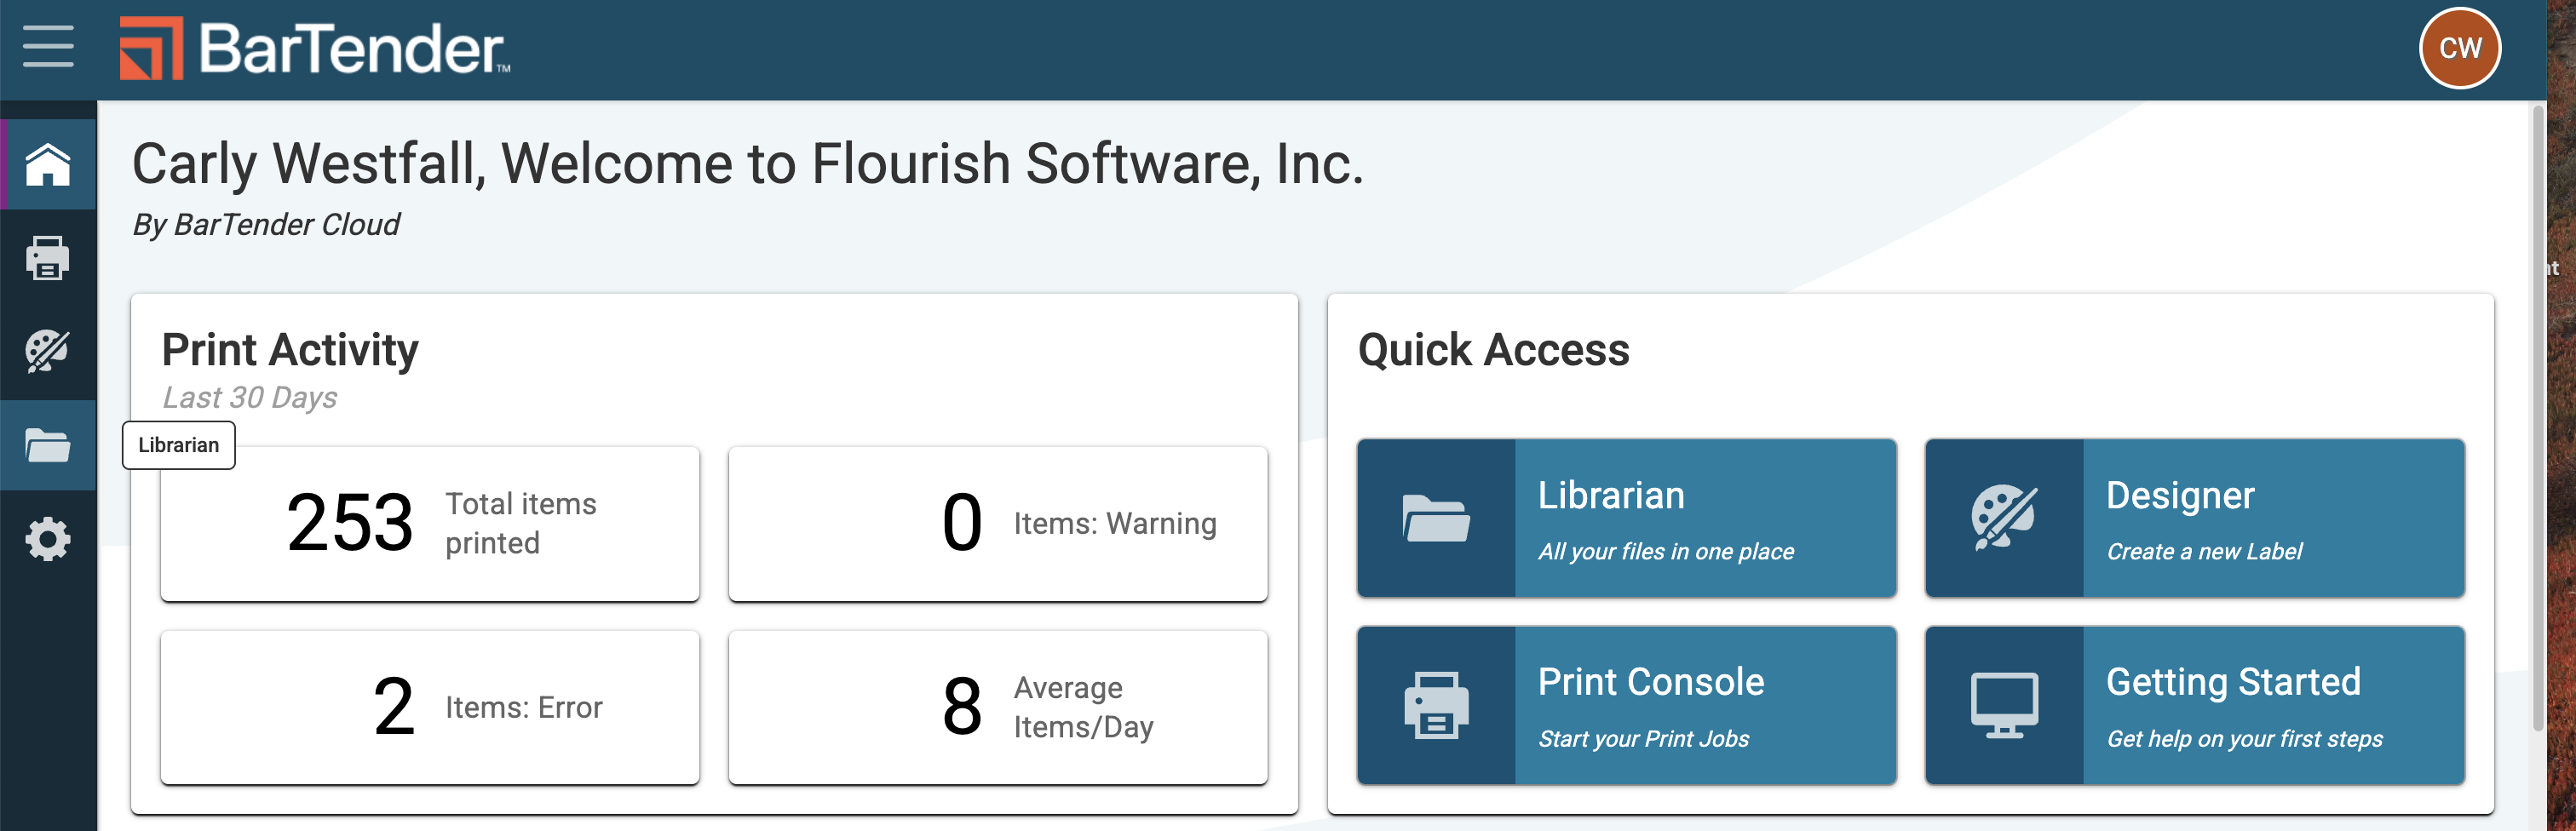
The BarTender Cloud home screen dashboard for a Flourish Software, Inc.
  1. Click +New (drop-down menu) and select Document Design.
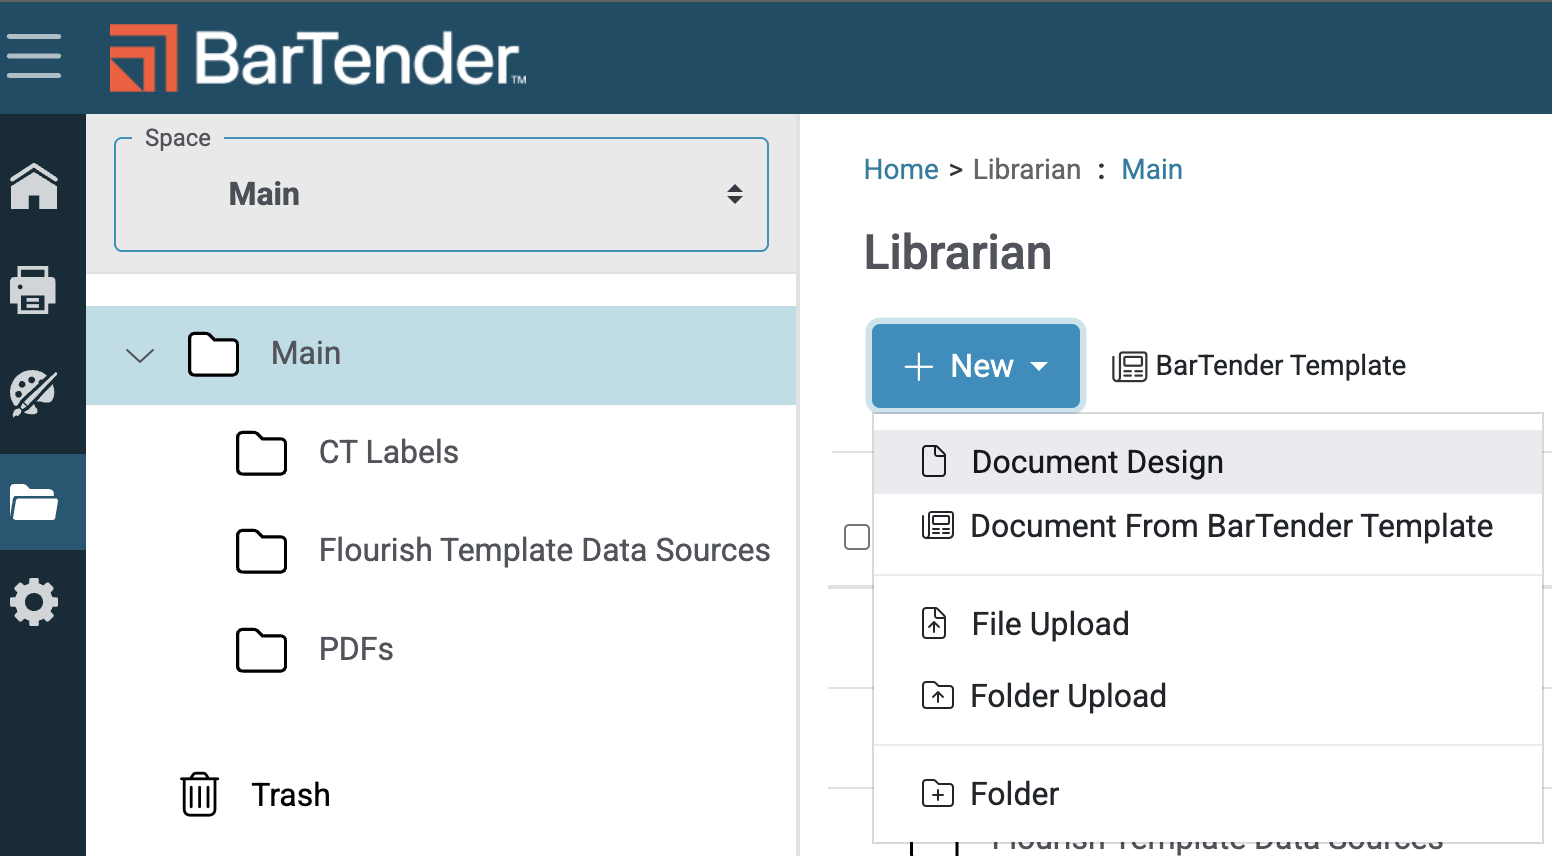
Screenshot of the BarTender Librarian interface showing the Main space folder structure — including subfolders for "CT Labels," "Flourish Template Data Sources," and "PDFs" —…
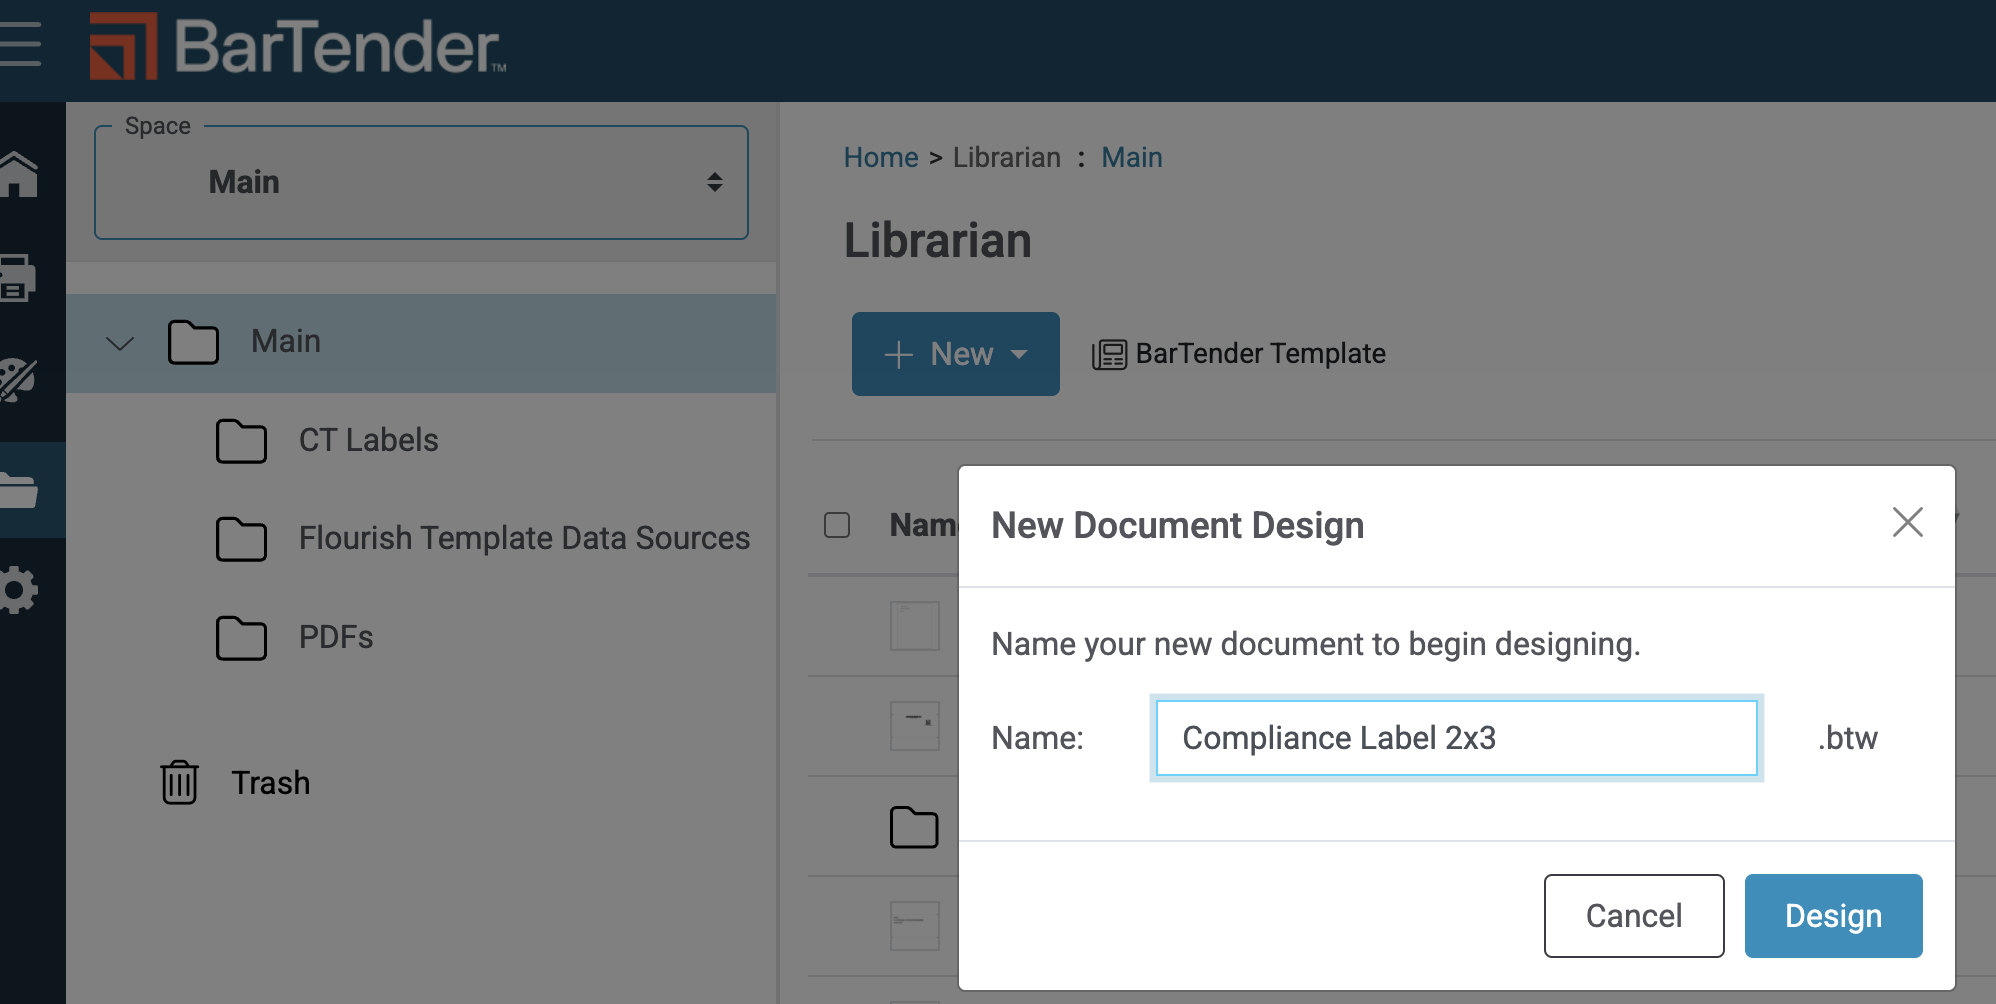
  1. Name your template, click Design.
The BarTender Librarian interface showing the "New Document Design" dialog box, where a user is naming a new label template file "Compliance Label 2x3" with a .btw extension before…
  1. Find your template in the Librarian and click on the 3 dots to the right of the filename. Click Design.
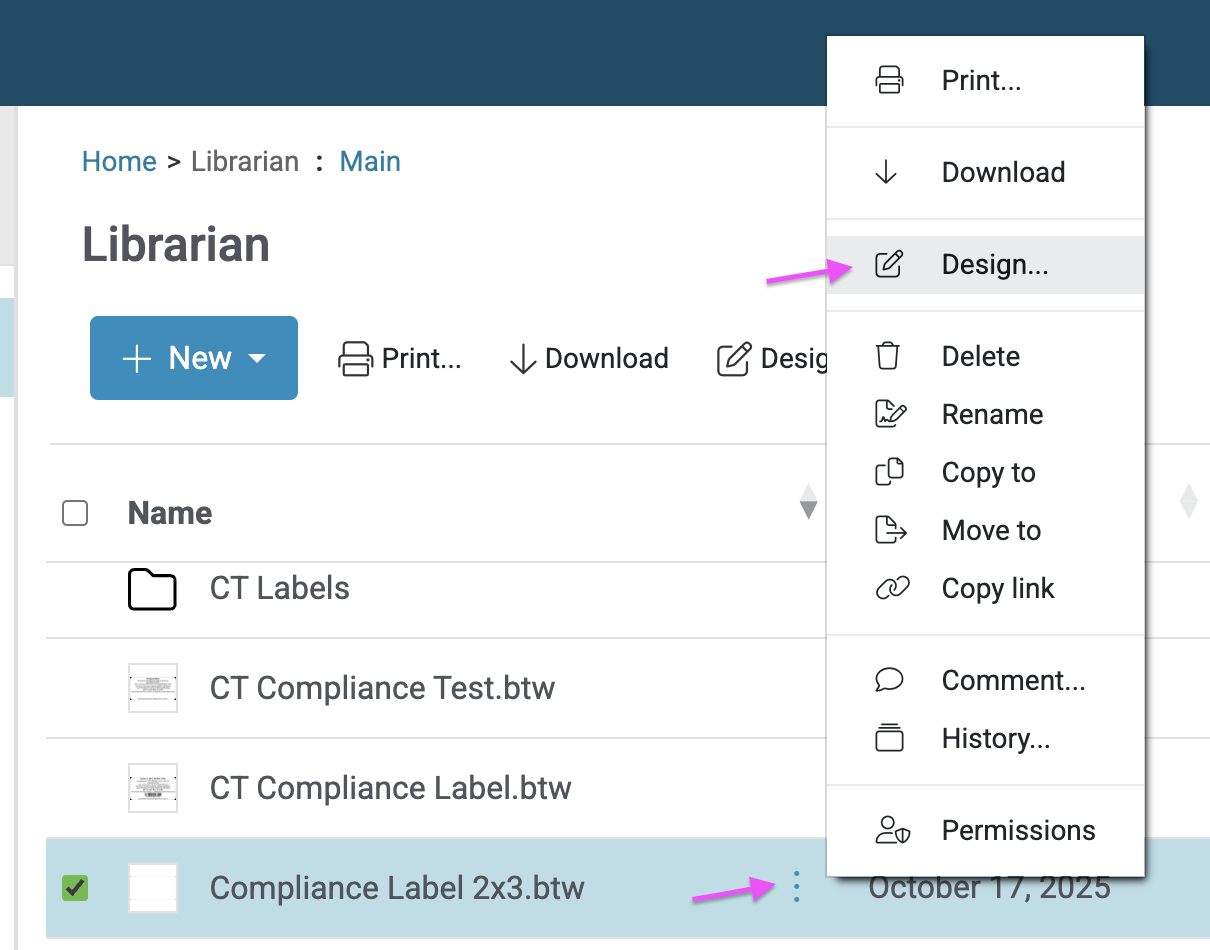
Screenshot of the BarTender Librarian interface showing a file list that includes a folder ("CT Labels") and two label template files (.btw), with a selected file ("Compliance…
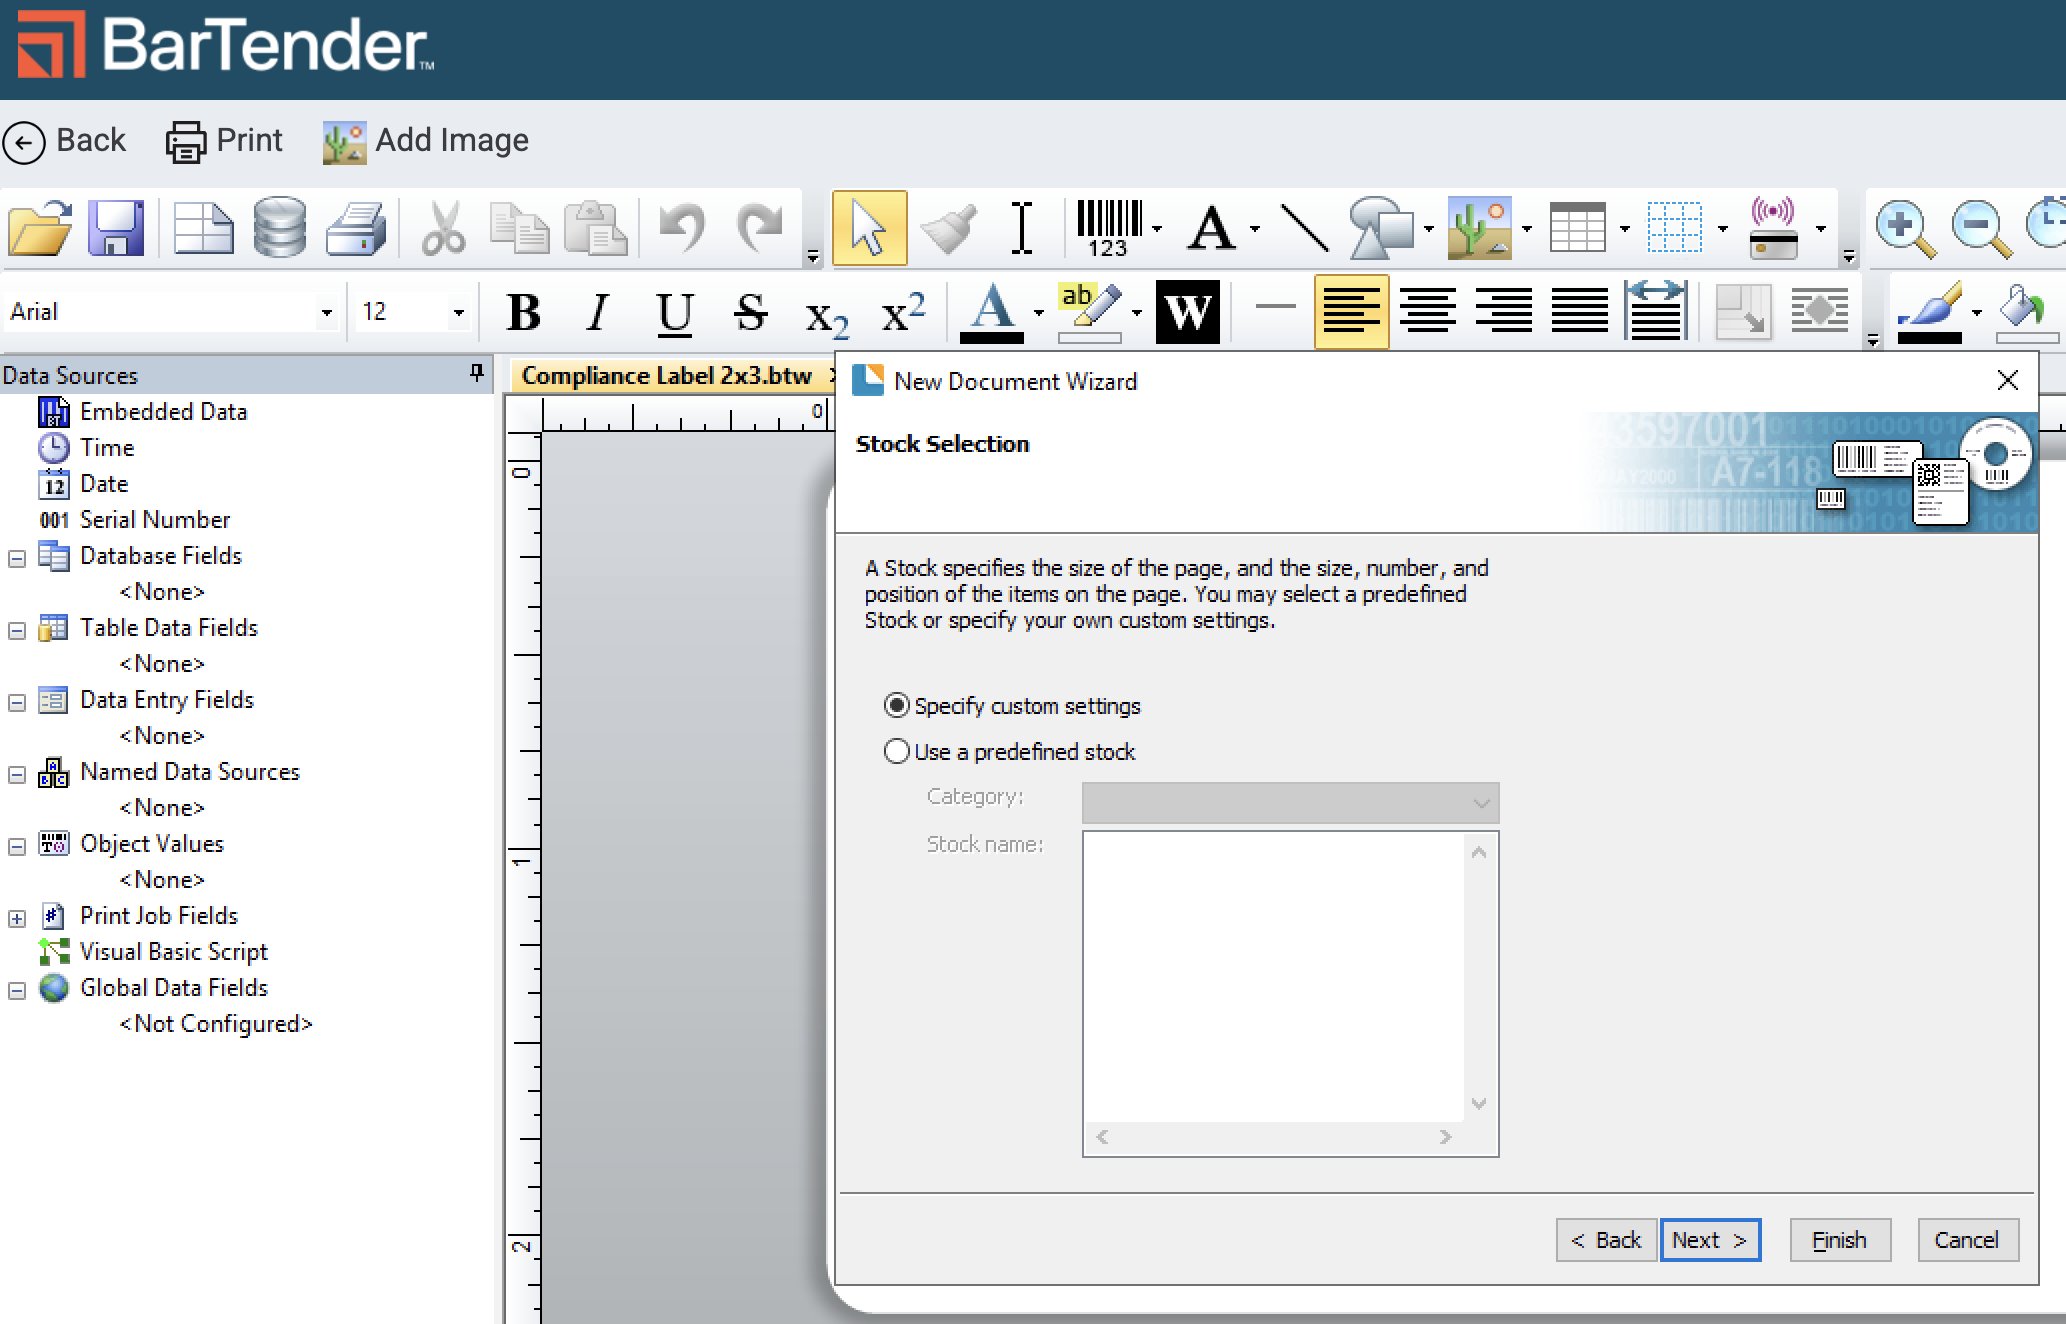
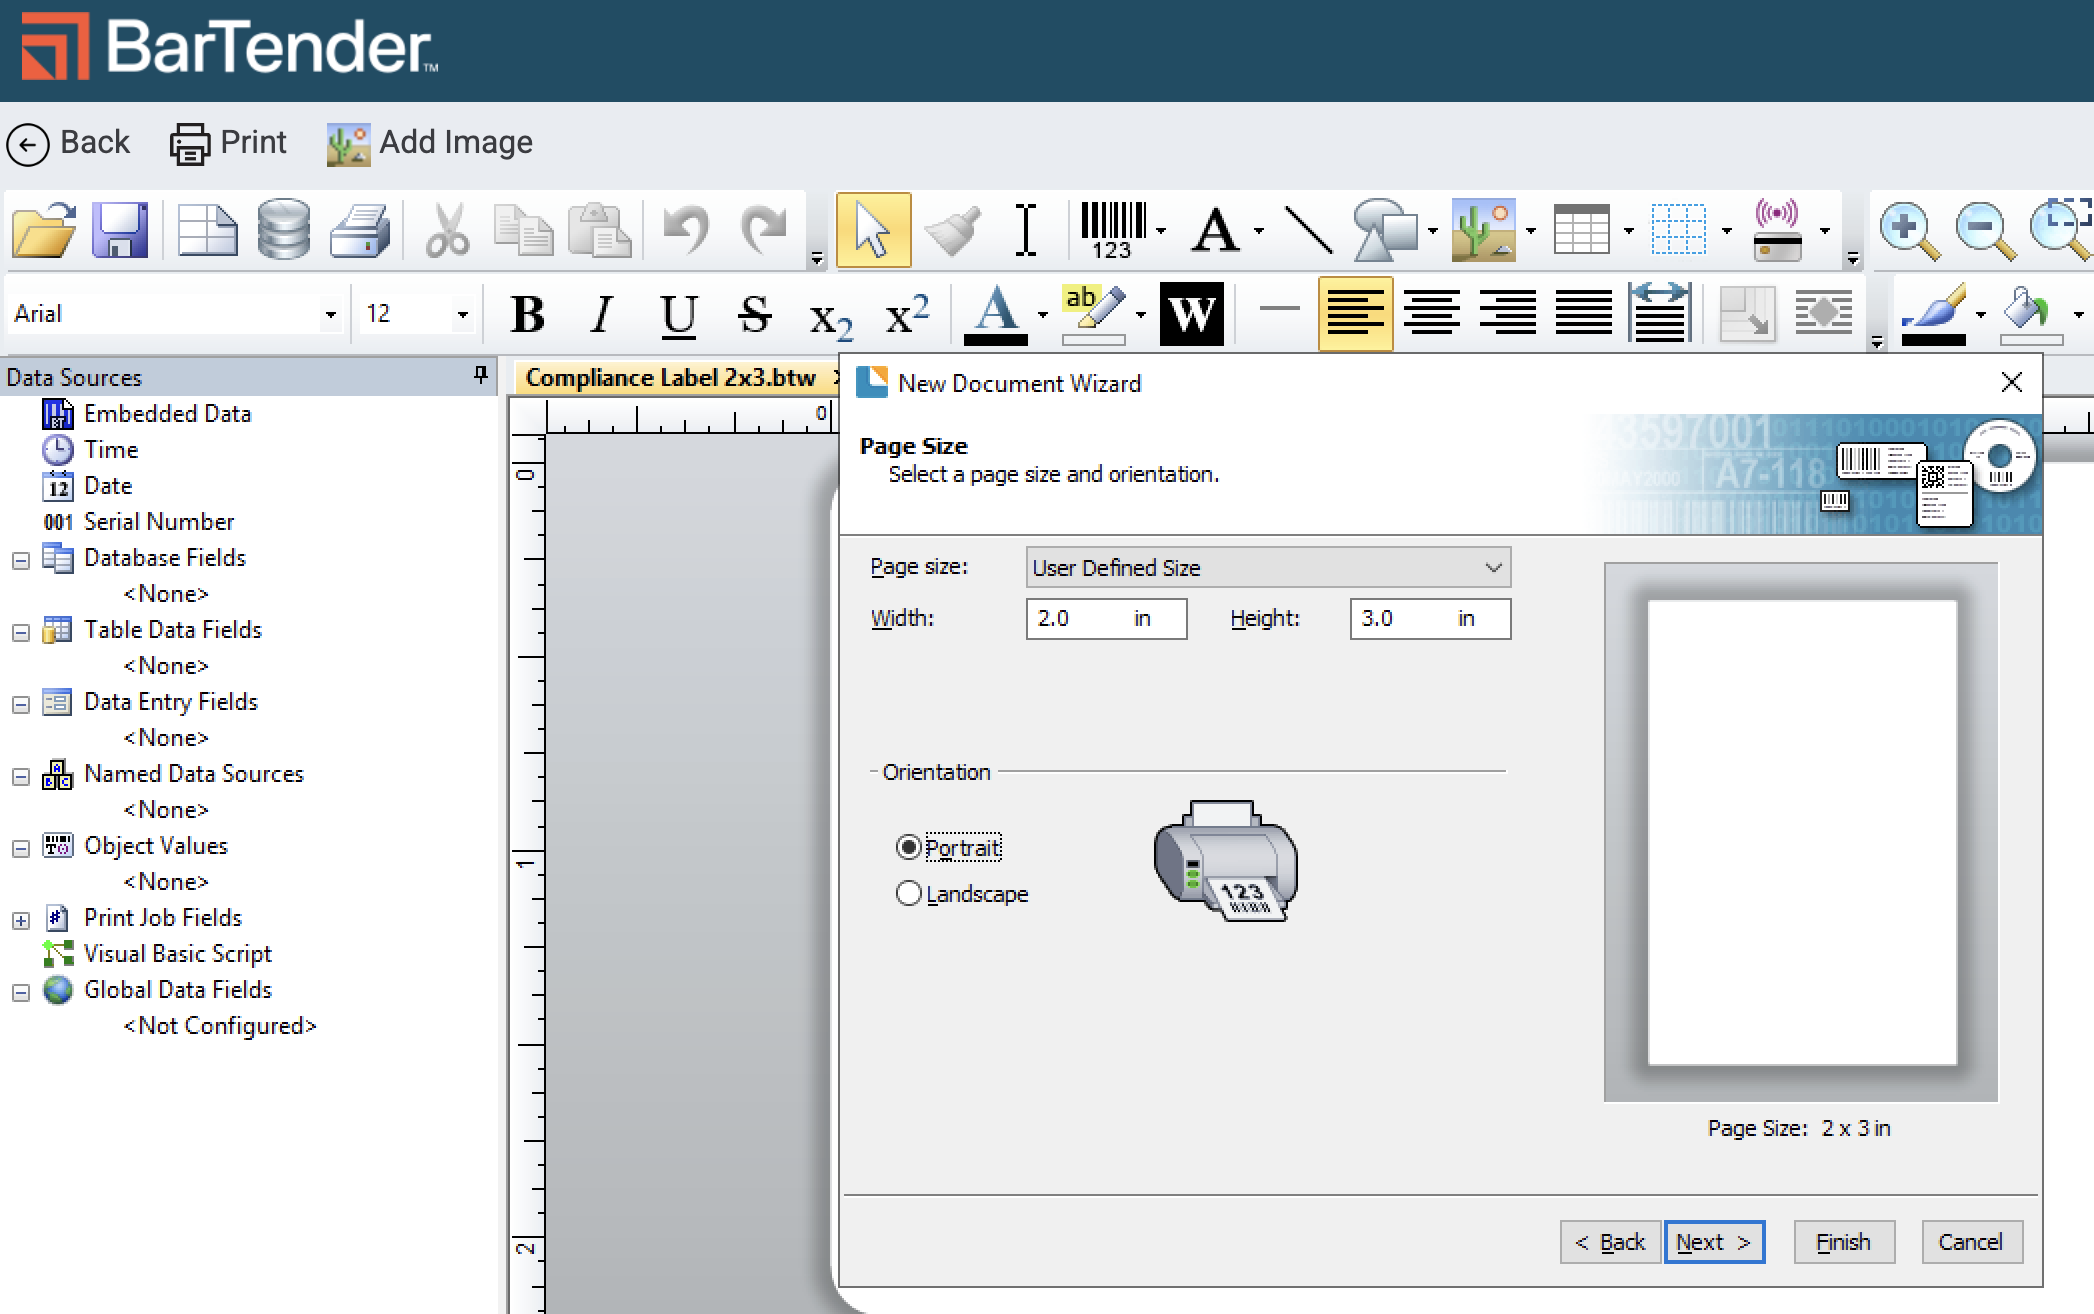
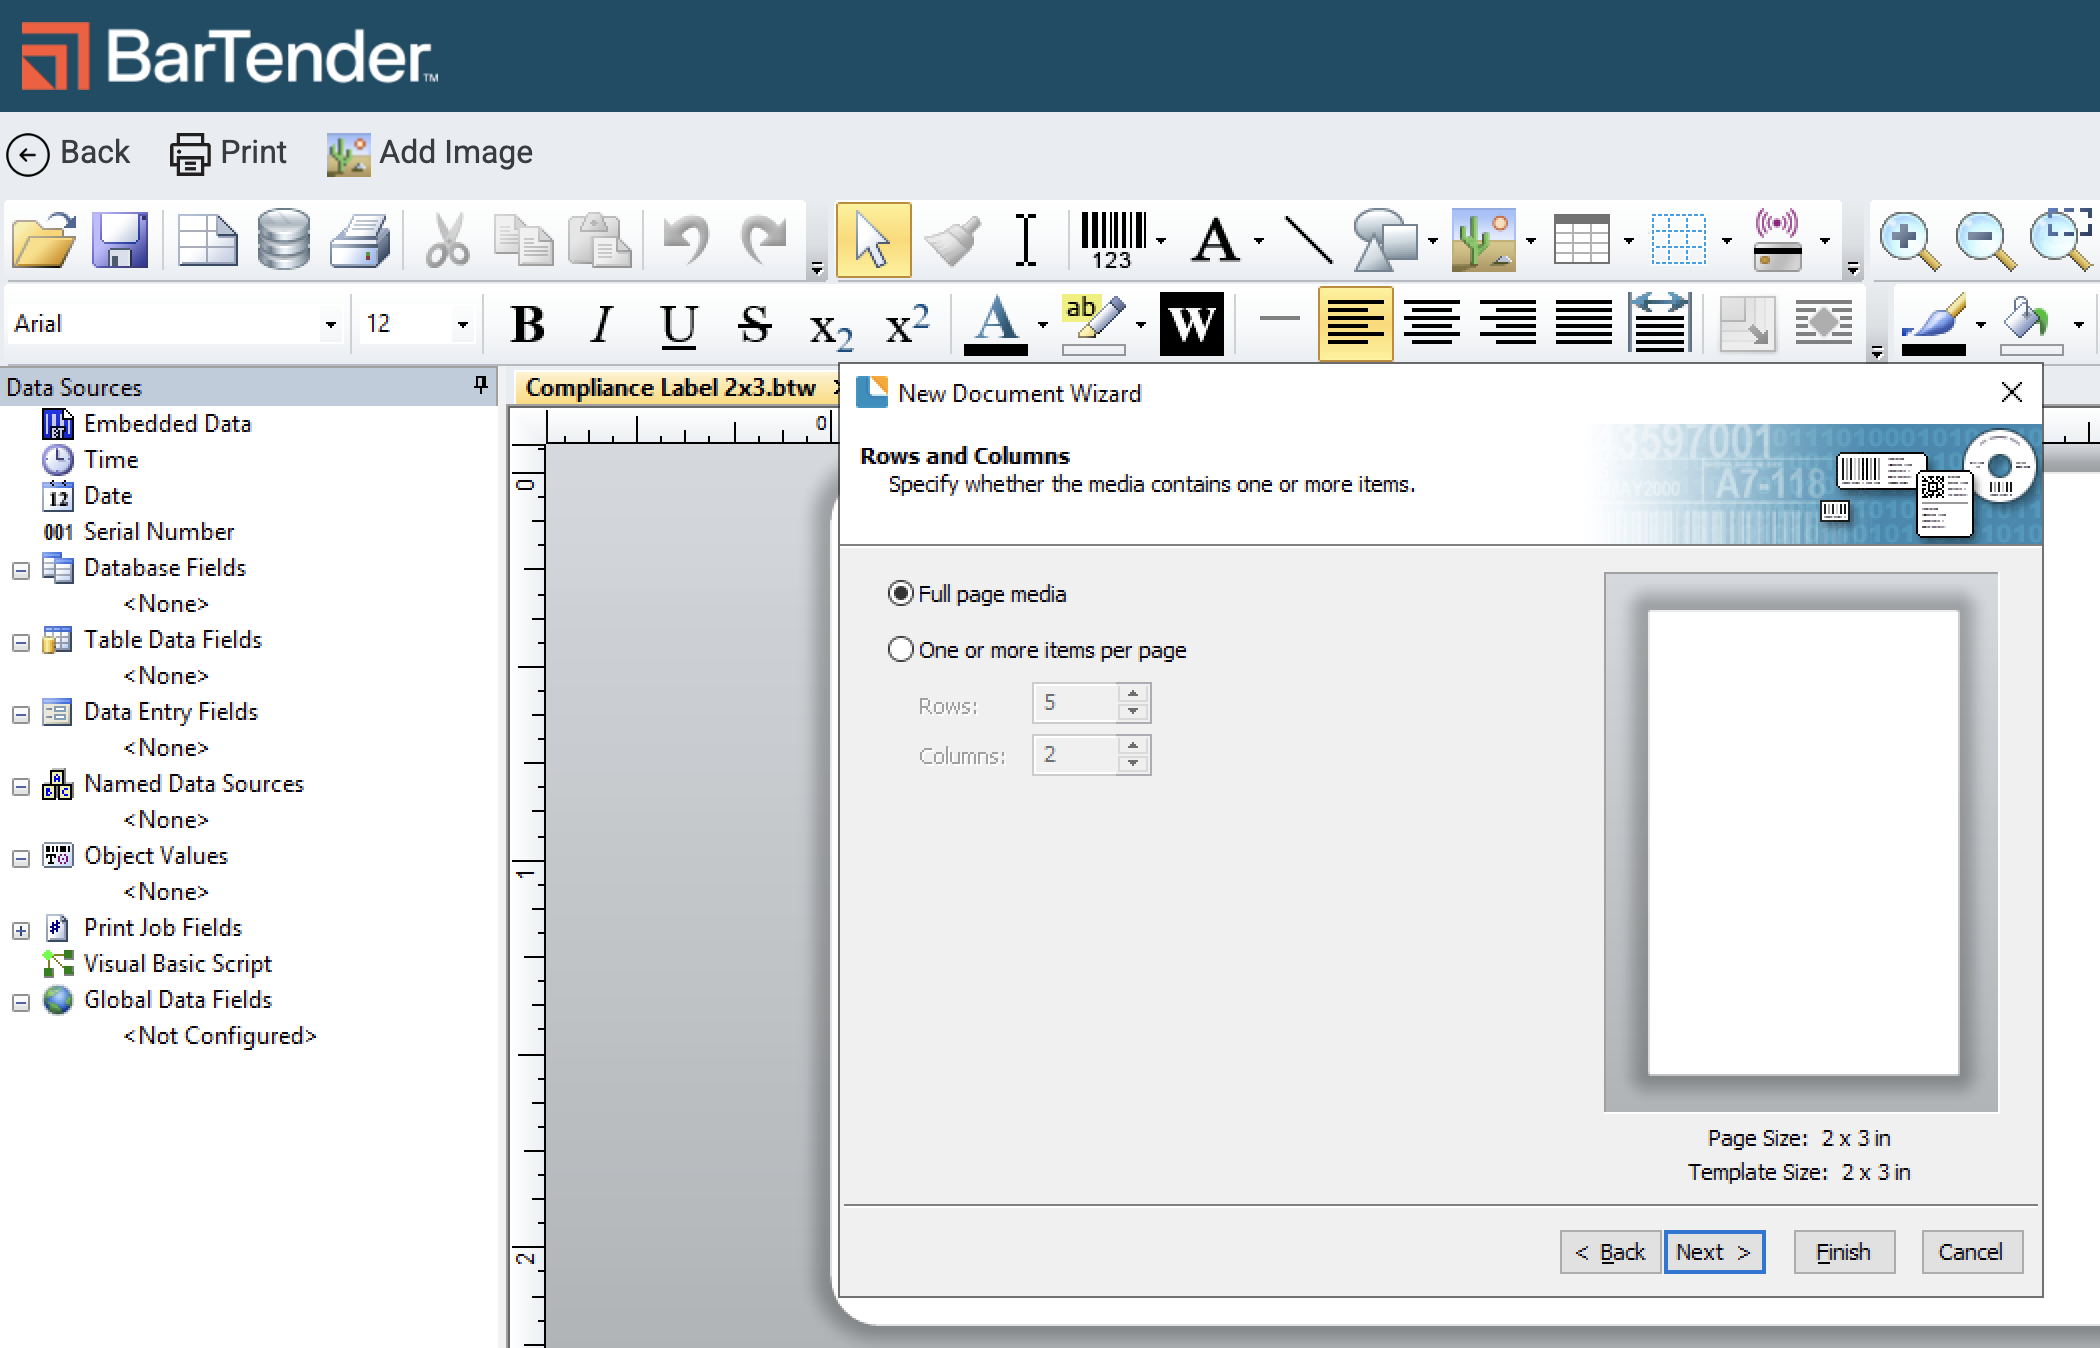
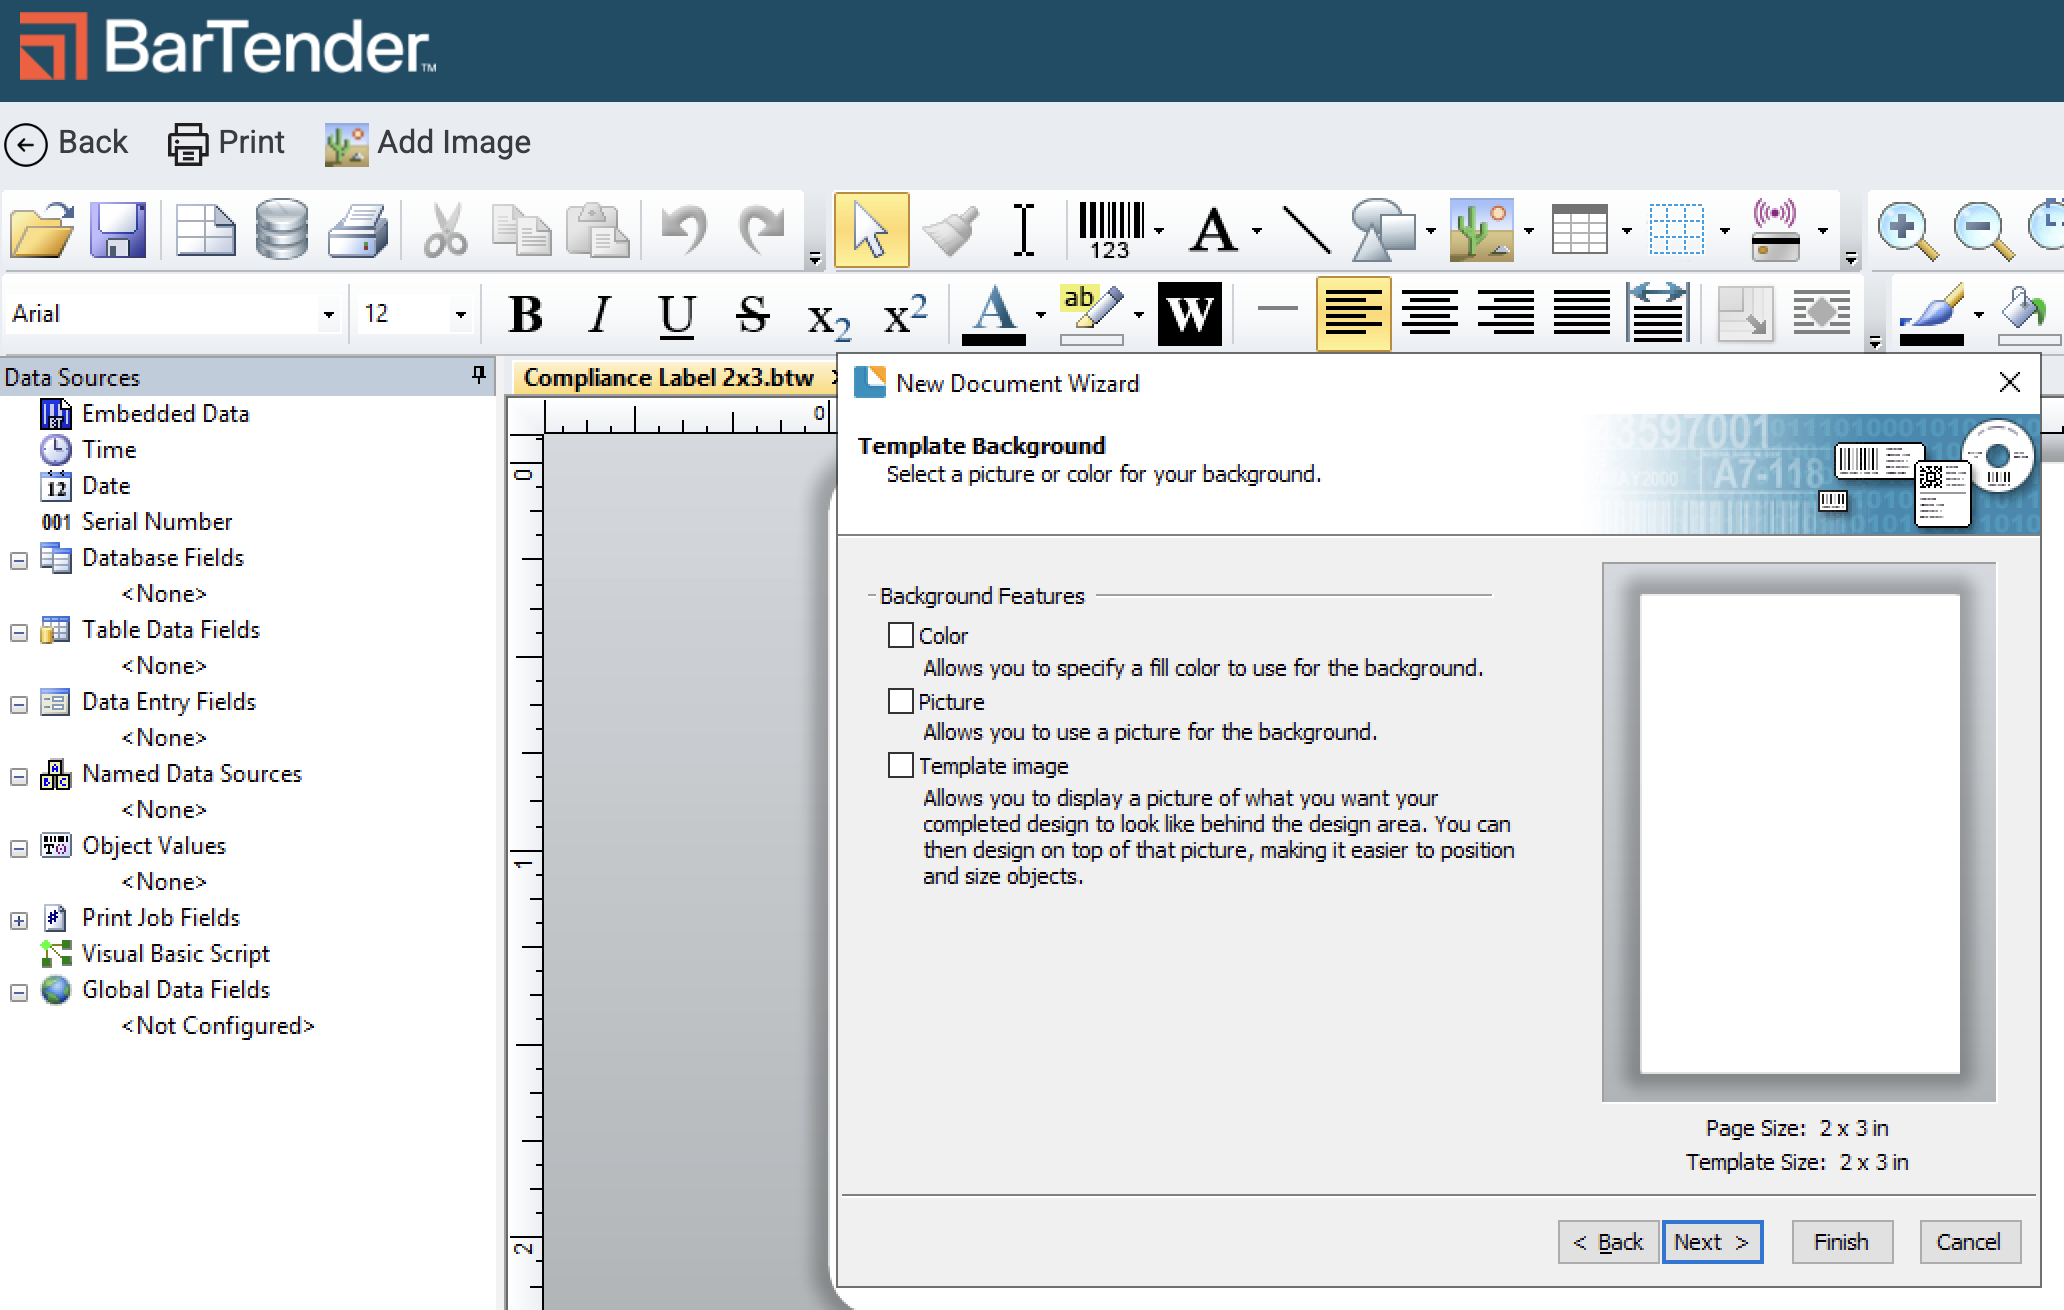
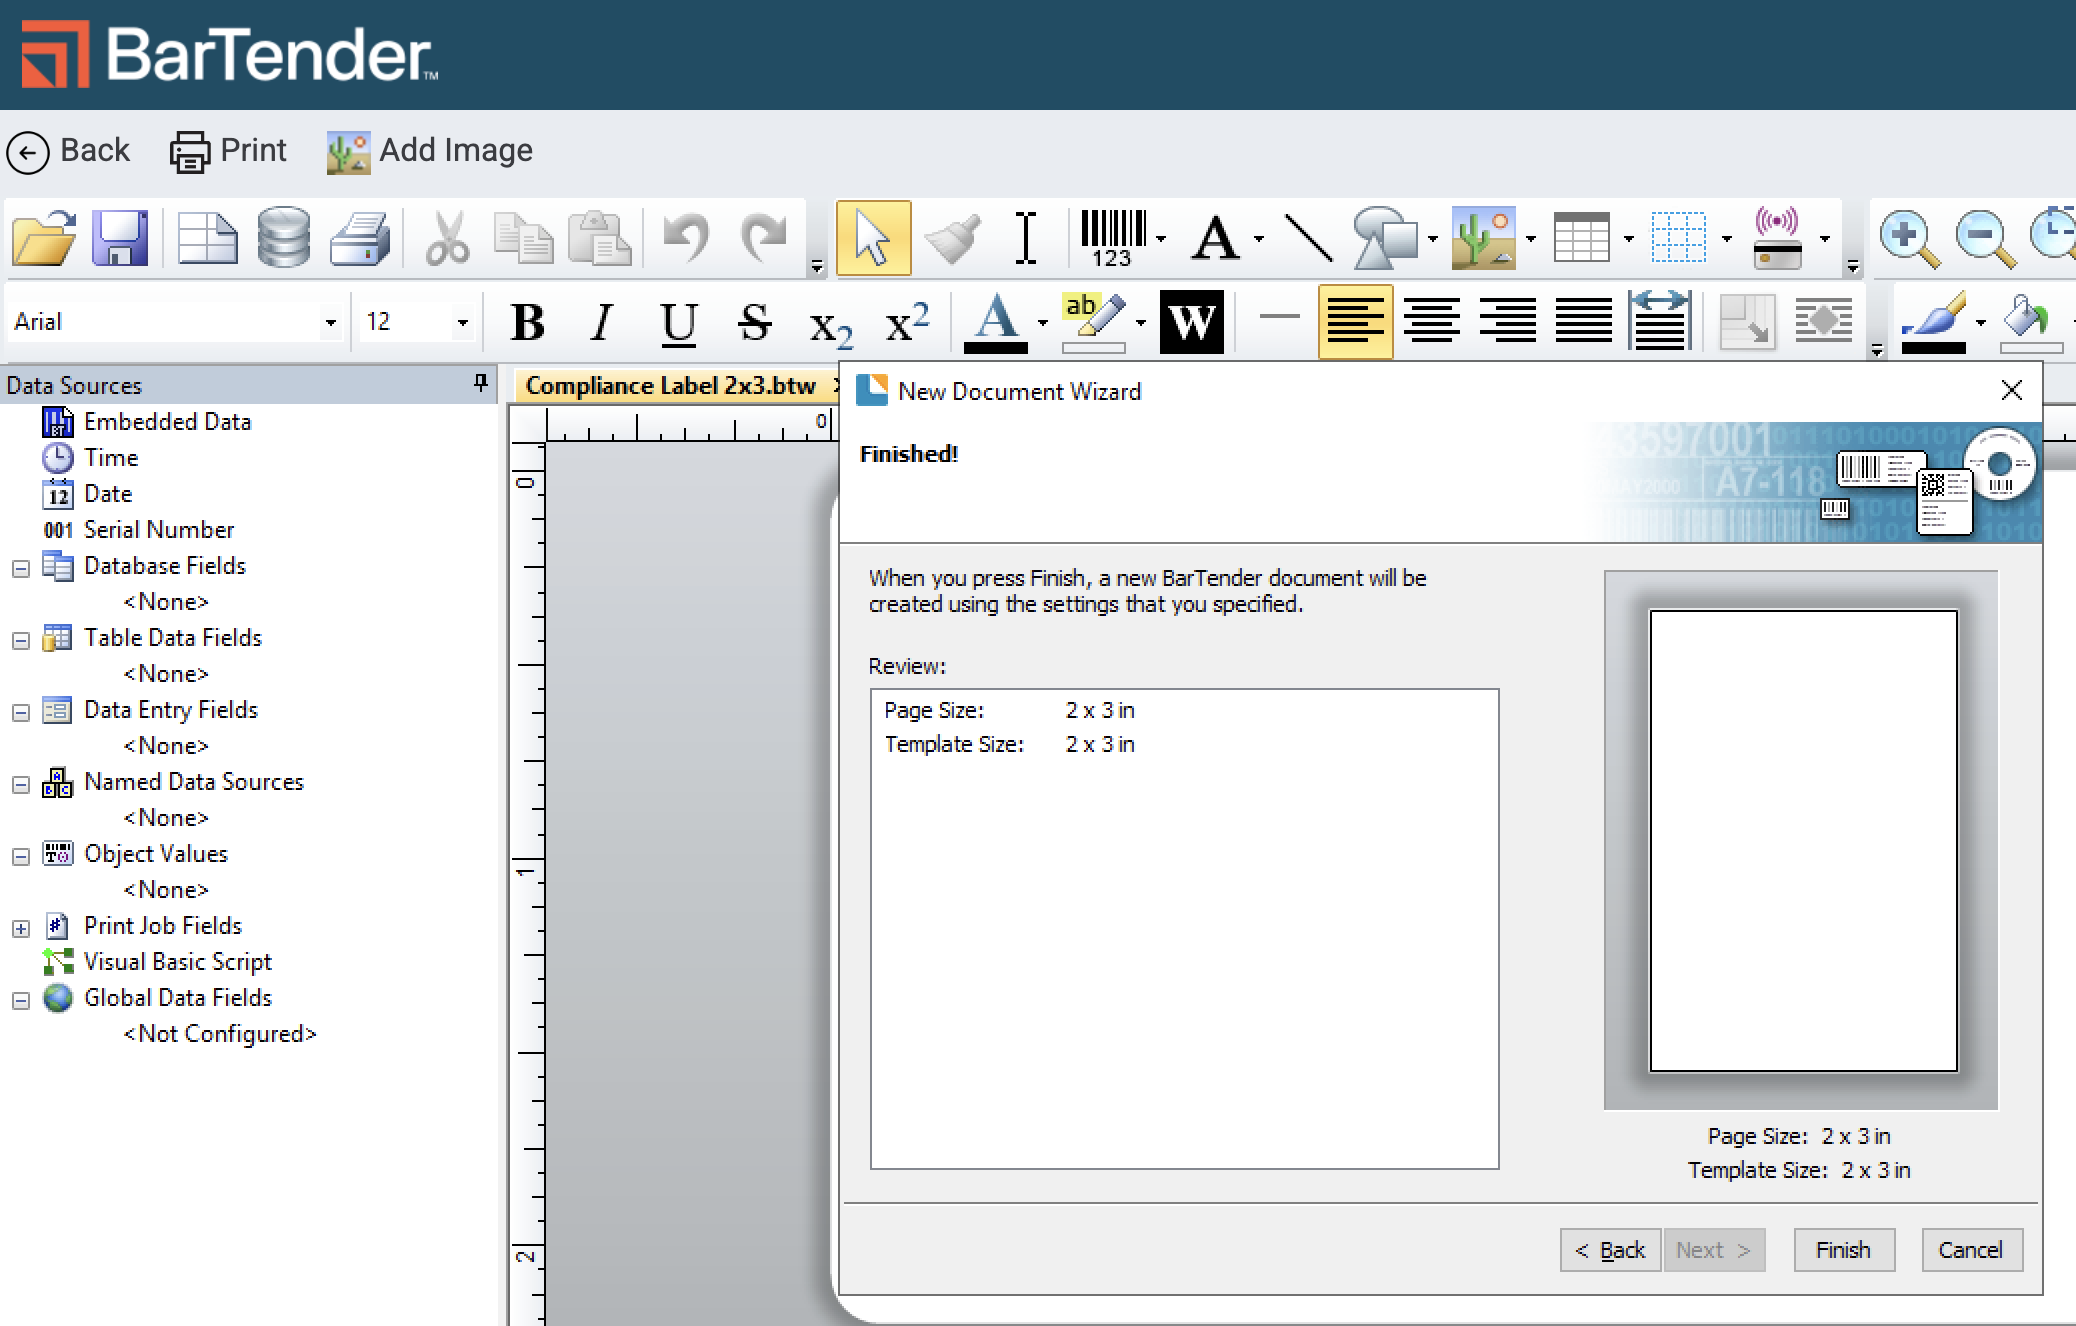
  1. A new tab on your browser will open and you will be prompted to set the printer to use and set the dimensions of your label. Follow the prompts in BarTender to define the settings. Please see example screenshots below.
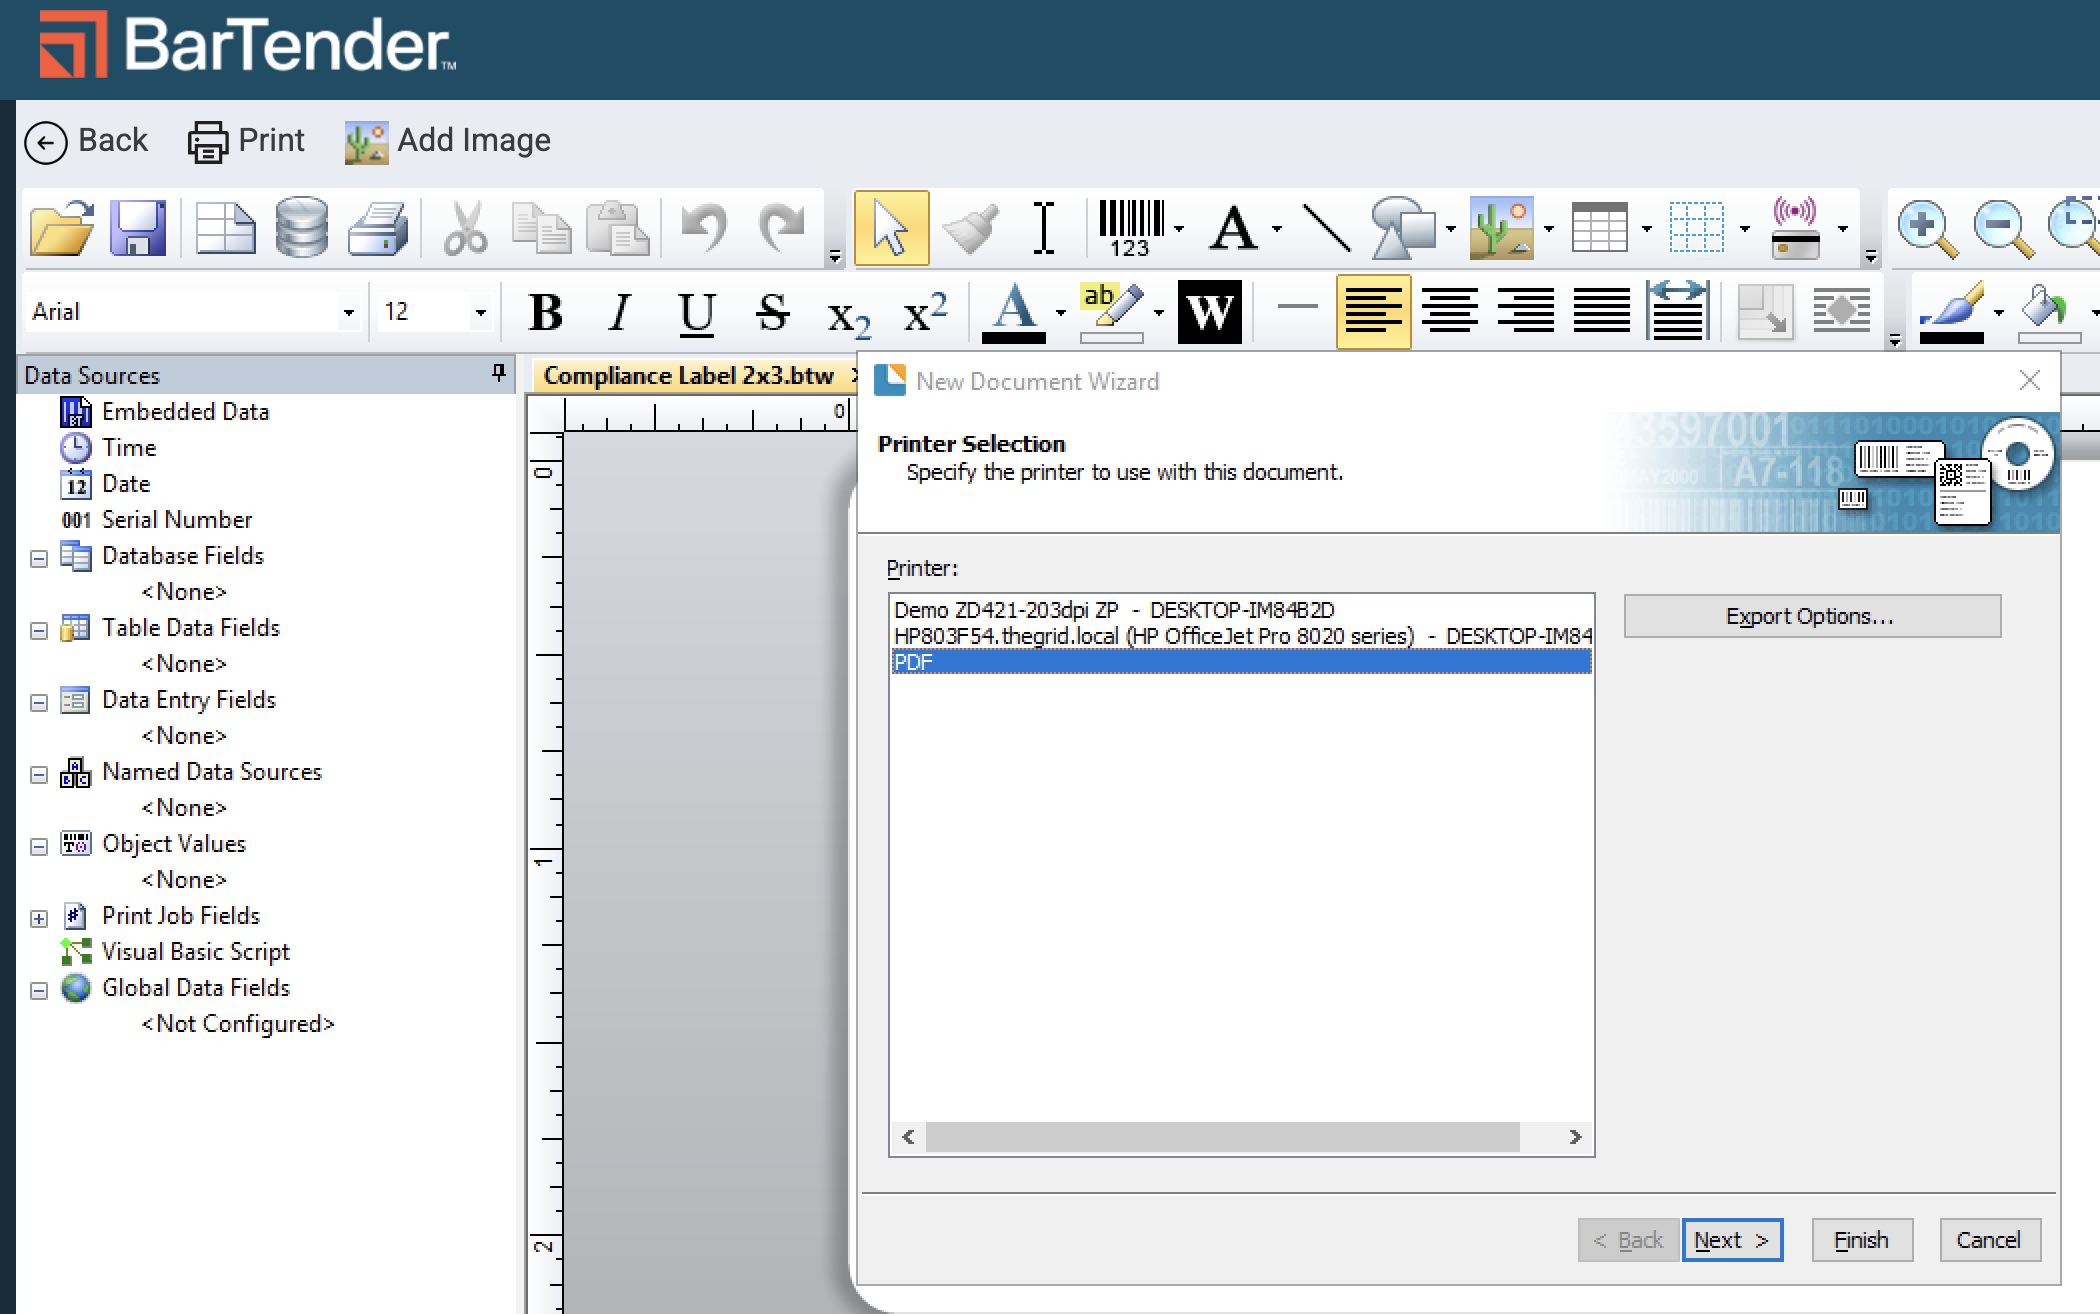
The BarTender Template Designer interface displaying the New Document Wizard's "Printer Selection" step, where a user is prompted to choose a printer (such as a Zebra ZD421, HP…
Screenshot of the BarTender Template Designer interface showing the New Document Wizard's "Stock Selection" step, where users choose between specifying custom label dimensions or…
The image shows the BarTender Template Designer interface with the New Document Wizard open to the Page Size step, where a user is configuring a label template named "Compliance…
The image shows the BarTender Template Designer interface with the New Document Wizard open to the "Rows and Columns" step, where a user is configuring a 2×3 inch label template…
The image shows the BarTender Template Designer interface with the New Document Wizard open to the "Template Background" step, where users can optionally set a background color,…
The image shows the BarTender Template Designer interface with the New Document Wizard open at its final "Finished!" step, displaying a review summary confirming a label Page Size…
  1. Click Finish.

Connect Your Template to the Flourish Database File

Connect the Flourish database fields to the Template file in BarTender so you can configure your label with integrated Flourish data.

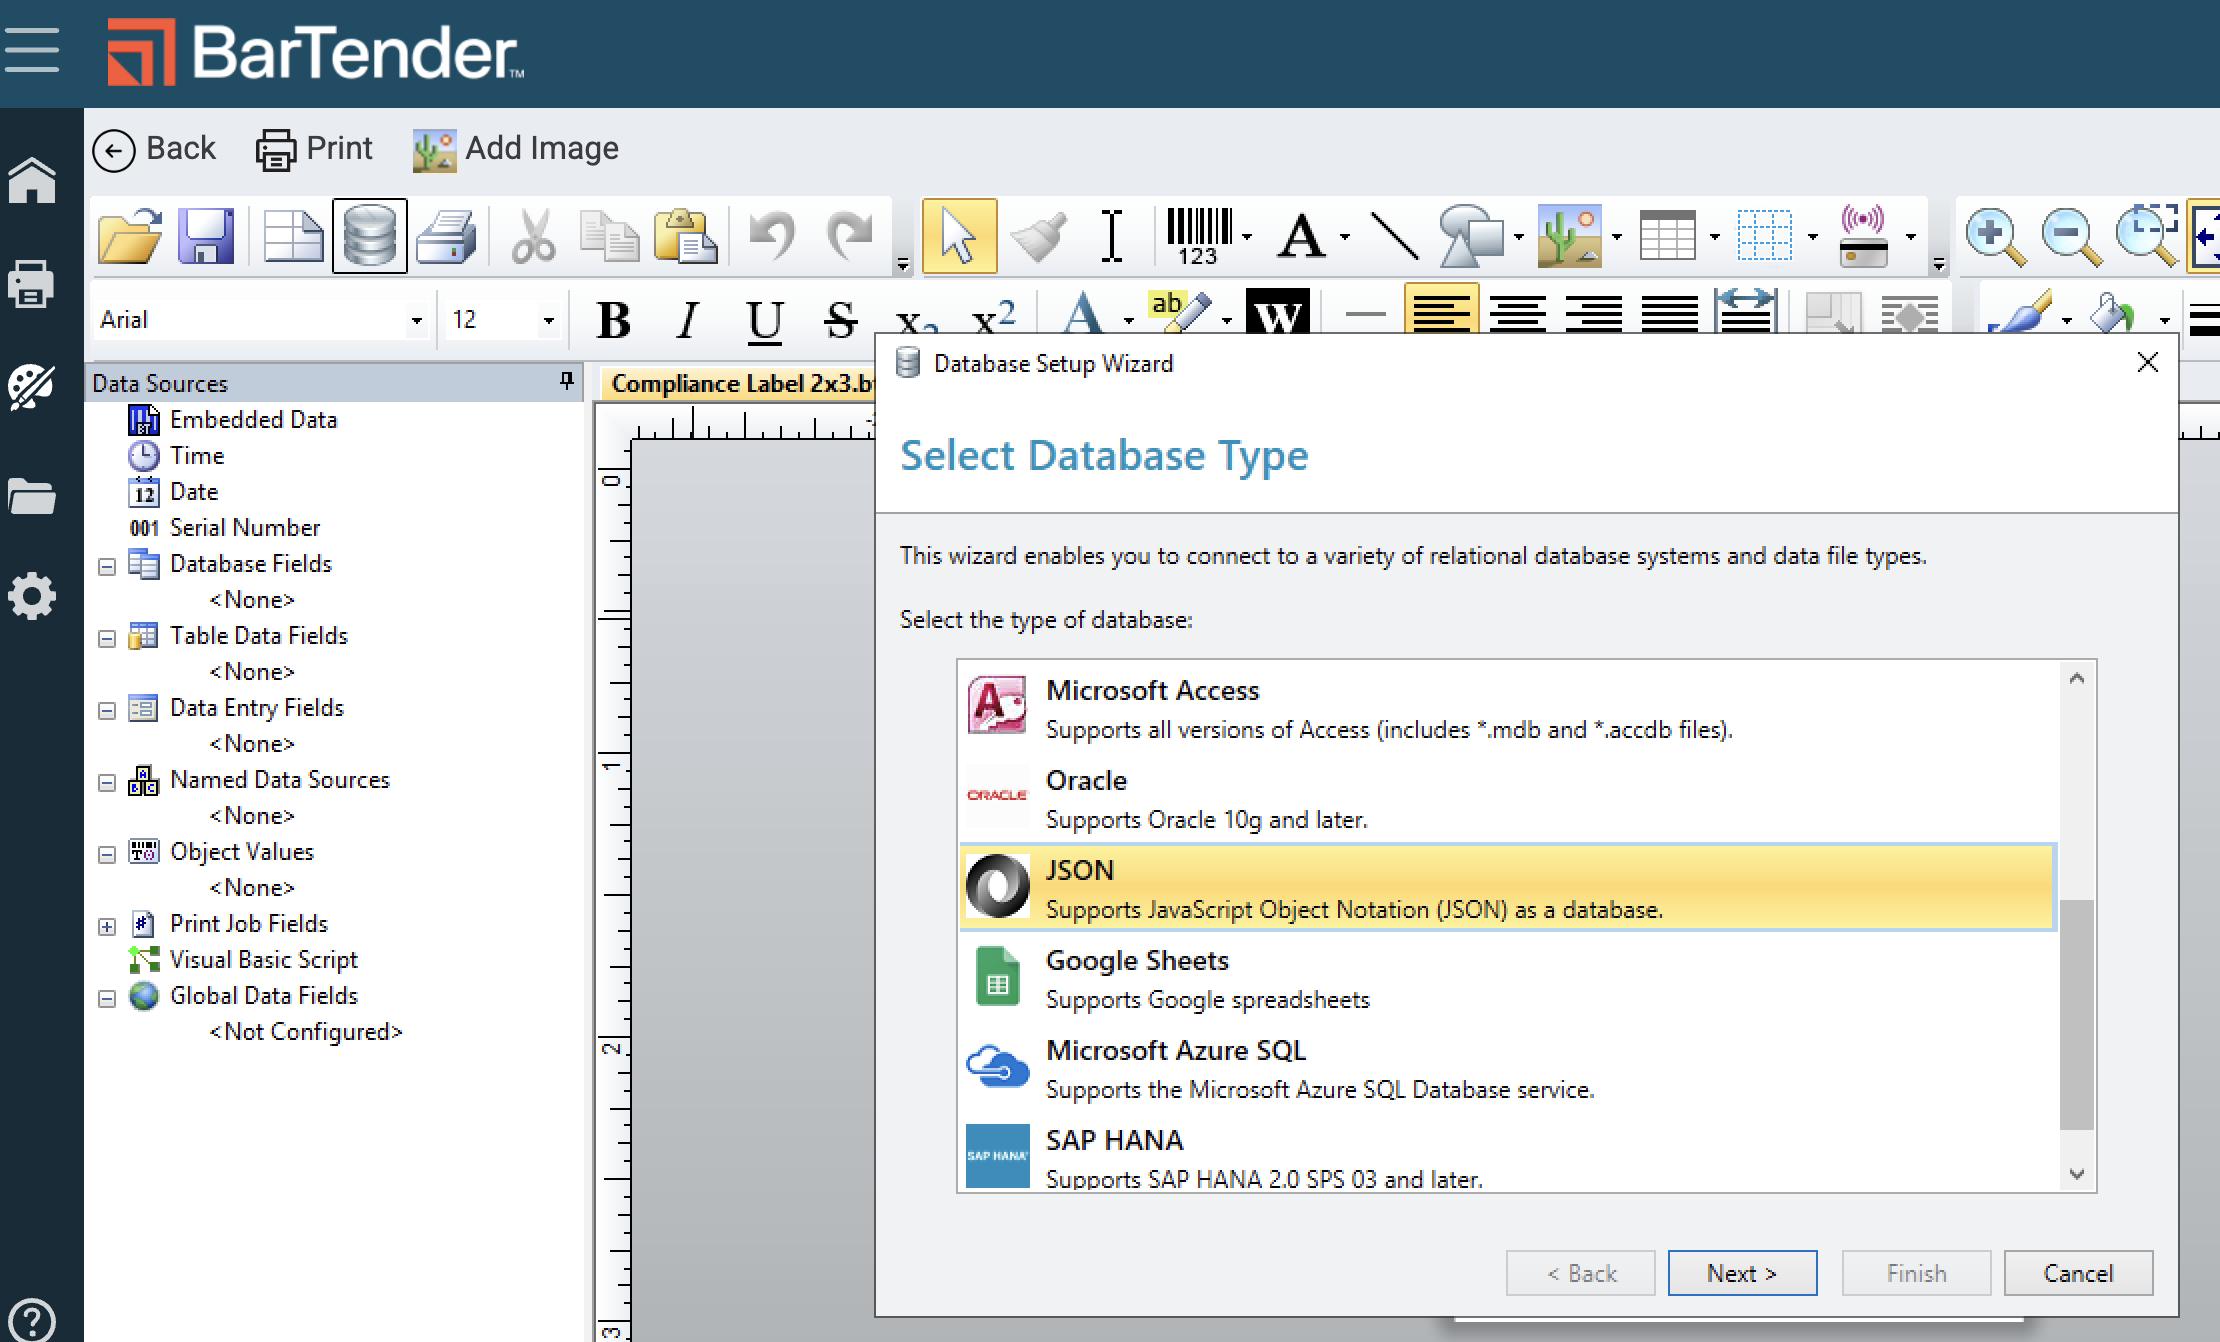
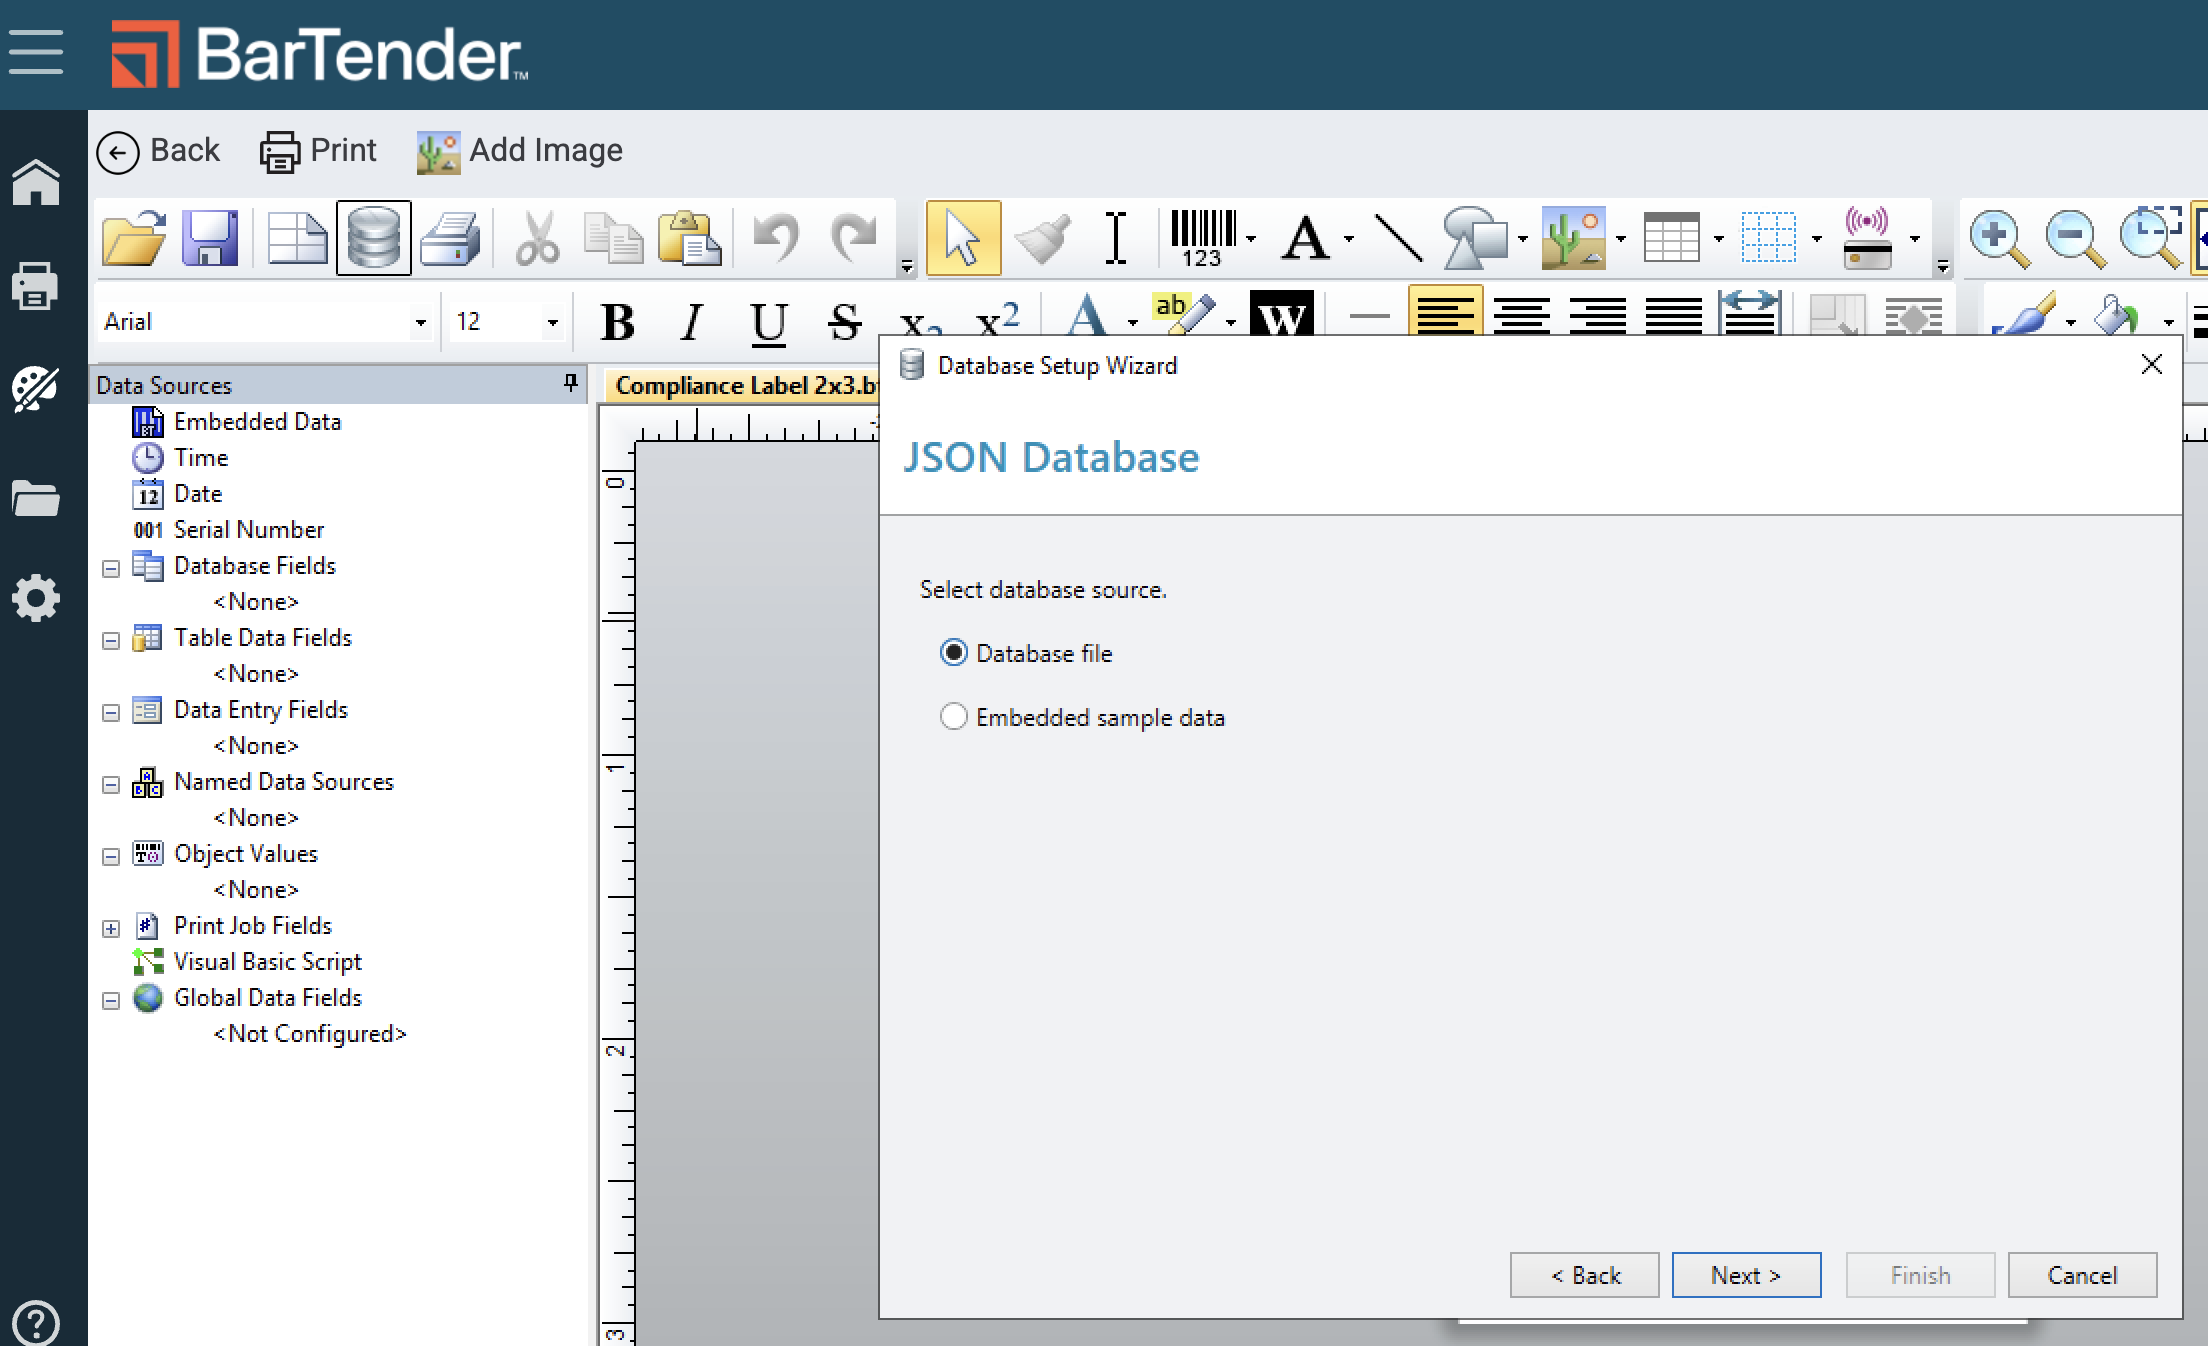
  1. Click on the Database Connection Setup icon at the top of screen.
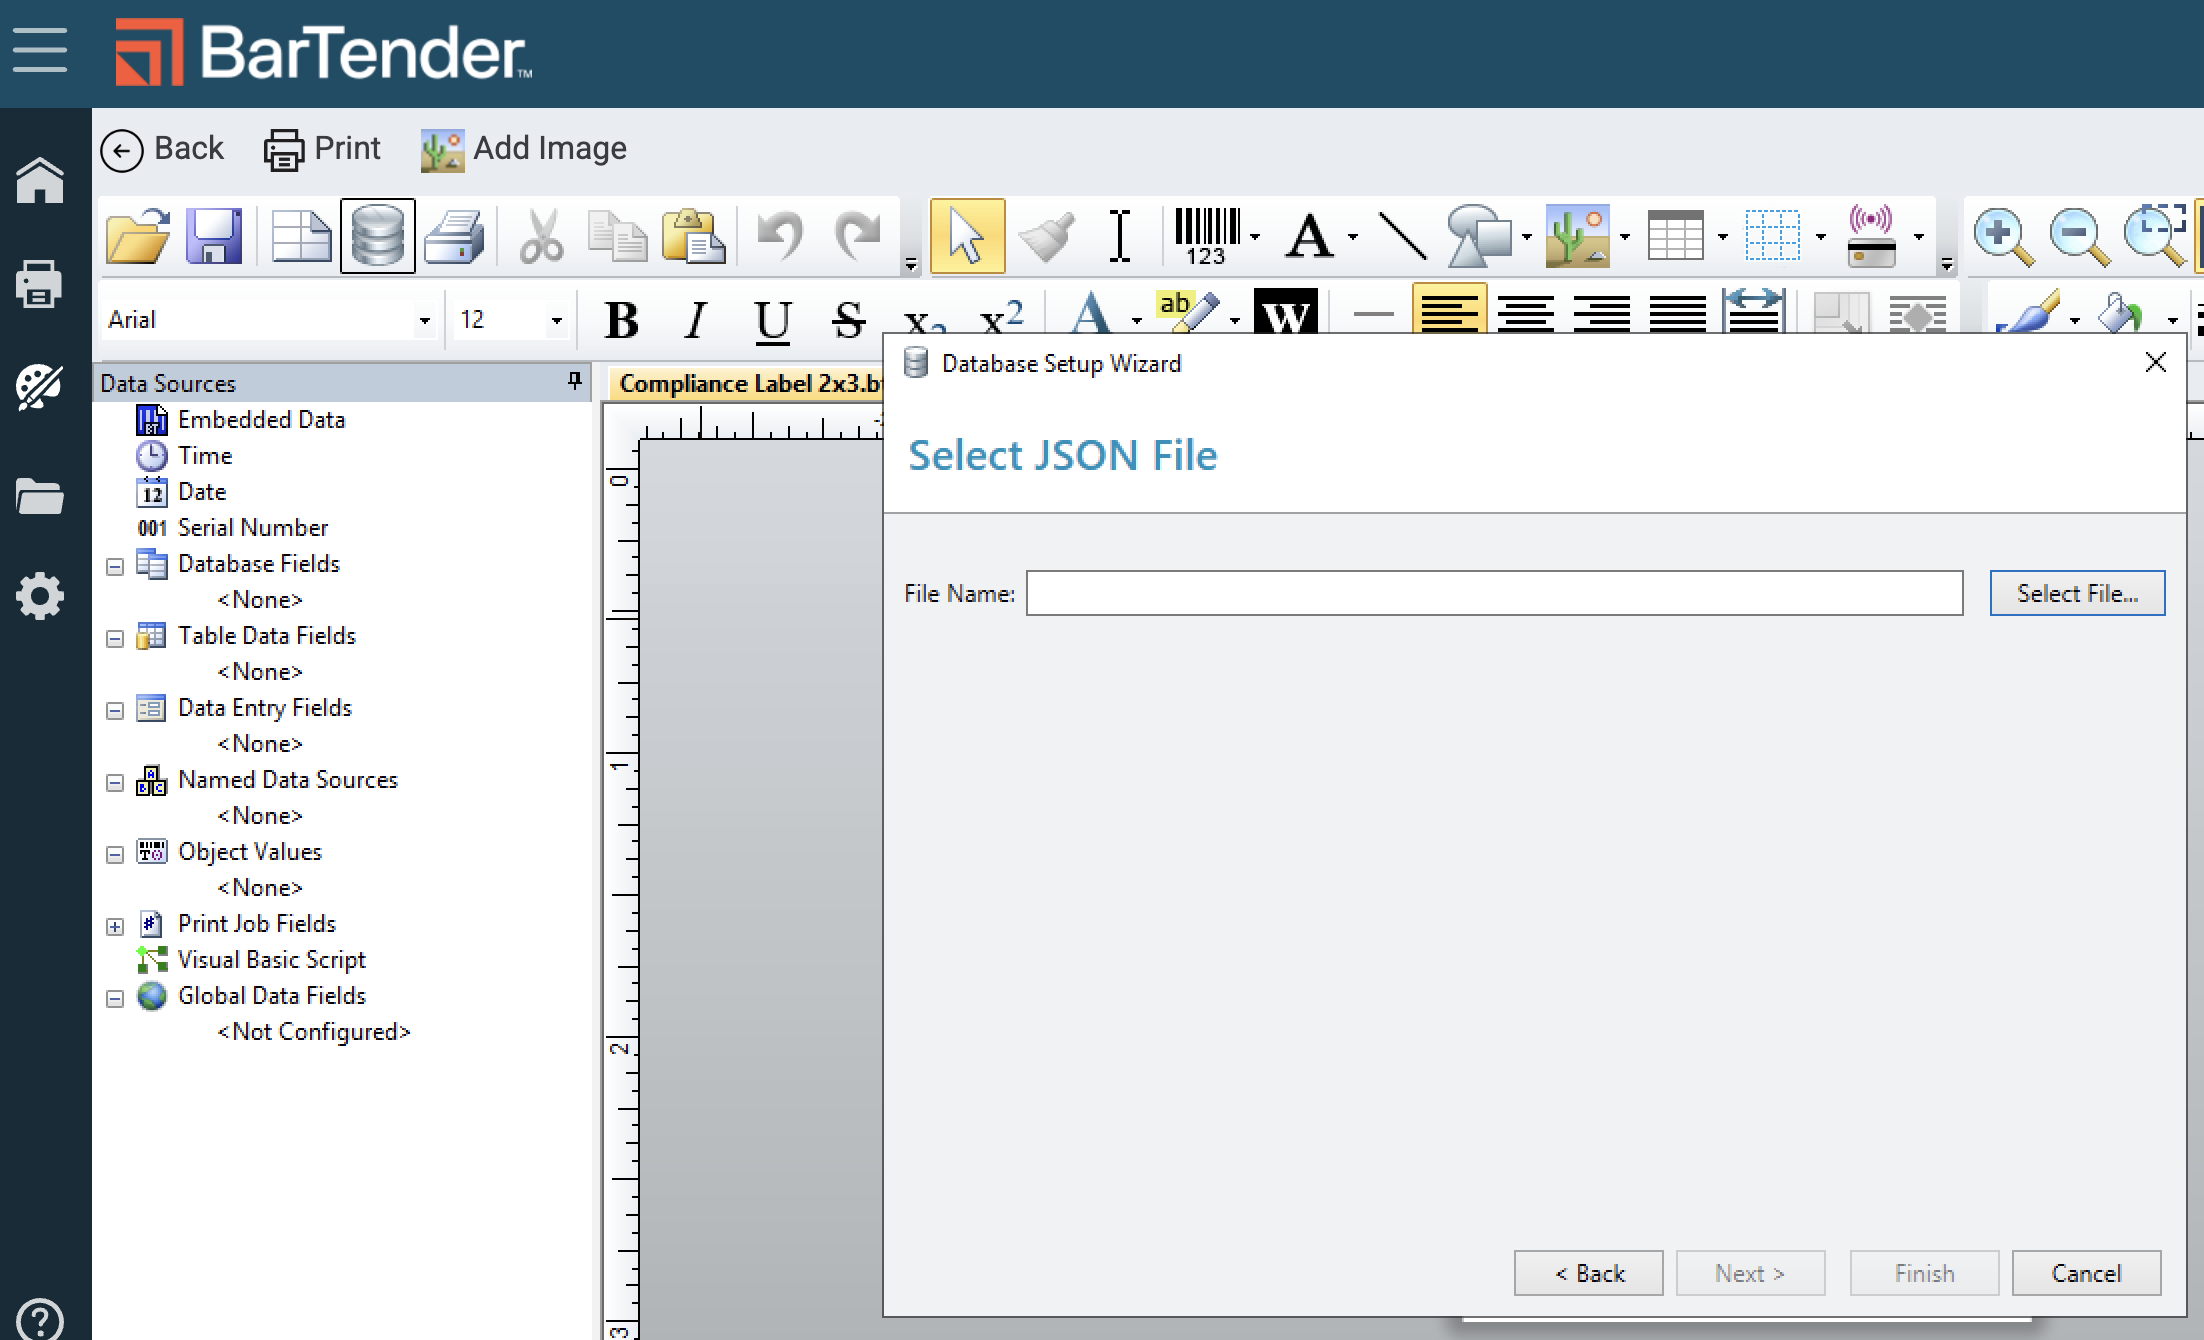
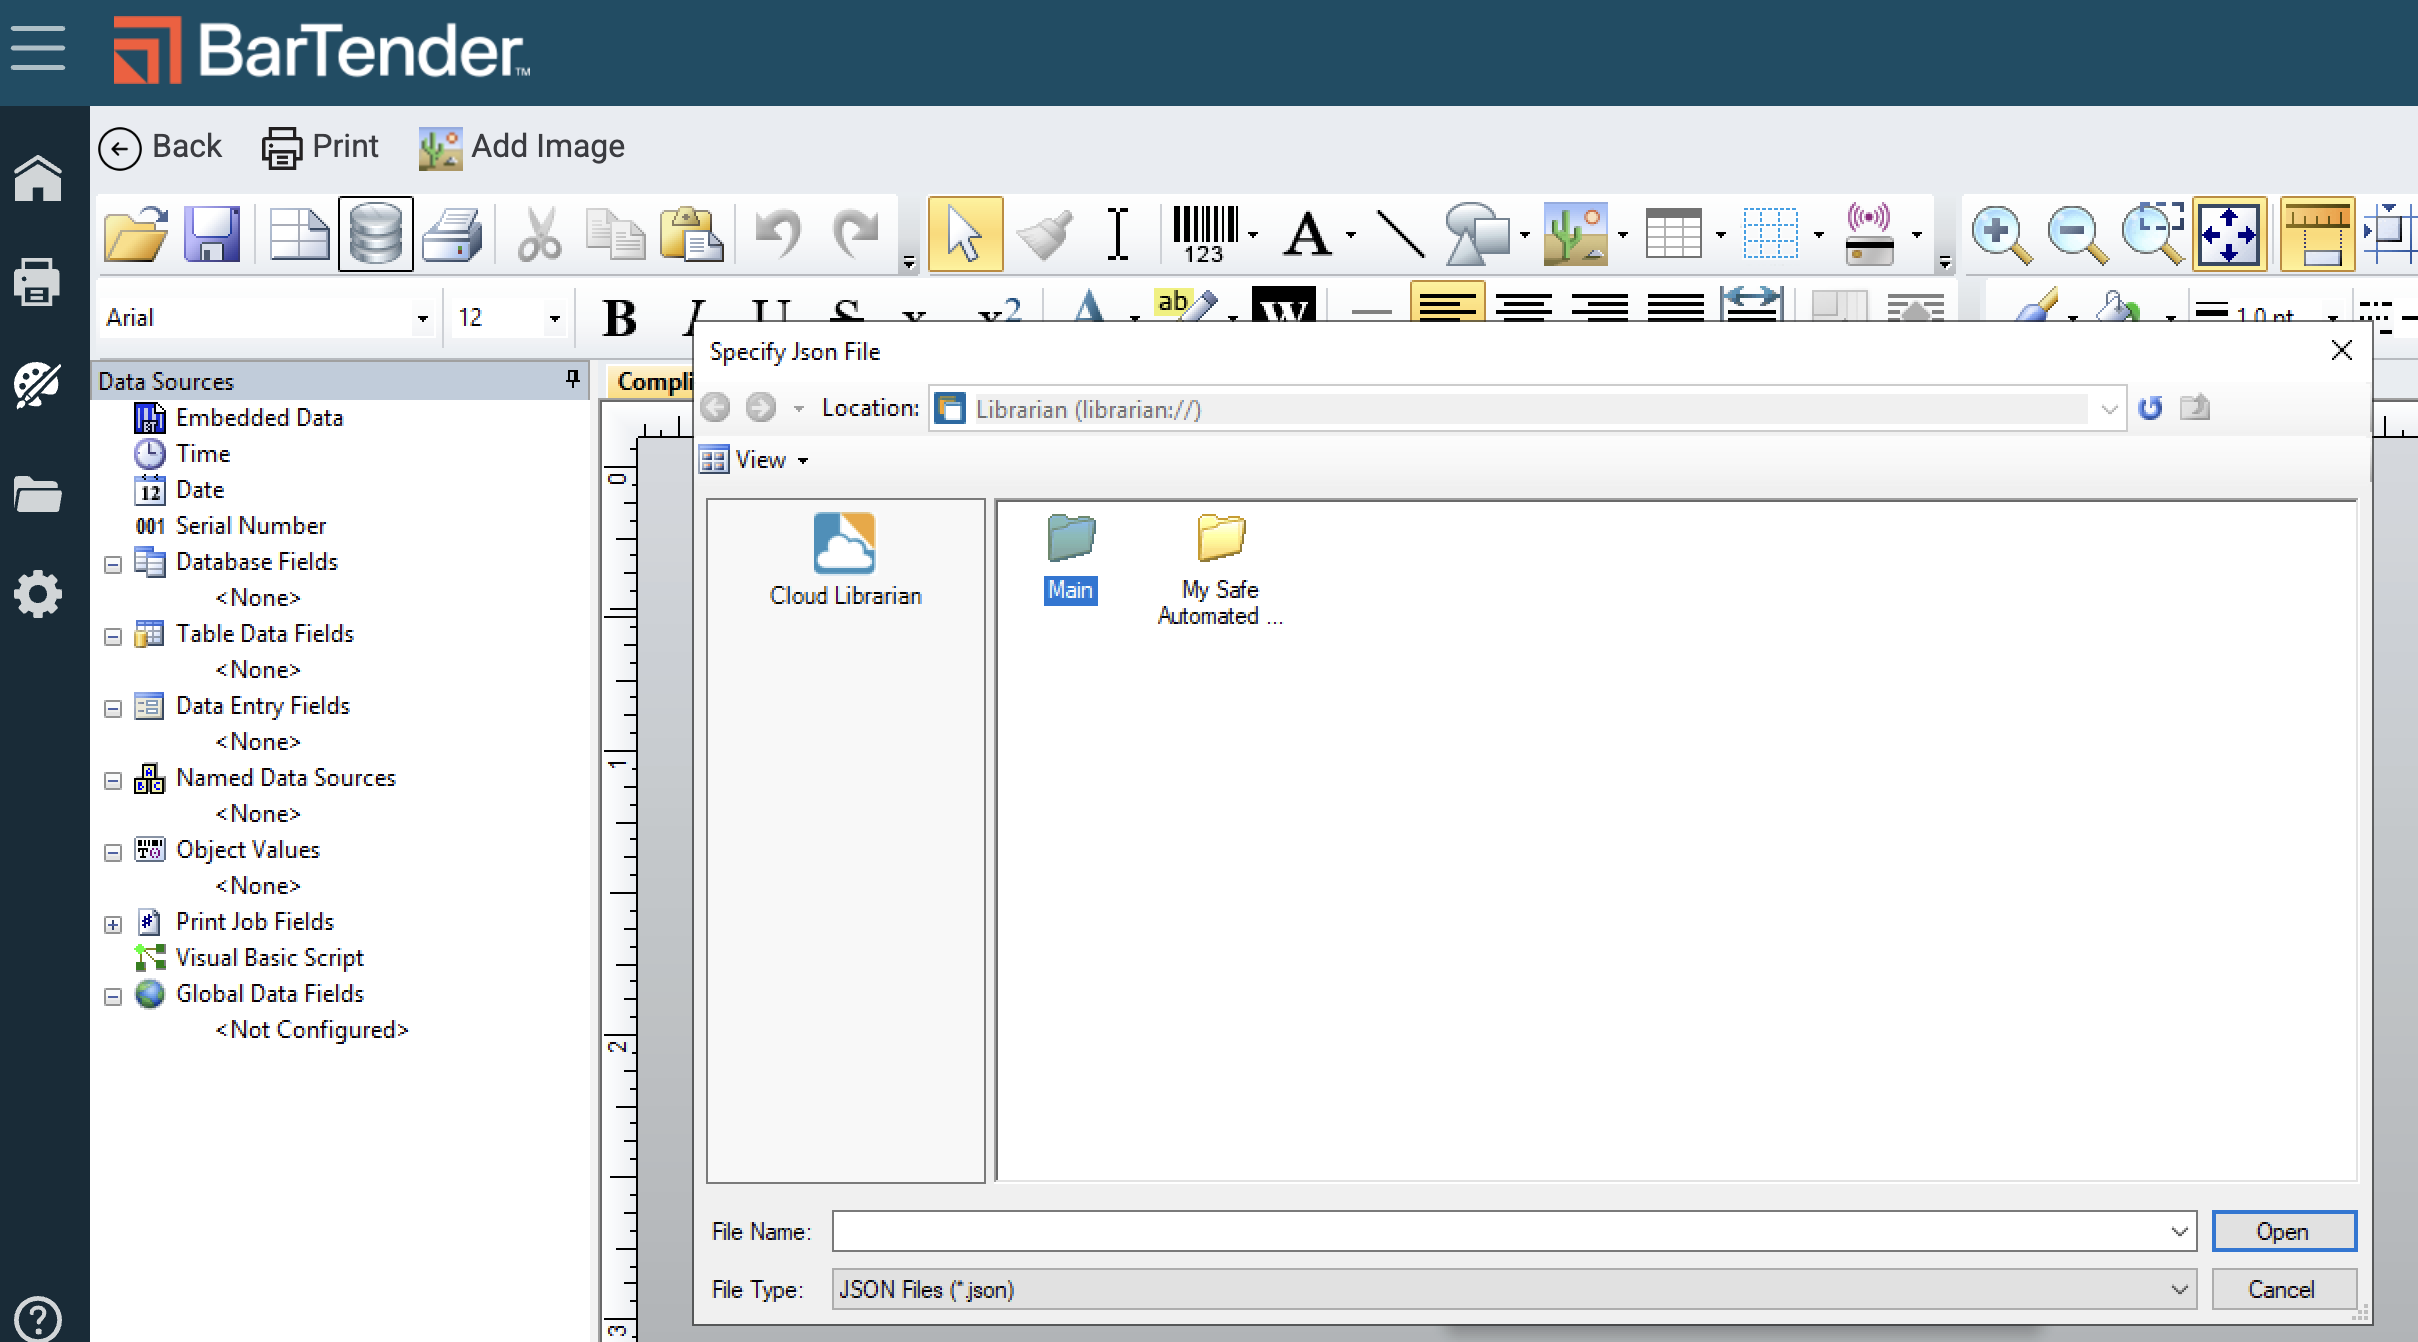
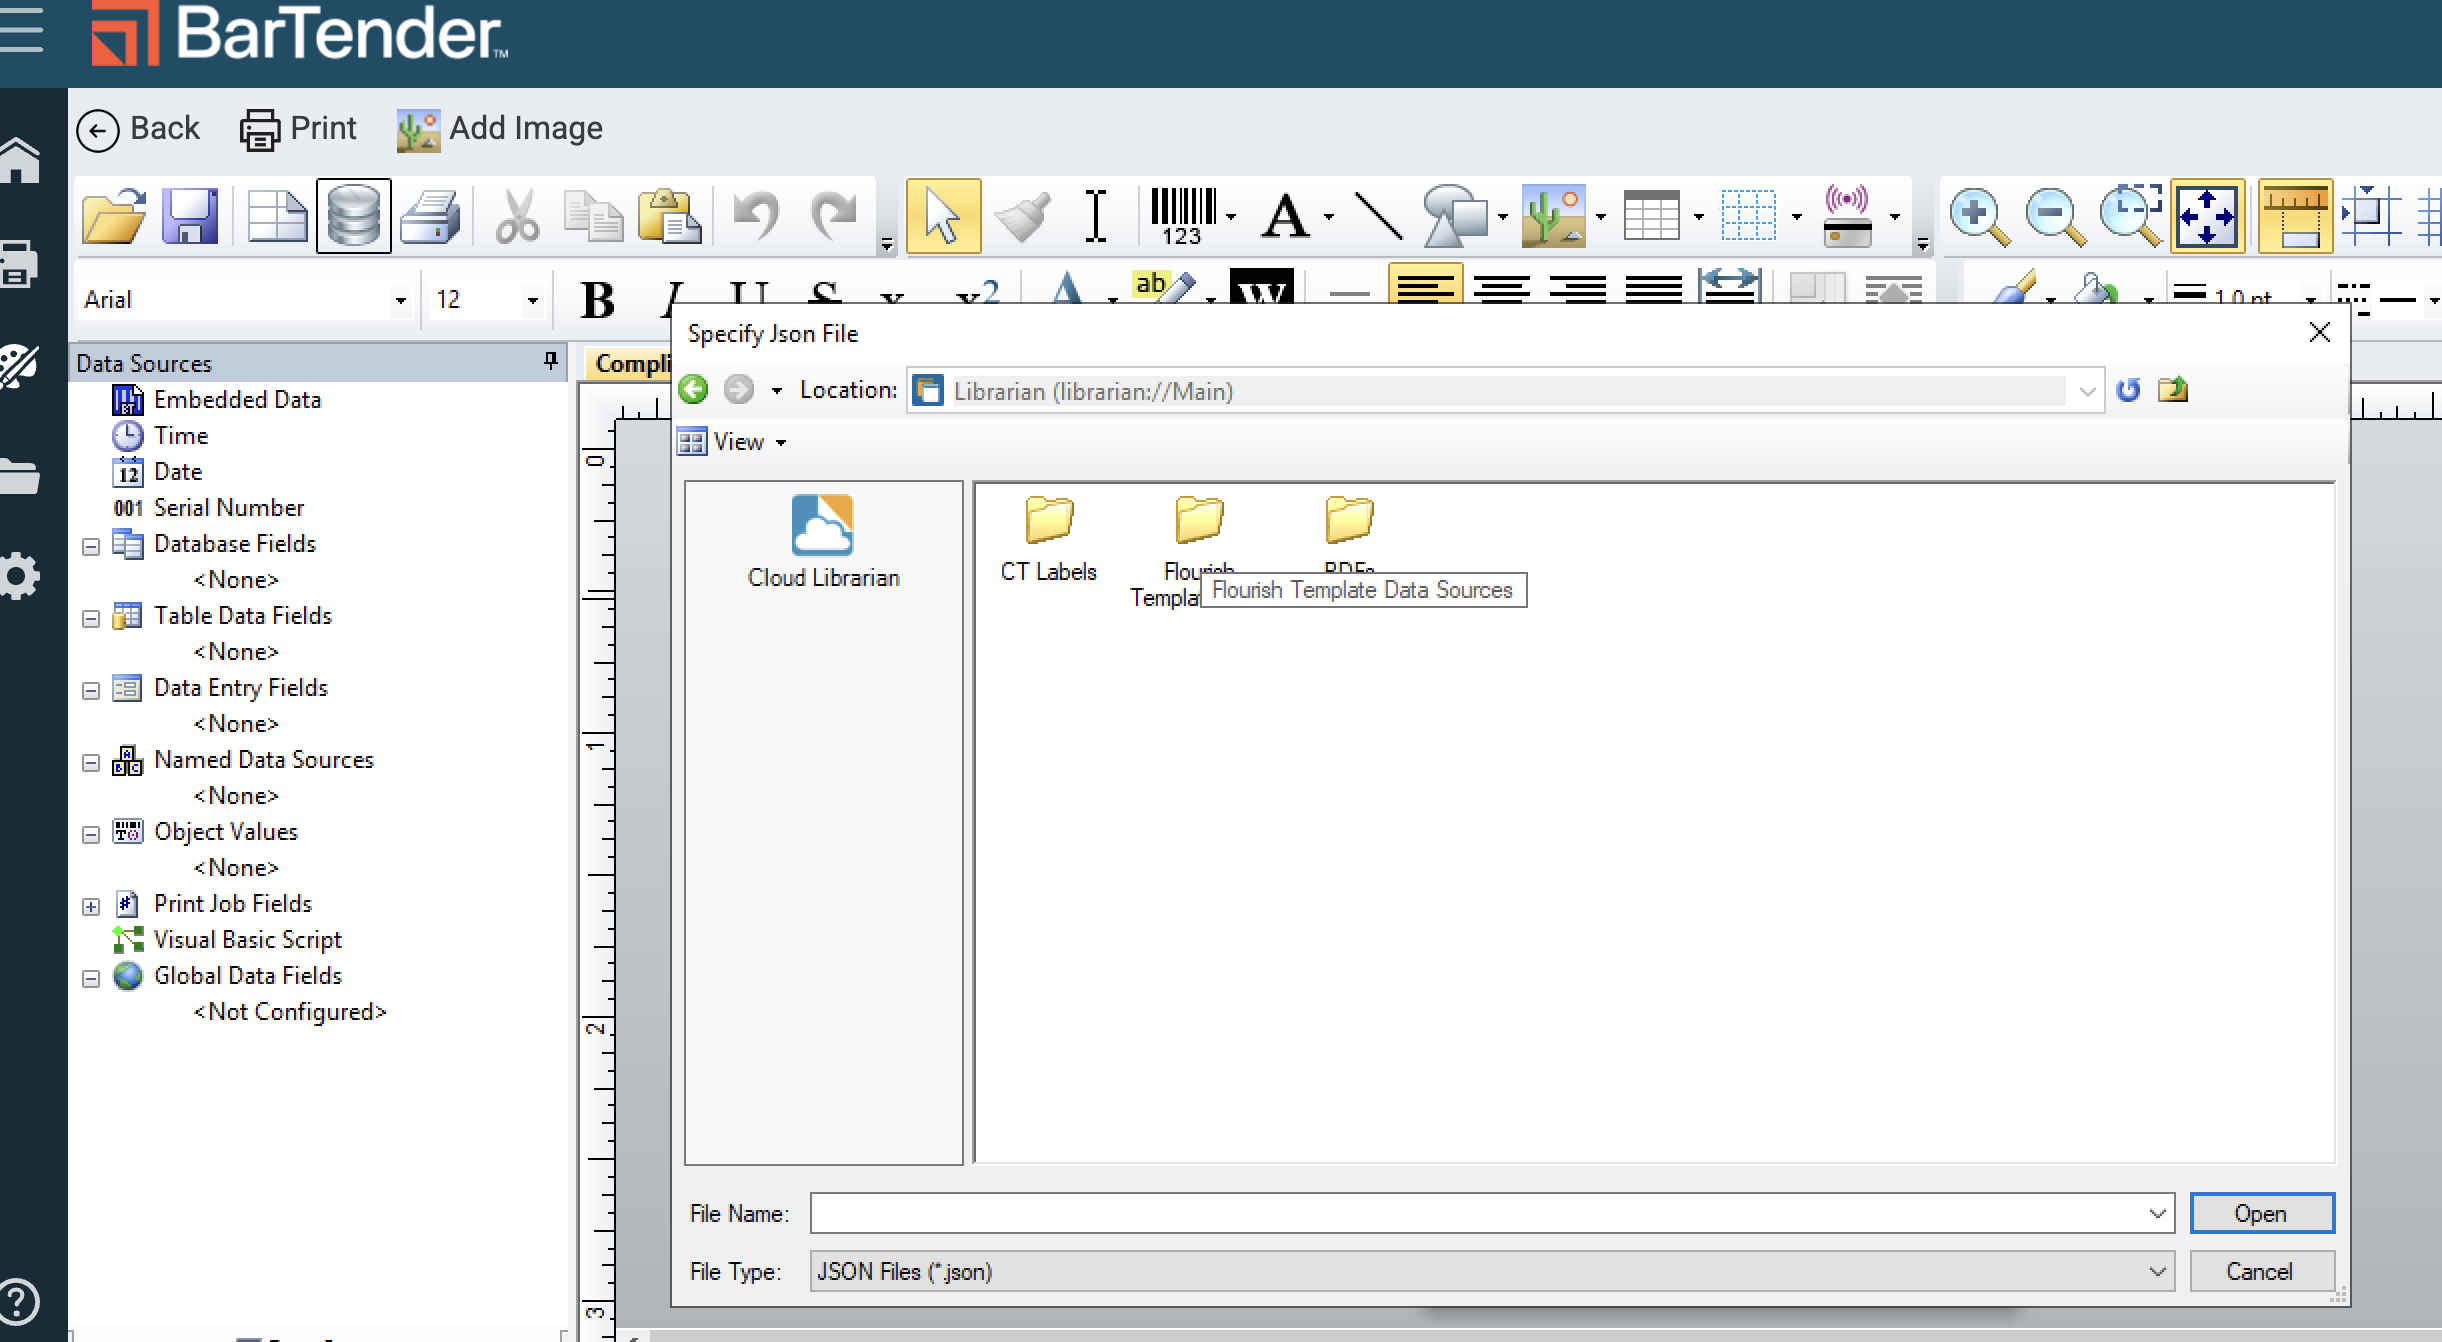
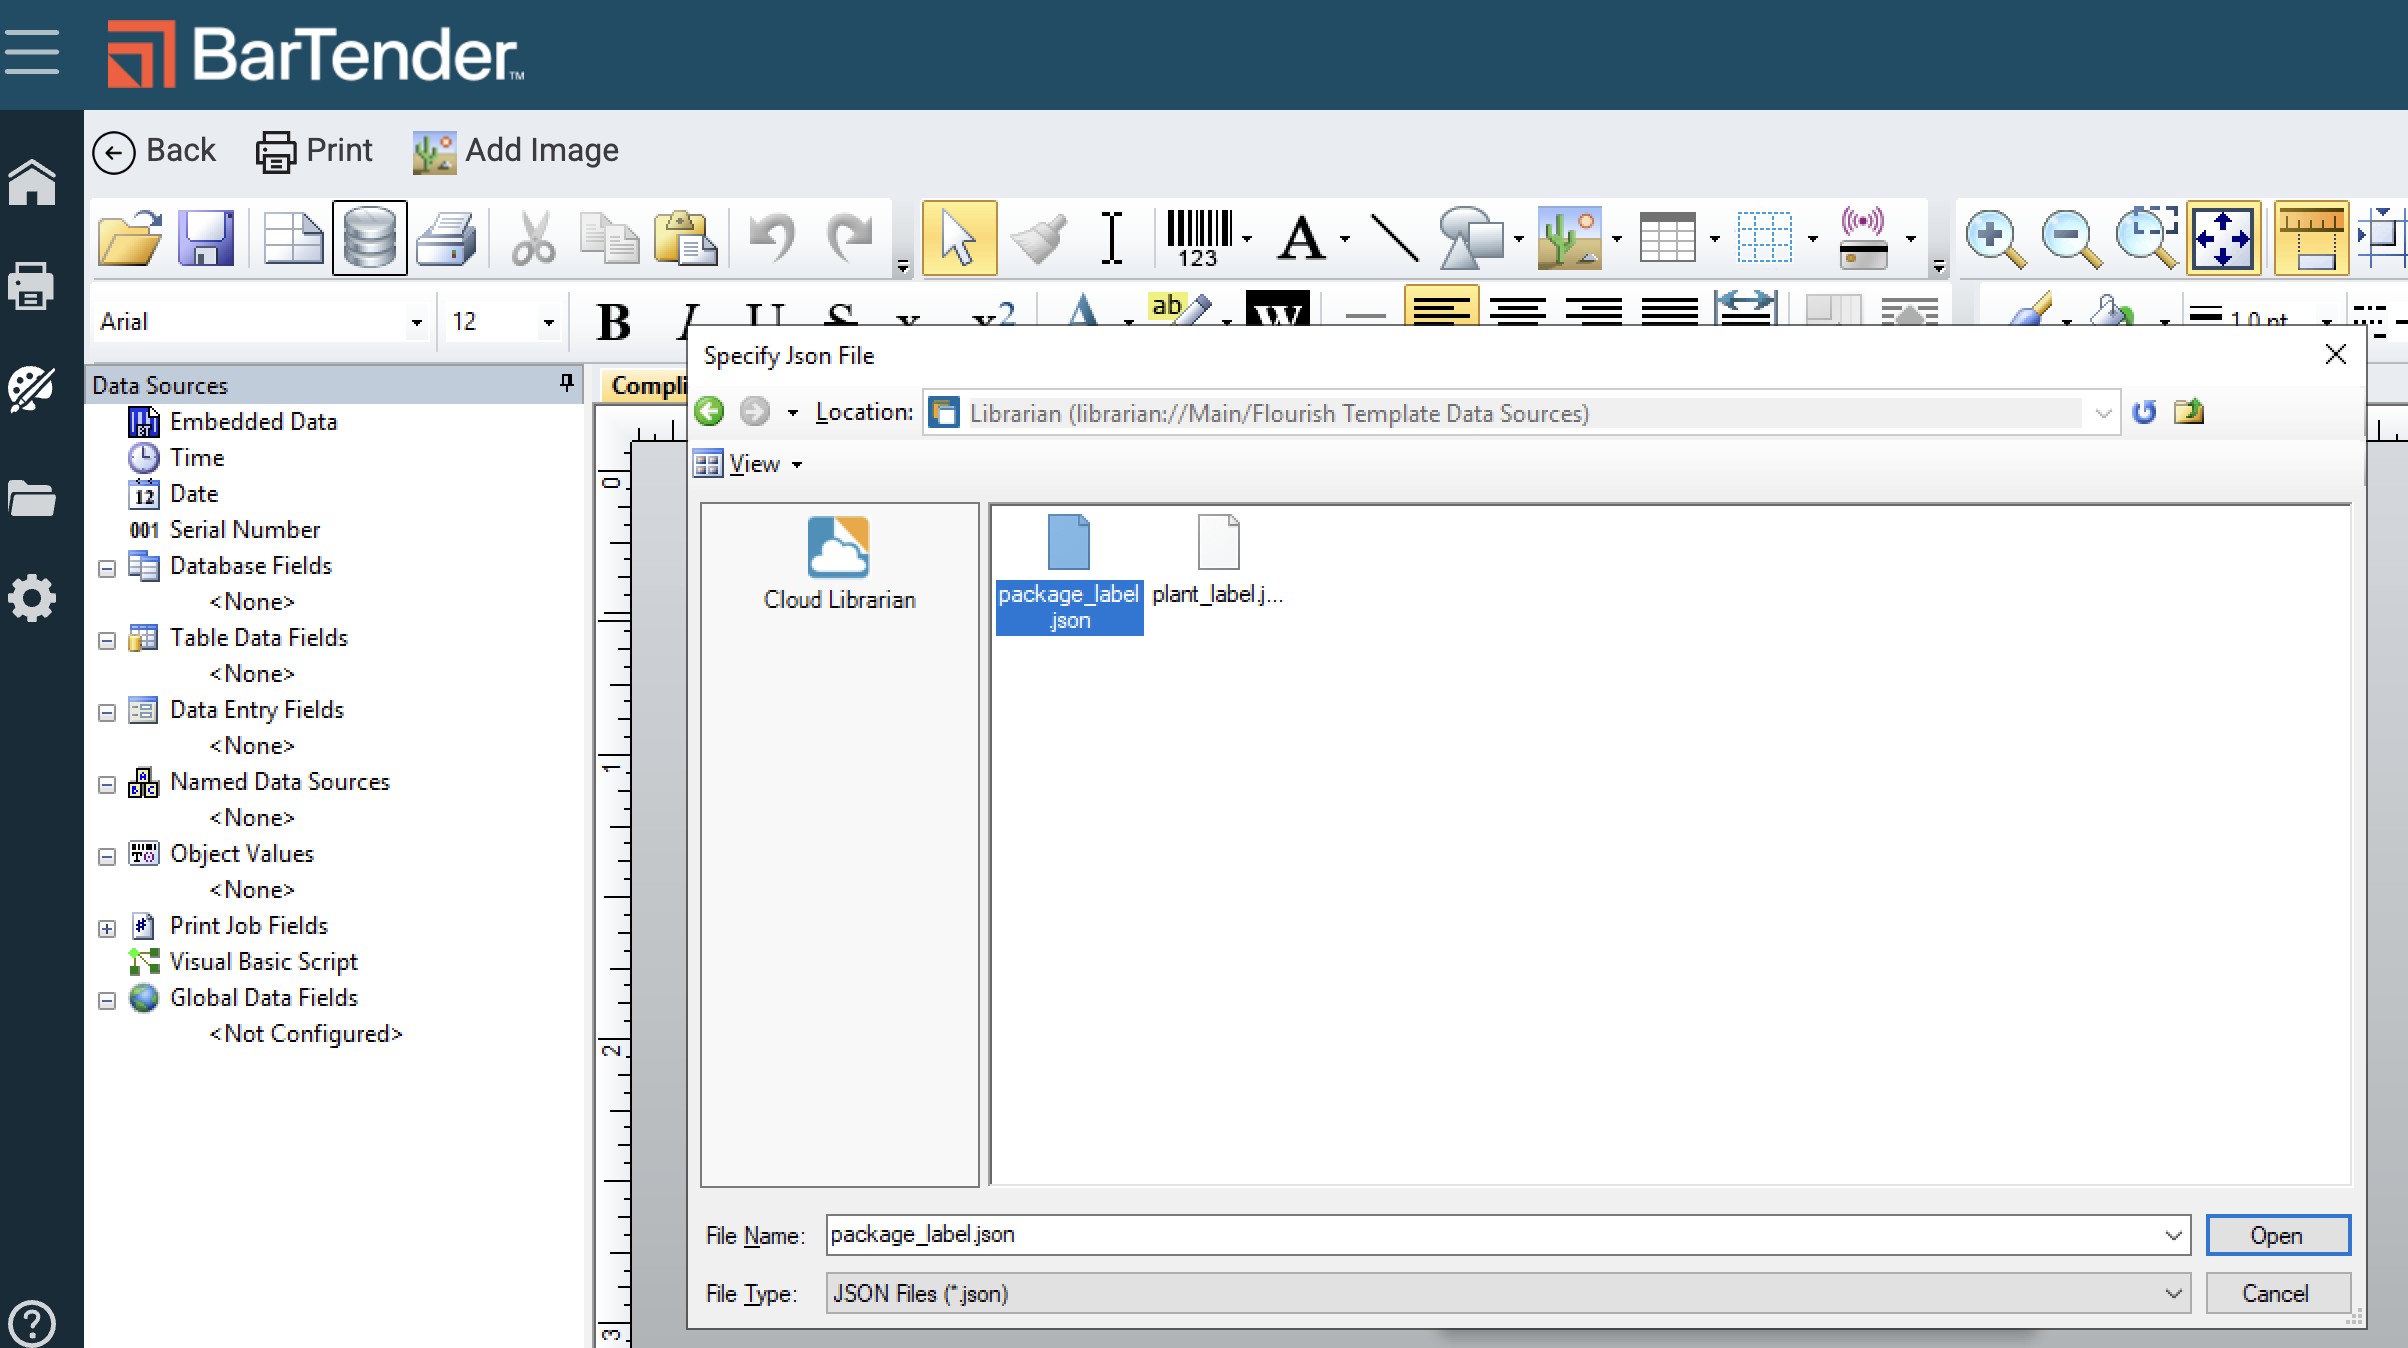
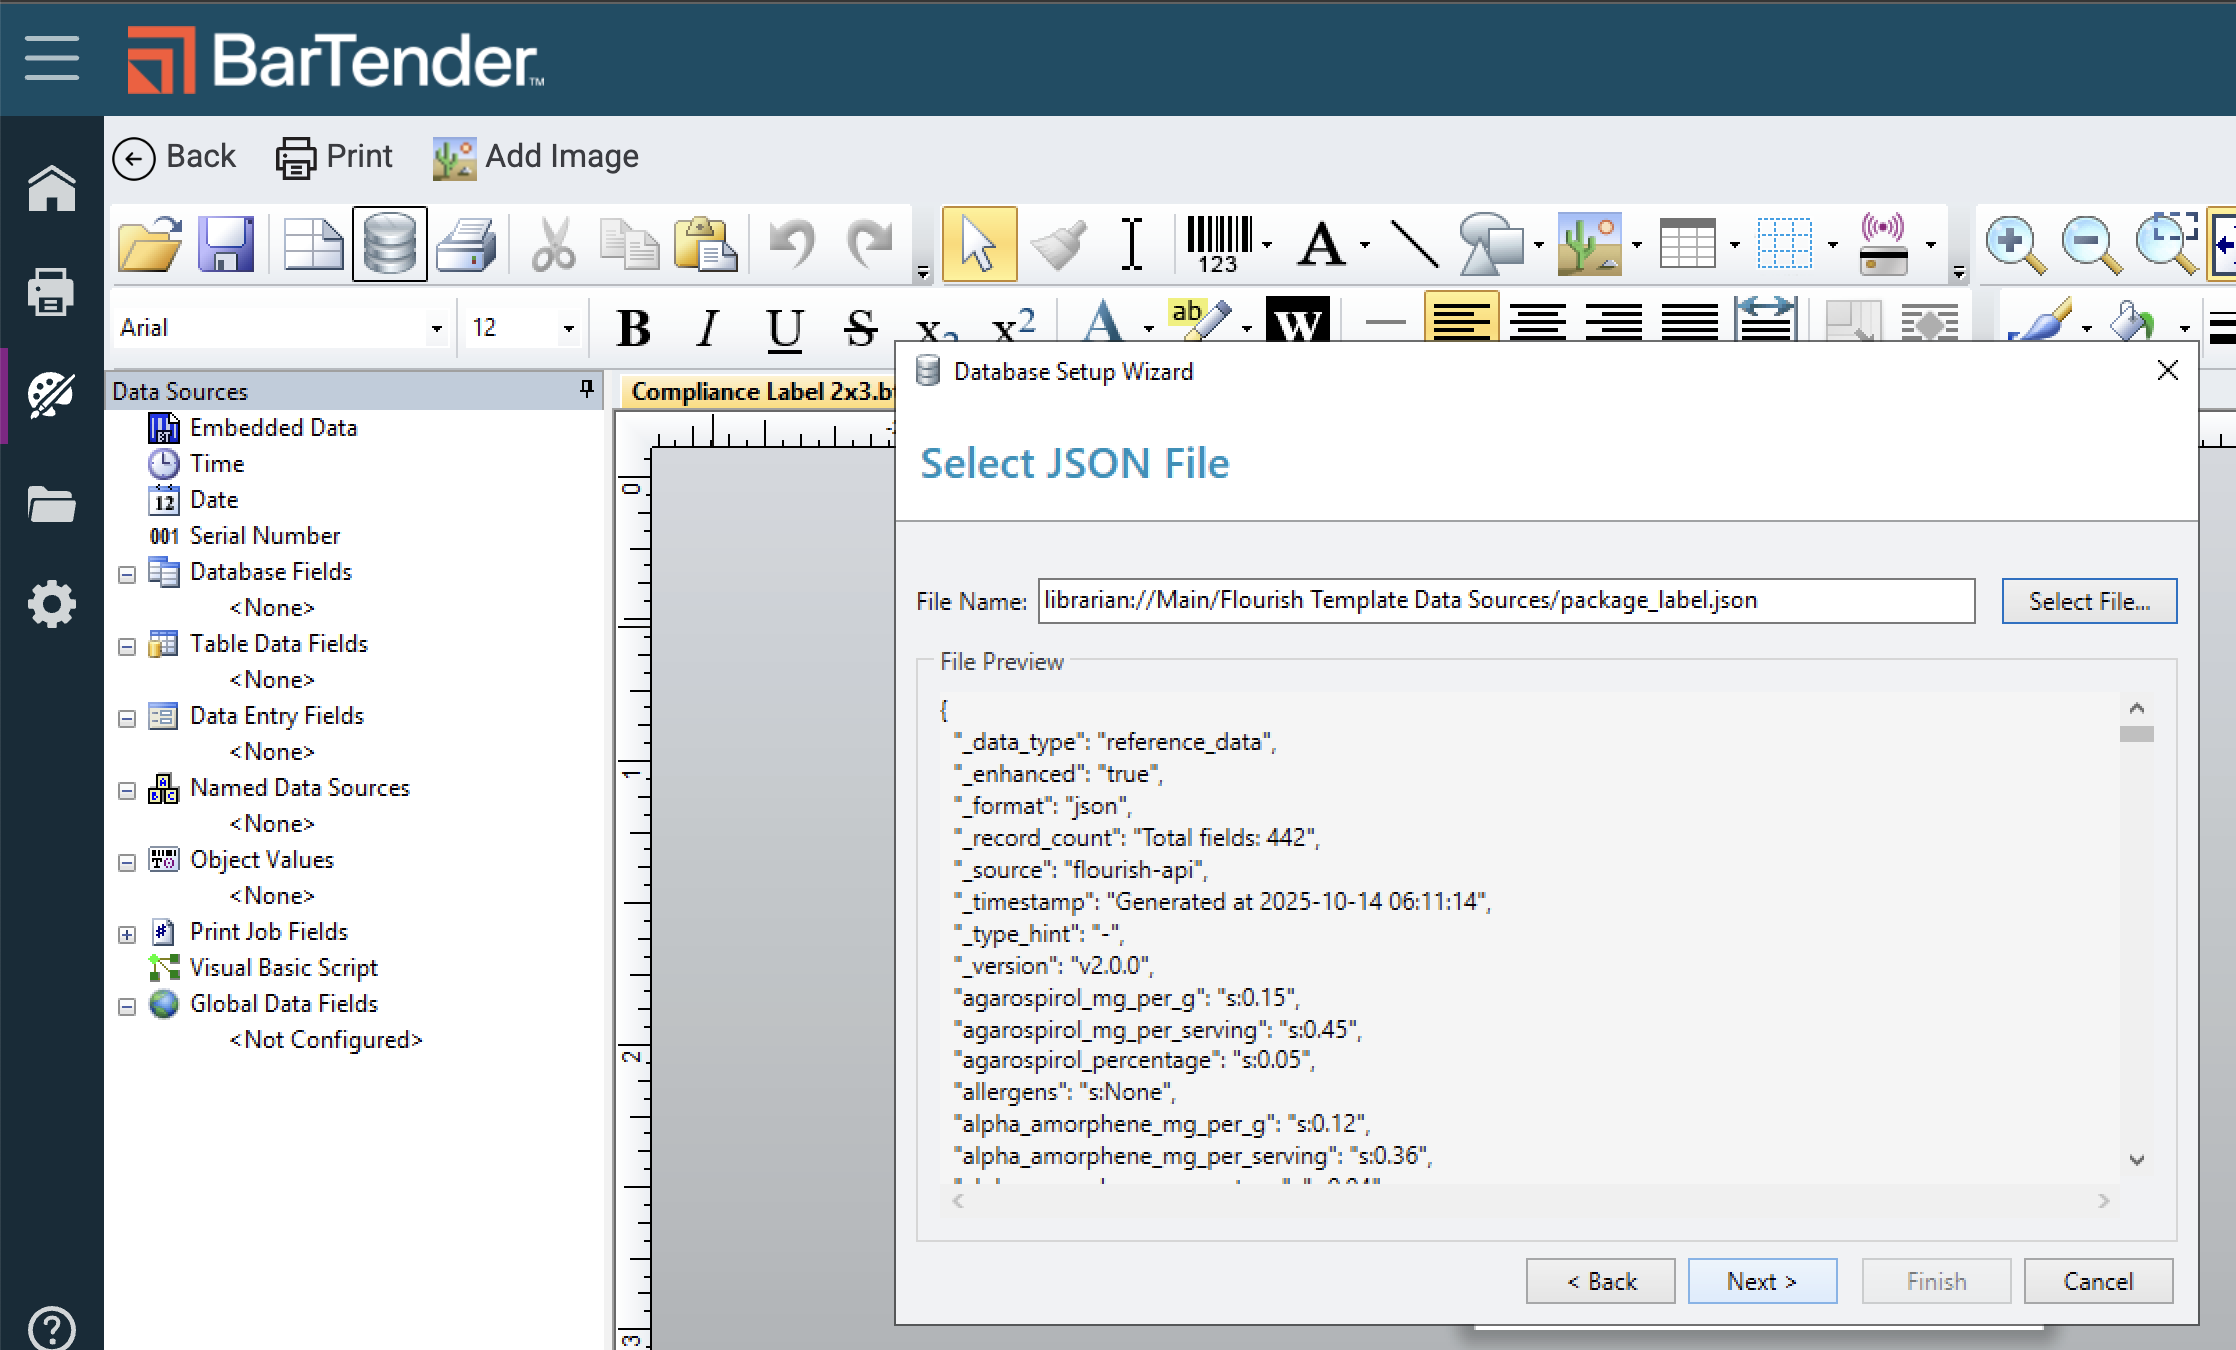
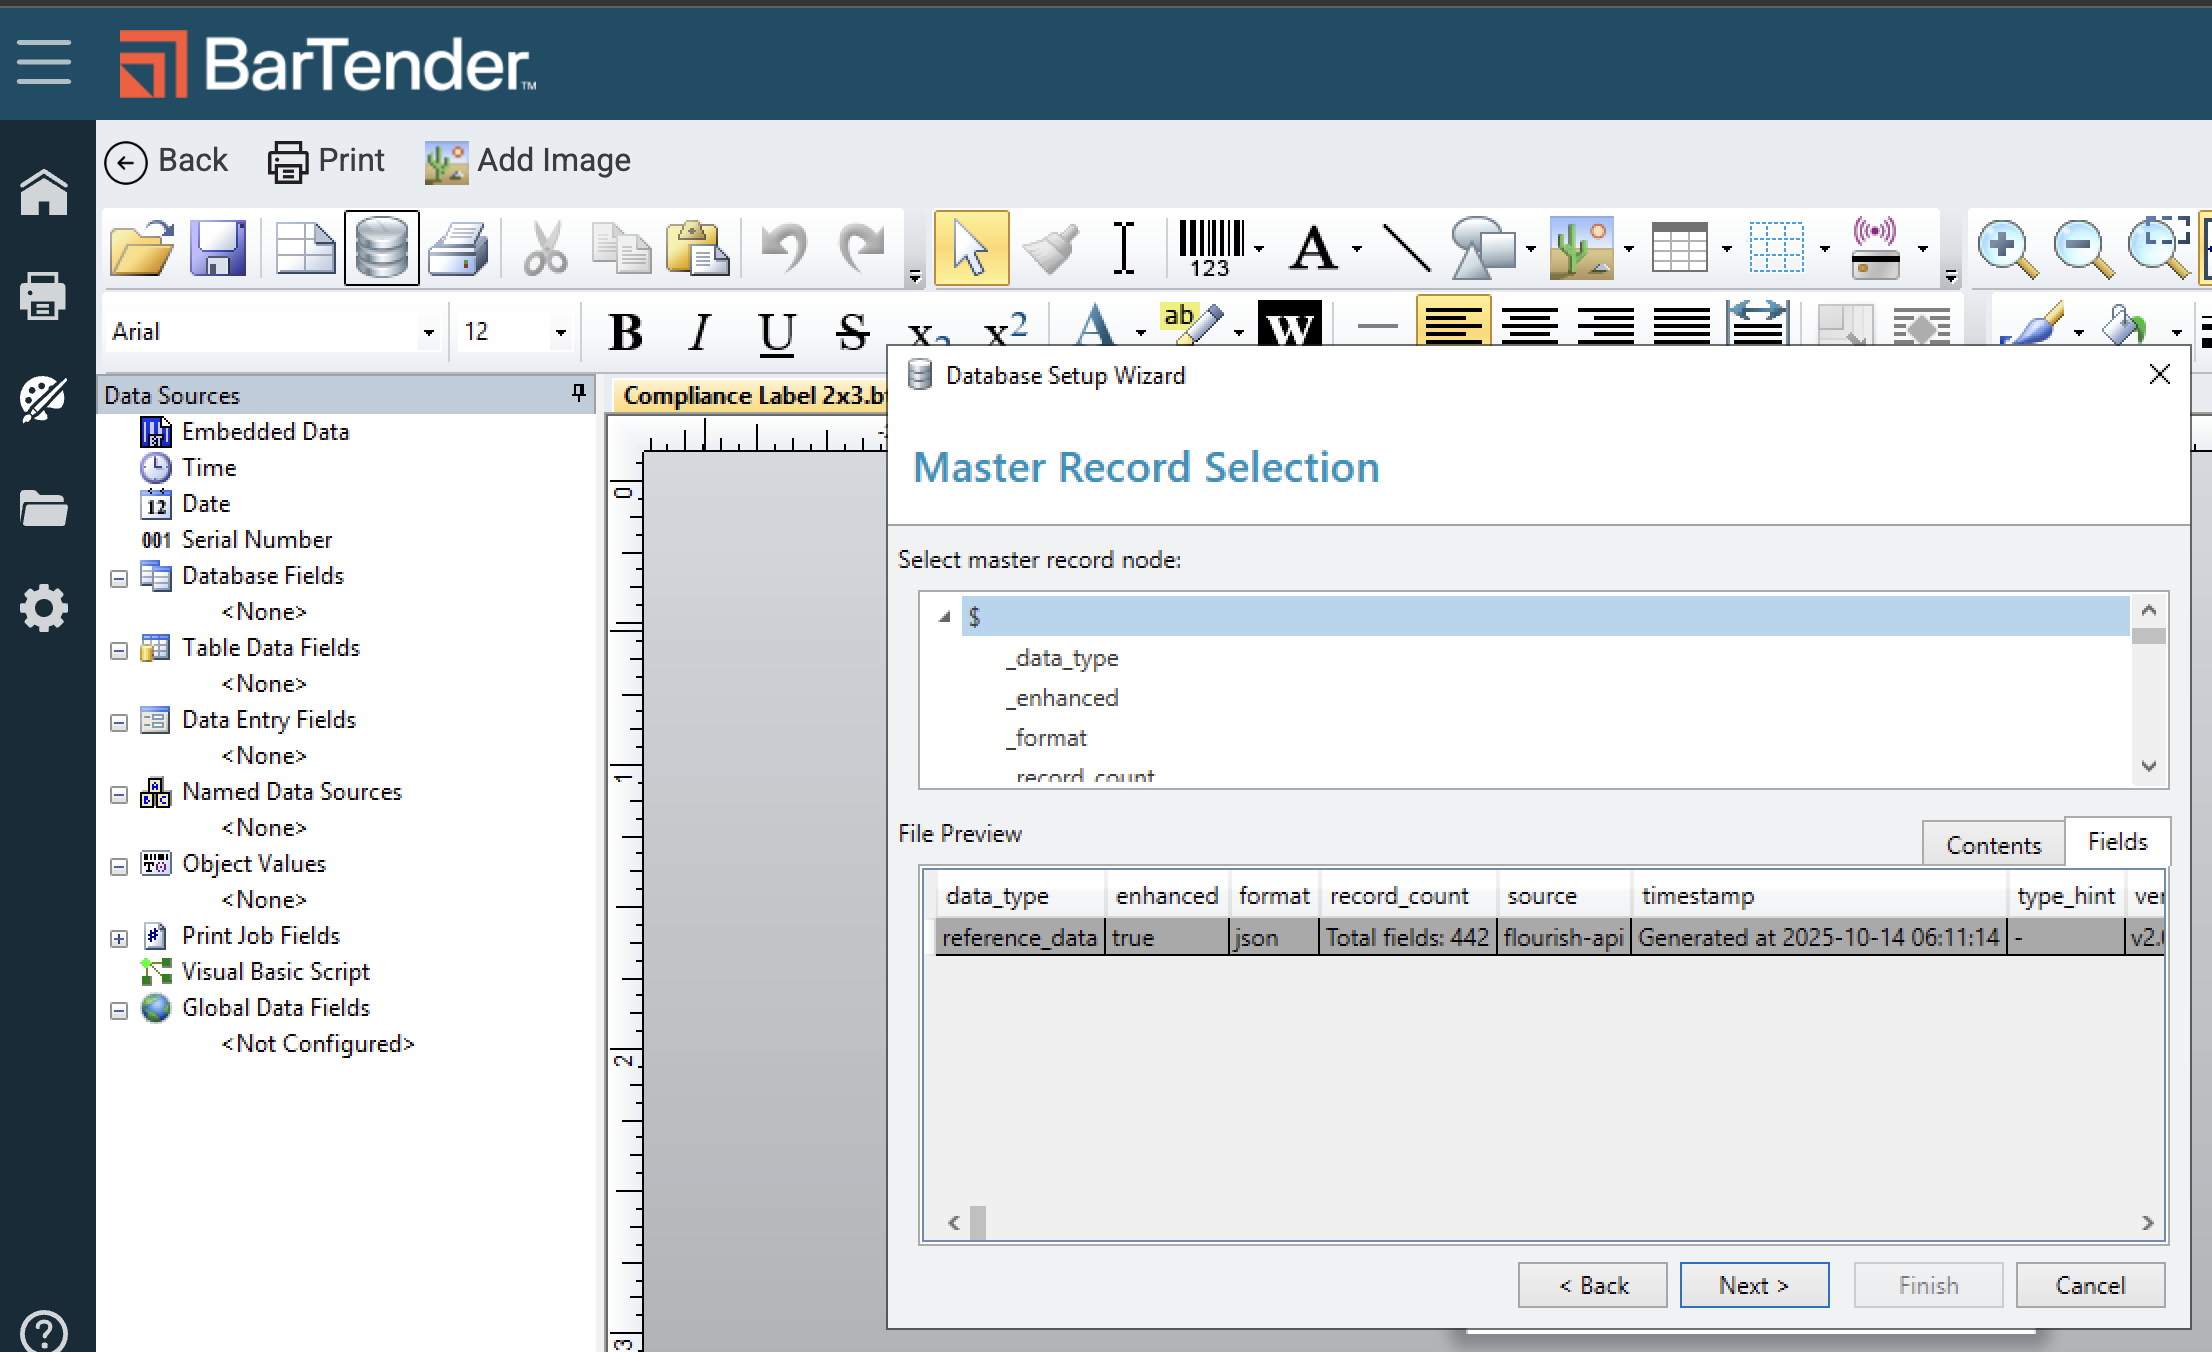
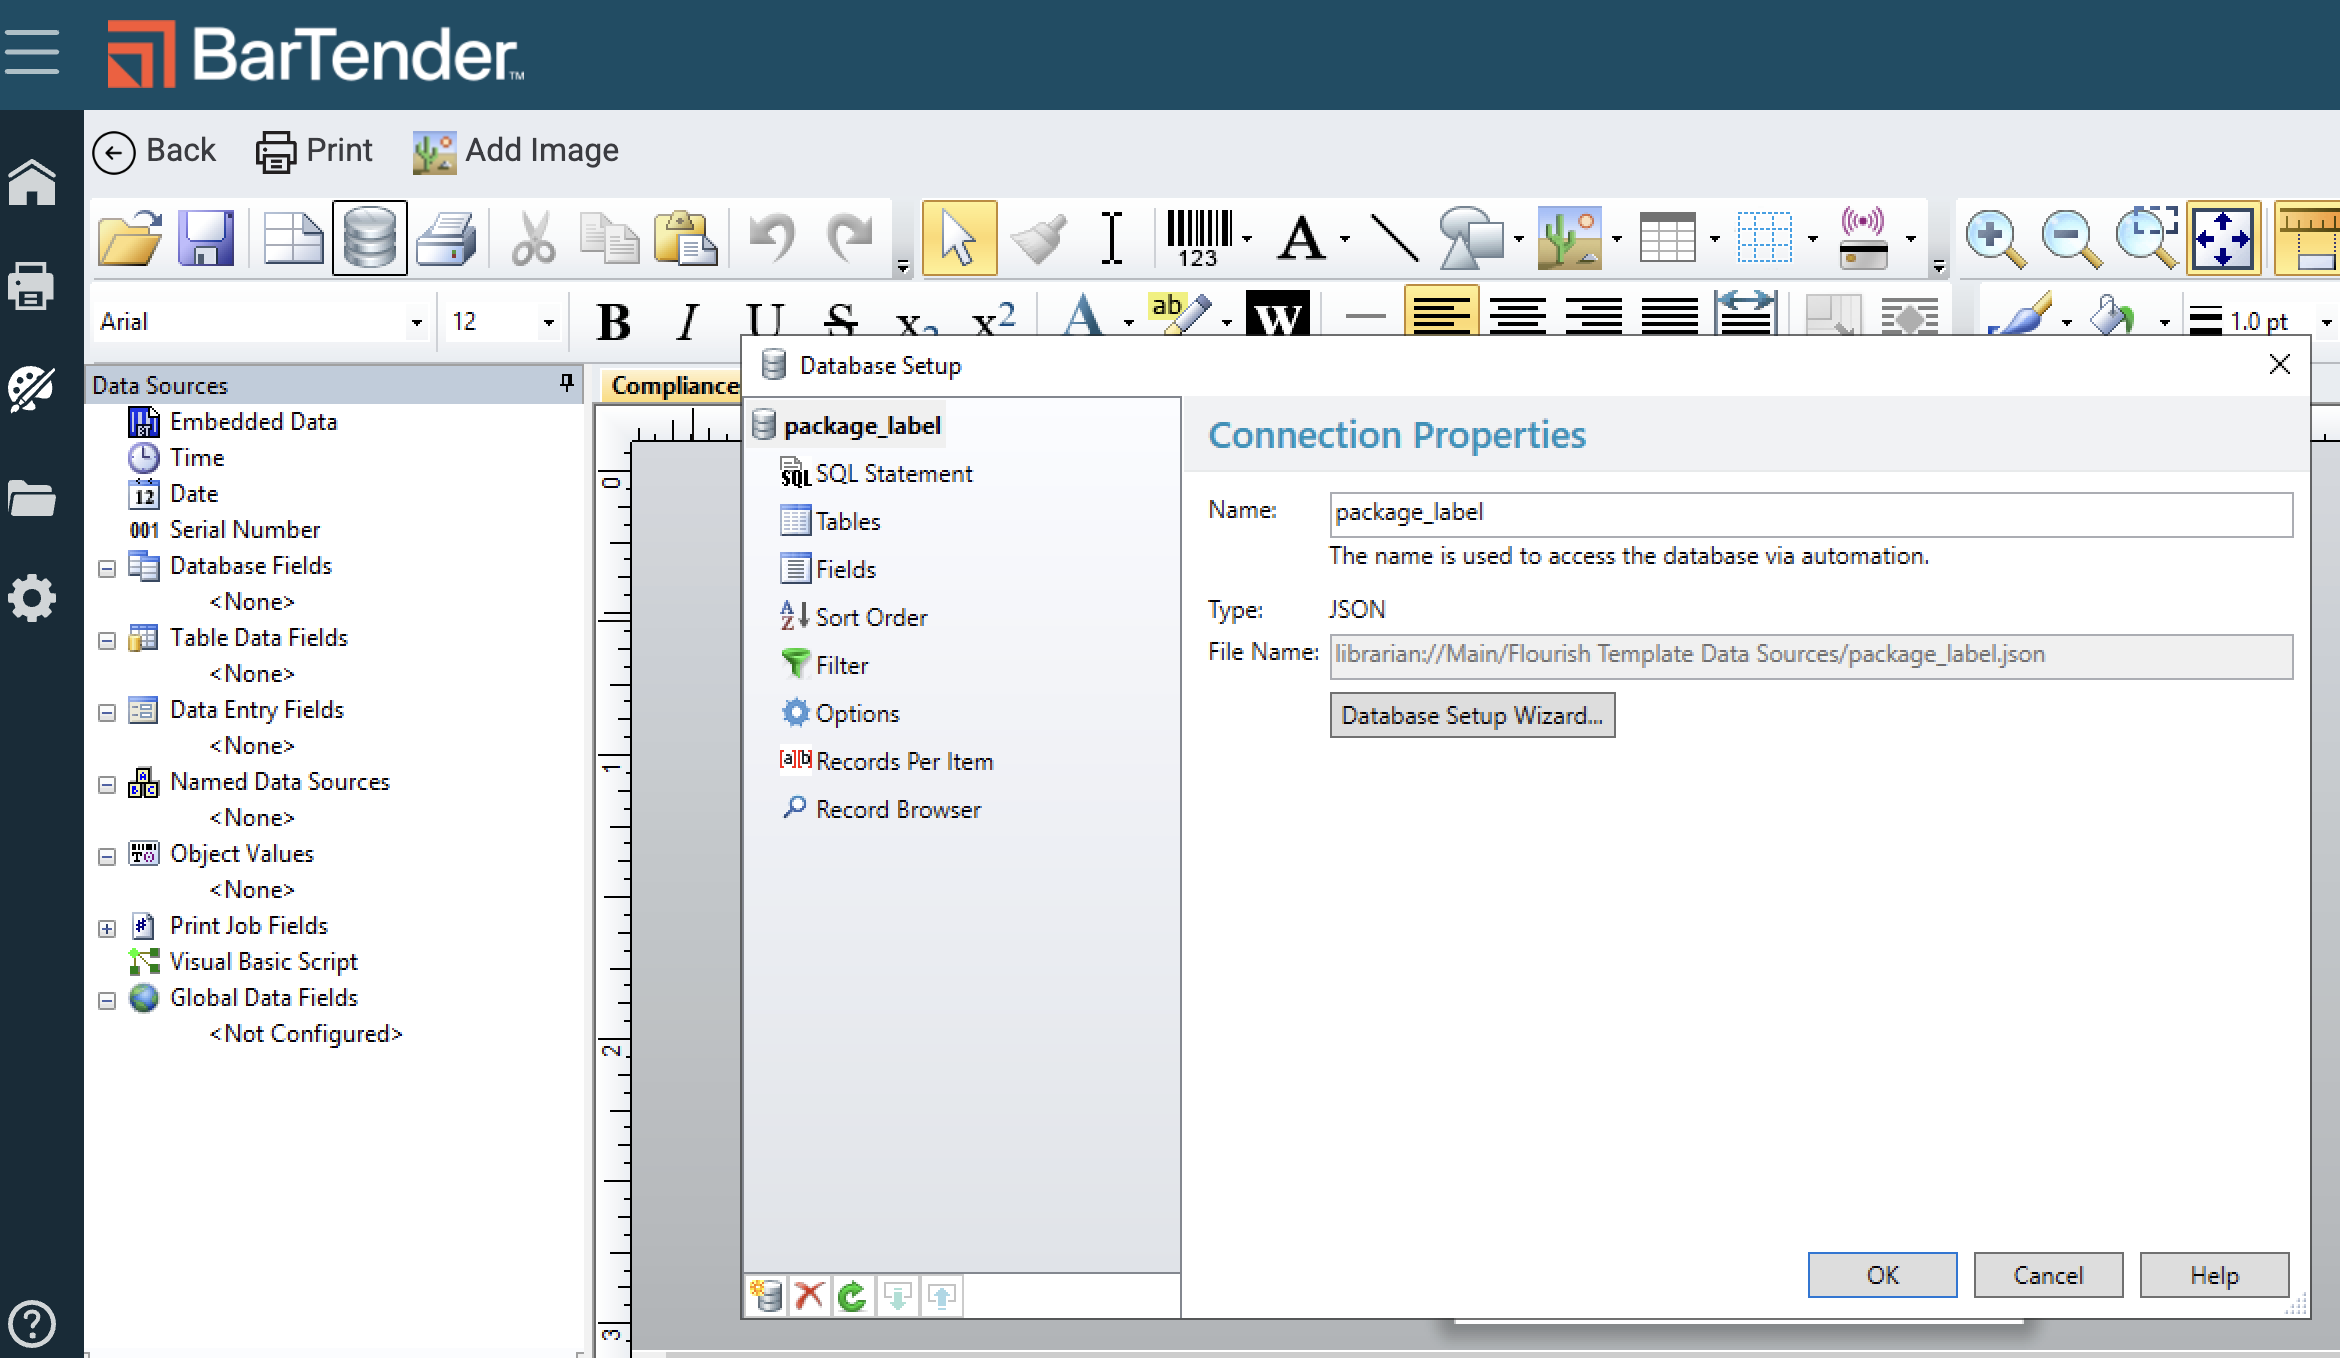
    1. Follow the prompts to add the package_label.json file to the template from the file in your librarian.
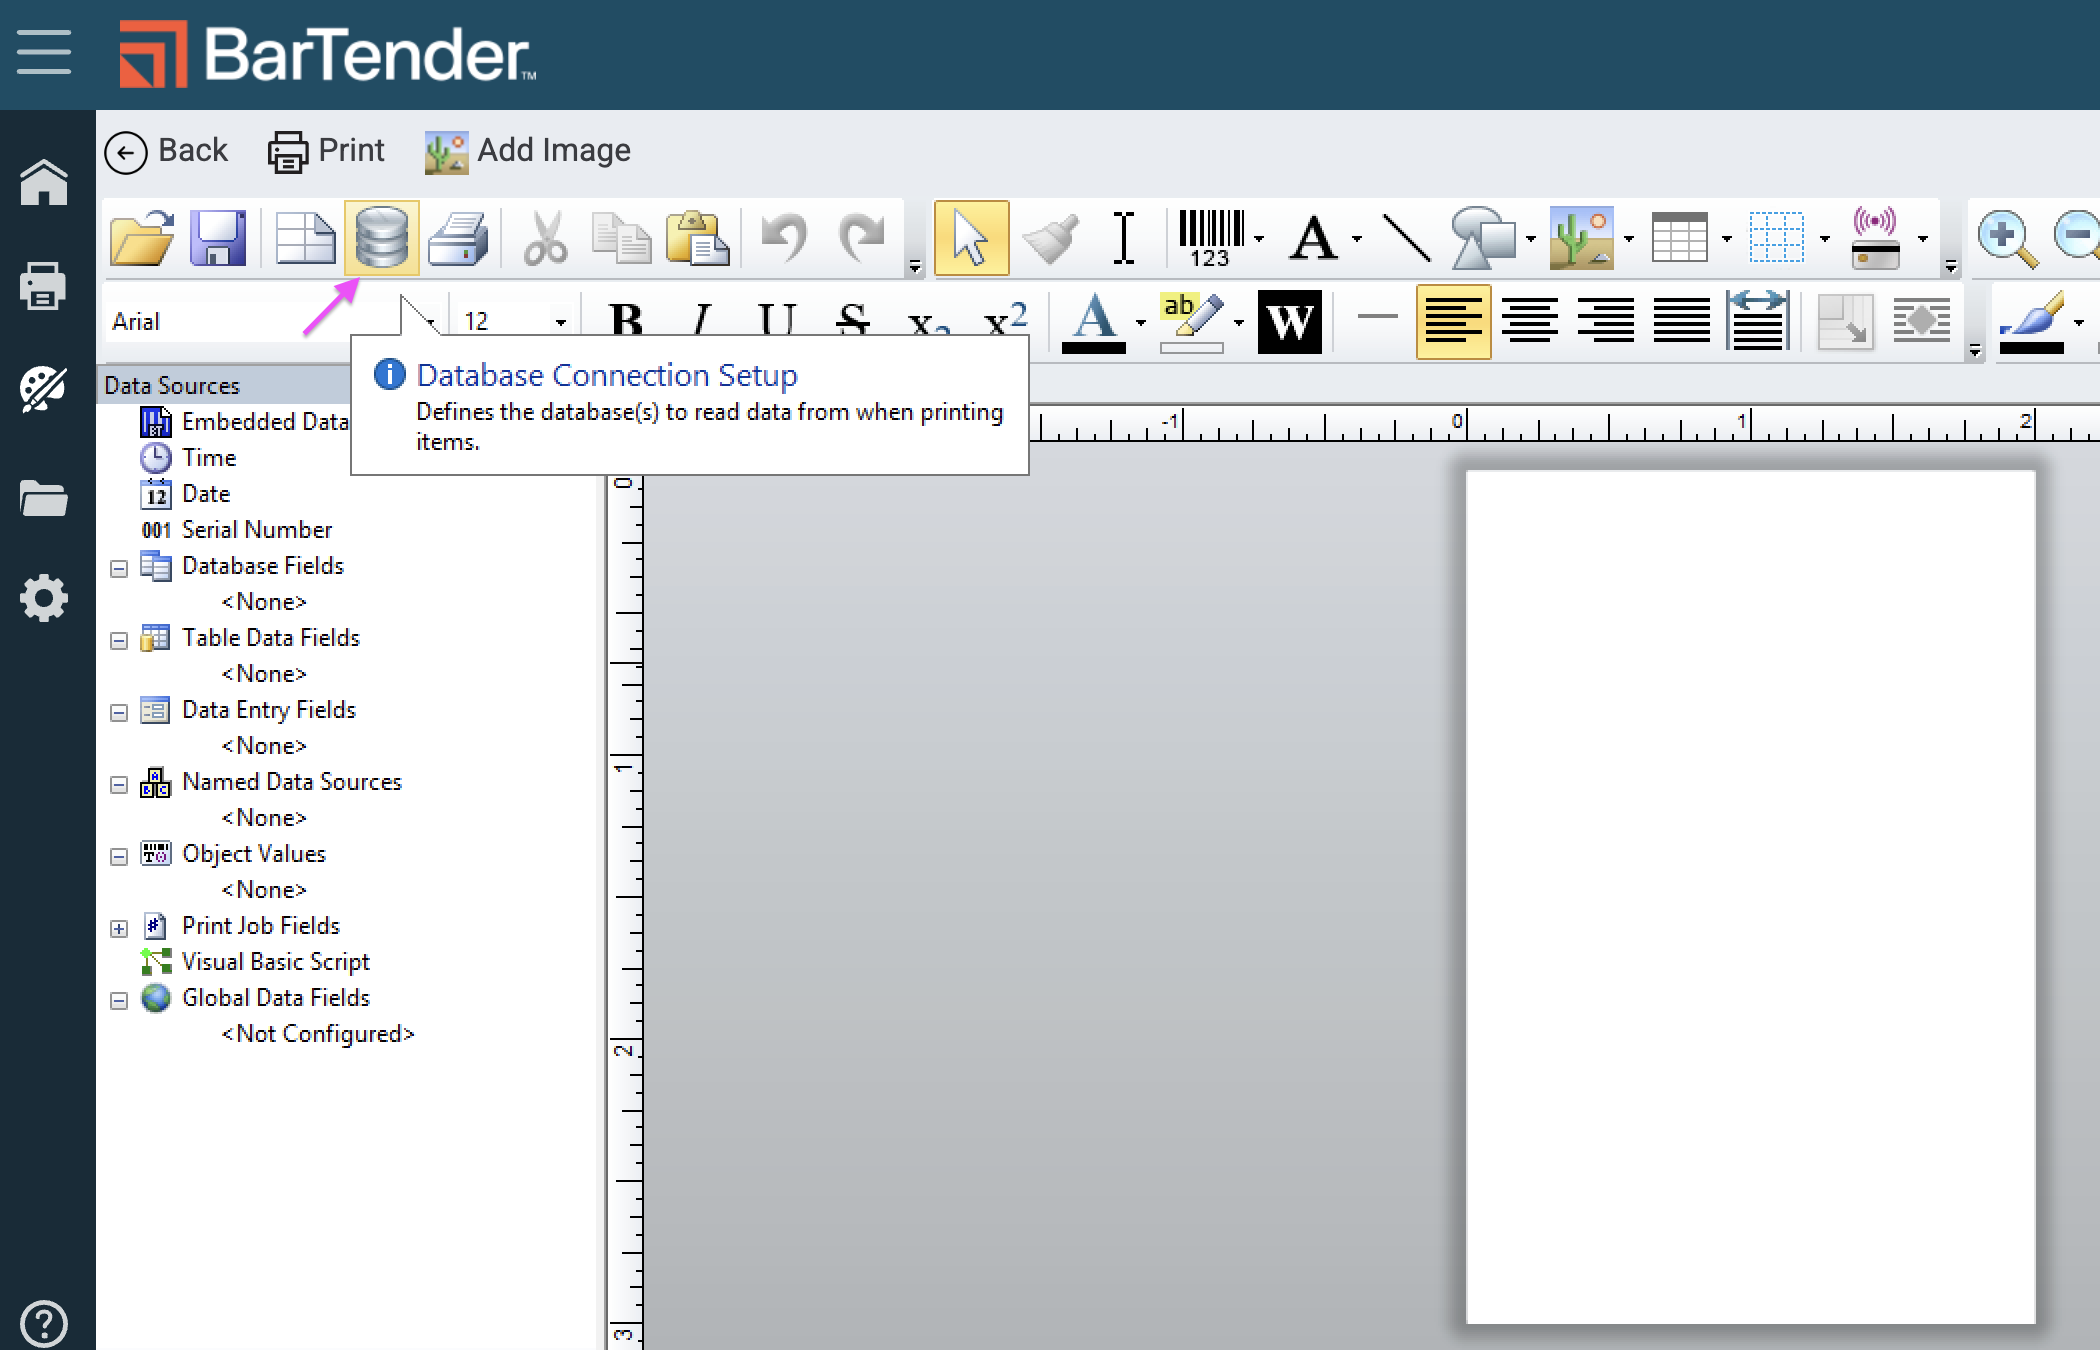
The BarTender Template Designer interface showing the Database Connection Setup icon highlighted with a pink arrow in the top toolbar, along with a tooltip reading "Defines the…
The image shows the BarTender Template Designer interface with the Database Setup Wizard dialog open, displaying the "Select Database Type" step where the JSON option is…
The image shows the BarTender Template Designer interface with the Database Setup Wizard dialog open, prompting the user to select a JSON database source — either "Database file"…
The screenshot shows the BarTender™ Template Designer interface with the Database Setup Wizard dialog open to the "Select JSON File" step, where users enter or browse for a file…
The screenshot shows the BarTender™ Template Designer interface with a "Specify Json File" dialog box open, displaying the Librarian file browser where users can navigate to and…
The screenshot shows the BarTender Template Designer with a "Specify Json File" dialog open, displaying the BarTender Cloud Librarian file browser navigated to the main library…
The image shows the BarTender Template Designer with a "Specify Json File" dialog open, displaying the Cloud Librarian location (`librarian://Main/Flourish Template Data Sources`)…
The image shows the BarTender Template Designer interface with the Database Setup Wizard open to the "Select JSON File" step, where the `packagelabel.json` file from the Flourish…
The image shows the BarTender Template Designer with the Database Setup Wizard open to the "Master Record Selection" step, where the Flourish-sourced JSON data file is being…
The image shows the BarTender Template Designer with the Database Setup dialog open, displaying the Connection Properties for the packagelabel data source — configured as a JSON…
  1. Click OK and the Flourish database fields will populate on the left side panel for template design and mapping.
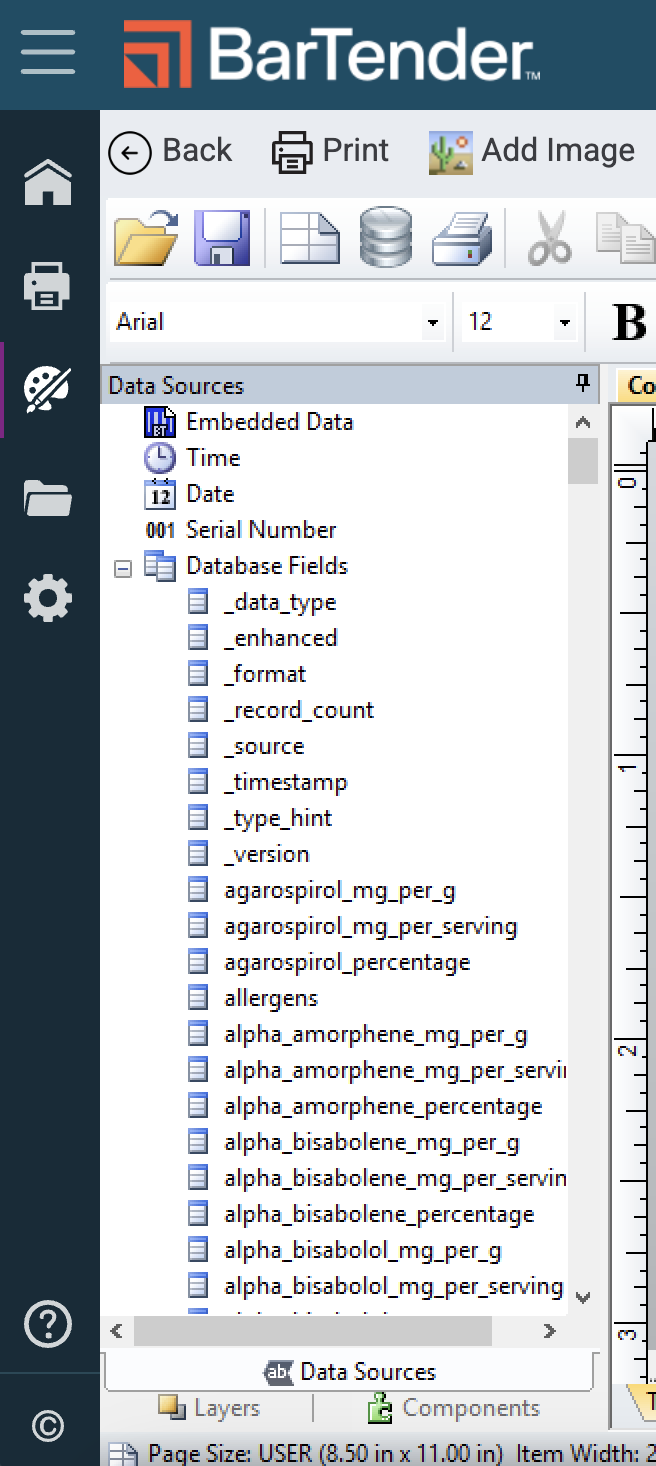
The image shows the BarTender Template Designer interface with the Data Sources panel open on the left side, displaying the available database fields that have been connected from…

Designing the Label

  1. Click the text box (A icon in the toolbar) to create a text field. This will be used for element headers and field mappings. It is standard to use Normal or Normal Wrapped if word wrapping is needed for Ingredients or Warnings.
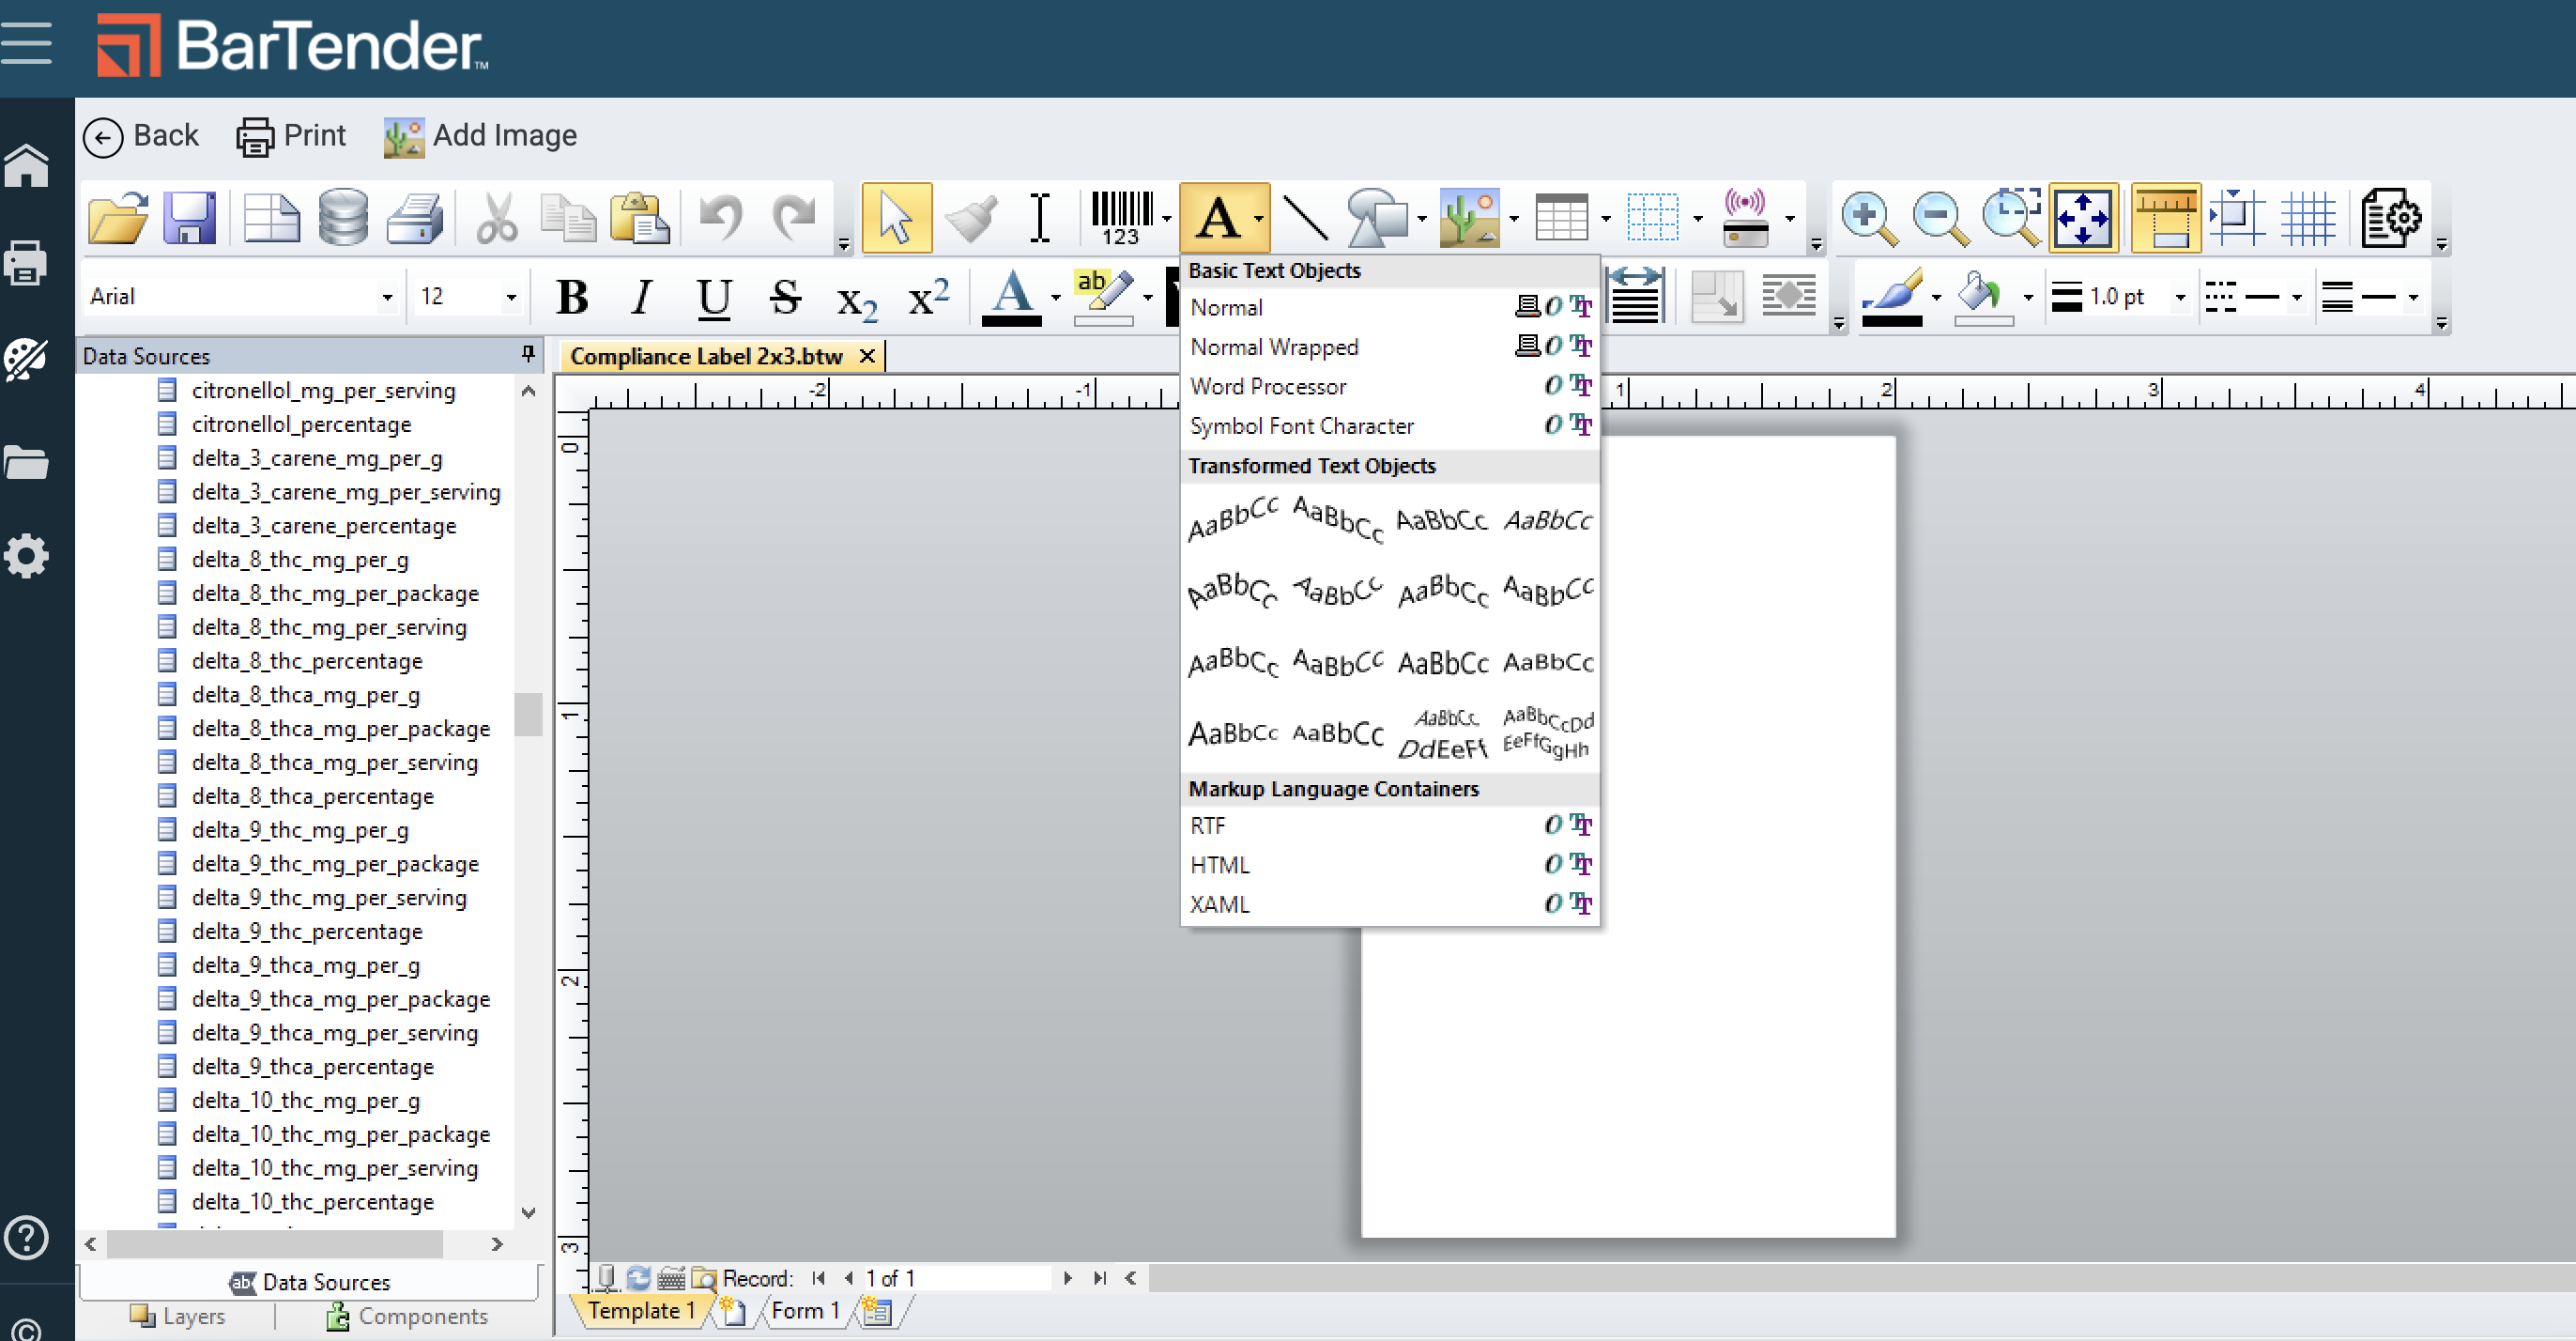
The BarTender Template Designer interface showing a label template file ("Compliance Label 2x3.btw") open for editing, with a left-side Data Sources panel populated by…
  1. You can configure the label in two different ways.
    1. Option 1: Find the field name on the left, click and drag into the desired area of the label. You can do this with or without a field name header.
    2. Option 2: Create the text box, right click to select Properties and follow the prompts.
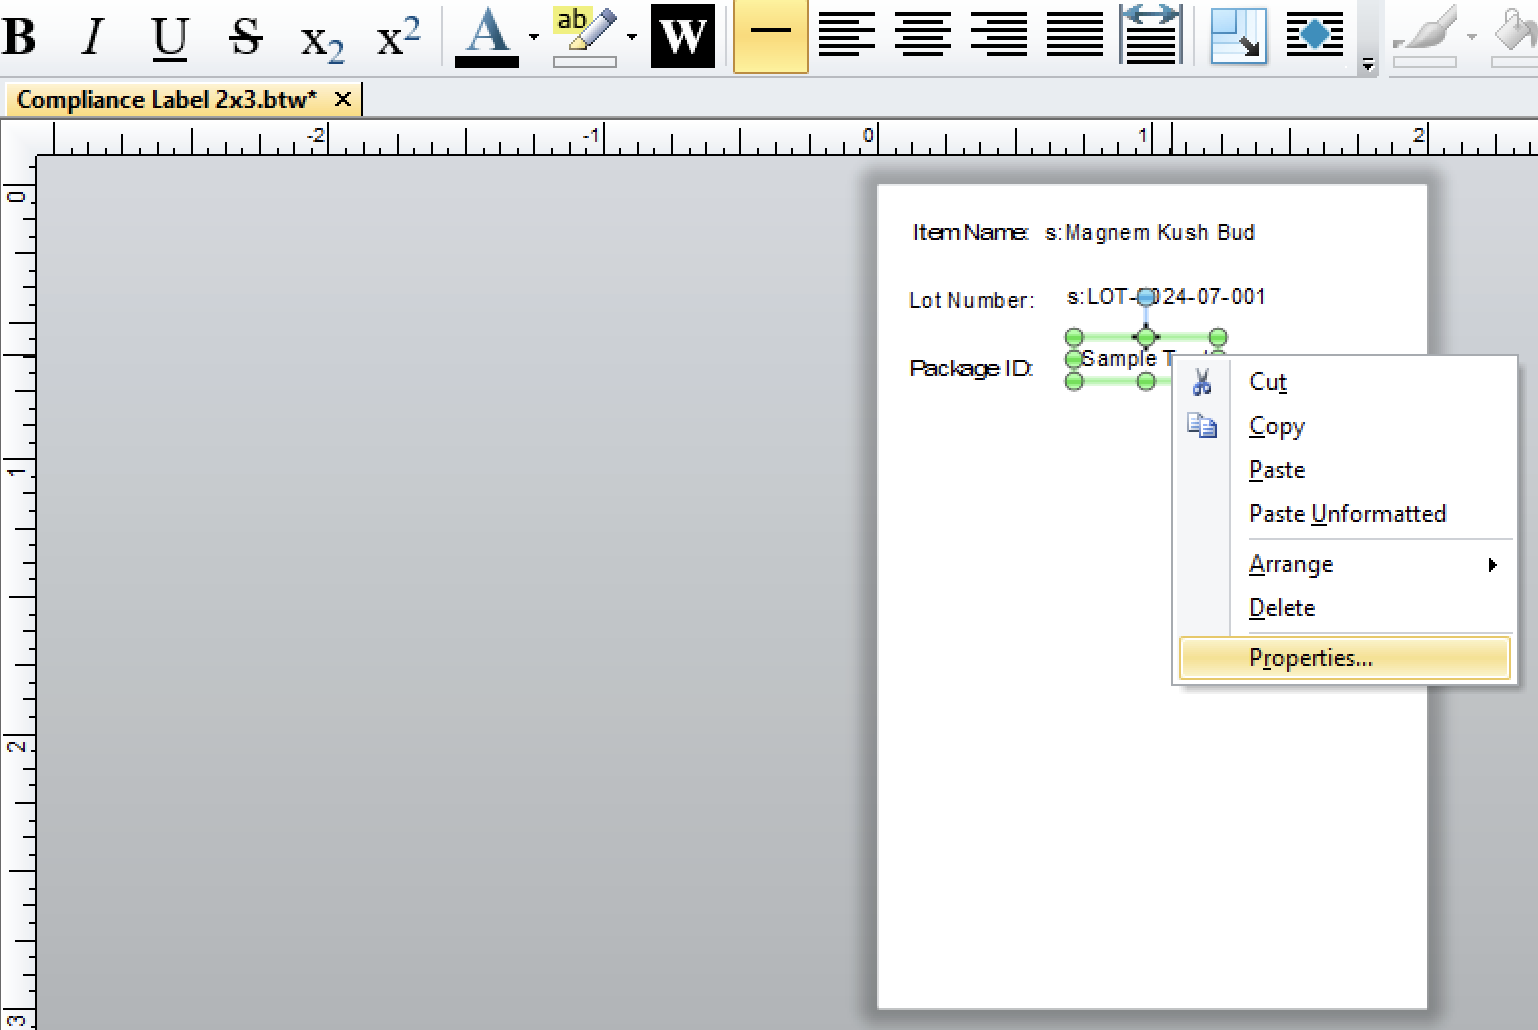
      The BarTender Template Designer canvas showing a partially built compliance label (2x3.btw) with mapped Flourish data fields — Item Name, Lot Number, and Package ID — populated…
The image shows the BarTender Template Designer interface with the Text Properties dialog open, displaying the Data Source tab for a text field ("Text 6") currently set to…
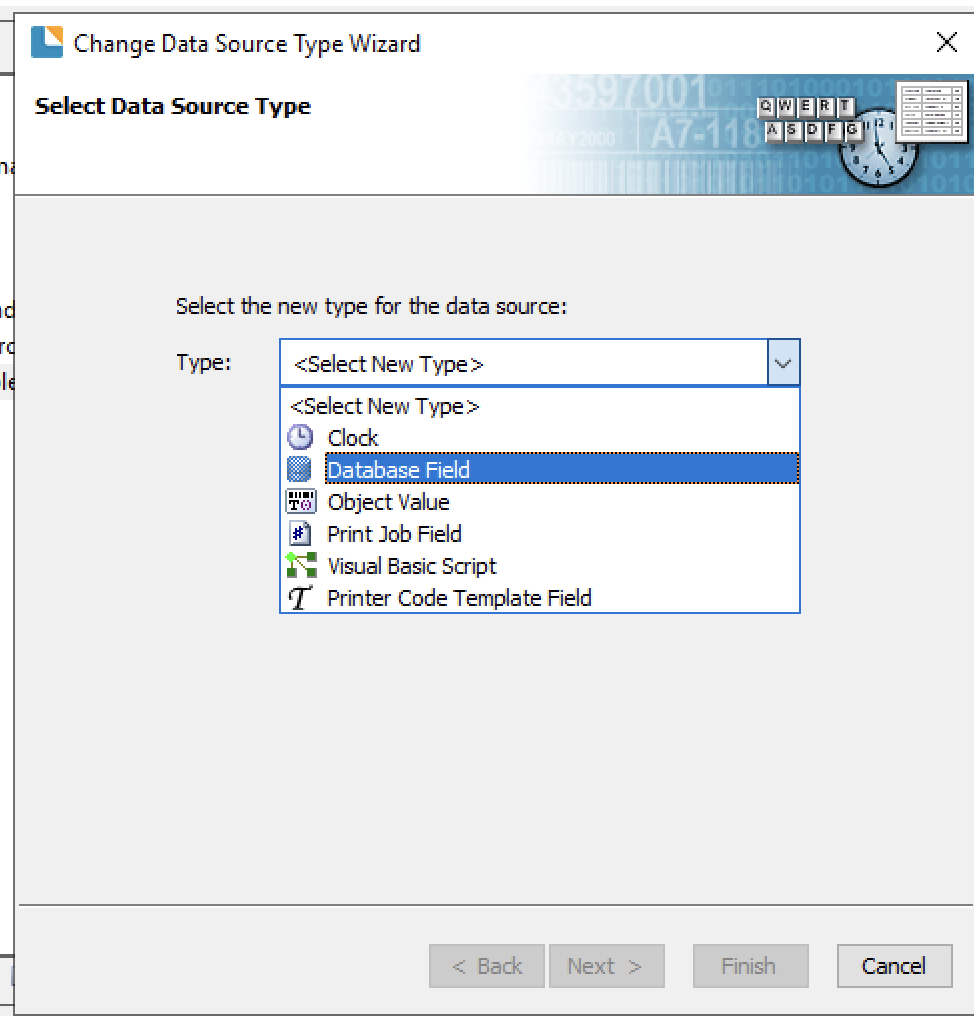
The image shows the BarTender™ "Change Data Source Type Wizard" dialog, specifically the "Select Data Source Type" step, with a dropdown menu open displaying options including…

Select Database Field and Click Next.
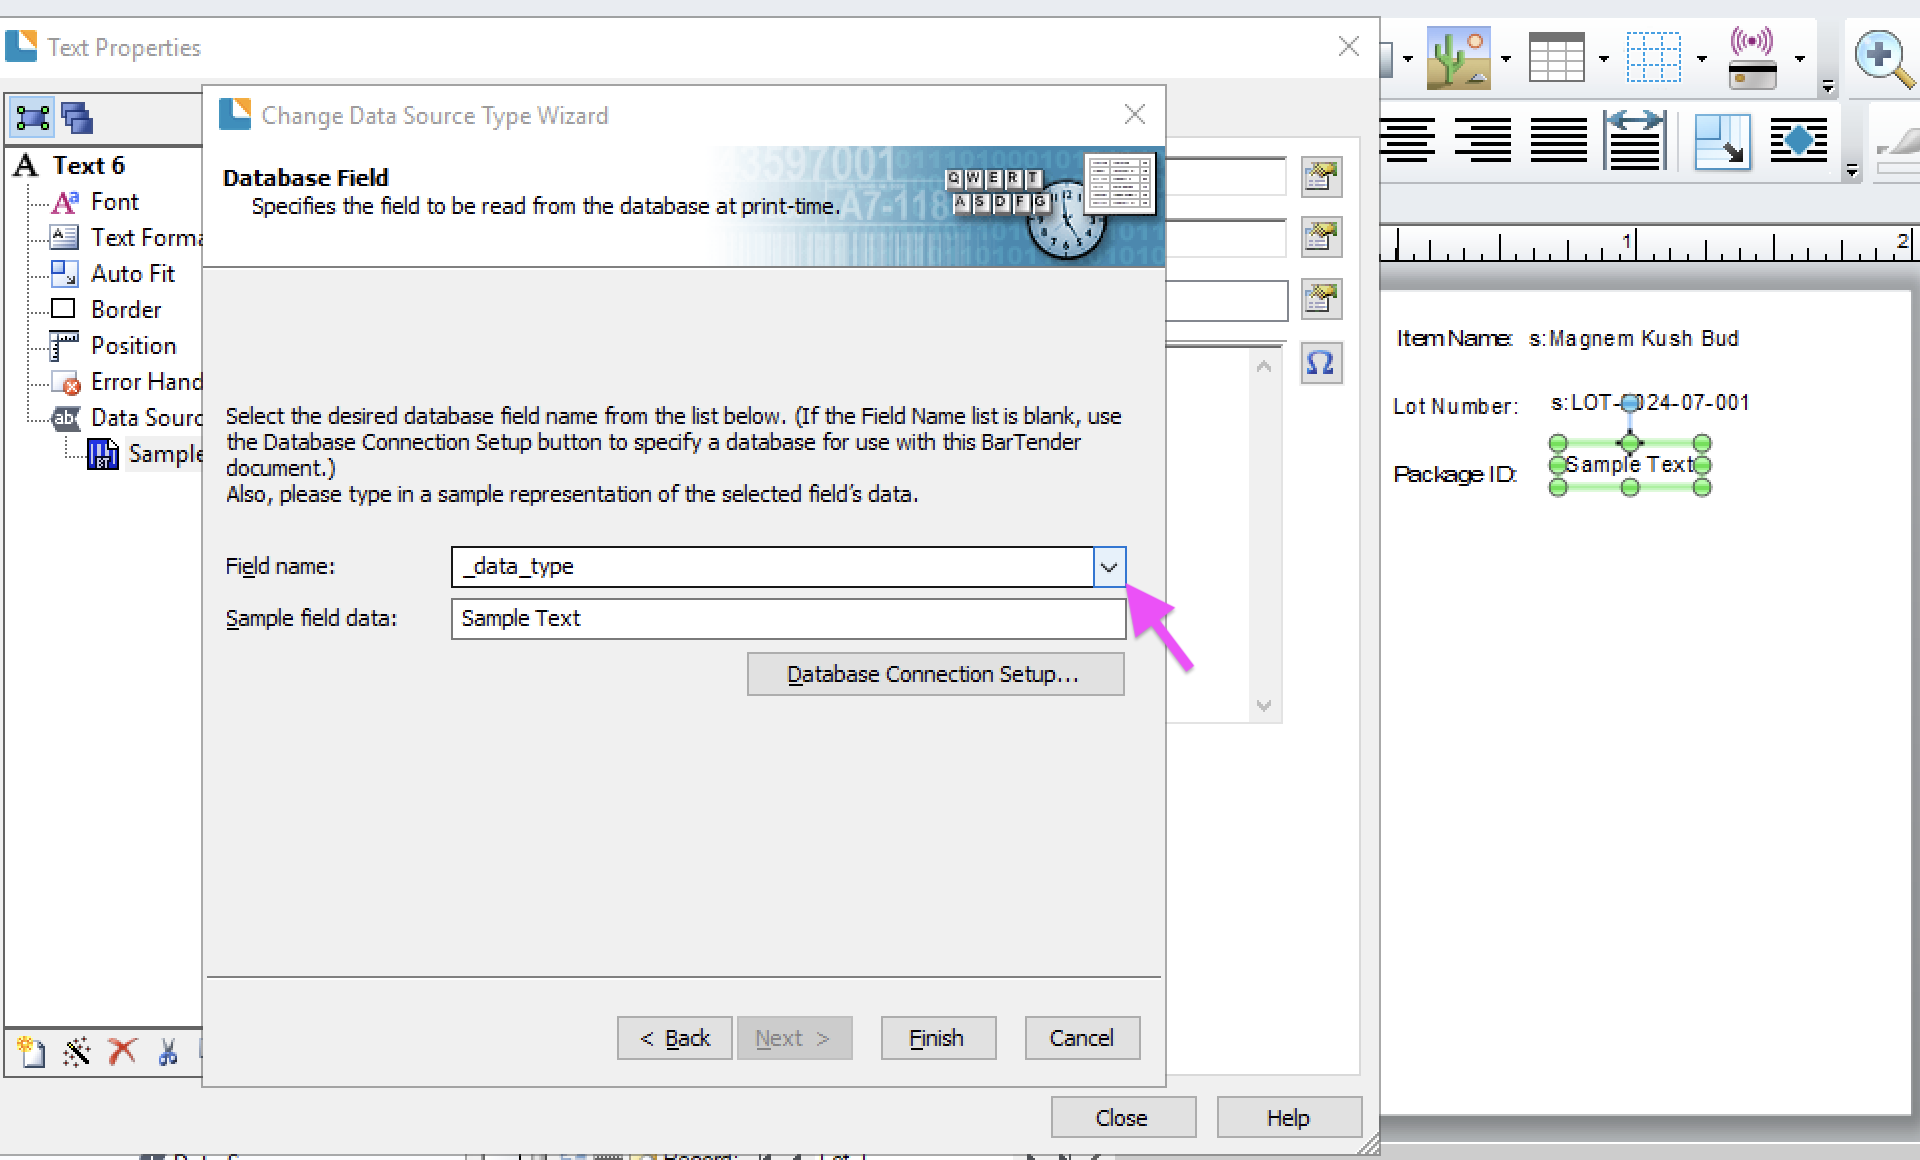
Screenshot of the BarTender™ Change Data Source Type Wizard dialog, showing the "Database Field" step where a user selects a Flourish field name (such as `datatype`) from a…

Click the drop-down menu to search and find the field name to add. Once selected, click Finish. The text box is now mapped to a Flourish field.

Option 2 allows you to search the name of the field you are looking for.

Here is a quick video to demonstrate both ways to handle this.

  1. Continue either process until all required fields are mapped. Click Save. Click Print to preview a test print of your label. To print labels, follow the instructions below for printing labels out of Flourish.
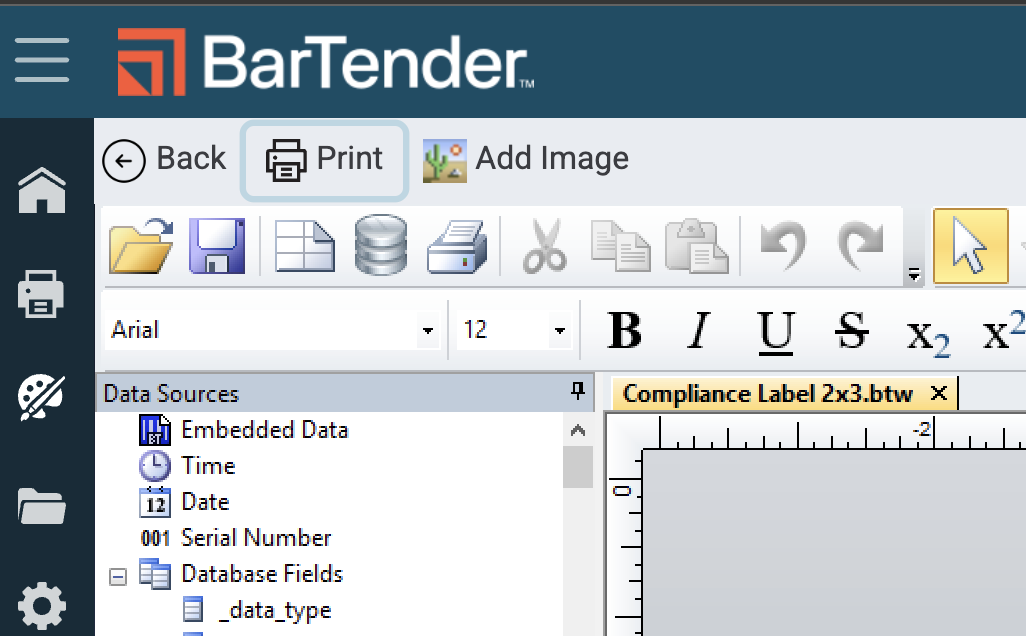
The image shows the BarTender Template Designer interface with a label file named "Compliance Label 2x3.btw" open in the design canvas, and the Data Sources panel on the left…

You can use the BarTender® integration to print package, product, or plant labels directly within Flourish.

To print labels:

  1. Initiate a print action (individual or bulk).
  2. Toggle ON the Print with BarTender™ option.
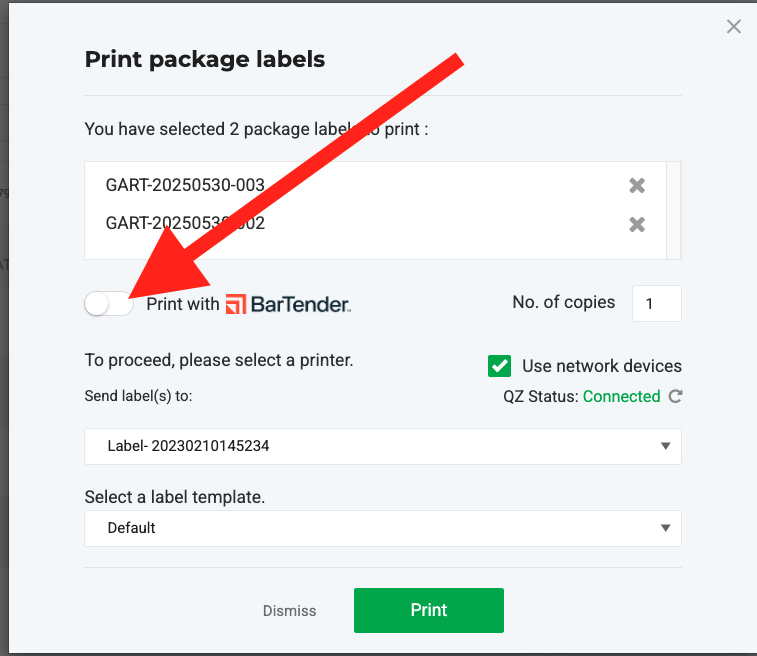
    The "Print package labels" dialog in Flourish Software, with a red arrow pointing to the "Print with BarTender" toggle (currently in the OFF/disabled state), illustrating the…
  3. Enter the number of copies (default is 1).
  4. Select a printing device from the dropdown.
  5. Choose a label template from the dropdown.
  6. Click Print.
  7. A success message will confirm your labels have been sent to the printer.
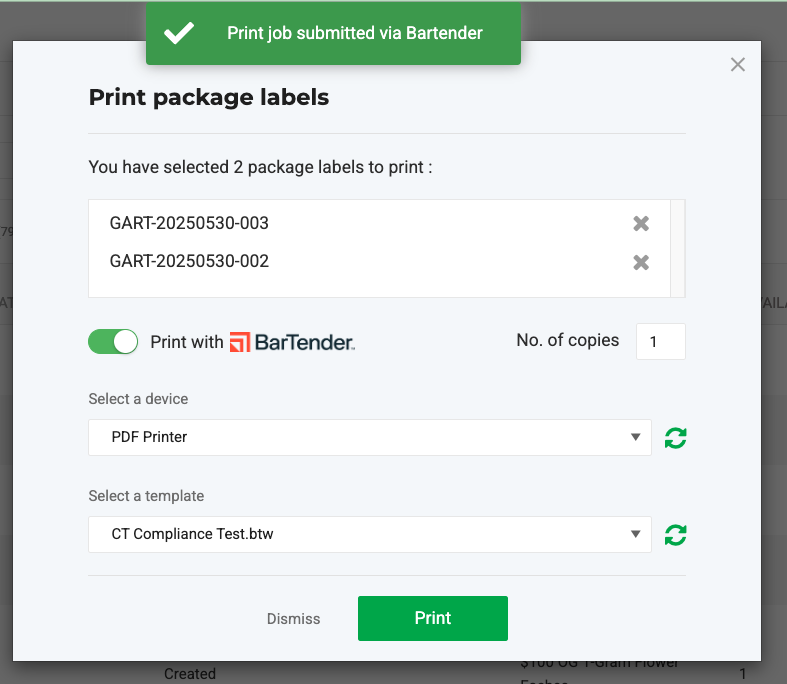
    The image shows the Flourish Software "Print package labels" dialog with a green success banner reading "Print job submitted via Bartender" at the top, confirming that two package…

How did we do?

BarTender Designer - RFID Encoder Setup

Contact