Table of Contents
Item Tag Association Management
Purpose. Use Item Tag Association Management to create and edit tags, and to add or remove items from a tag in bulk. Select a tag, then manage which items are associated with it — without editing ite…
Table of Contents
Purpose
Use Item Tag Association Management to create and edit tags, and to add or remove items from a tag in bulk. Select a tag, then manage which items are associated with it — without editing items individually. This feature lets administrators manage daily specials, discounts, and item visibility without editing items individually.
Tag associations apply at the facility level. Changes take effect immediately across all areas that use the tag, including discounts and POS visibility.
Prerequisites
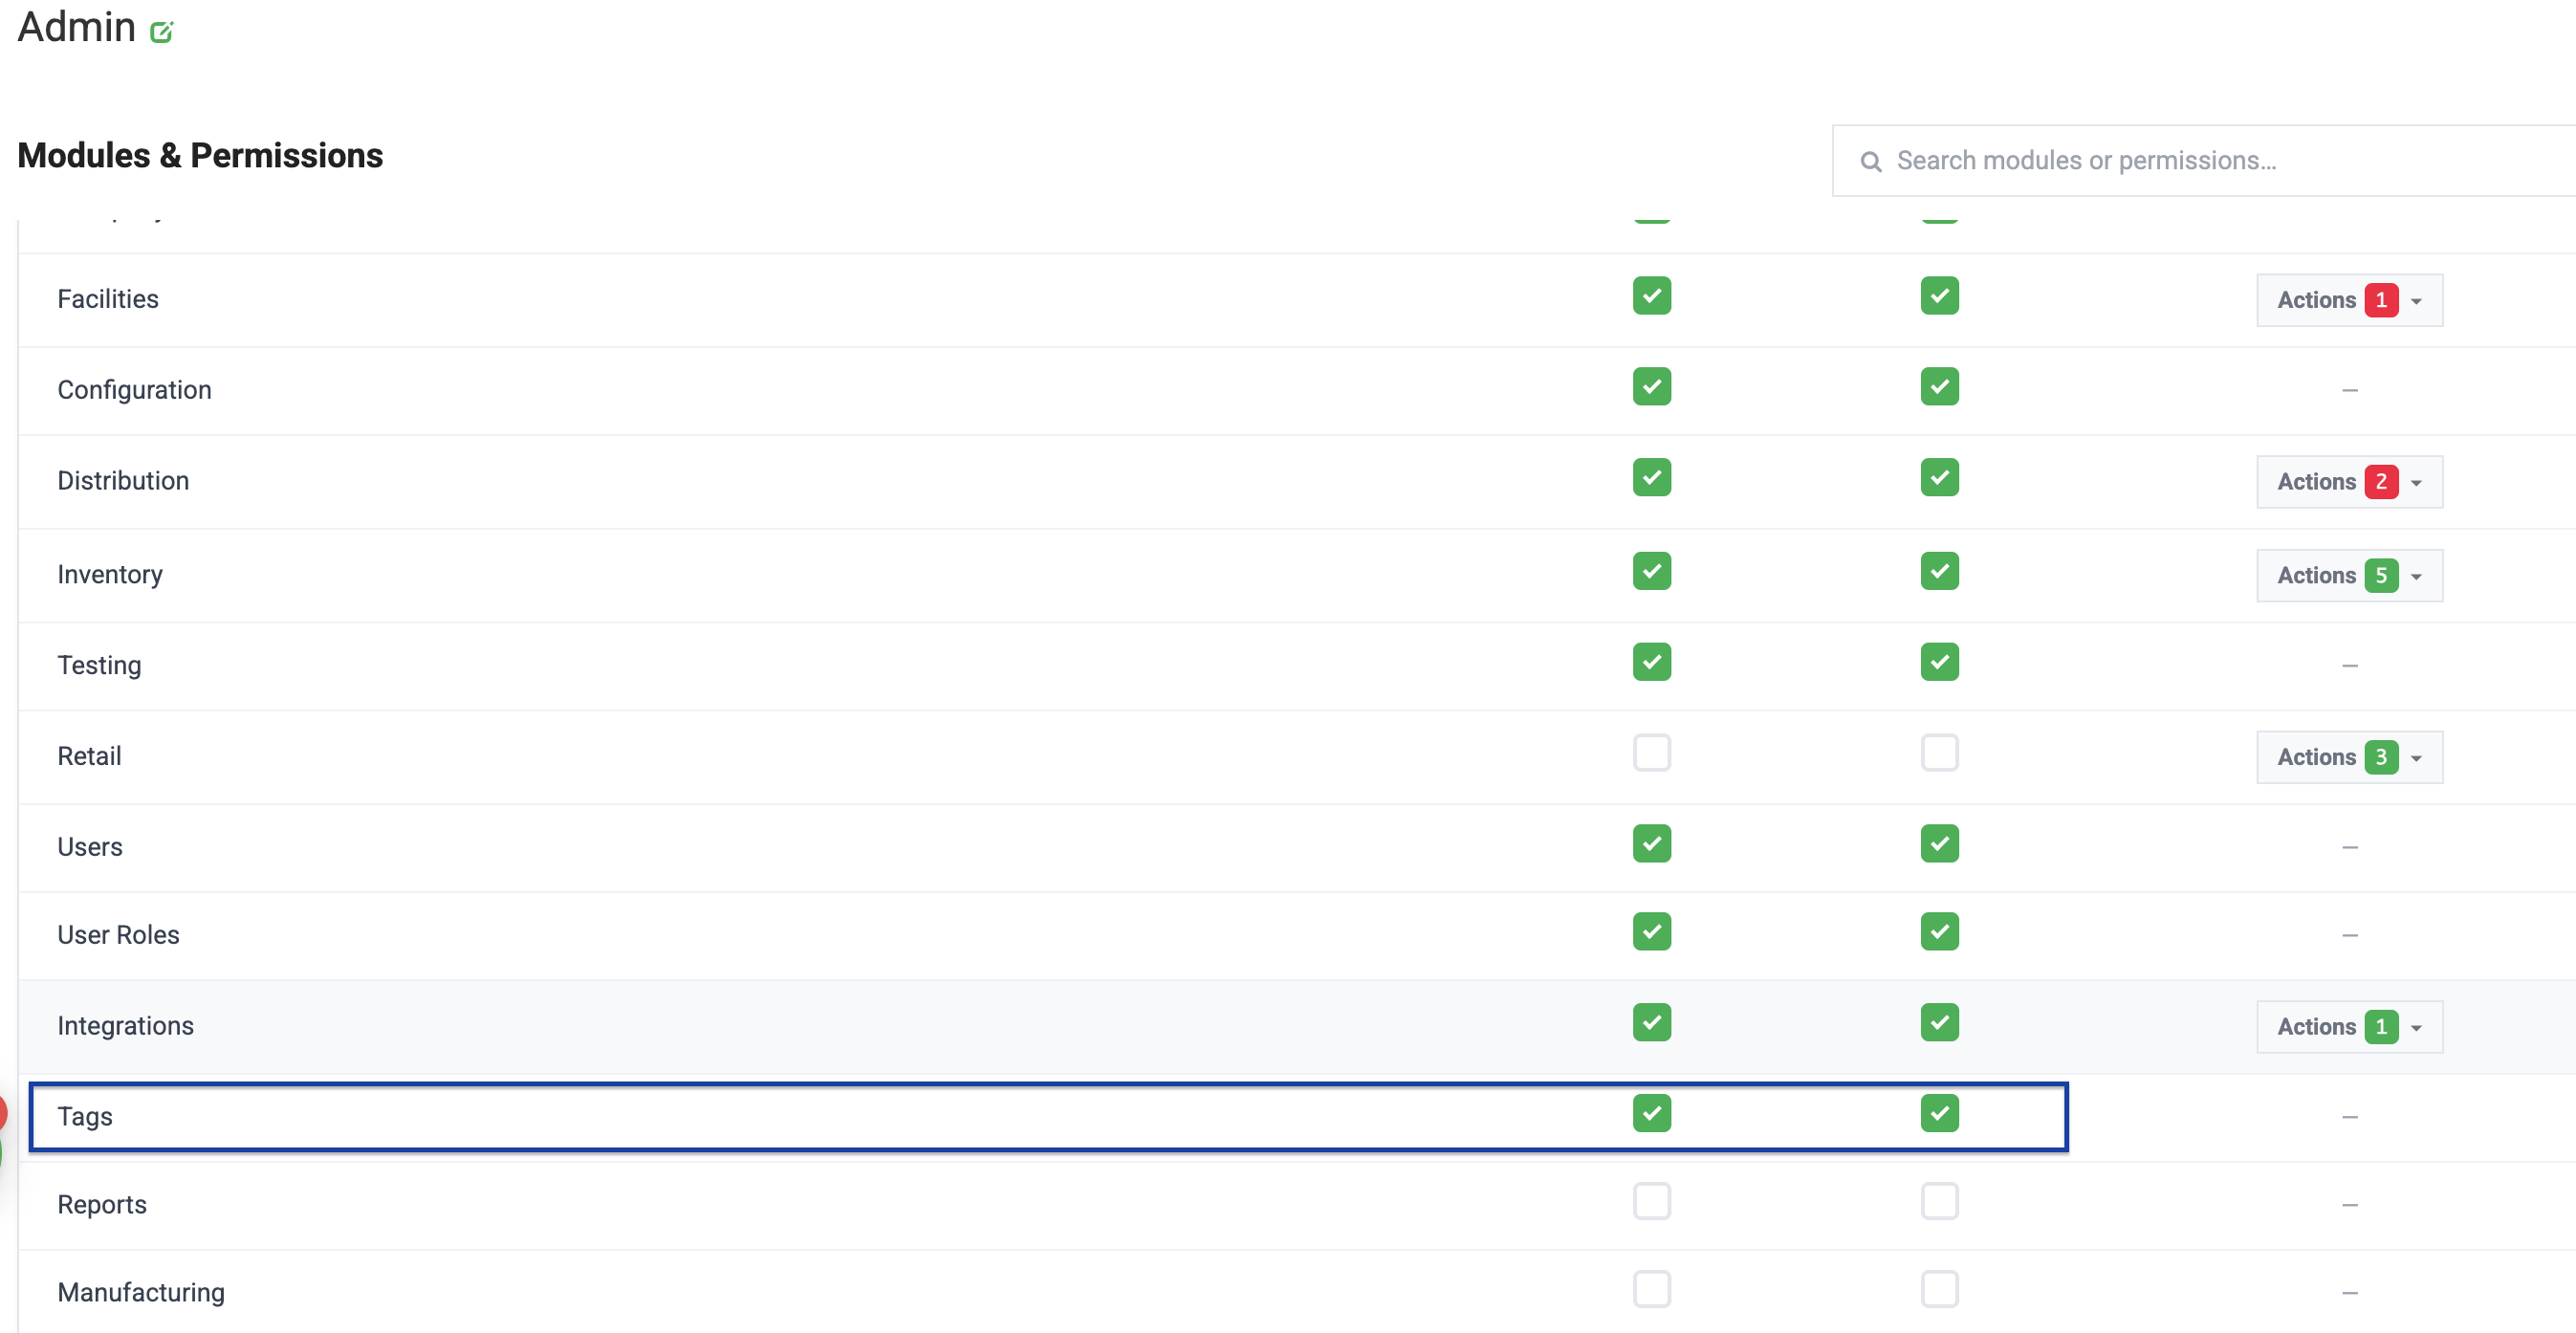
You must have permission to manage tags.
- Click Settings.
- Select User Roles.
- Select the facility you need.
- Click Configure next to the role.
- Locate the Admin card.
- On the Tags line, ensure the View and Update toggles are on.
- Click Save.
Create a New Tag
- Click Add New Tag
- In the "New Tag" modal:
- Type the Tag Name
- Type Description (optional)
- Click Save.
Edit Tag Name and Description
- Locate the tag
- Click the Pencil icon to edit the tag
- In the "Edit Tag" modal:
- Type the Tag Name
- Type Description (optional)
- Click Save.
Tag Item Management
- Locate the tag you want to manage.
- Click Manage Items next to the tag.
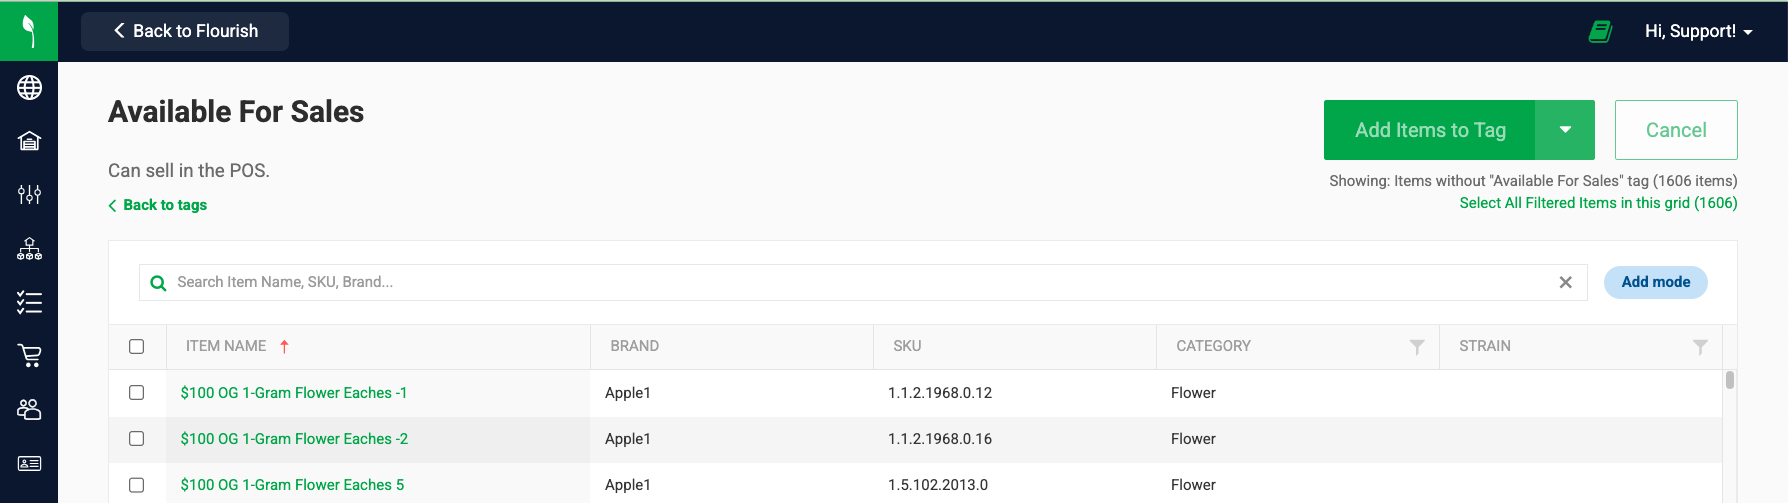
The Manage Tag Items screen opens:
On the right, the name of the tag and the description. On the left, Action buttons.
Add Items to a Tag
- Click Add Items to Tag to switch modes.
- Use the search bar or filter by Category, Strain to find items.
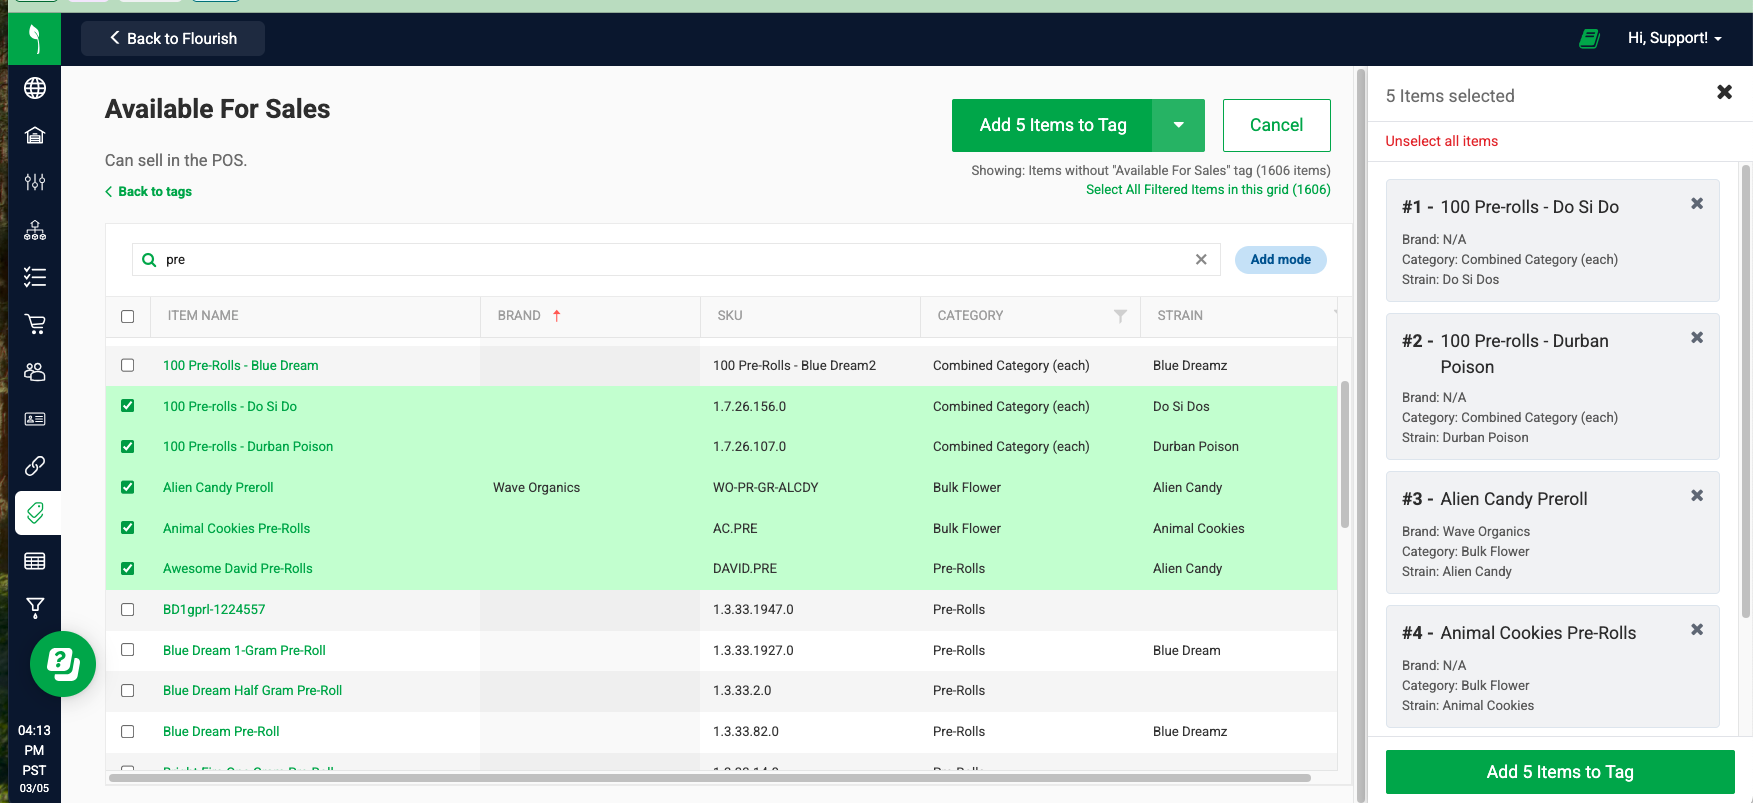
- Select the checkbox next to each item you want to add.
- Review the selected items in the drawer on the right.
- Click Add Items to Tag.
- Confirm the action in the confirmation modal.
A success notification confirms the items were added to the tag.
Remove Items from a Tag
- Select Remove Items From Tag.

- The default view shows all items currently associated with the tag.
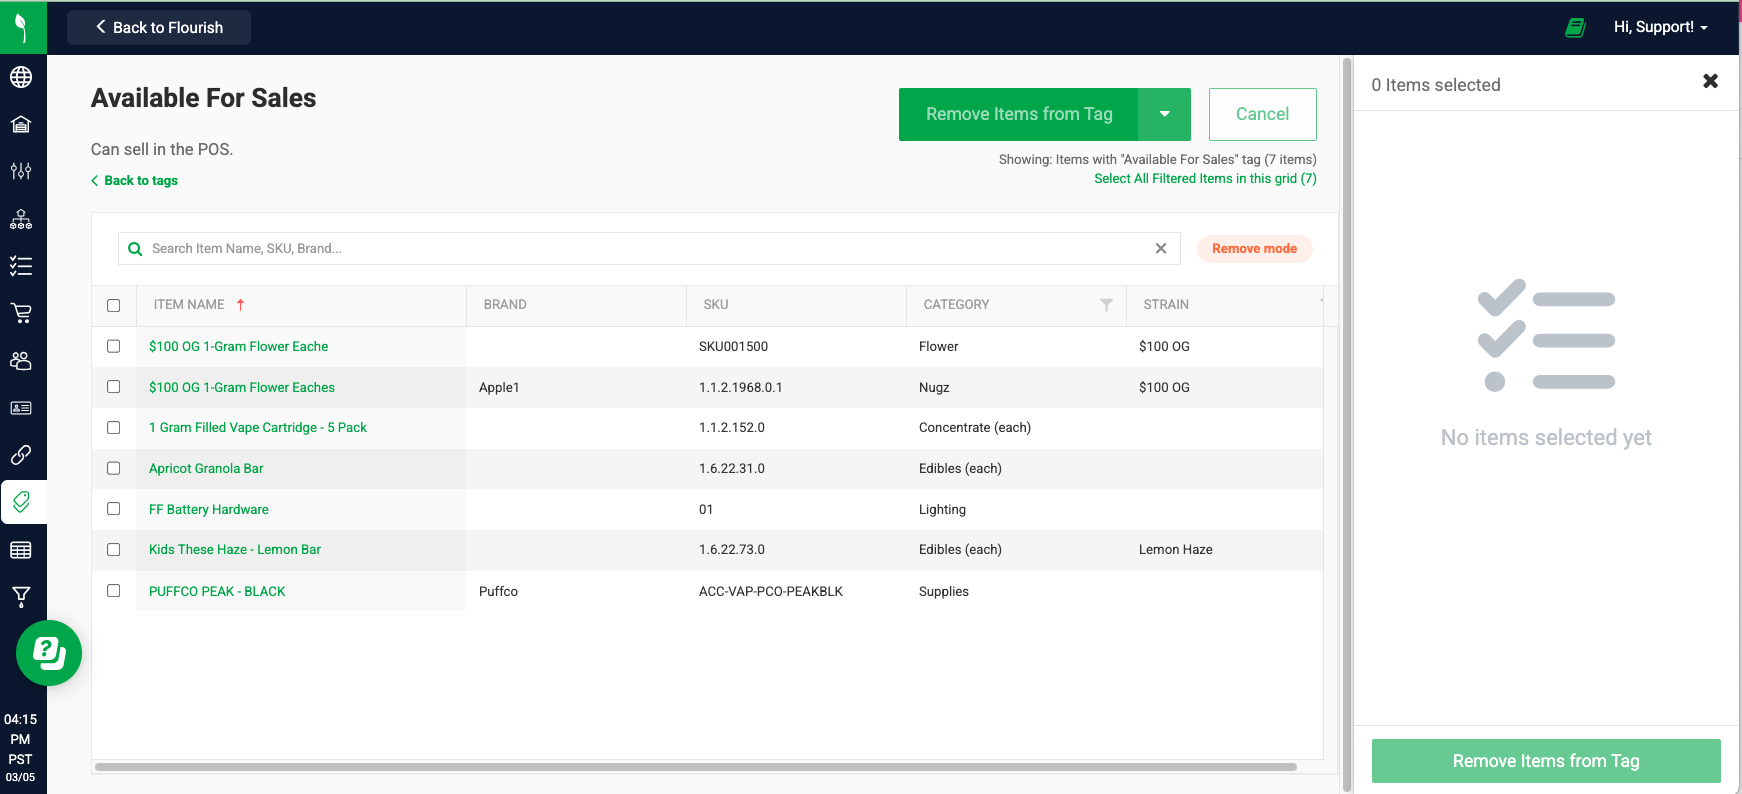
- Use the search bar or filter by Brand, Category, Strain, Class, or Item Name / Retail Display Name / SKU to find items.
- Select the checkbox next to each item you want to remove.
- Review the selected items in the drawer on the right.
- Click Remove from Tag.
- Confirm the action in the confirmation modal.
A success notification confirms the items were removed from the tag.
Select All Filtered Items
- Apply filters or enter a search term to narrow the list.
- Click Select All Filtered Items to select every item matching the current filter.
- Review the selected count and items in the drawer.
- Click Add to Tag or Remove from Tag.
- Confirm the action in the confirmation modal.
Return to the Tags List
Click Back to Tags at the top of the screen.
How did we do?
Set Up Item Pricing
Set Up Separate Retail and Wholesale Pricing
