Table of Contents
Split and Allocate Packages to an Outbound Order
There are two general flows when allocating packages to an Outbound Sales Order, dependent upon your organization's flow: Create and allocate packages to an order at the same time. Create the order,…
There are two general flows when allocating packages to an Outbound Sales Order, dependent upon your organization's flow:
- Create and allocate packages to an order at the same time
- Create the order, then allocate packages to fulfill the order
METRC And Non-Compliance
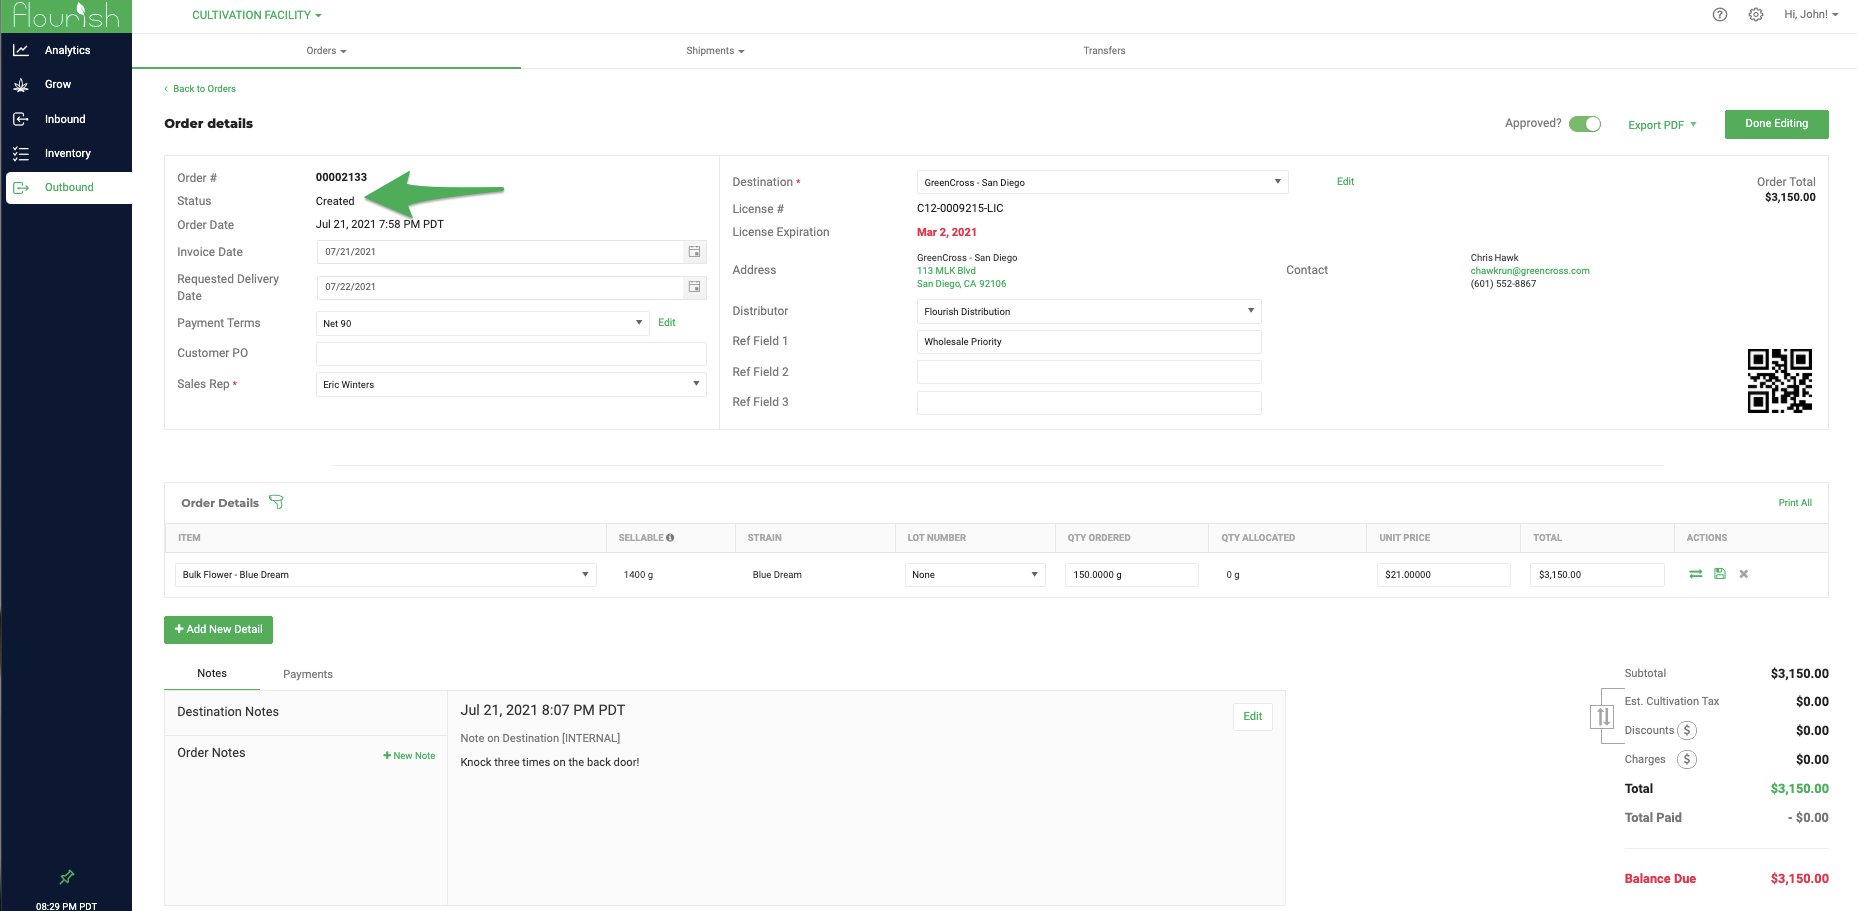
In the case where orders are submitted and then allocated/fulfilled separately, orders will be in either "Created" status or "Partially Allocated" status.
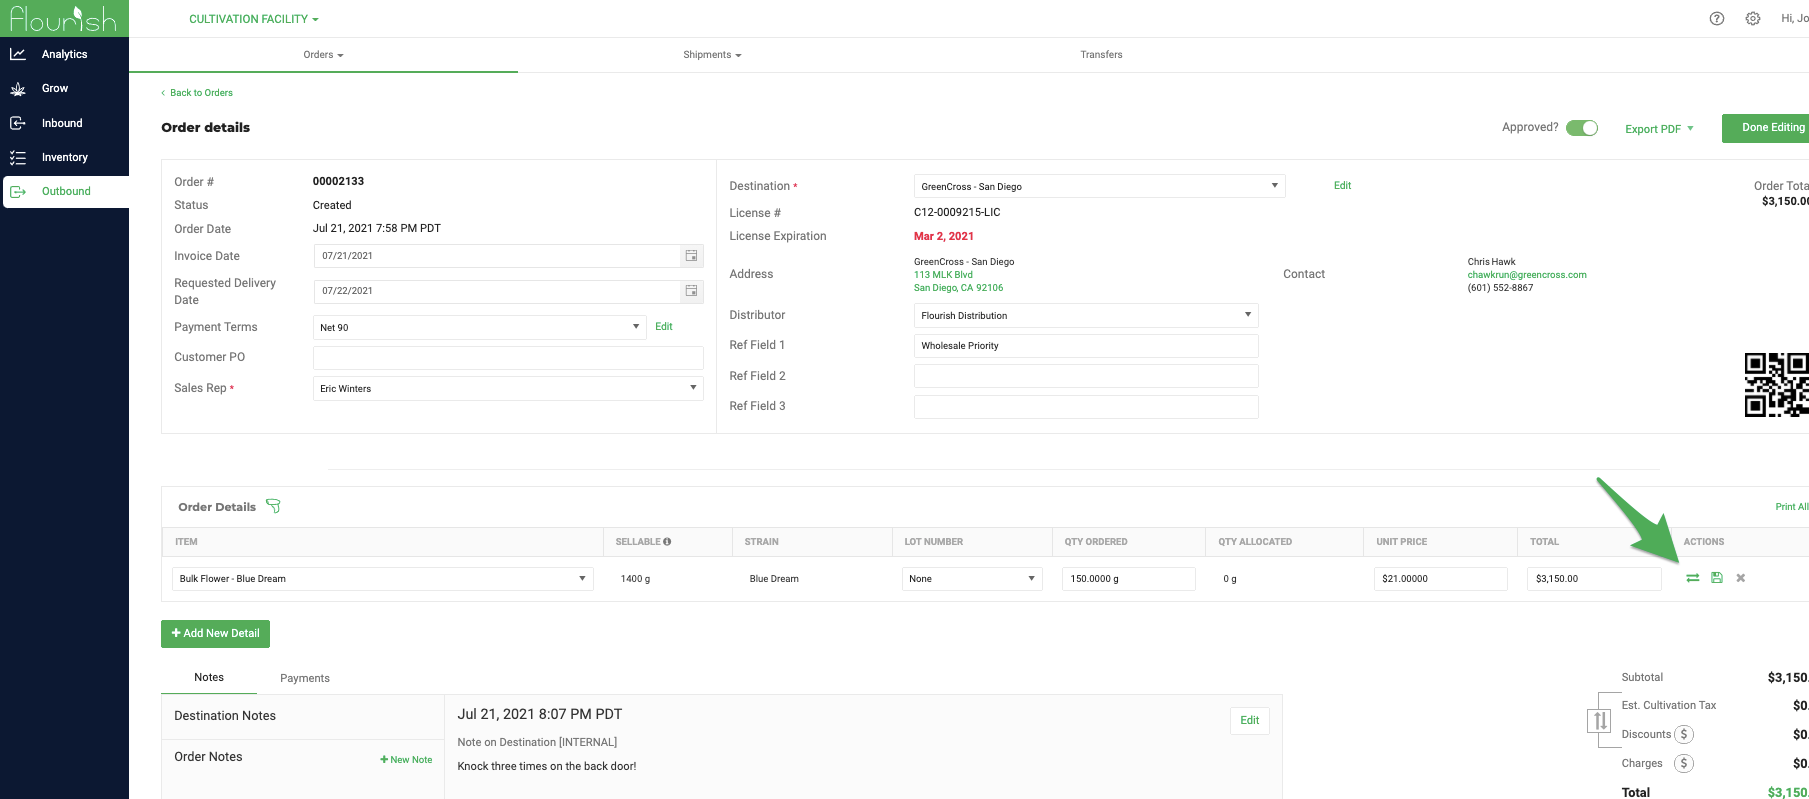
To allocate packages to an order, click the green arrows on the order line itself. This allows the fulfillment team to choose which packages (or in METRC states, which UID will be assigned to the order). Typical methods for allocating orders include First In First Out, for instance, but consult specific company SOPs to be sure of the process.
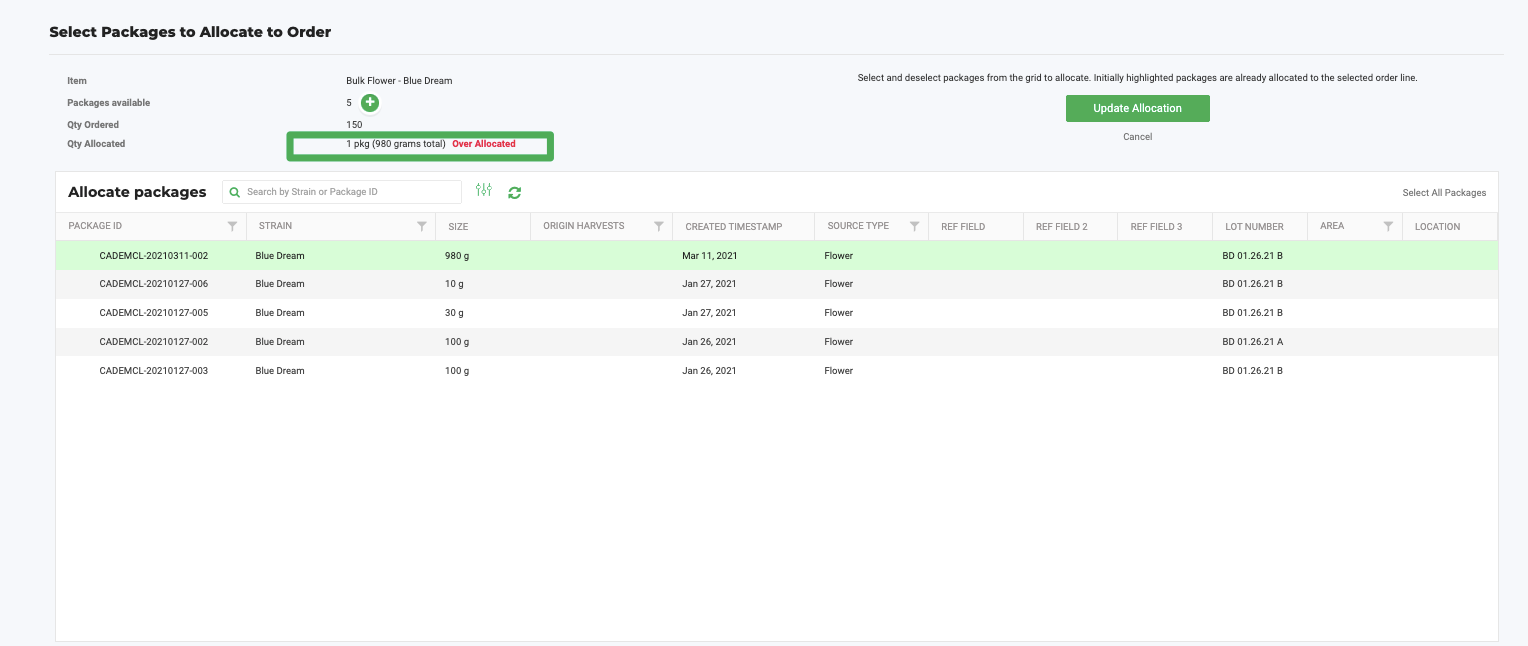
From here, all packages with the matching item name (and strain, if required) will appear. Manually select the packages to fill the order, or alternatively, use the mobile app or a hand scanner to allocate packages matching the item and strain.
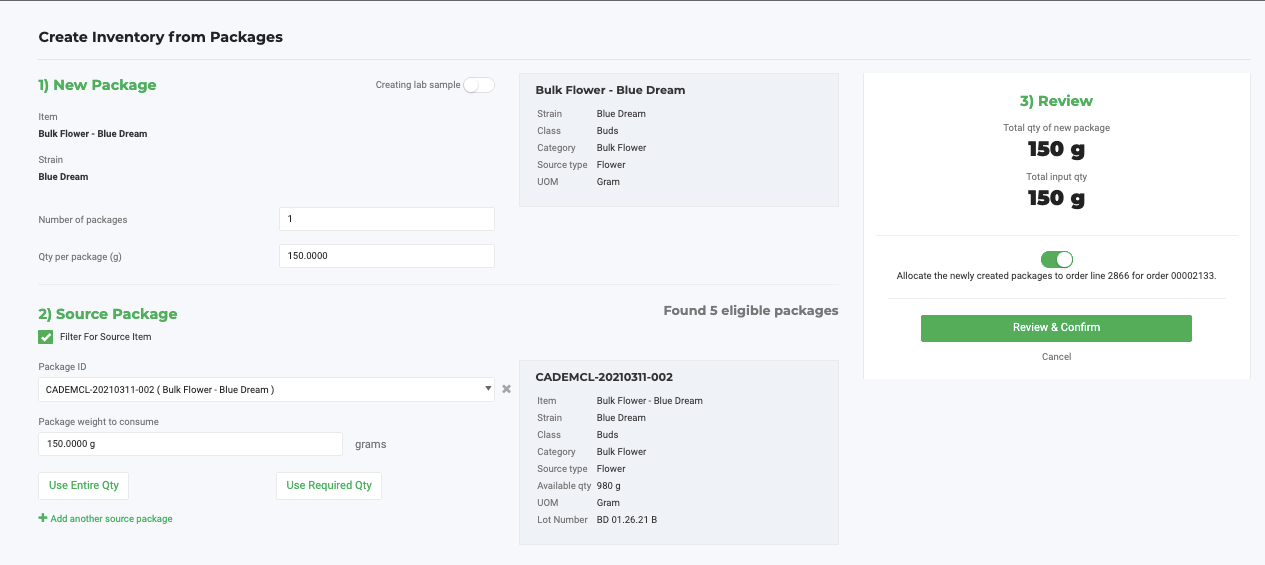
When a package does not have a large enough quantity to fulfill the order, Flourish will notify you. In this case, the system makes it easy for you to split the packages onto separate Package IDs (or METRC tags) without leaving the screen:
- Notice the amount in which the allocation exceeds the order quantity
- Click the Green (+) to split the Package ID on the fly
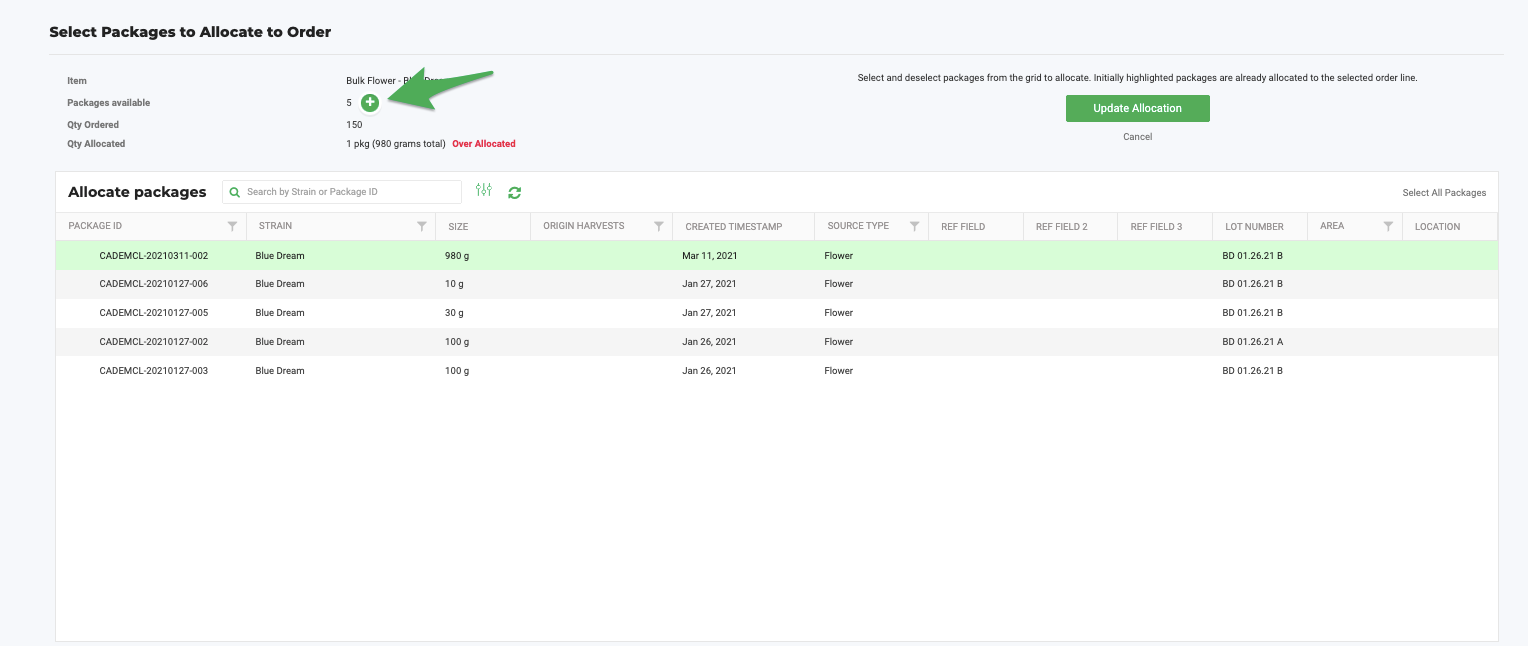
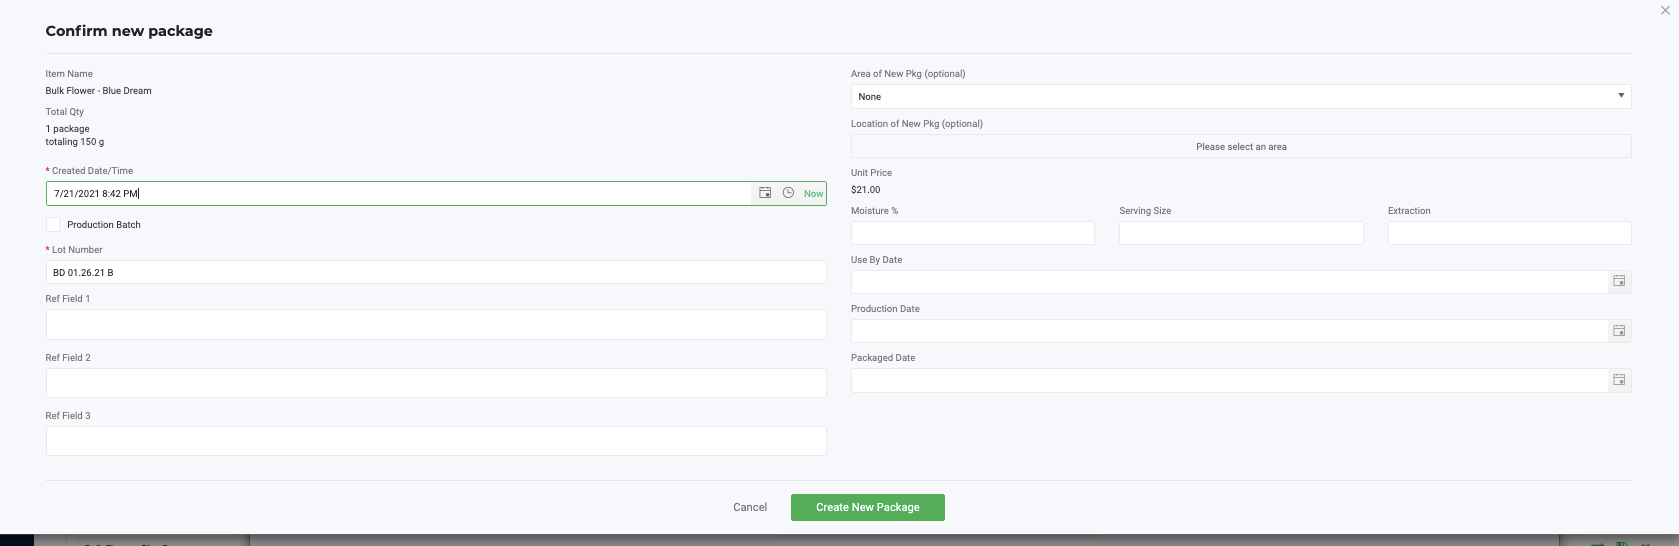
- Review the results of the new screen, as Flourish will automatically separate out the ordered quantity from the source package. If a new METRC tag needs to be used, choose the METRC tag of the New Package being created to fulfill the order before clicking Review & Confirm
- Fill in the required information for the newly created package; Flourish will keep the same lot number to carry over lab results and other attributes
- Click Create New Package
- Click either Save on the order line or Done Editing in the top right
If Quickbooks Online is integrated, sync the item with Quickbooks Online now or as corresponding to your SOPs.
The order is now ready to print documents as necessary (Invoice, packing list, and/or COAs) before being added to a shipment.
BioTrack
Split Packages while Allocating
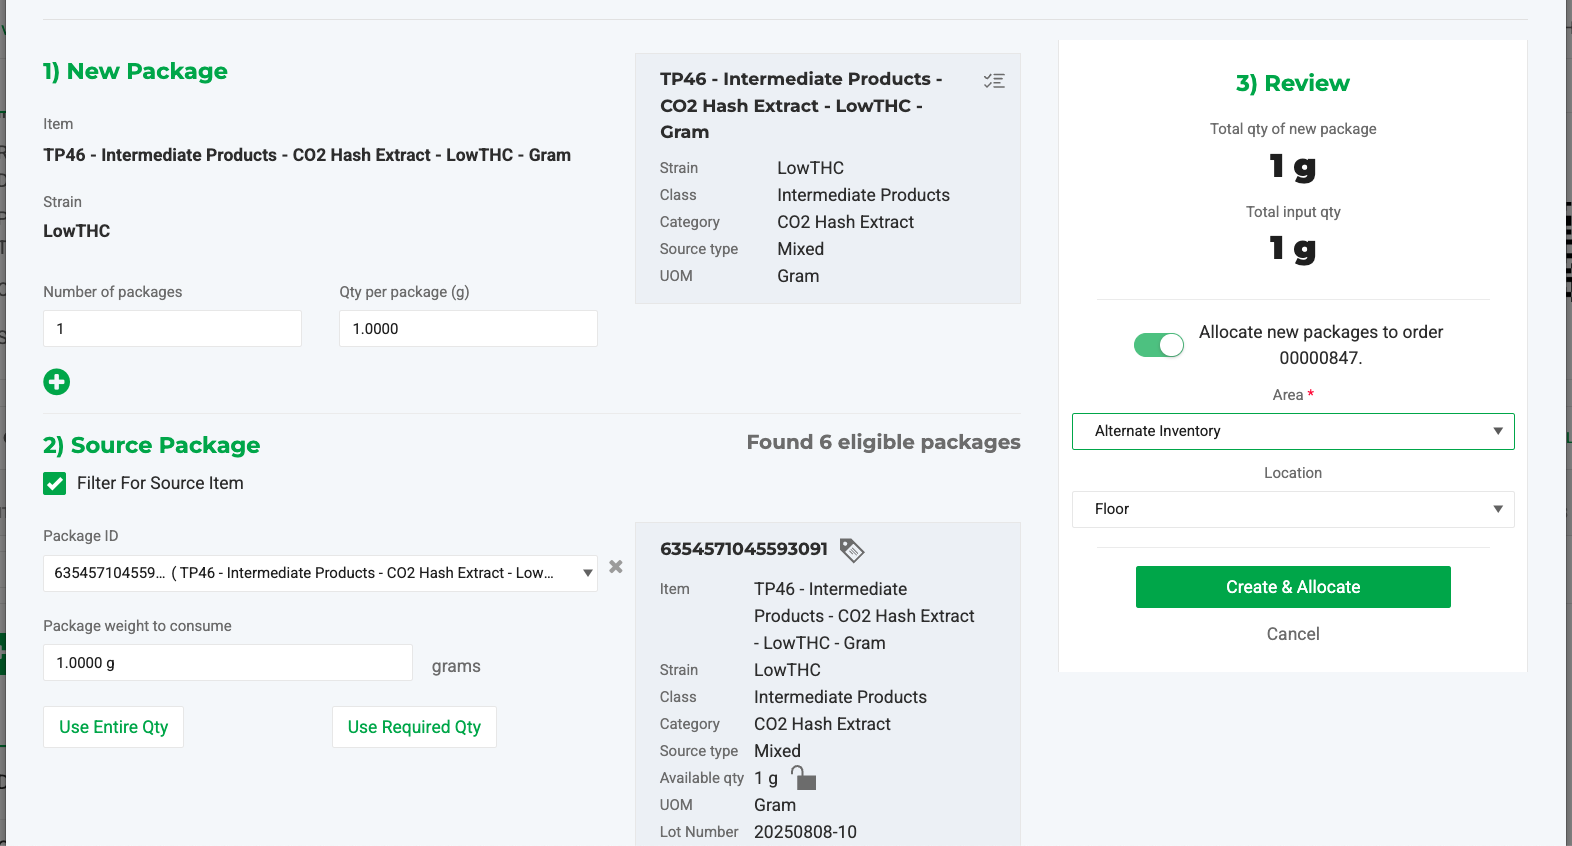
With BioTrack, when you need to split and create a new package while allocating, it is a split/Sublot action, so the verification screen is not required, and the process is one step shorter:
The steps:
- Click the allocation arrows

- Click the
 sign
sign - Fill in the details
- Select the Area
- Select the Location
- Click

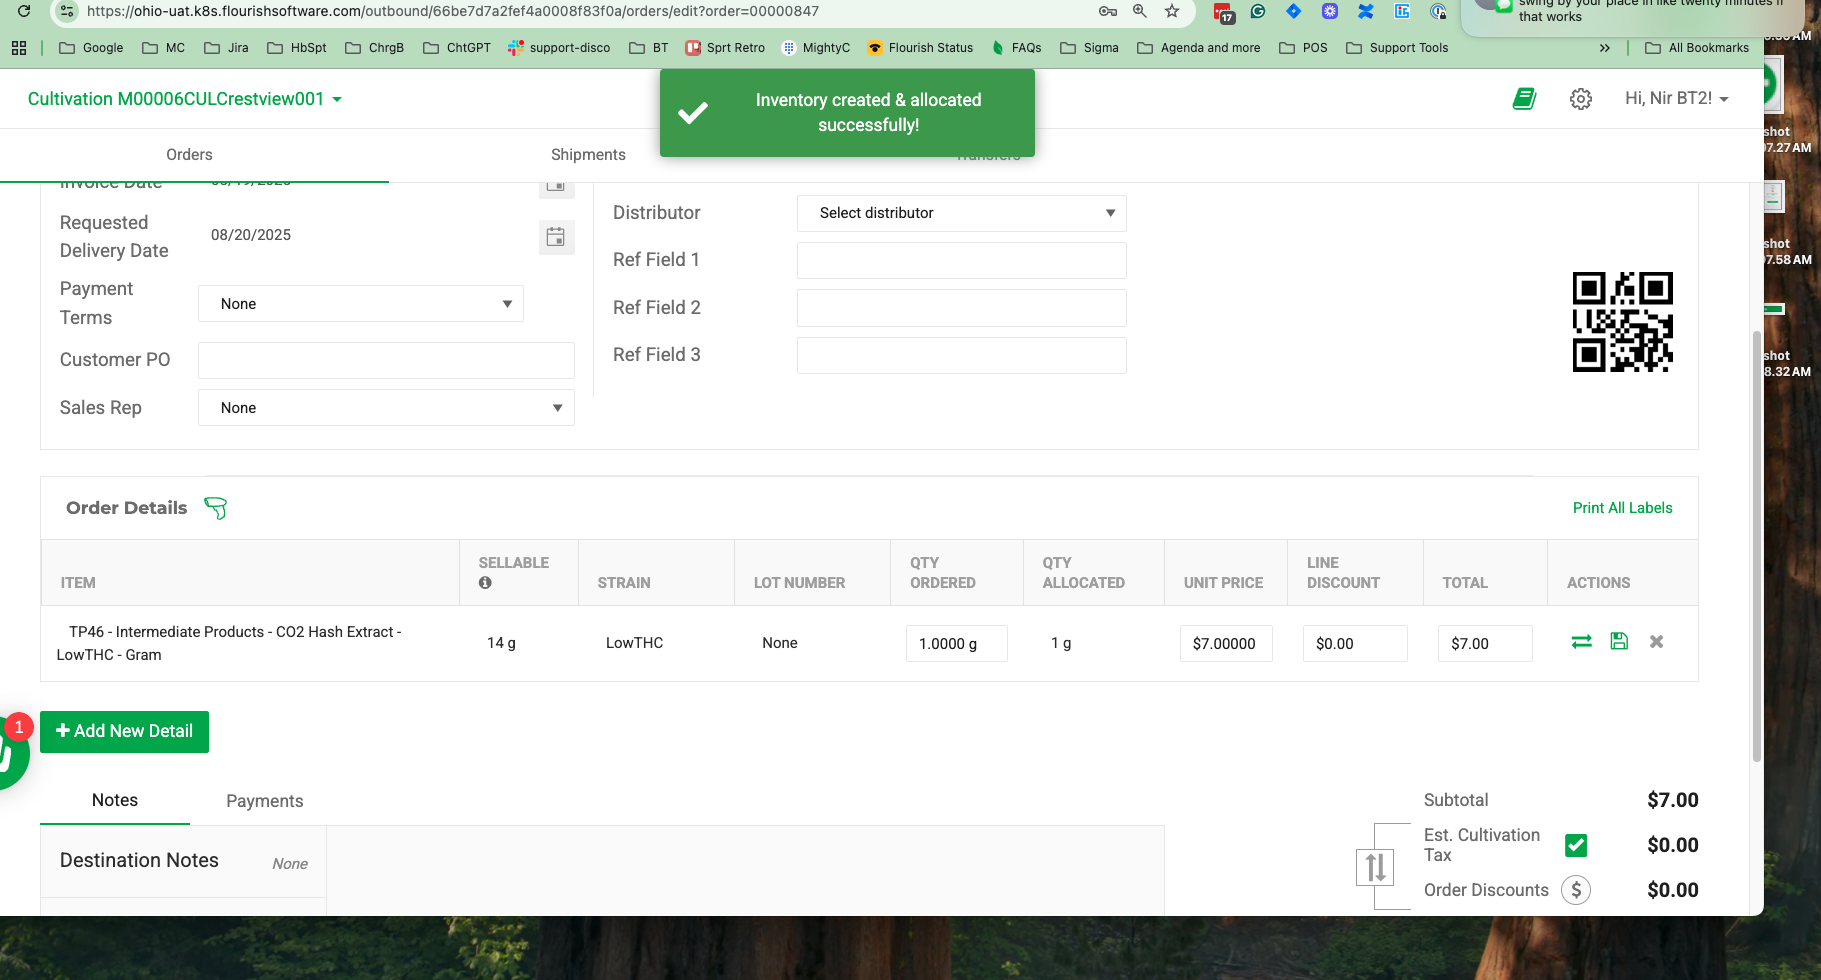
- Watch for the success message
How did we do?
Creating New Outbound Orders
Filter and View Outbound Orders by Status