Table of Contents
Export Analytics Data in Flourish
Flourish Analytics enables fast, easy data exports via multiple methods: direct download, email, webhook, and cloud storage. Access levels determine export capabilities.
Table of Contents
Exporting data with Flourish Analytics is fast and easy. Your access level determines your data export capabilities.
Access The Export Options
From the Page
- Hover on the top right corner of the table or element to view the filter menu.
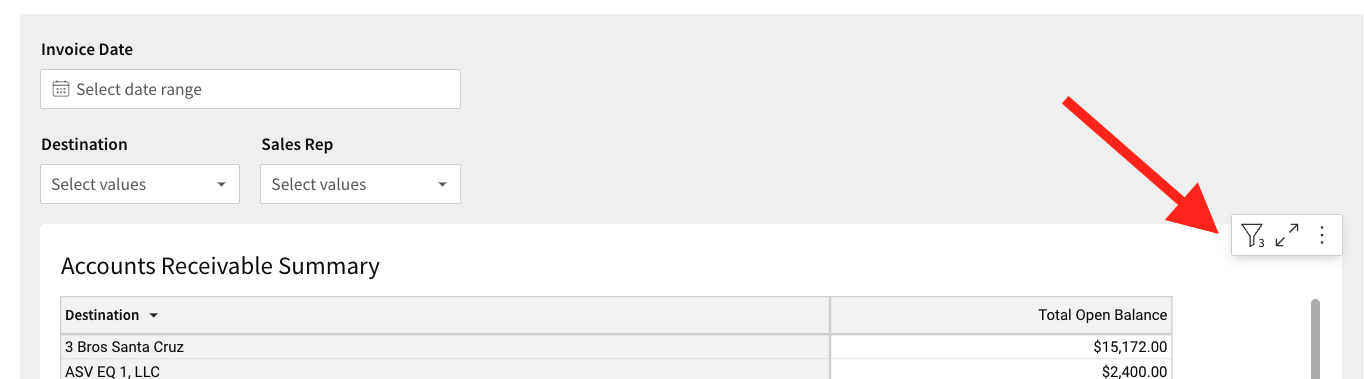
- Click the three dots.
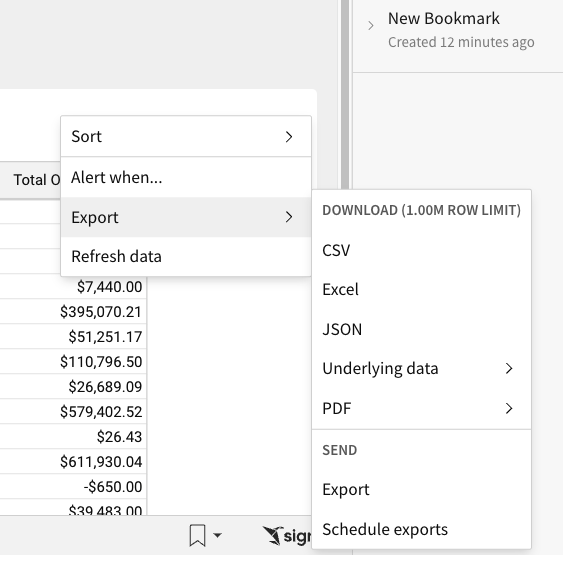
- Select Export.
From the Workbook
Please follow the steps below to export the data you need:
- Go to the Workbook you want to set as your favorite.
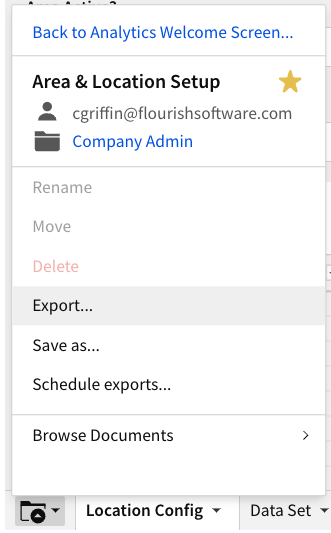
- Locate the folder icon
 on the bottom left and click it.
 - Click "Export..."
- Click the icons on the top-right to select your export options:
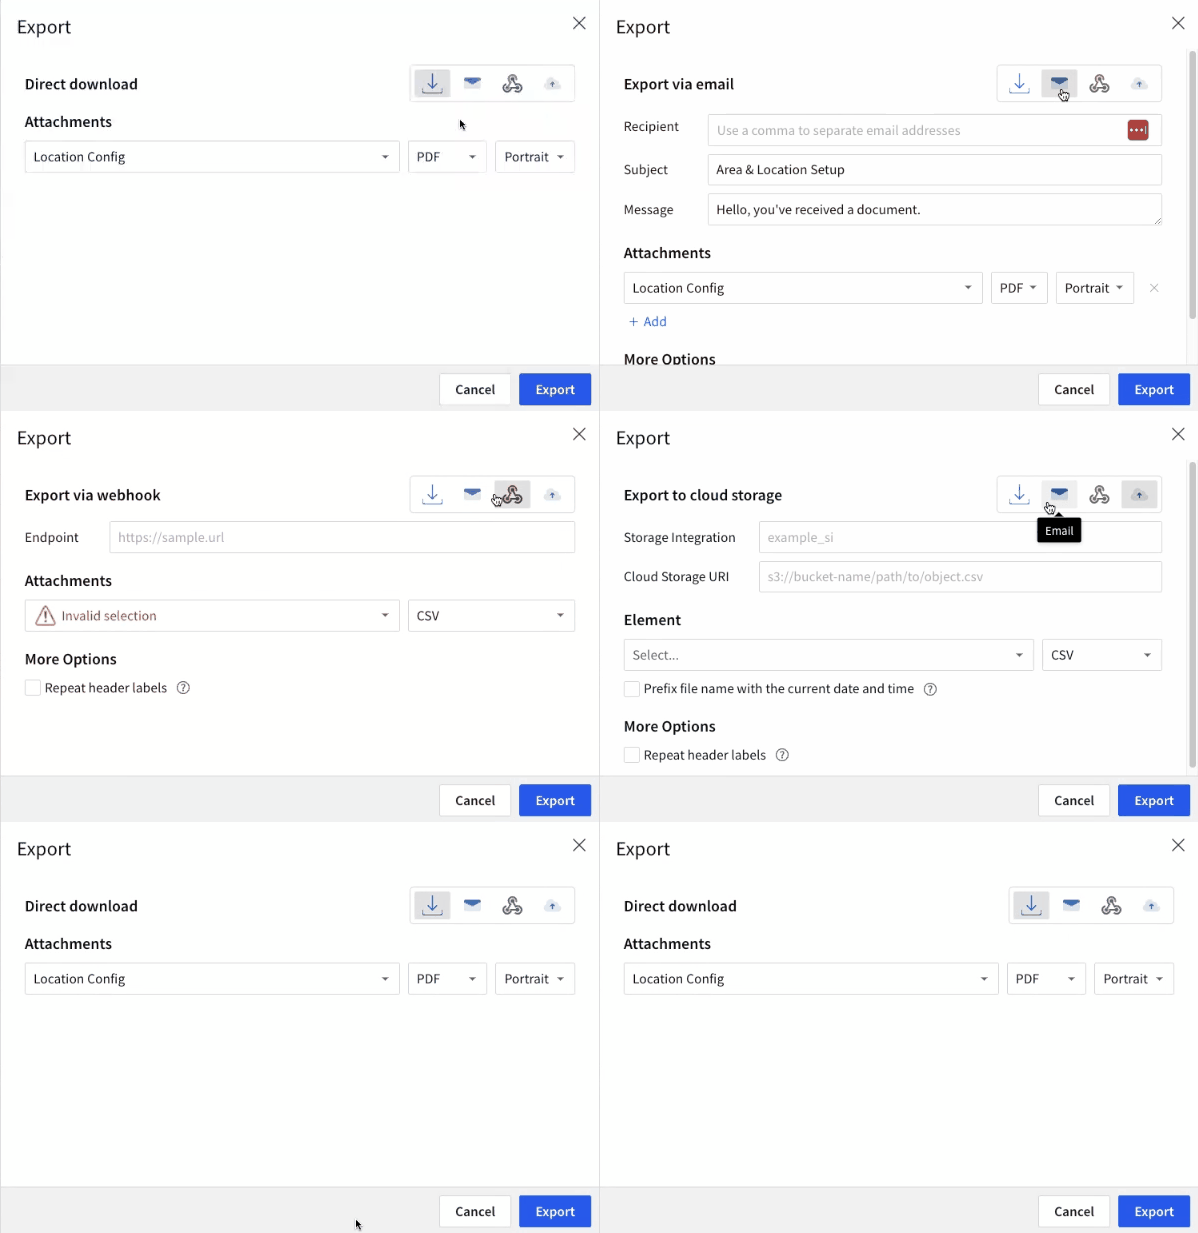
Export Options
- Direct download
- Export via email
- Export via webhook
- Export to cloud storage
Direct Download
- Select the Attachment you want to download. You can select the entire workbook, all pages, or parts of a page.
- Select the format - the format selection changes according to what you want to export.
For an Entire Page Or Workbook
For a part of a Page or Data Set
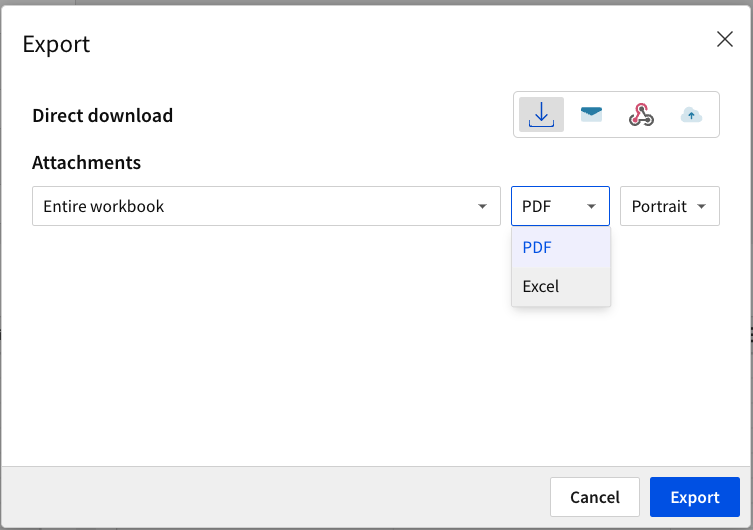
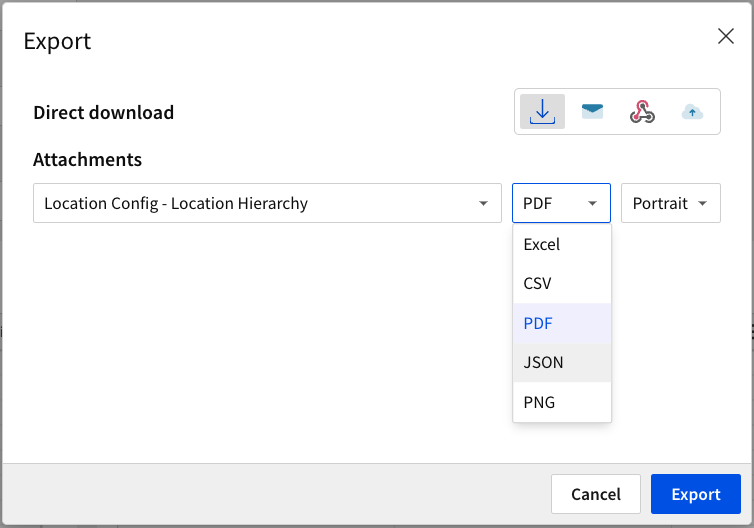
- Select the orientation: portrait or landscape.
- More Options - check the boxes as you desire.
- Click Export.
Export via email
After selecting email, type or select the fields below to send.
| 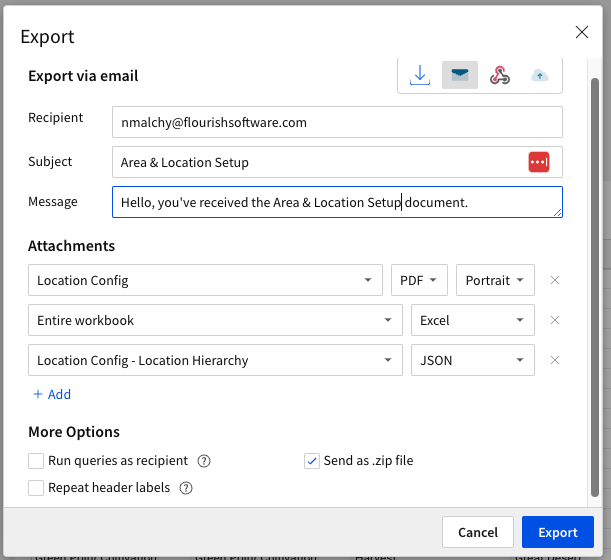 |
 sign to learn about the option.
The Sender of the email is "Flourish Analytics via Sigma Computing" <info@send.sigmacomputing.com>
Export via webhook
Contact us if you have a use case for this.
Export to cloud storage
Contact us if you have a use case for this.
Schedule Exports
From the specific report tab
- Hover on the top right corner of the table or element to view the filter menu.
- Click the three dots.
- Hover over "Export" and click "Schedule exports..." from the dropdown list
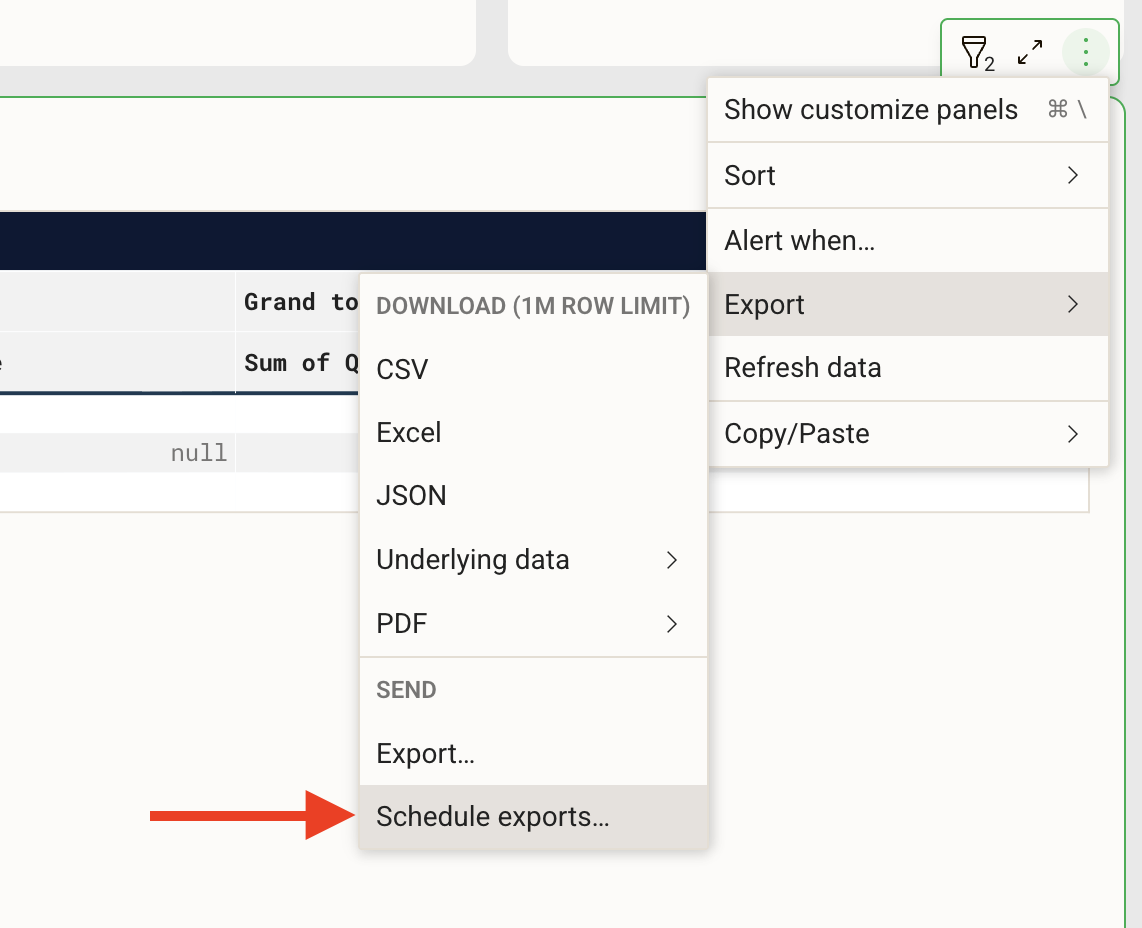
- A "Schedule exports" page will open up.
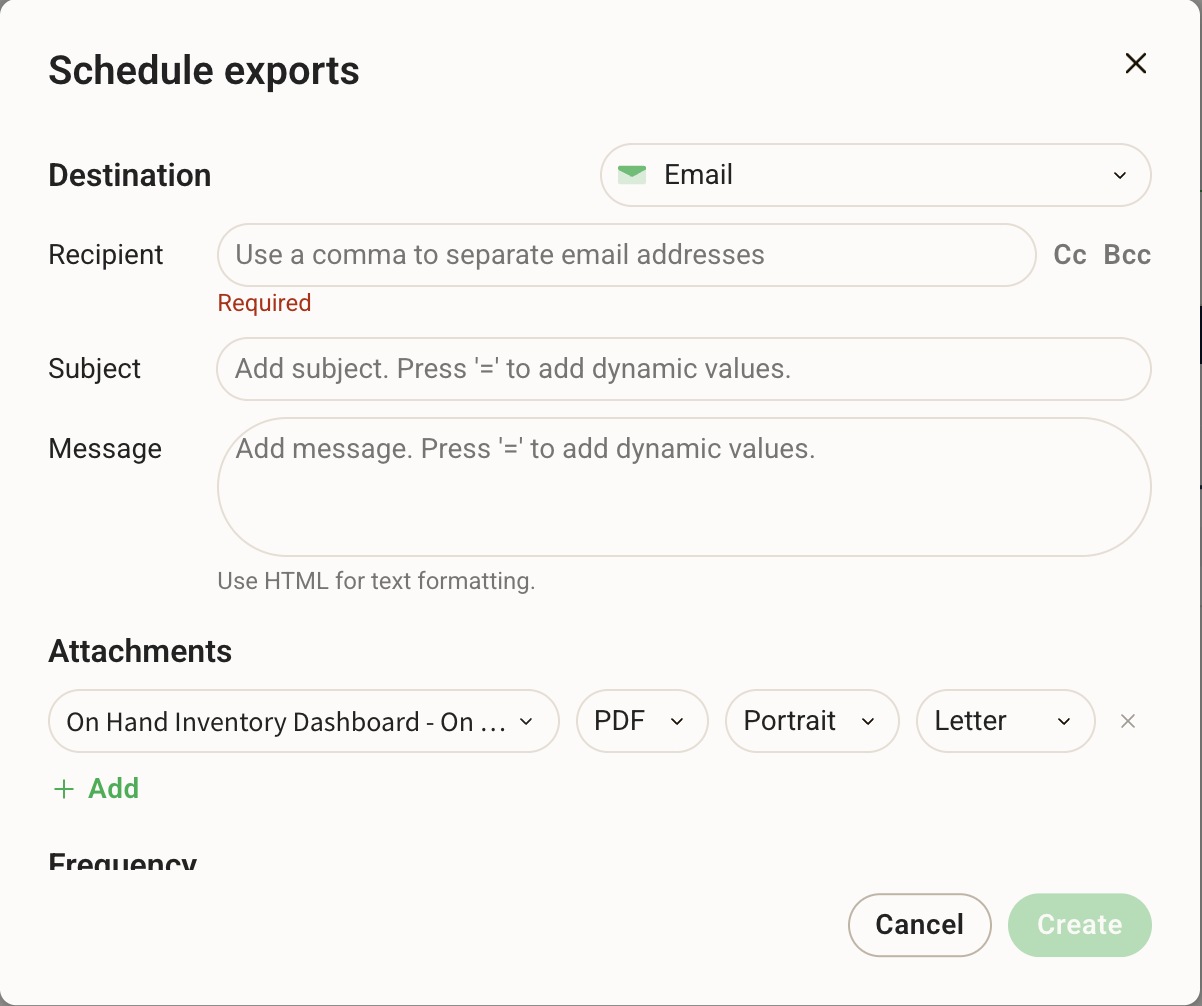
- Define the required details for:
- Destination (most common is "Email")
- Attachments
- This selection will default to the report tab currently opened before clicking Schedule Export.
- Set your attachment type as PDF, Excel, or PNG
- Click "+ Add" if you want this scheduled export to send multiple file attachments for different the report widgets/elements that are available in the workbook.
- Frequency
- This will determine how often this report is generated and sent to your defined Destination.
- (optional) More Options
- Most common selection is "Customize Control Values."
- This relates to the control elements seen on that report tab page.
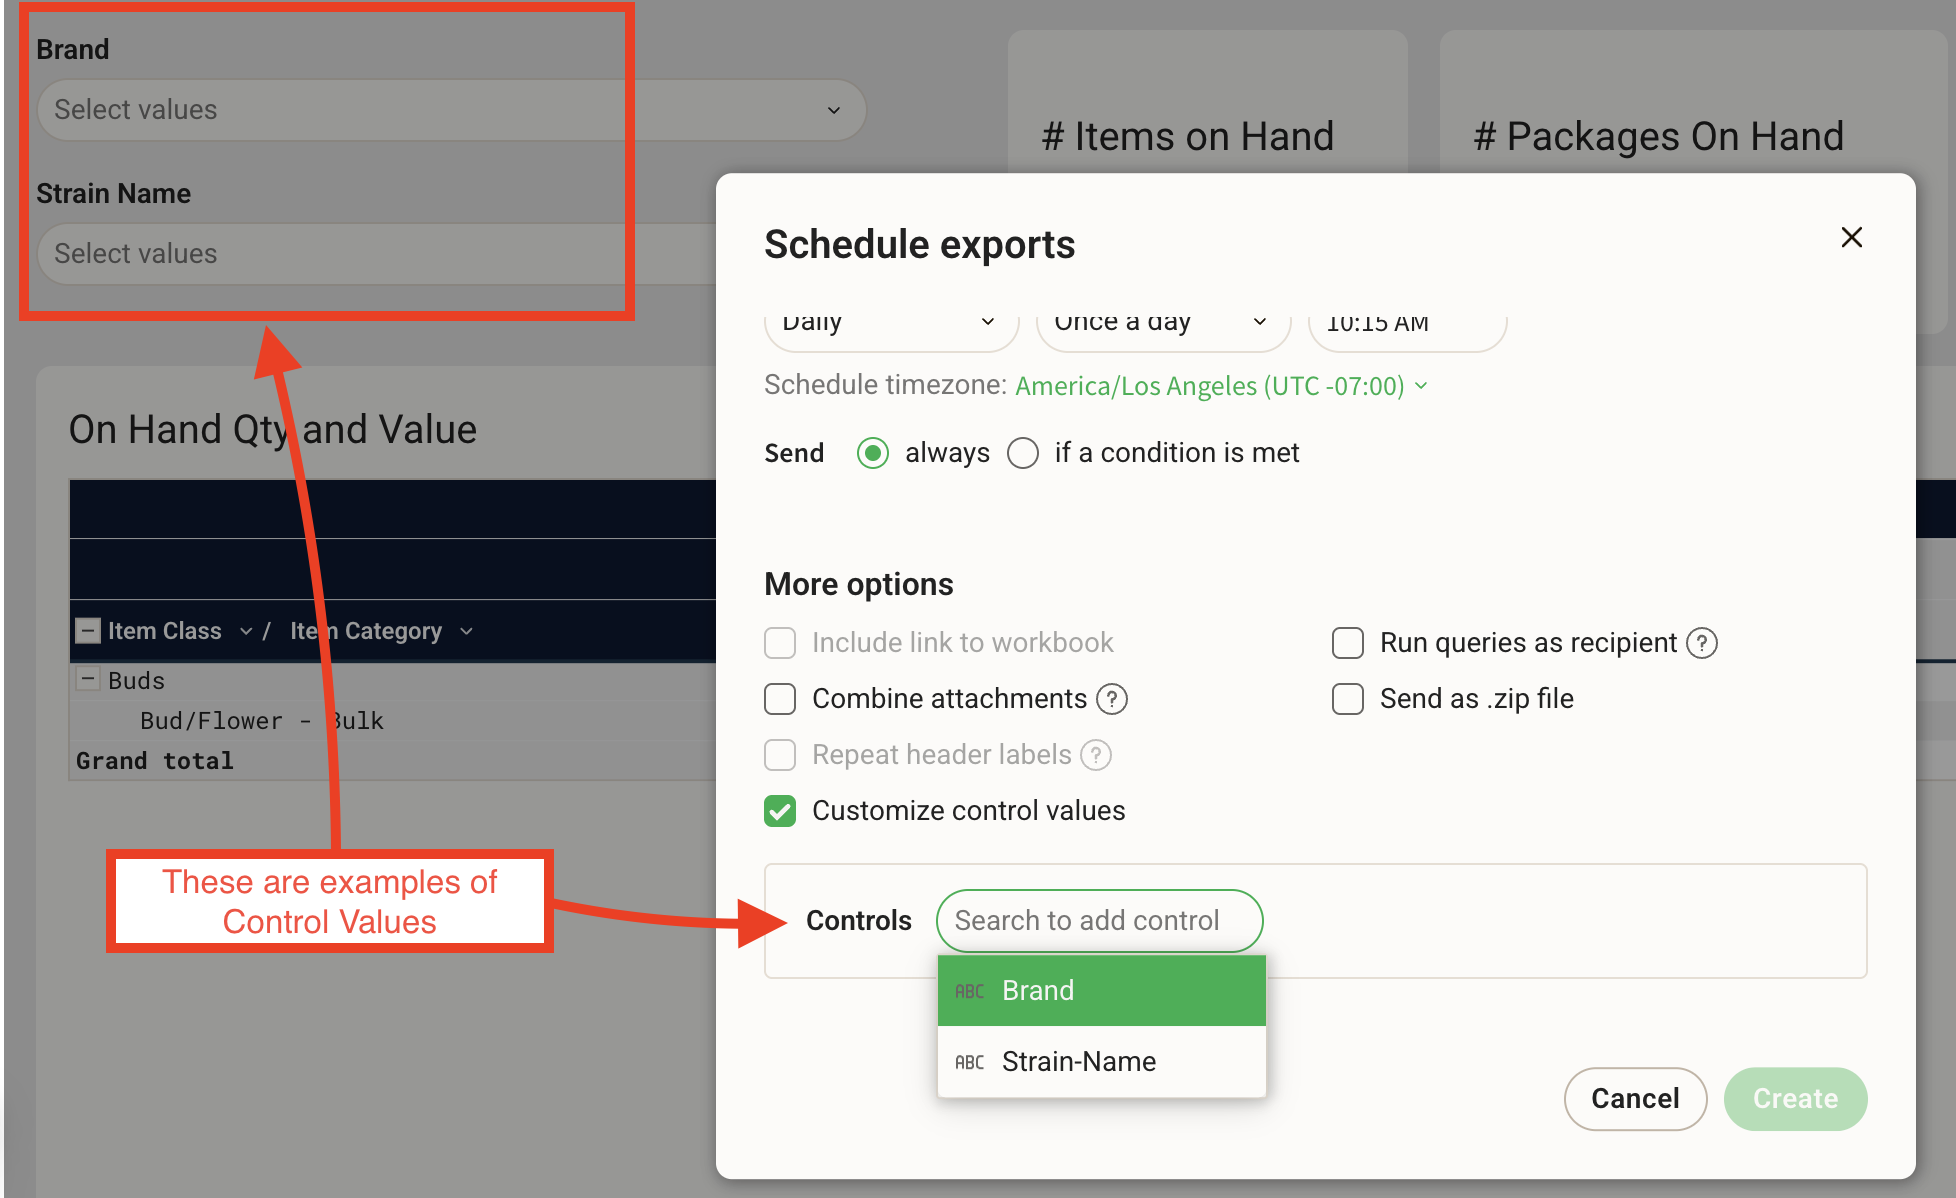
- Once you select a Control Value, select an option from the dropdown menu for that value to filter on.
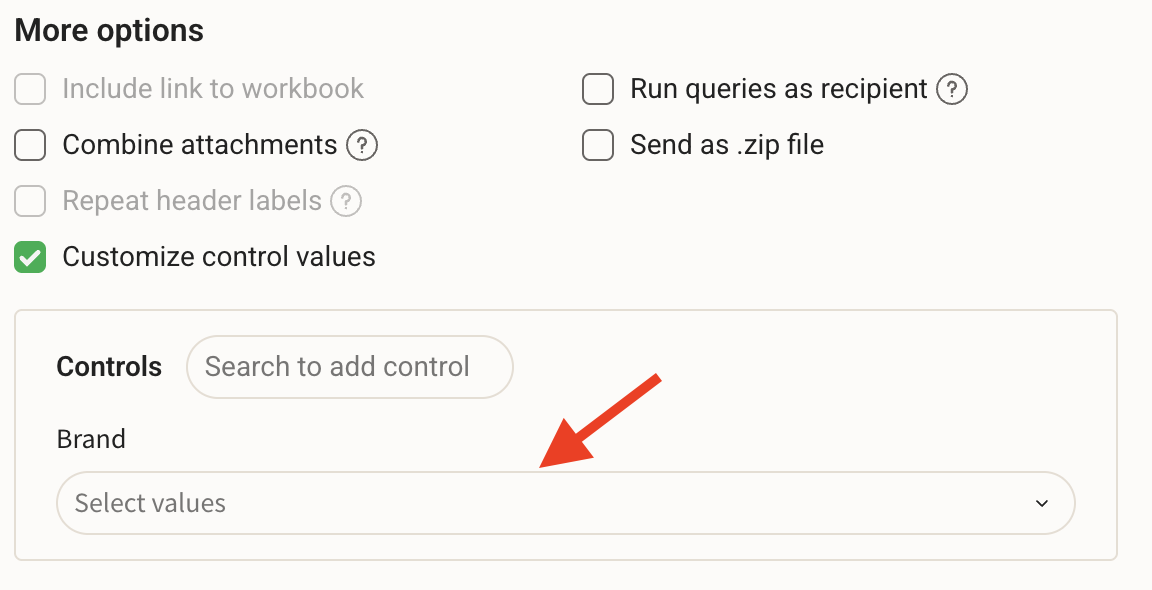
- The scheduled export will always send with these Control Values filtered.
- This relates to the control elements seen on that report tab page.
- Most common selection is "Customize Control Values."
- Click "Create" to save your scheduled export.
From the Workbook
- Navigate to the desired workbook report
- Locate the folder icon on the bottom left and click it.
- Select "Schedule export..."
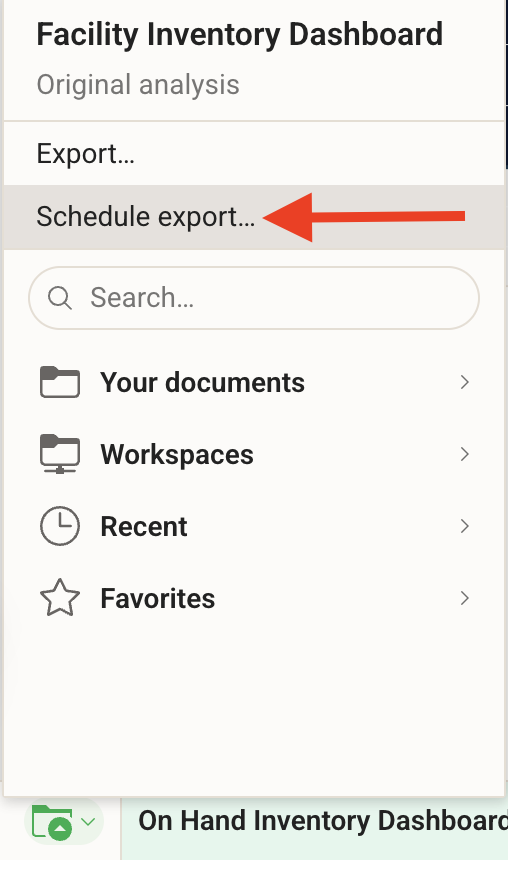
- This will open the "Schedule exports" overview — this is where you can manage and edit all scheduled exports currently configured for this workbook.
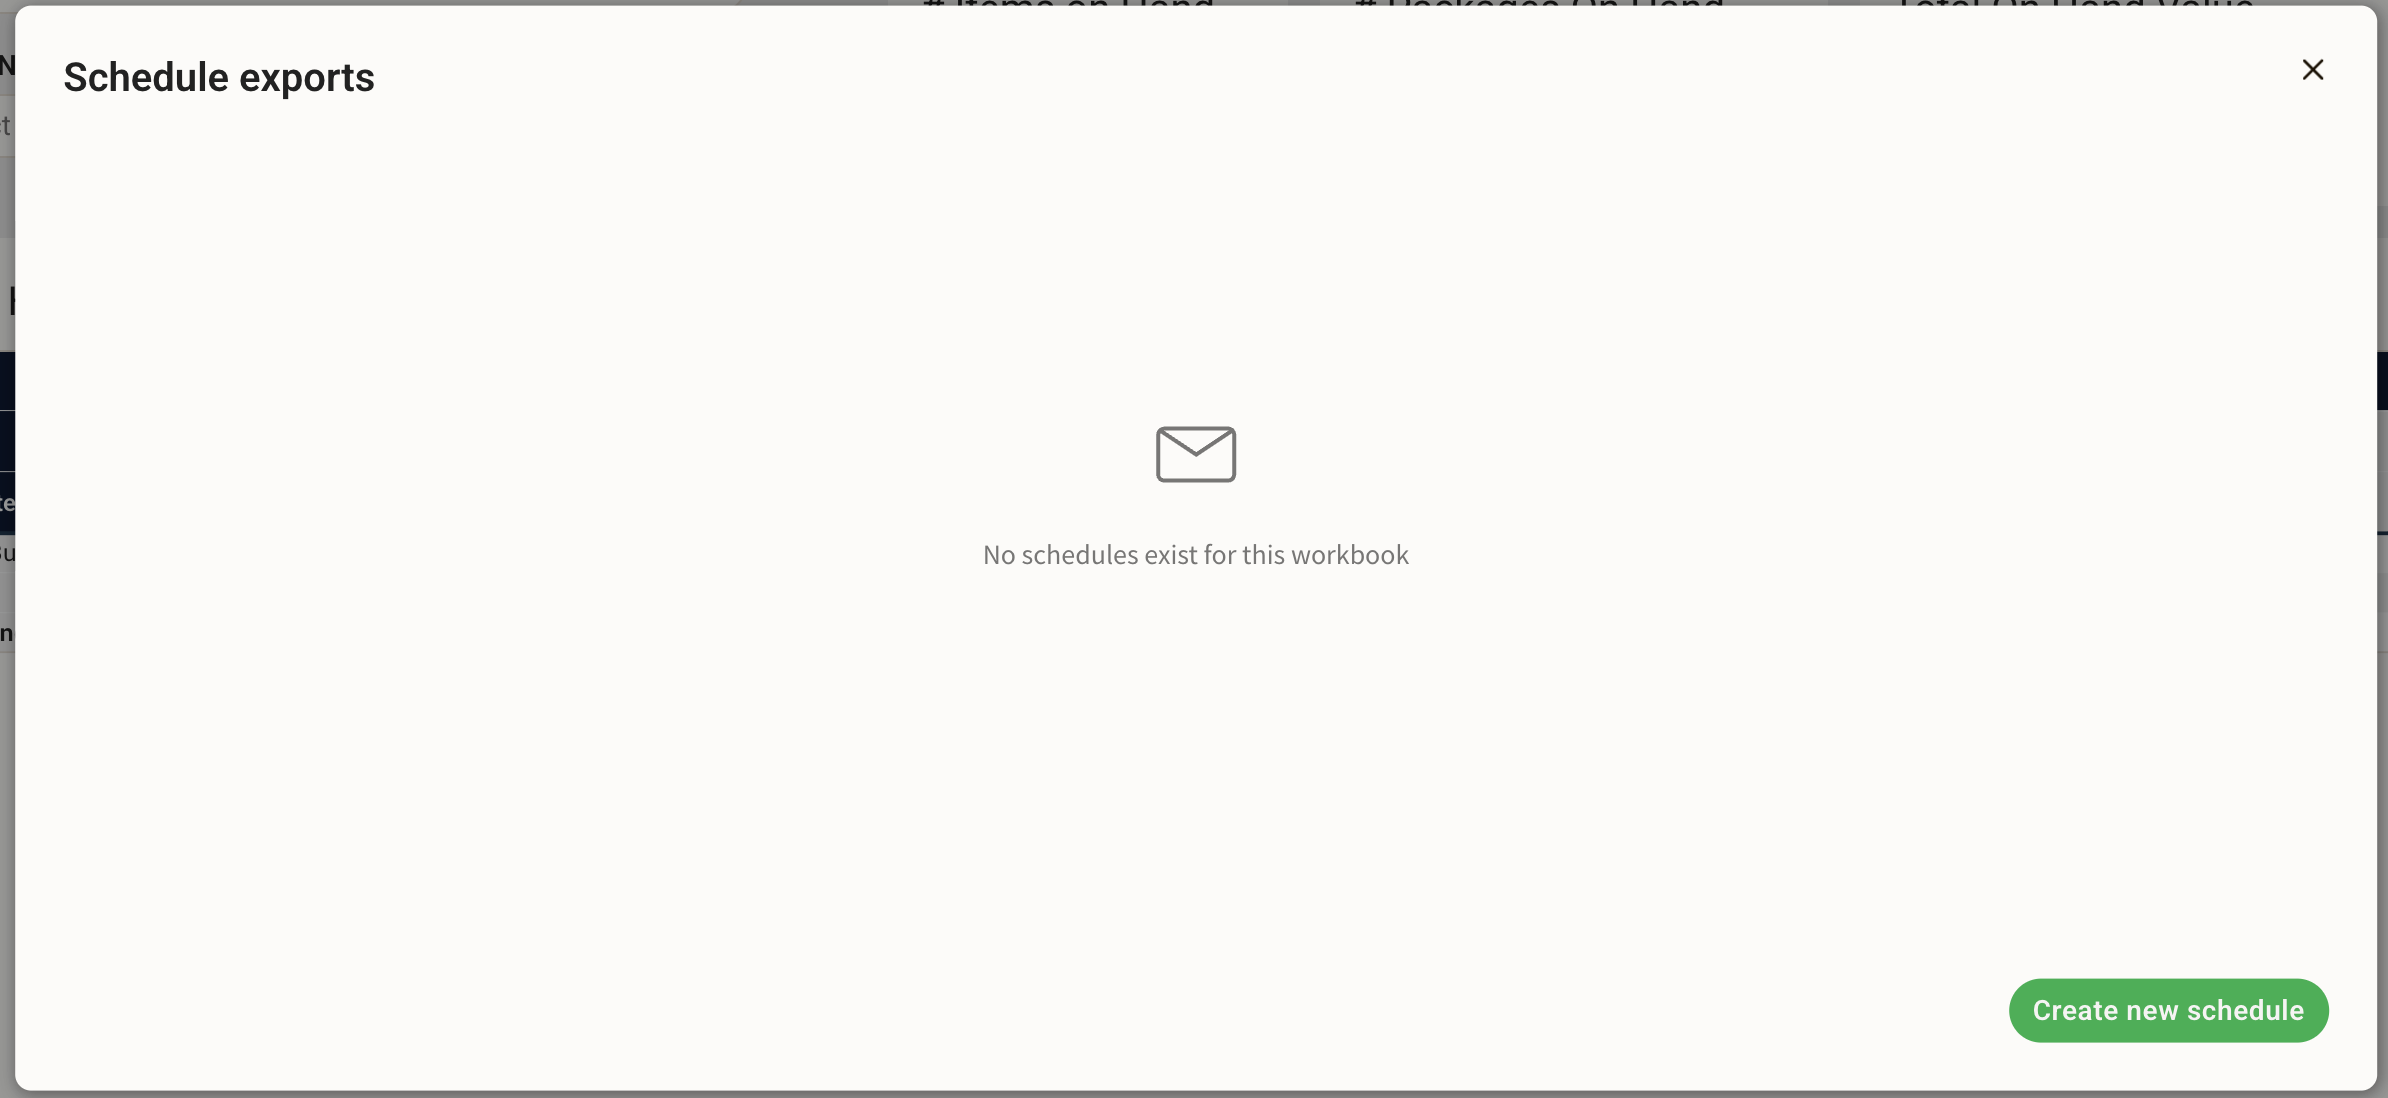
- Click "Create new schedule"
- Follow the same steps outlined above, starting at step 4.
How did we do?
Flourish Analytics - Customize and Bookmark the Data
Flourish Analytics – Green Check Integration and Verified Reports
