Connecticut Lab Sampling and Manifesting
Connecticut BioTrack: Create and Manifest a Lab Sample. Purpose. Use this workflow to split a lab sample package from a tested batch, send it to the lab as its own outbound order, and manifest it in…
Connecticut BioTrack: Create and Manifest a Lab Sample
Purpose
Use this workflow to split a lab sample package from a tested batch, send it to the lab as its own outbound order, and manifest it in Flourish. All actions sync directly to BioTrack — you don't need to log in to BioTrack separately to complete these tasks.
Prerequisites
- Your Flourish user role must have Outbound and Inventory permissions enabled.
- The lab must be set up as a Destination before you create the sample order.
- Locate the parent package's barcode ID in Inventory > All Packages and note it — the lab will reference this ID when uploading test results.
Create the Lab Sample Order
- Navigate to Outbound.
- Click Create New Order.
- Select the lab from the Destination DBA drop-down.
- Add any other relevant order details.
- Click Start Order.
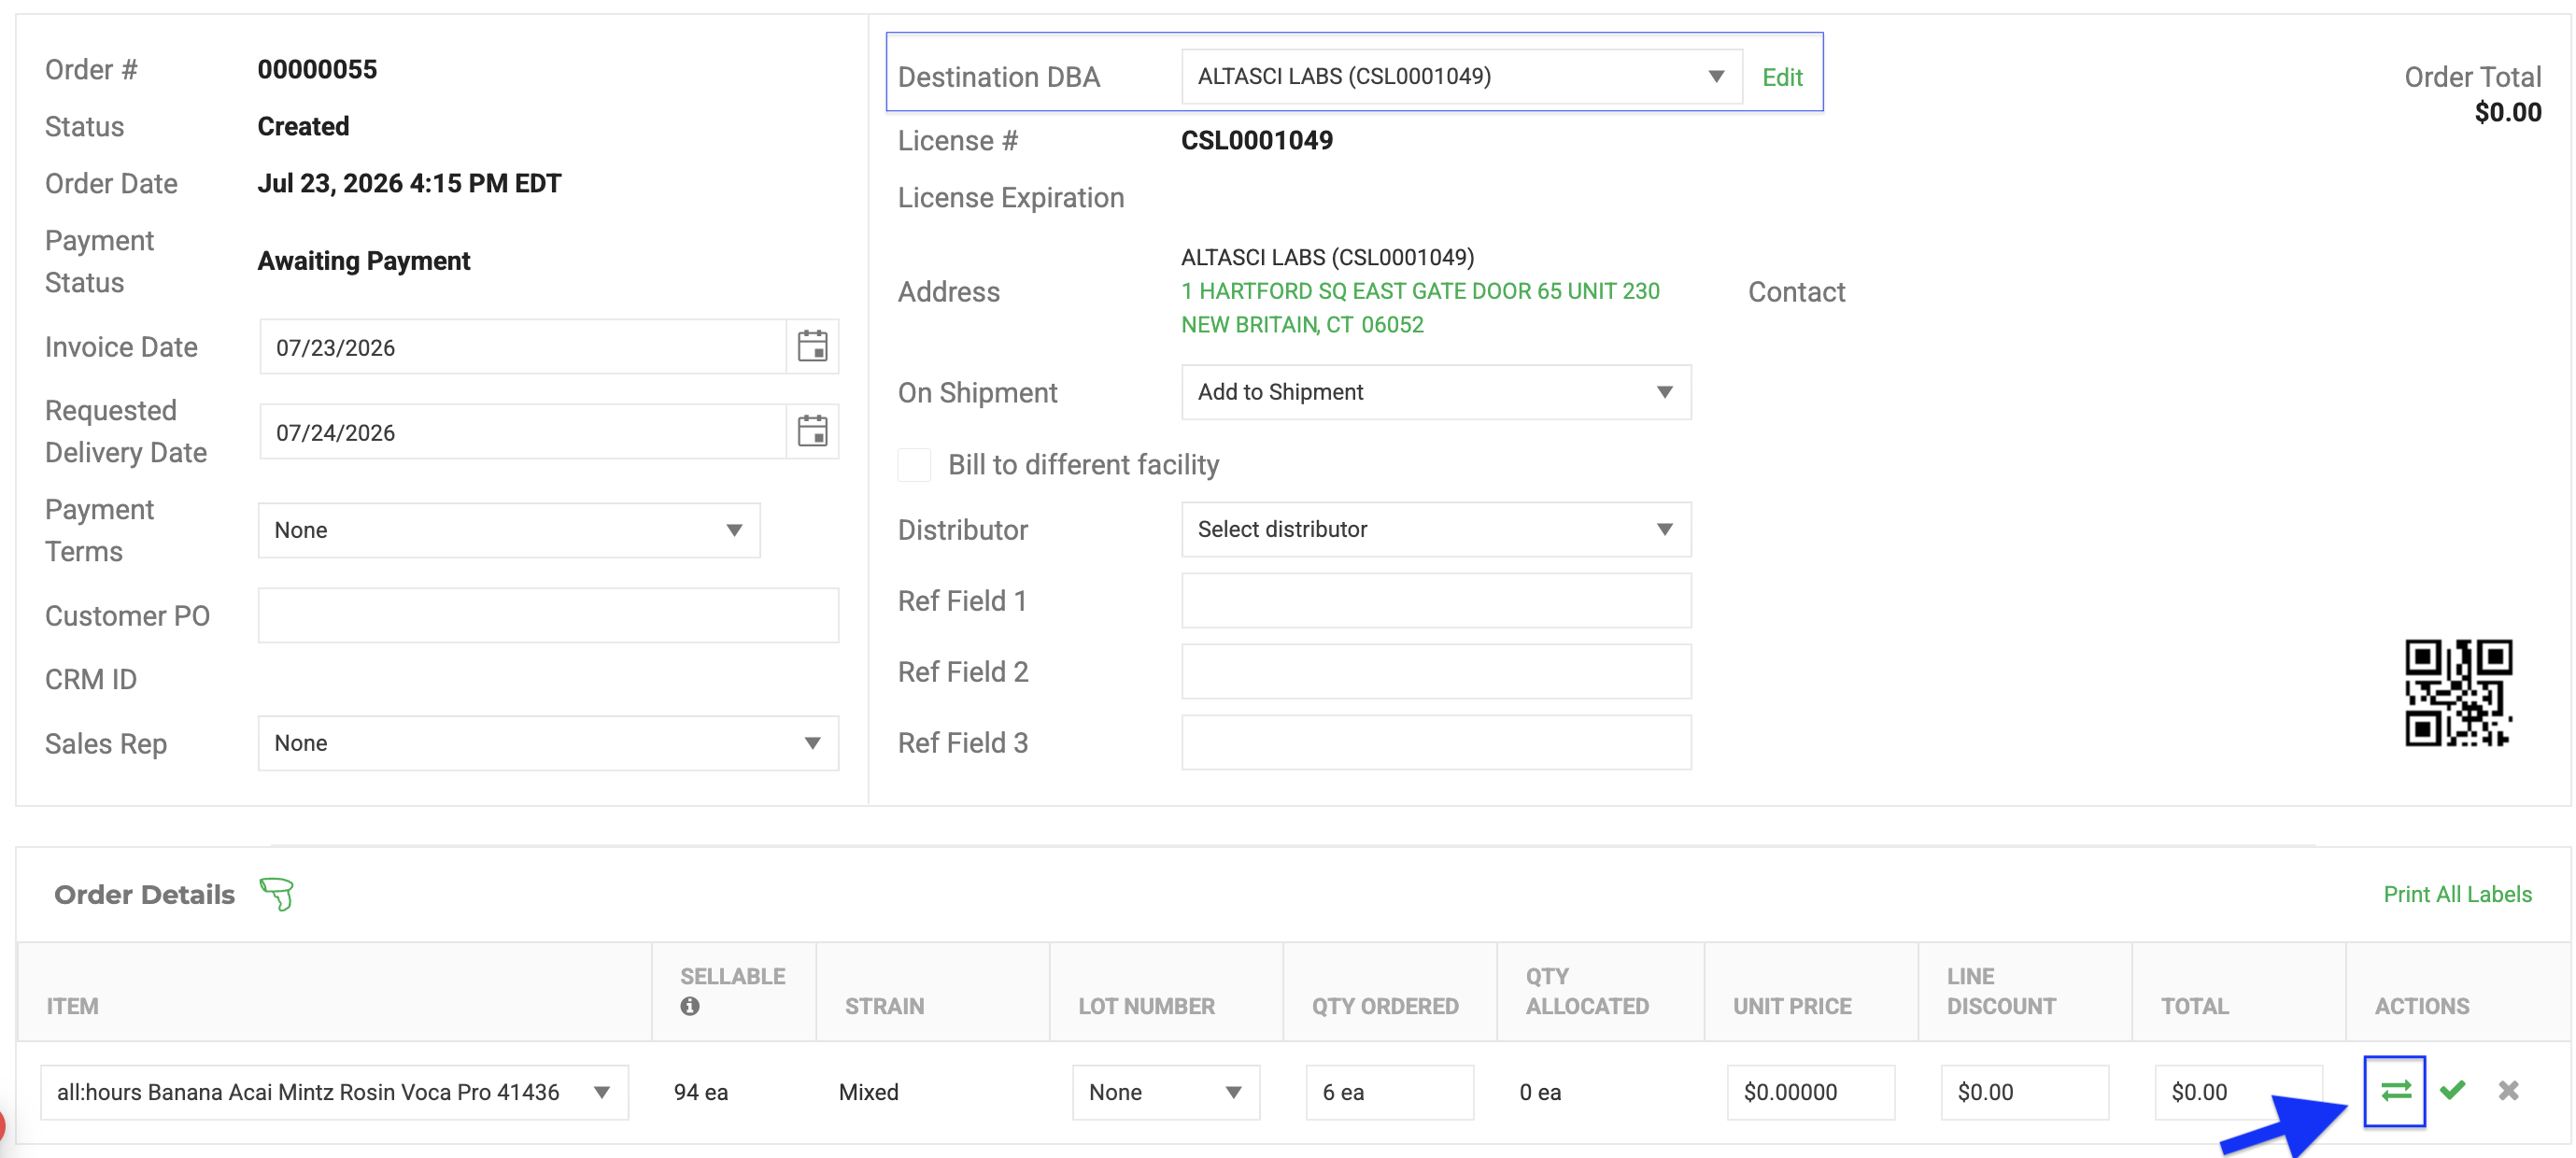
- Add the item to the order and enter the quantity ordered.
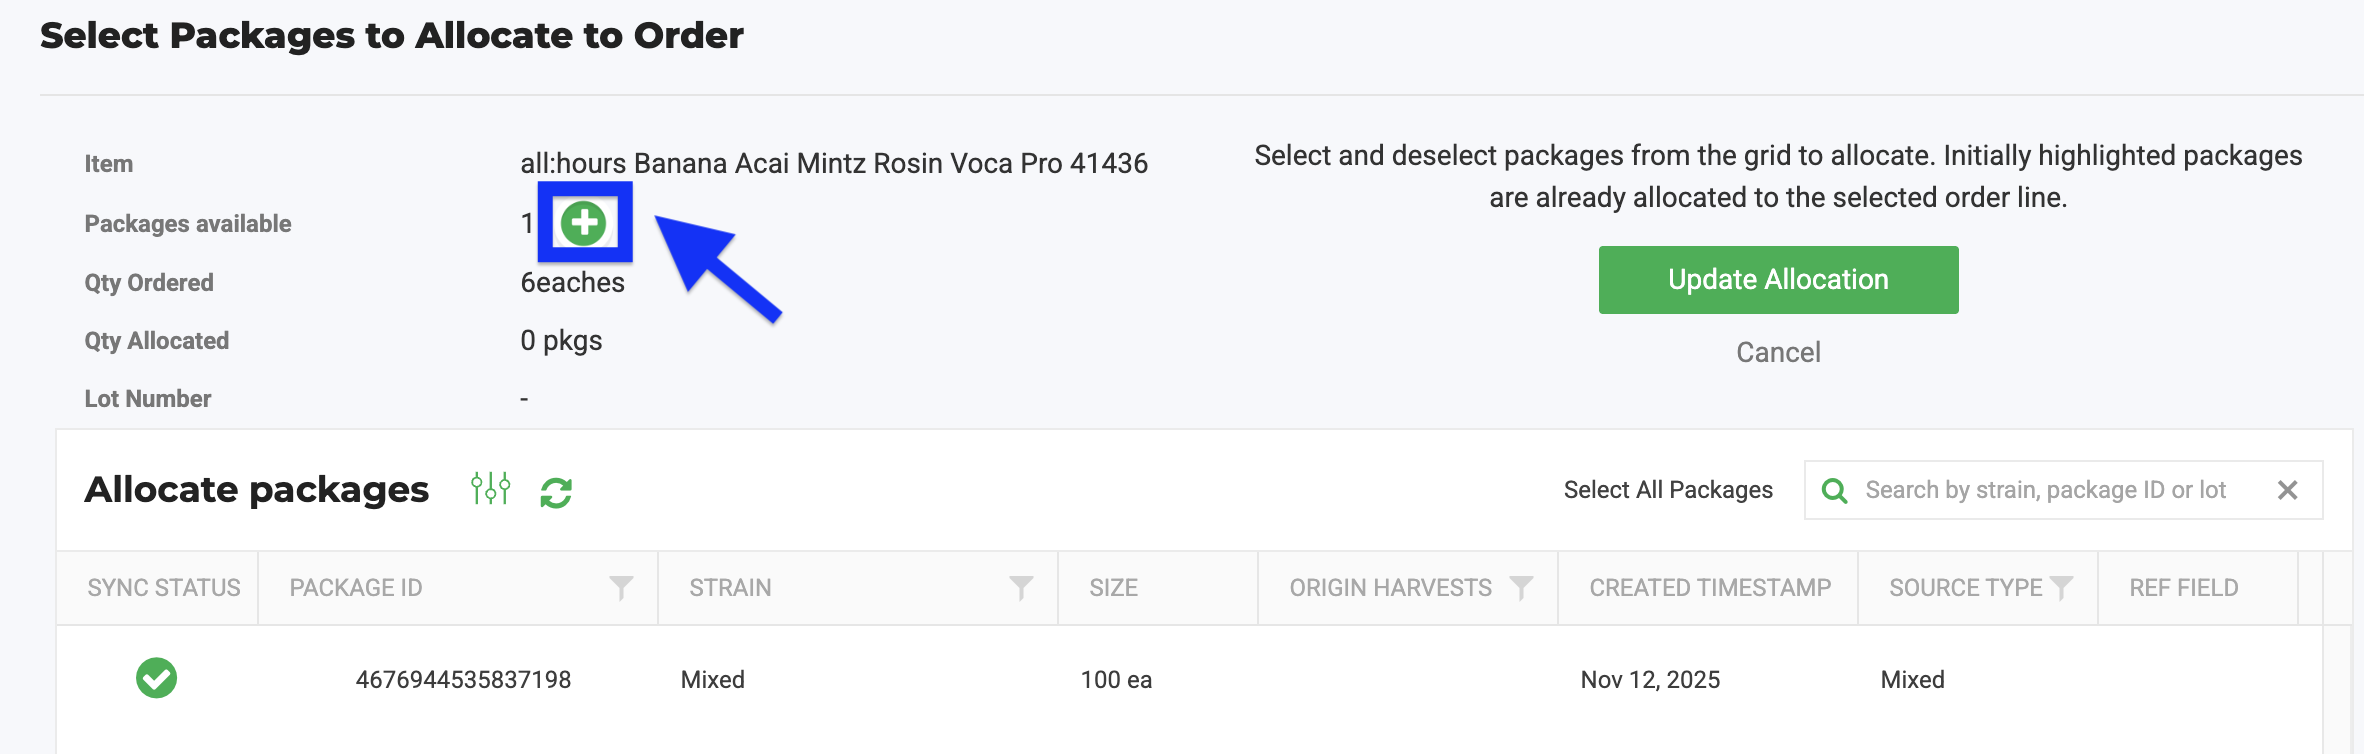
- Click Allocate Packages to open the allocation screen. The parent package displays but can't be selected directly — this prevents the full batch from being sent to the lab.
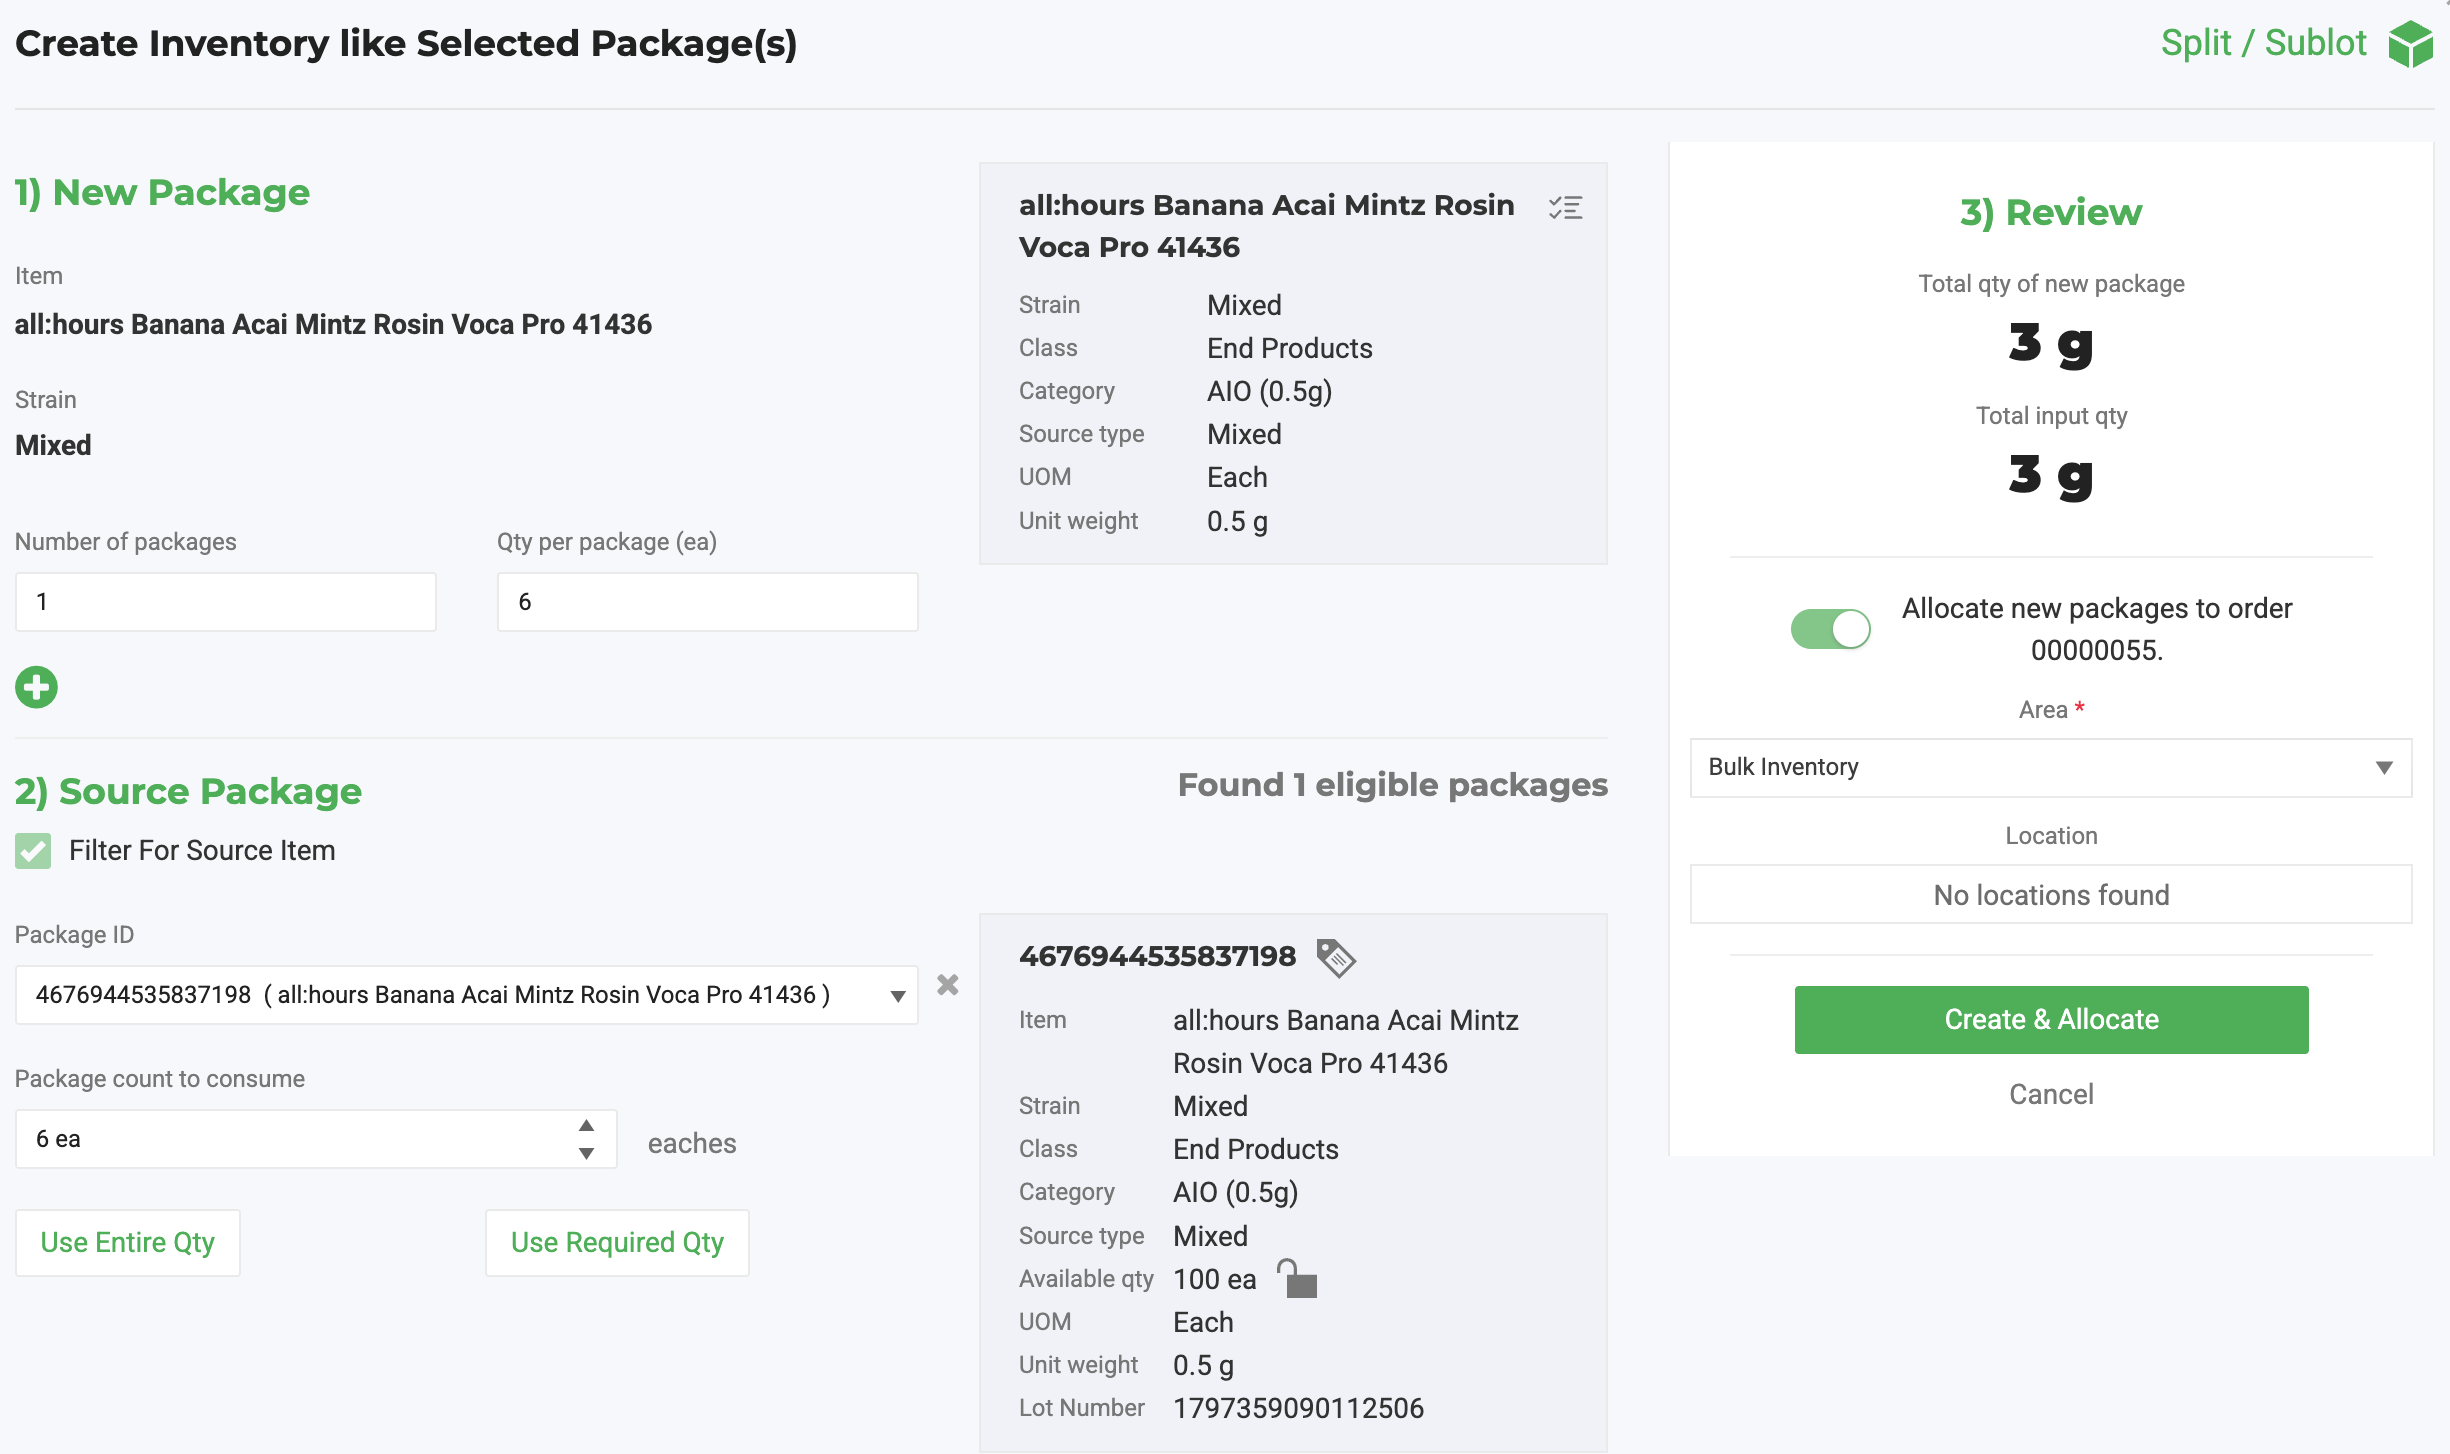
- Click the green + at the top of the allocation screen to create a new QA Sample.
- Enter the quantity of grams or units the lab will receive. This splits a new lab sample package from the parent package.
- Click Review and Confirm. The sample package is created and automatically allocated to the order.
- Click Done Editing.
Create Lab Samples Using Bulk Actions
Use this method to create and assign multiple lab sample packages in a single workflow without starting from the Outbound module.
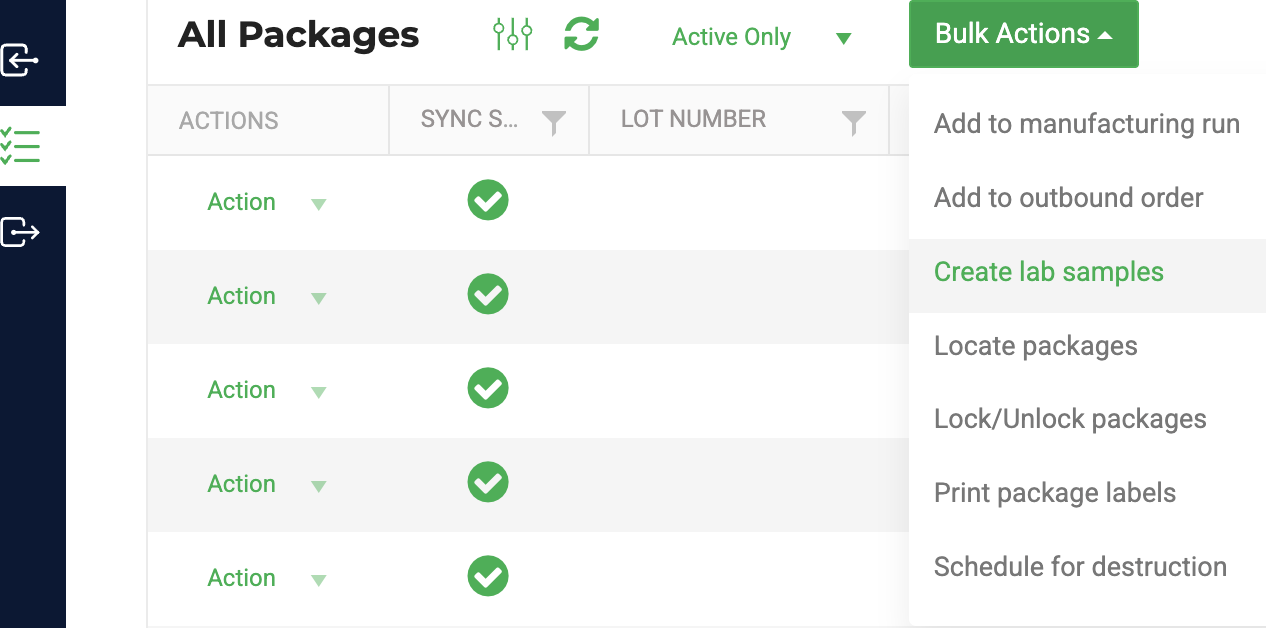
- Navigate to Inventory > All Packages.
- Click Bulk Actions.
- Select Create Lab Samples.
- Check the box next to each package you want to sample.
- Select New Order to create a new lab order, or select an existing order to add the samples to it.
- Select the Destination (the lab) for the order.
- Follow the prompts to enter sample quantities and confirm the packages to split.
- Click Review and Confirm.
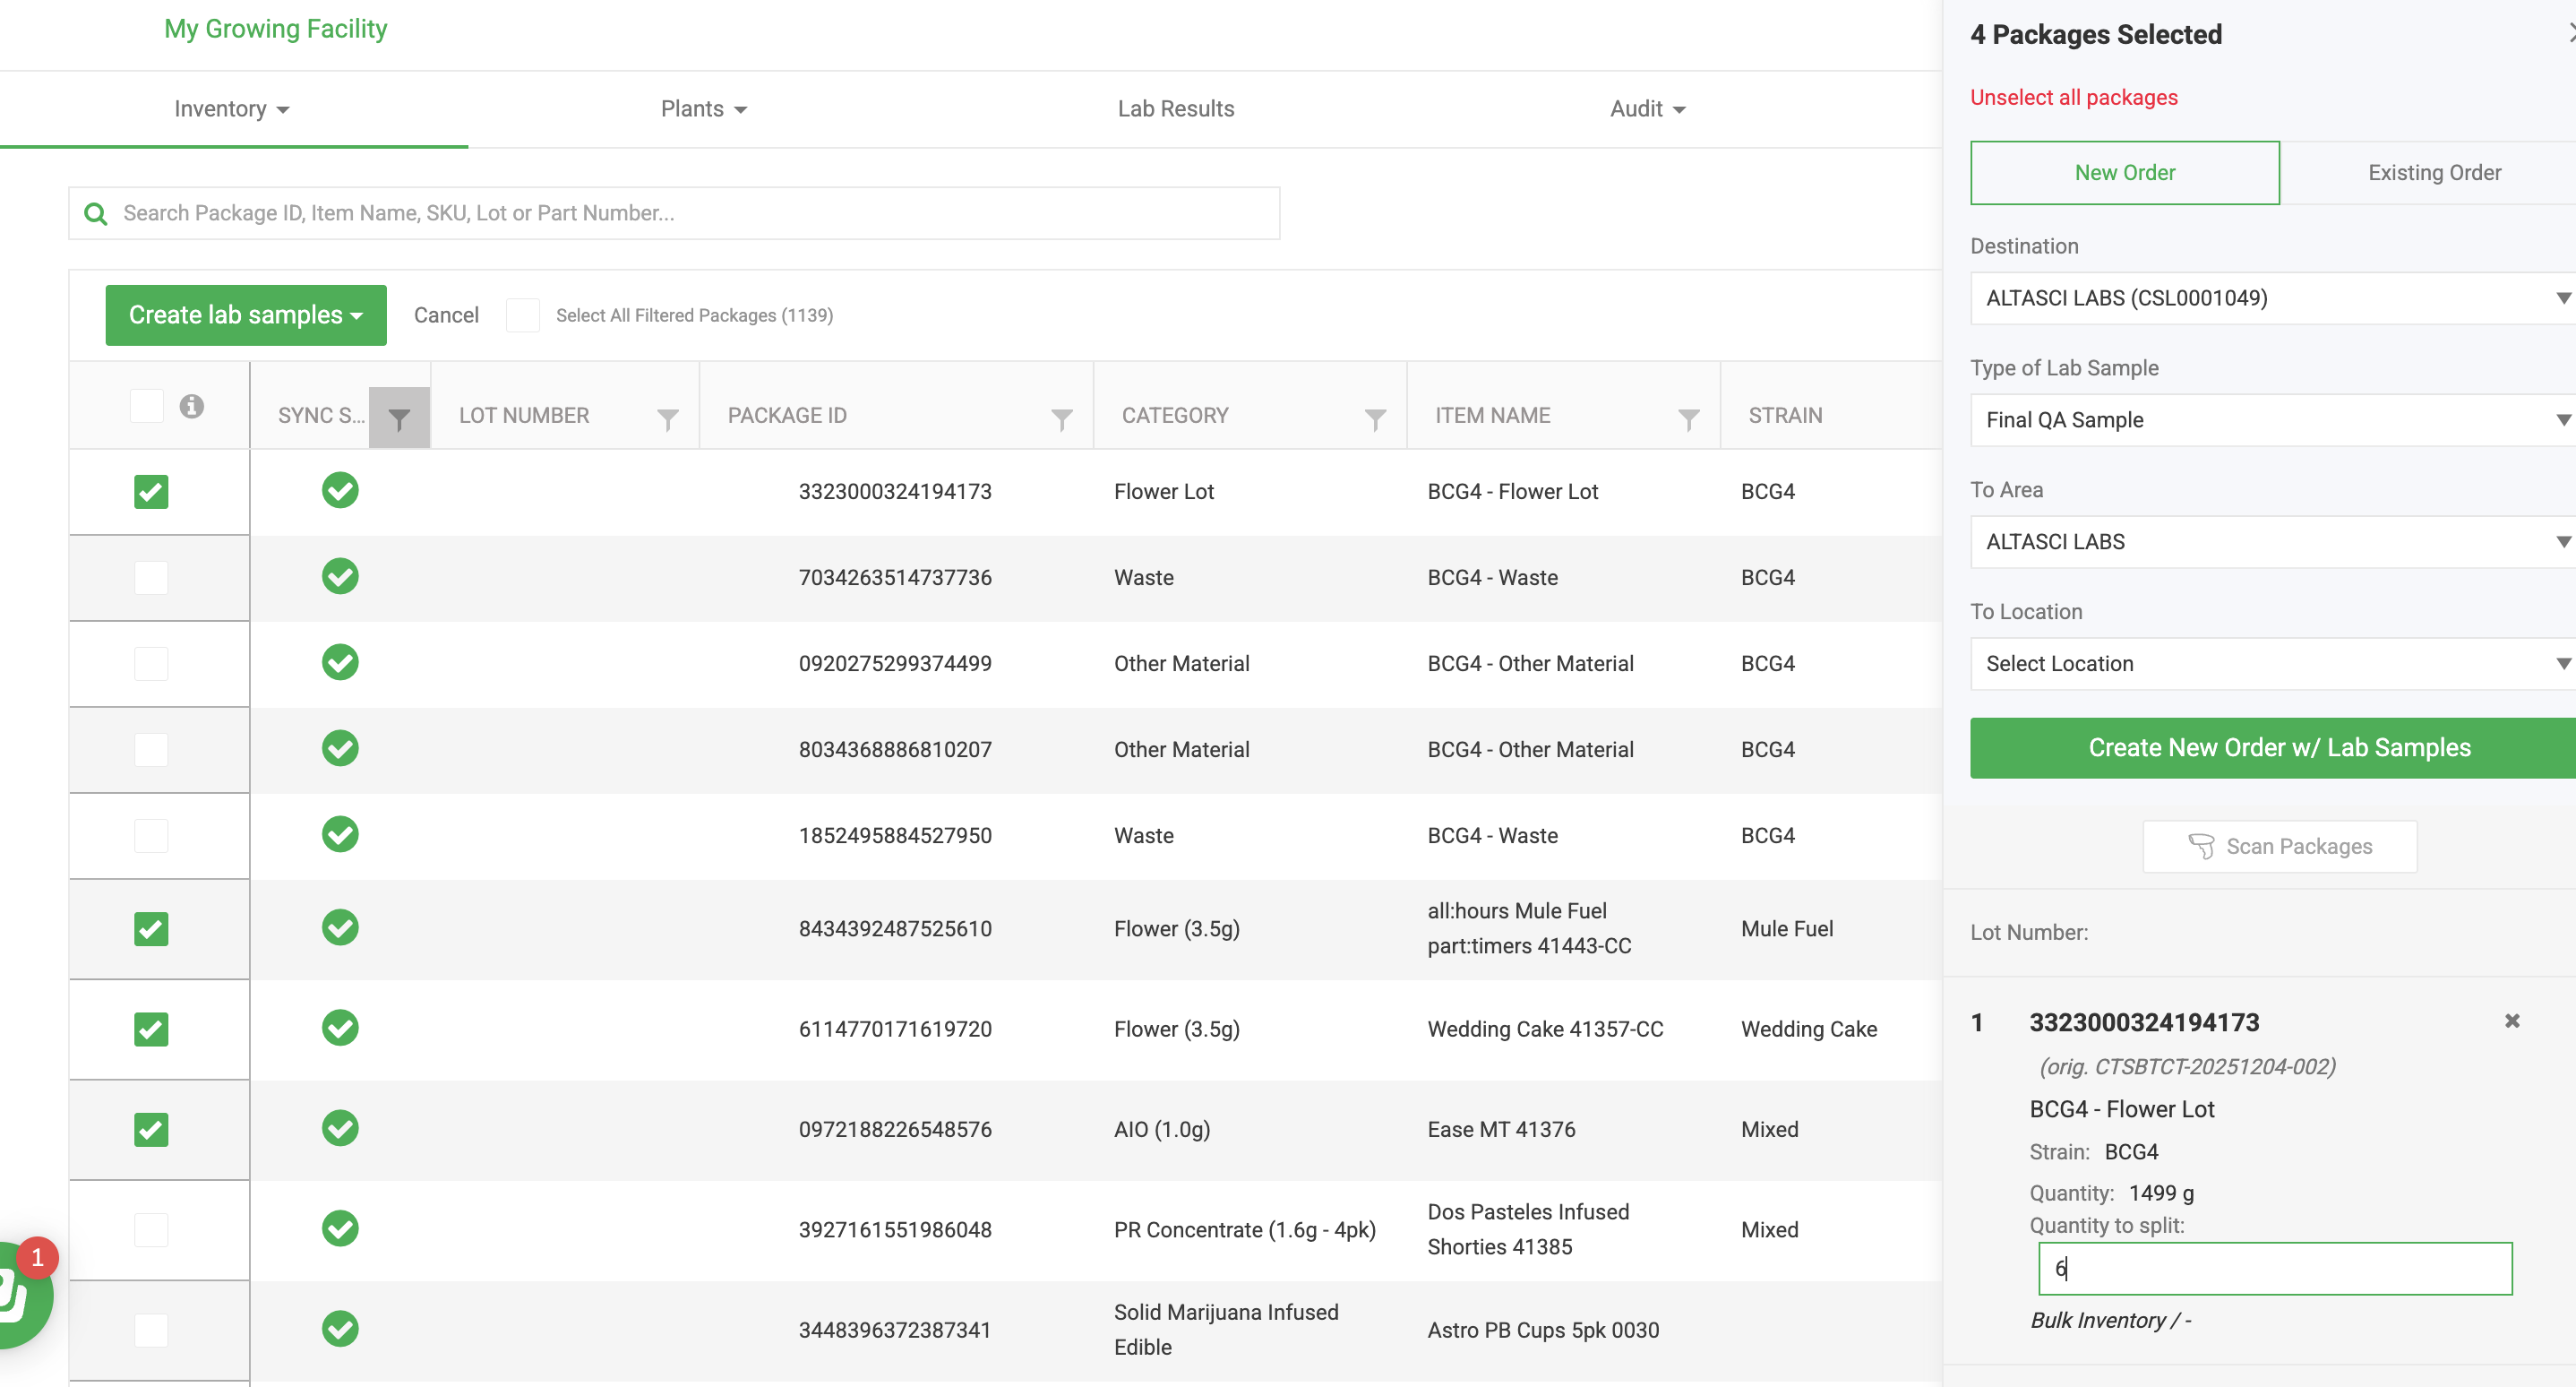
Flourish takes you to the order you just created. Continue with the Create the Shipment and Manifest steps below to complete the manifest.
Create the Shipment and Manifest
- From the order screen, click the Shipment drop-down.
- Select Create a New Shipment.
- Enter the Distributor and Vehicle information.
- Assign two drivers to the shipment — Connecticut requires two.
- Enter the planned route.
- Enter the Departure and Arrival times.
- Click Create Manifest.
Flourish pushes the manifest to BioTrack. Refresh the page and confirm the status shows In Sync.
Ship the Transfer
- When ready to dispatch, click Ship Transfer.
Cancel a Manifest
If you need to cancel a manifest after creating it, cancel it in Flourish first, before making any other changes. Click Cancel Shipment to remove the order from the shipment so you can edit it and re-create the shipment and manifest. If the manifest has already been accepted in BioTrack by the receiving party, contact your BioTrack administrator.
Related Articles
How did we do?
Connecticut BioTrack - Accepting Rejected Inventory
