Table of Contents
Create Inventory Packages After Harvest in Connecticut BioTrack
Learn how to create and manage post-harvest inventory packages (Flower, Other Plant Material, Waste) in Connecticut BioTrack after curing, including package workflows and bulk lab sample creation in Flourish Software.
Table of Contents
After Harvest
Curing a Harvest creates packages in your Inventory module.
According to the dry weights you entered, you can see three different packages:
- Flower for the total Dry Flower with Item "Flower - Strain Name".
- Other Plant Material for the total Dry Trim with Item name of "Other Plant Material - Strain Name".
- Waste with Item name "Waste - Strain Name".
 |
 |
 |
Create New Inventory
To create new inventory from a package, click "Action" and select "Create Package".
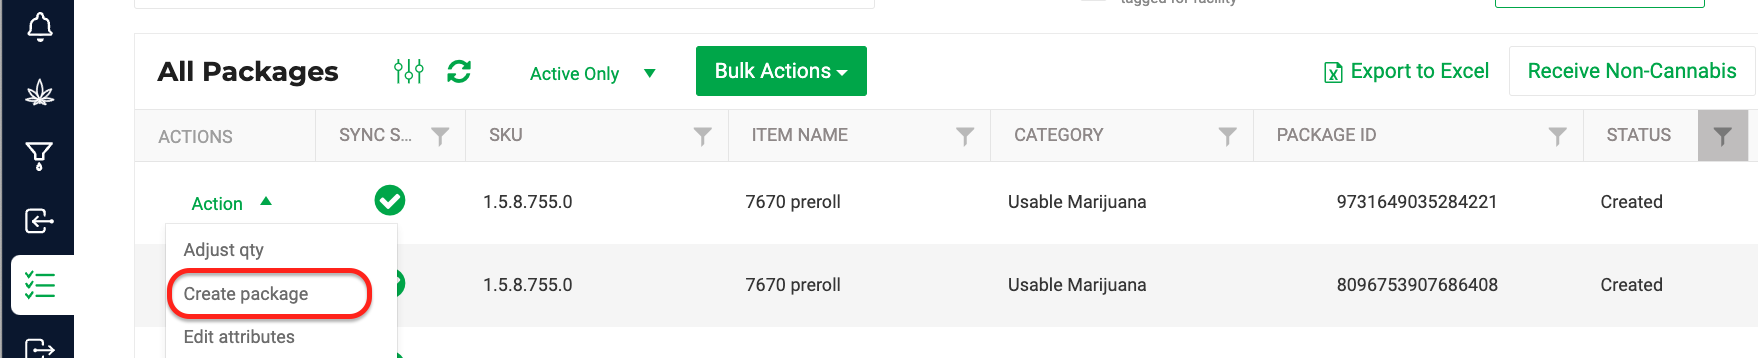
The system displays the modal to help you select the action:
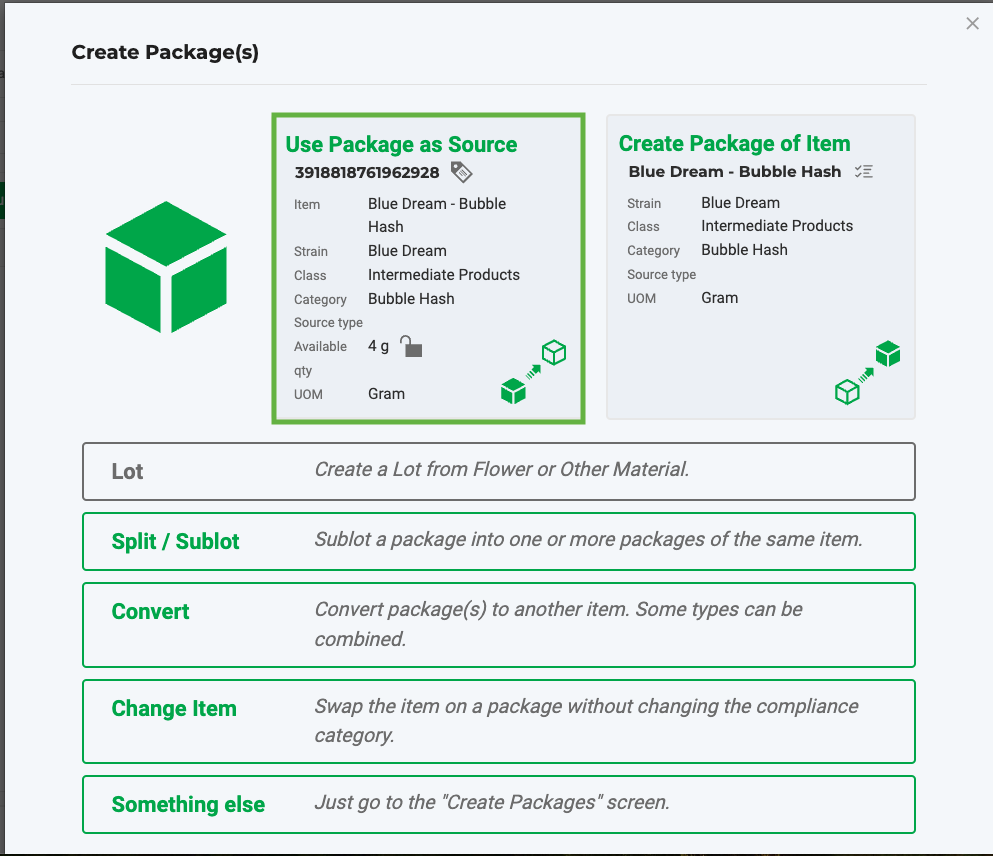
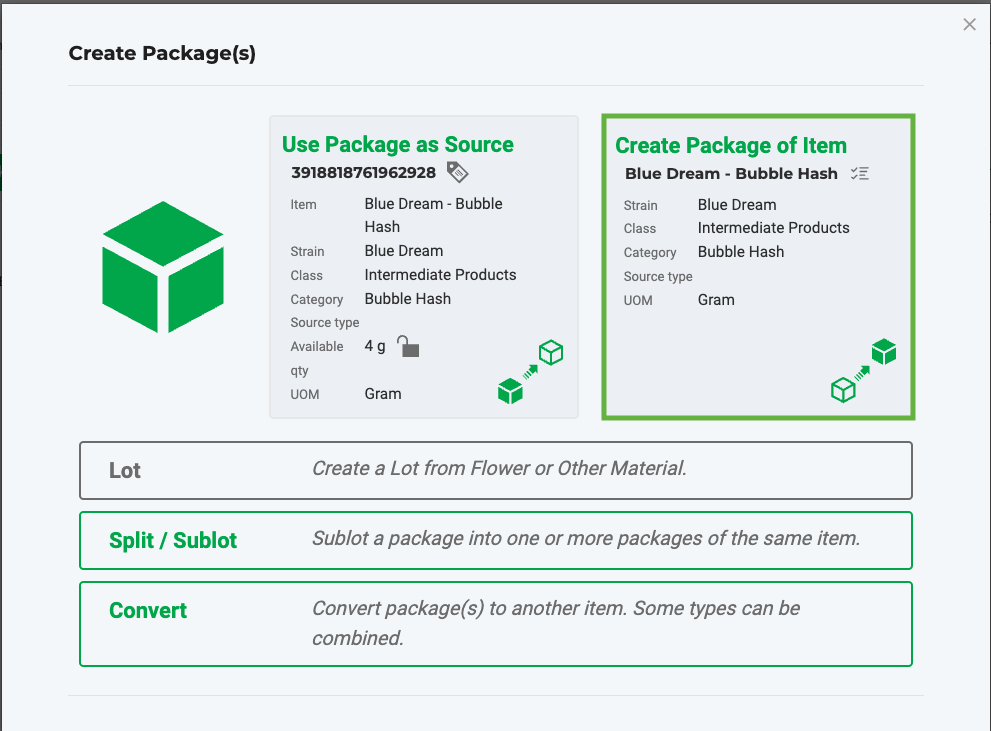
After you click the "Create Package" action Menu item, you can select two options to narrow down your actions. Click the squares to decide what you want to do. According to what you can do with this package:
| 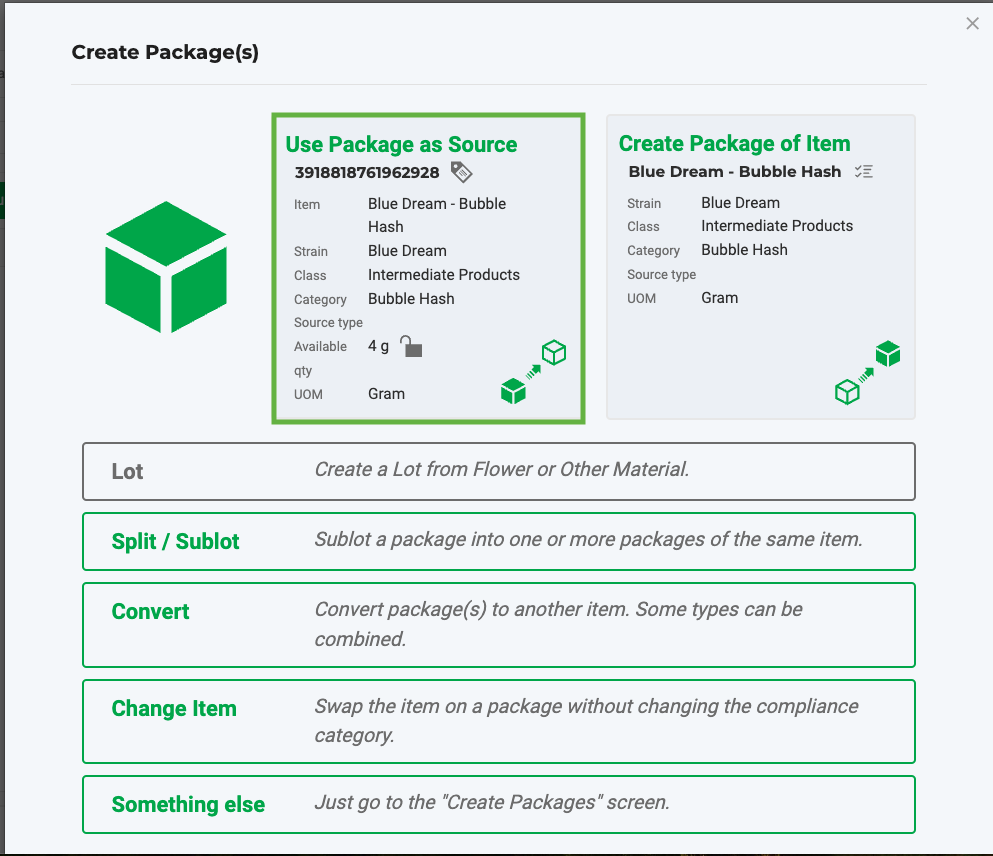 |
Select the action
Flourish helps you to narrow down the actions you want by selecting one of the square boxes:
- "Use Package as Source."
- "Create Package of Item."
Use Package as SourceCreate a new package using the package you selected as the source package. In this example, the available actions use Package 3918818761962928 as the source package to create a new package. Several actions are available. 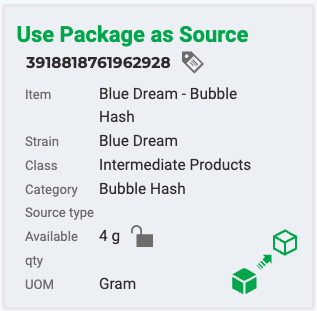 | Create package of ItemCreate a new package for the Item on the selected package; you can use something other than the package you selected as the source package. In this example, the available actions will create a new package for Blue Dream - Bubble Hash item. Other actions are available. 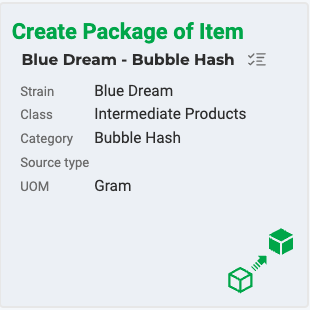 |
 |  |
Actions on a package
- Lot - Create a Lot from a Flower or Other material.
- Split/Sublot - Sublot a package into one or more packages of the same item.
- Convert - Convert package(s) to another eligible intermediate/end product Item. You can combine some types.
- Change Item - Swap the item on a package without changing the compliance category.
- Something else -Go to the "Create Package" screen.
Lot
Create a Lot from a Flower or Other material.
- Click Lot. Flourish selects the Item on this screen's "New Package."
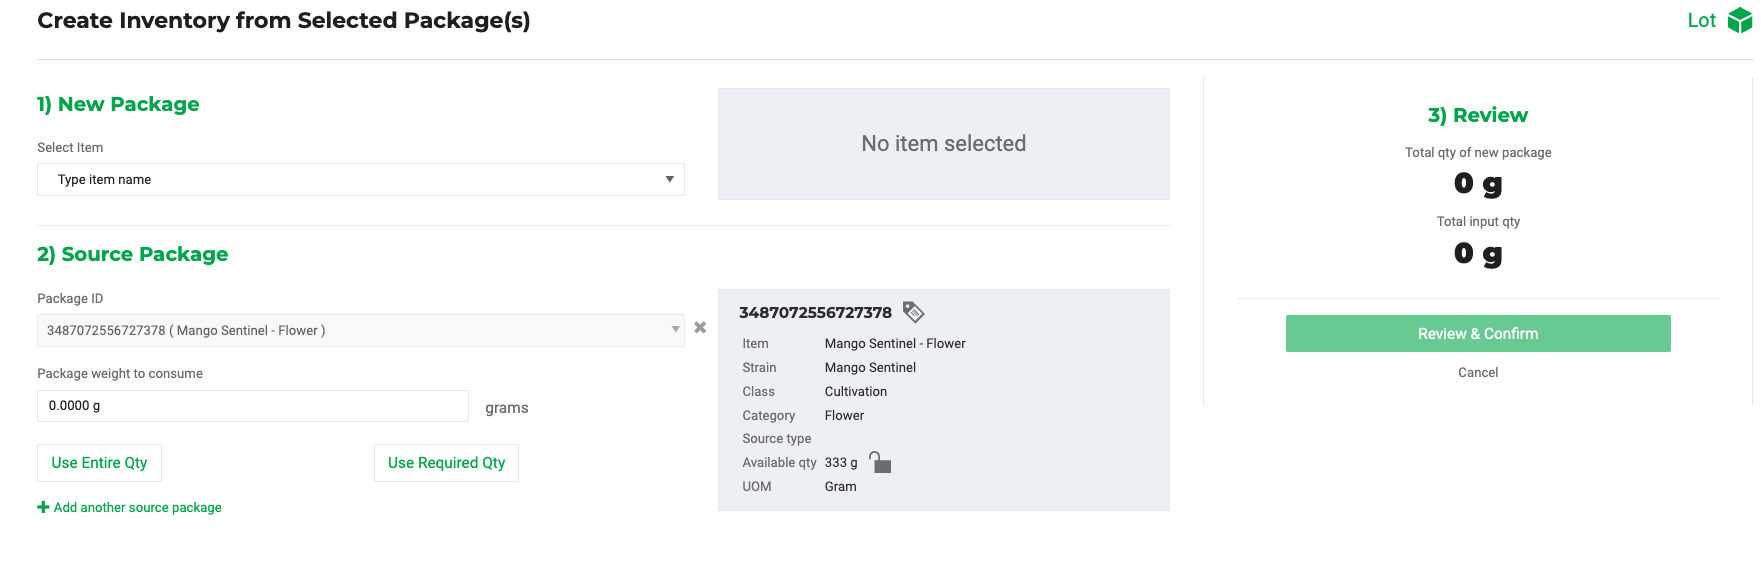
- You can select a different Item Item from the list of eligible items in the "New Package" area, which will empty the selection on the "Source Package" dropdown.
- Type in the "Number of packages"
- Type in the "Qty per package (g)"
- Creating Multiple Packages (Optional):
You can create multiple new packages with different quantities in a single session.- Click the
 sign to add another line, where you can specify the "Number of packages" and the "Qty per package (ea)"
 - Click the
 sign to remove the line. Learn more here.
- Click the
- In the "Source Package" part, fill the "Package weight to consume" in one of three ways:
- Type in.
- Click "Entire QTY".
- Click "Use Required Qty".
- If necessary, you can include additional source packages in this process.
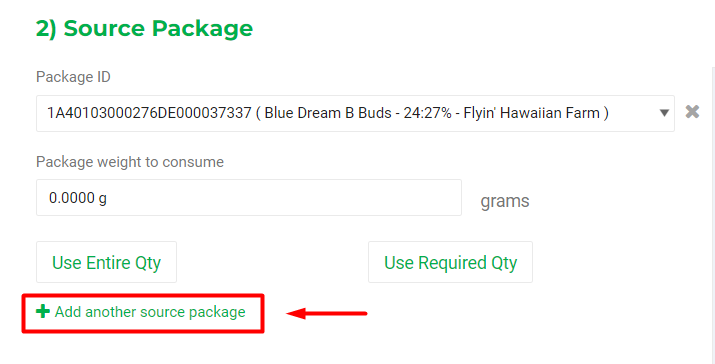
- The system will automatically validate the source package(s) weights and the new package balance.
- You may get this alert if the input and output quantities are not the same:
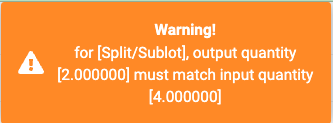
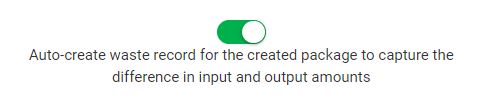
- There's also an override option to allow for differing input/output quantities:
- You may get this alert if the input and output quantities are not the same:
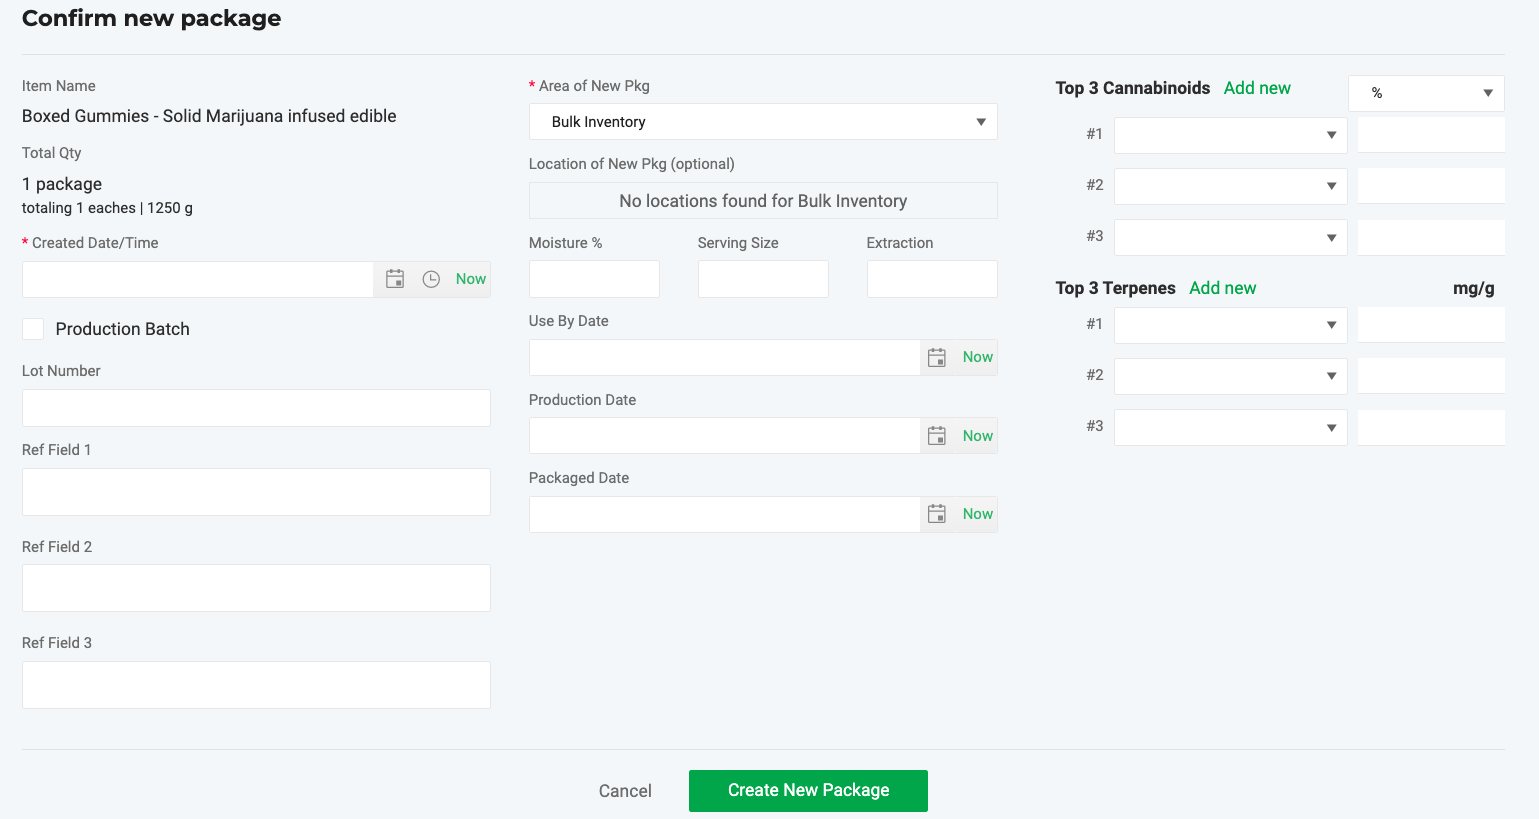
- Click Review and Confirm to review the details of the new and source packages. Fill in any required and optional information.
- Finally, click Create New Package to execute the creation process.
Split/Sublot
Sublot a package into one or more packages of the same item.
- Click Split/Sublot. Flourish selects the Item on this screen's "New Package" and "Source Package" parts.
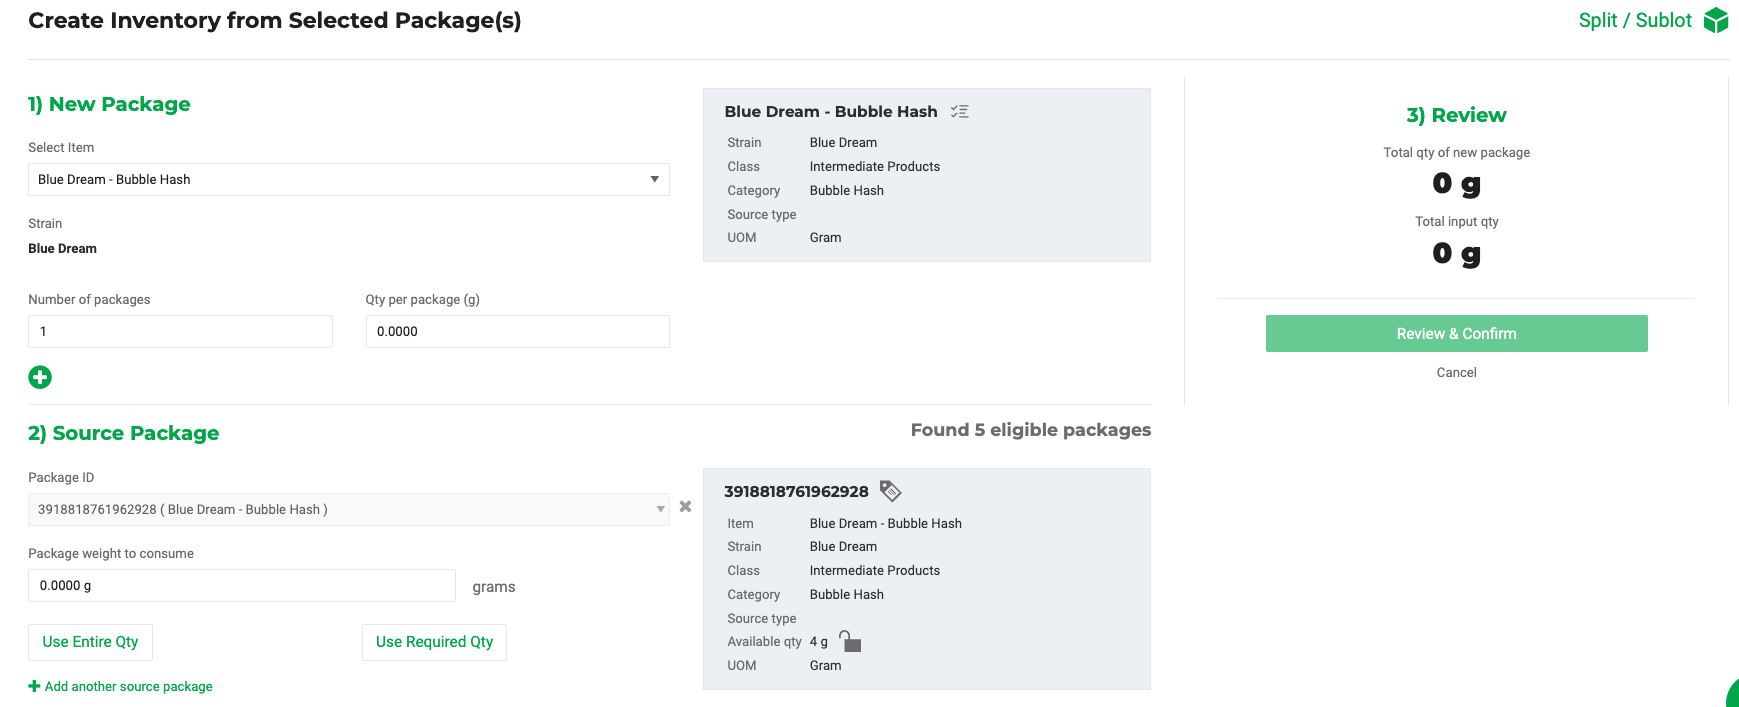
- Type in the "Number of packages"
- Type in the "Qty per package (g)"
- Creating Multiple Packages (Optional):
You can create multiple new packages with different quantities in a single session.- Click the sign to add another line, where you can specify the "Number of packages" and the "Qty per package (ea)"
- Click the sign to remove the line. Learn more here.
- Click the
- In the "Source Package" part, fill the "Package weight to consume" in one of three ways:
- Type in.
- Click "Entire QTY".
- Click "Use Required Qty".
- If necessary, you can include additional source packages in this process.
- The system will automatically validate the source package(s) weights and the new package balance.
- You may get this alert if the input and output quantities are not the same:
- There's also an override option to allow for differing input/output quantities:
- You may get this alert if the input and output quantities are not the same:
- Click Review and Confirm to review the details of the new and source packages. Fill in any required and optional information.
- Finally, click Create New Package to execute the creation process.
Convert
Convert package(s) to another item. You can combine some types.
- Click "Convert".
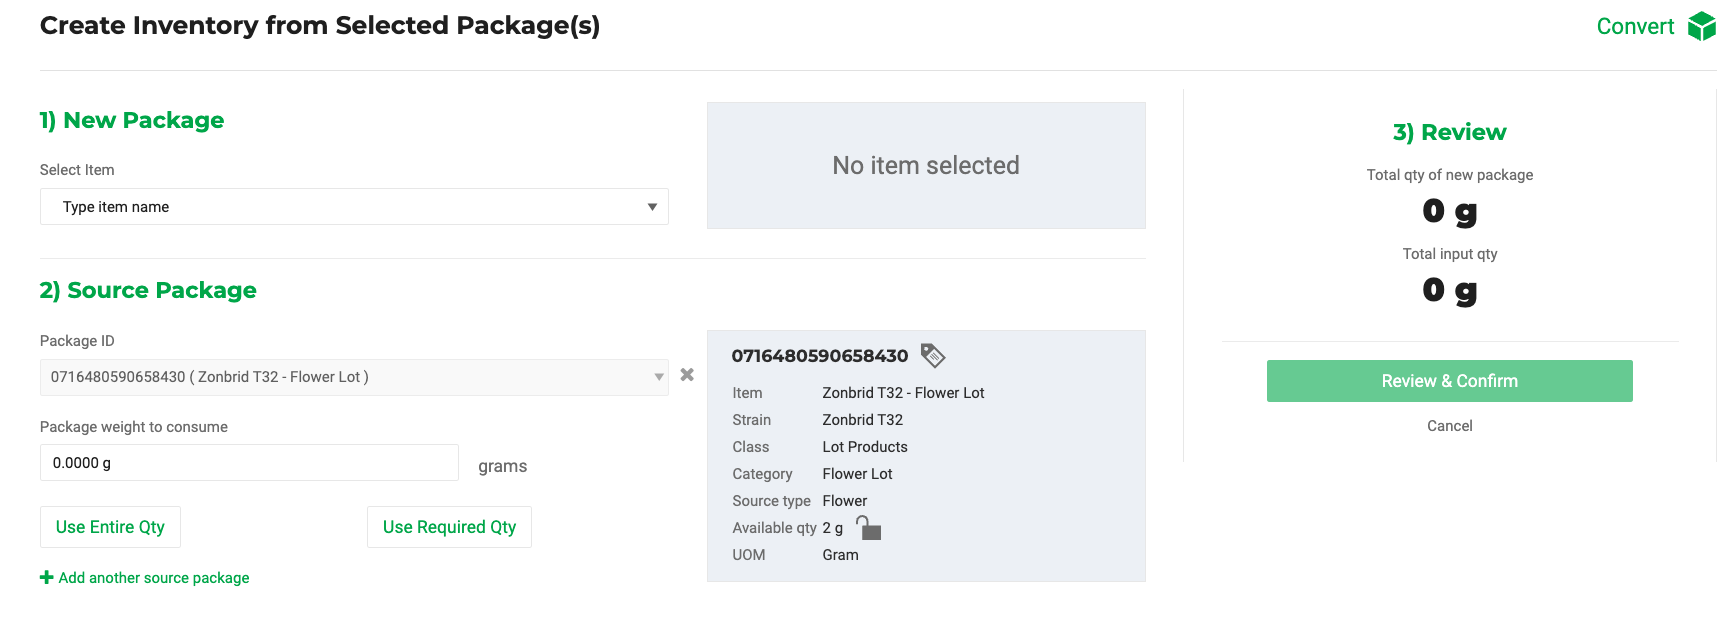
- In the New Package part:
- Select Item - defaults to the item of the source package.
- Select Strain.
- Type in the Number of packages.
- Type in the Qty per package (ea)
- Creating Multiple Packages (Optional):
You can create multiple new packages with different quantities in a single session.- Click the sign to add another line, where you can specify the "Number of packages" and the "Qty per package (ea)"
- Click the sign to remove the line. Learn more here.
- Click the
- In the "Source Package" part, fill the "Package weight to consume" in one of three ways:
- Type in.
- Click "Entire QTY".
- Click "Use Required Qty".
- If necessary, you can include additional source packages in this process.
- The system will automatically validate the source package(s) weights and the new package balance. There's also an override option to allow for differing input/output quantities:
- Click Review and Confirm to review the details of the new and source packages. Fill in any required and optional information.
- Finally, click Create New Package to execute the creation process.
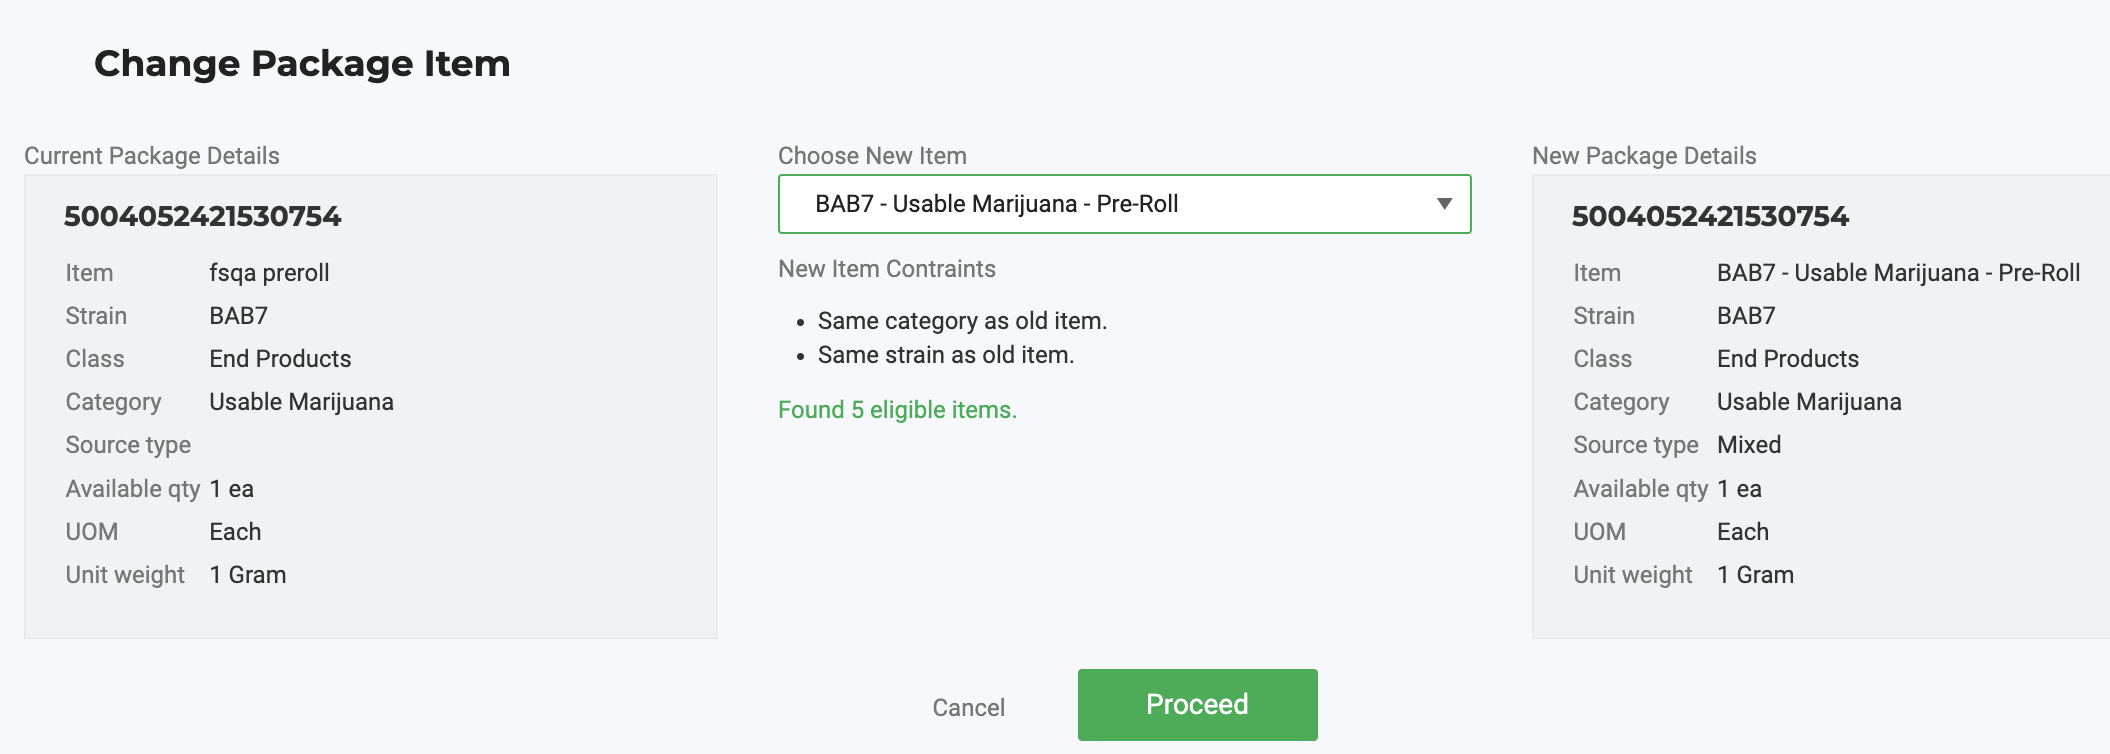
Change Item
Swap the item on a package without changing the compliance category.
- Click "Change Item."
- Select your new item from the "Choose New Item" drop-down menu.
- Click Proceed.
Something else
- Click "Something else."
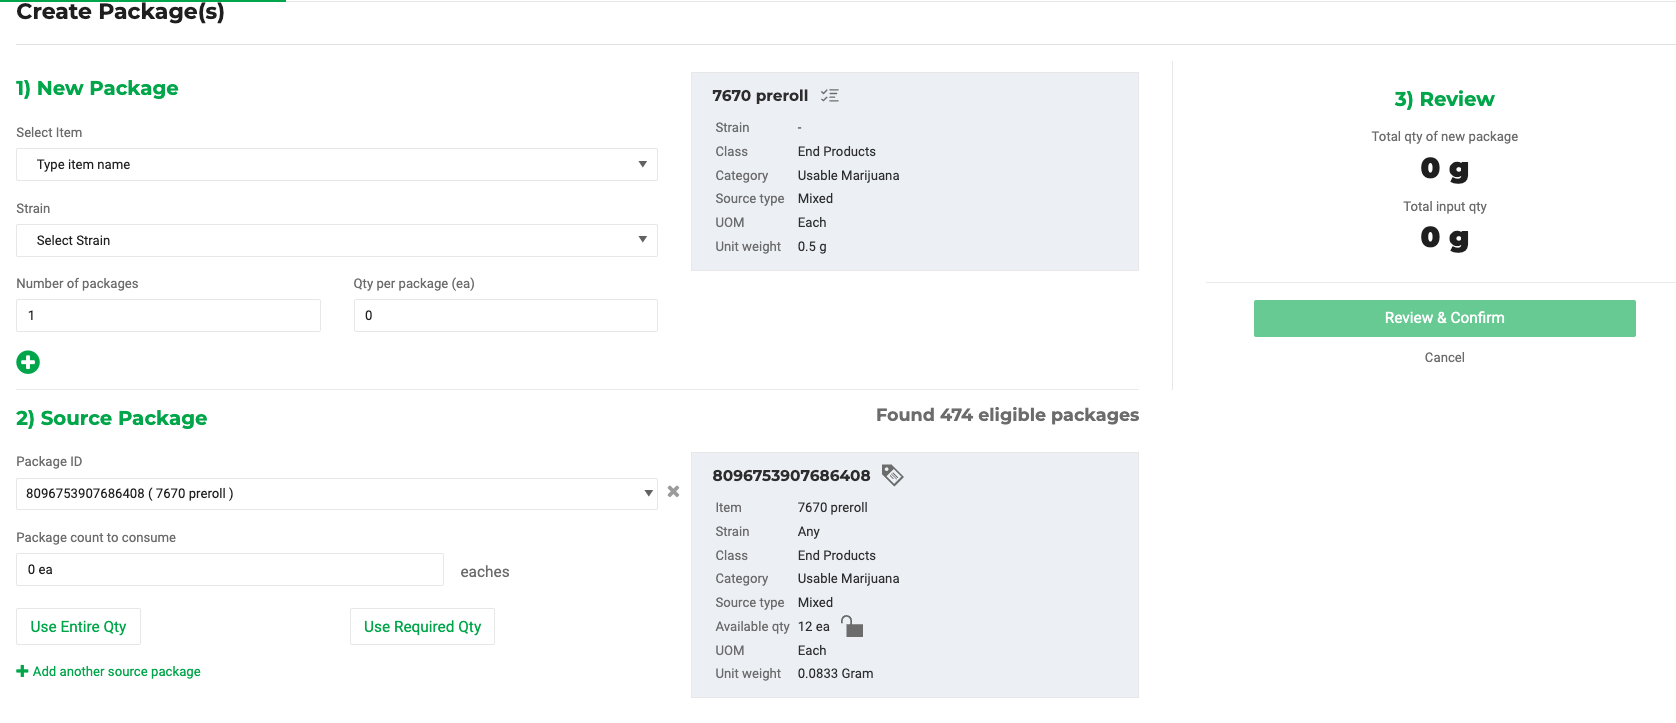
- In the New Package part:
- Select Item - defaults to the item of the source package.
- Select Strain.
- Type in the Number of packages.
- Type in the Qty per package (ea)
- Creating Multiple Packages (Optional):
You can create multiple new packages with different quantities in a single session.- Click the sign to add another line, where you can specify the "Number of packages" and the "Qty per package (ea)"
- Click the sign to remove the line. Learn more here.
- Click the
- Add Additional Source Packages (Optional):
If necessary, you can include additional source packages in this process.
- The system will automatically validate the source package(s) weights and the new package balance. There's also an override option to allow for differing input/output quantities:
- Click Review and Confirm to review the details of the new and source packages. Fill in any required and optional information.
- Finally, click Create New Package to execute the creation process.
Usable Weight Validation
Why
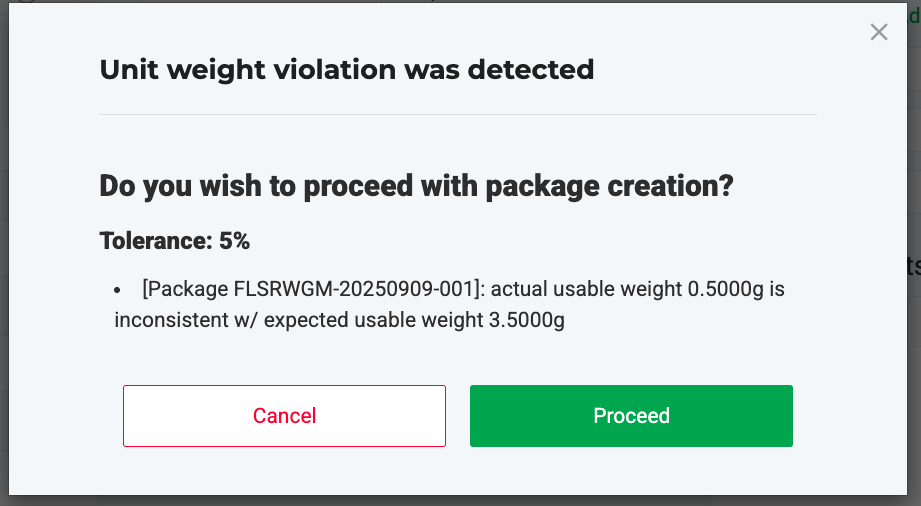
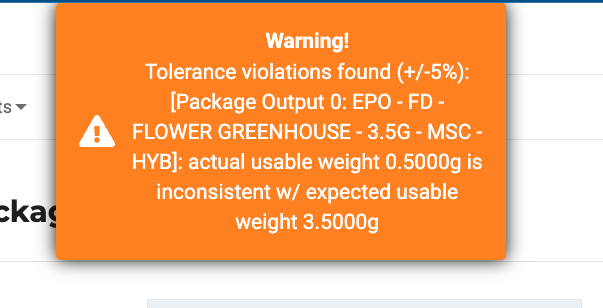
Flourish Software now helps you create End Product packages with the correct usable weight. During package creation, the system checks the usable weight reported to BioTrack to catch errors early and prevent compliance issues.
How
When creating packages of End Products in BioTrack Florida, Flourish now checks that the usable weight reported to BioTrack matches the unit weight of your output item. If there’s more than a 5% difference, you’ll see a warning before creation. You can adjust the weights or override to proceed, helping you catch errors early and ensure packages reflect the correct usable weight for compliance.
This validation applies across all package creation workflows:
- Package to Package
- Manufacturing Run
- Bill of Materials (BOM)
- Work Order
Examples of Validation messages
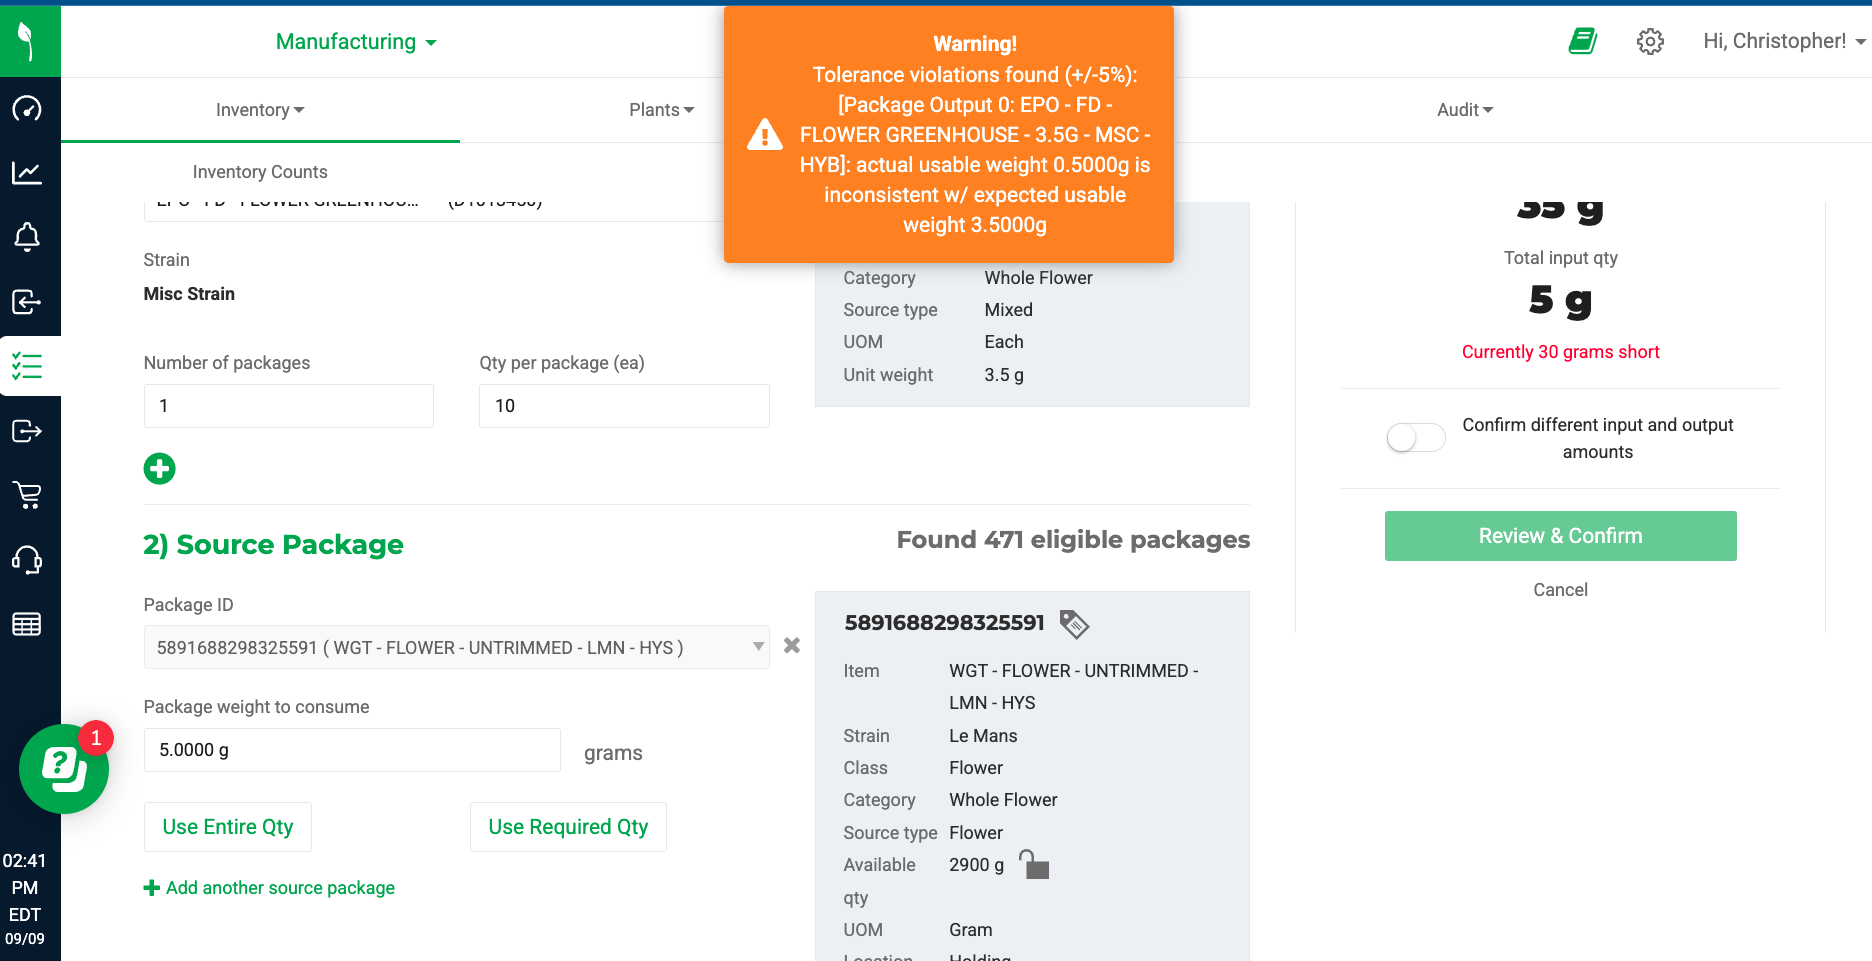 |
  |
Bulk Create Lab Samples
Creating lab samples in bulk saves time and helps maintain compliance.
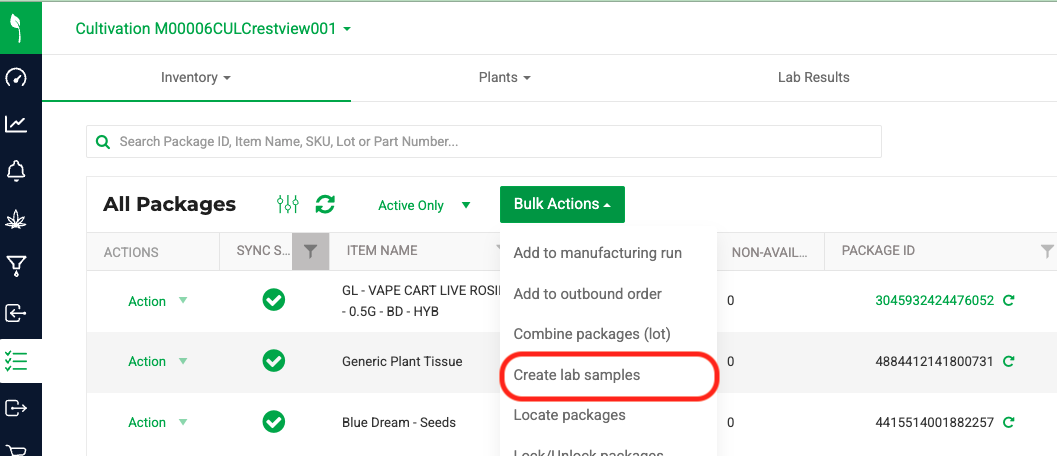
- Go to Inventory / All Packages.
- Click Bulk Actions > Create lab samples.
- Select a New Order or add to an existing Order (choose the lab for the order)
- Select the Destination (choose the lab for the order).
- Select the Type of Lab Sample – choose Final or R&D.
- Check the boxes next to the packages you want to use as source packages.
- For each package, enter the Quantity to split – this defines how much is split from the source onto a new barcode.
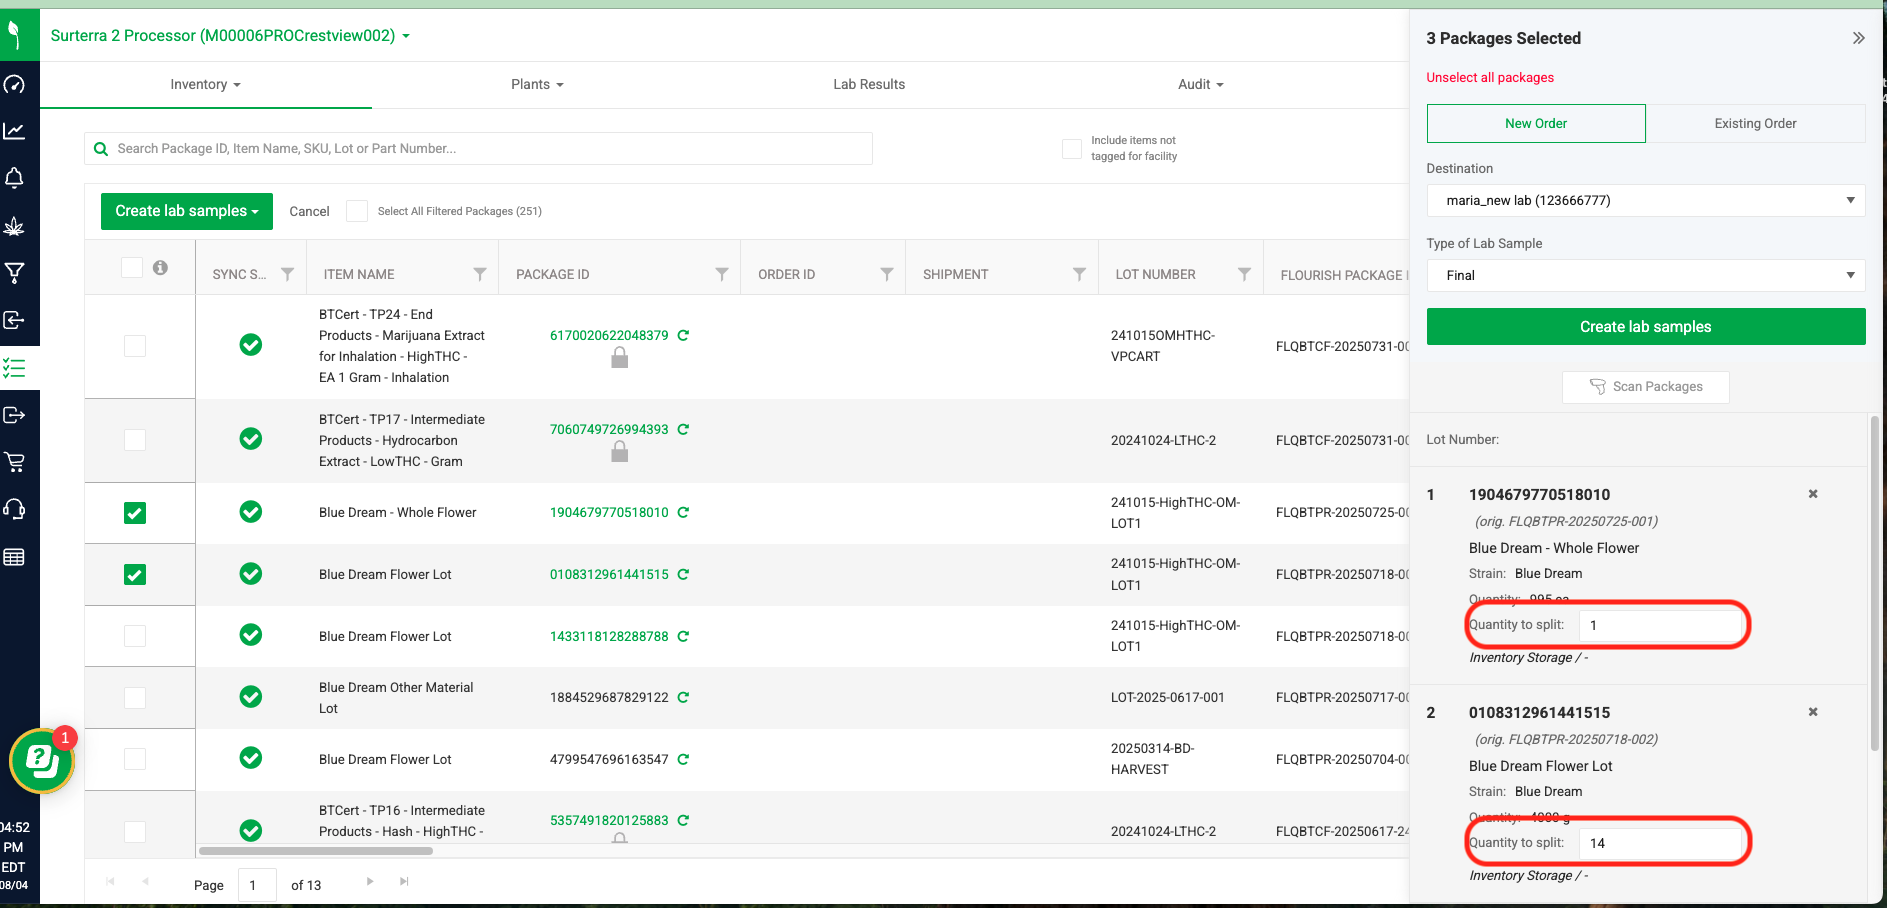
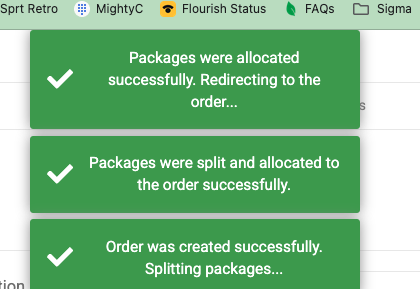
- Click Create Lab Samples. Flourish displays success messages and redirects you to the Order Details screen of the new outbound order.
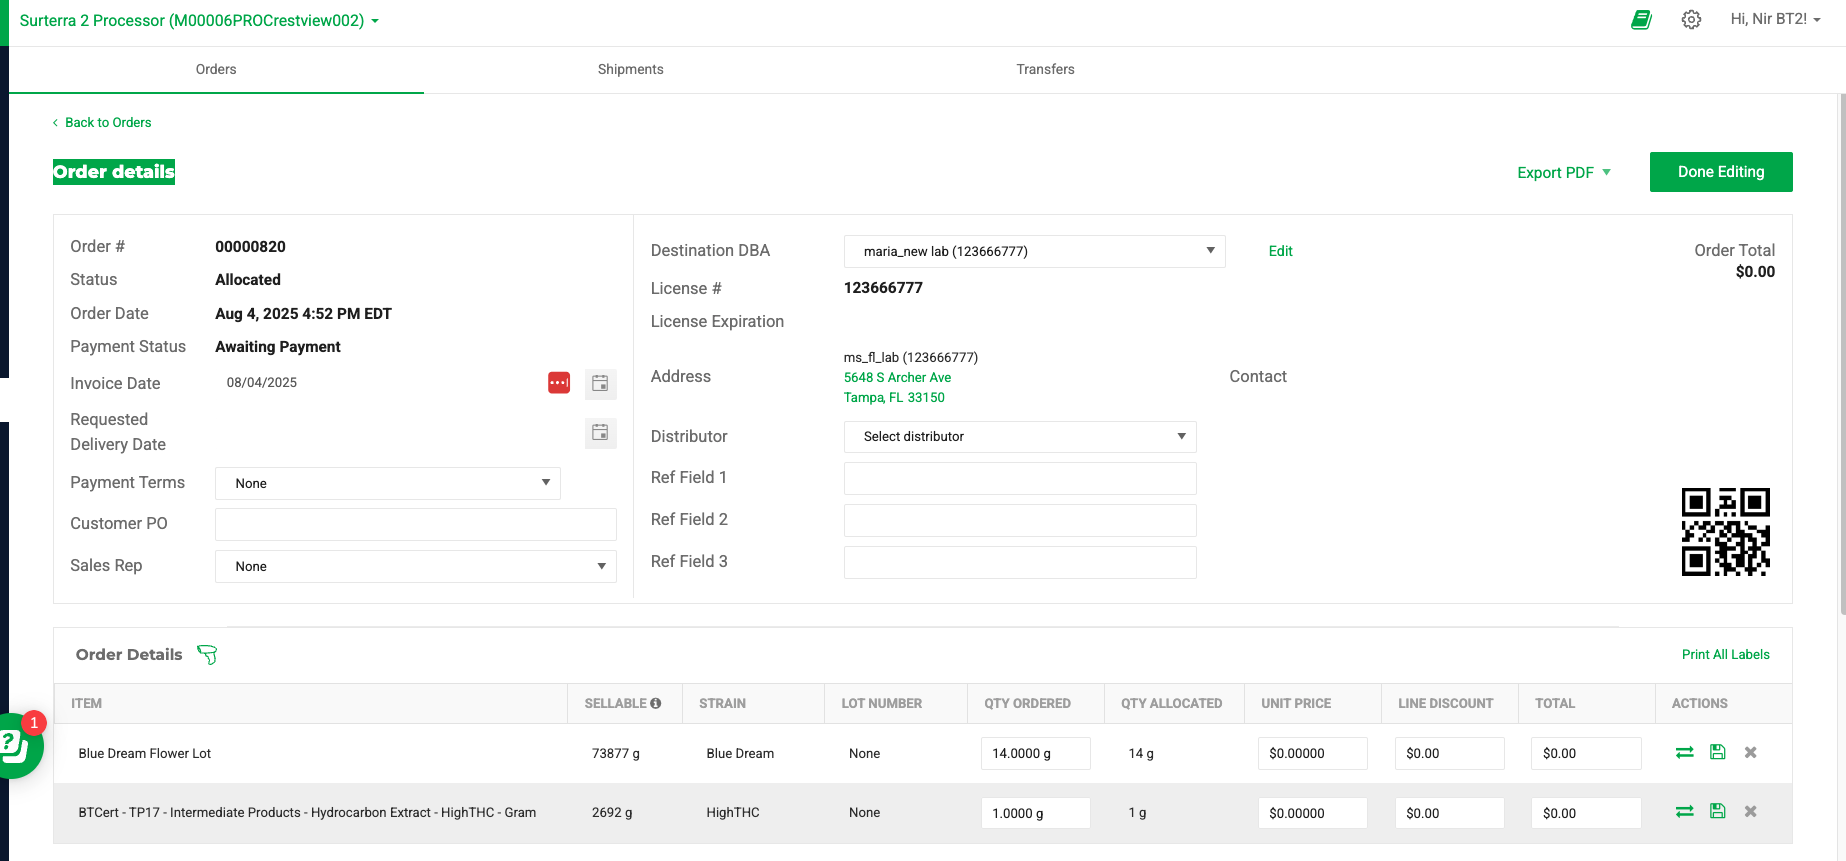
- Click Done Editing.
- Manifest the order to the lab for testing: See steps here.
How did we do?
Connecticut Manifesting in Flourish for BioTrack Clients
Connecticut BioTrack Category Conversions
