Set Up Your Flourish Buyer Portal (Sellers)
Create your first Buyer Portal menu, add your logo and legal documents, configure buyer email notifications, and publish your wholesale menu.
Set up your wholesale menu, branding, and buyer notifications. Once the menu is published, you can invite buyers.
Before you begin
- You need the Ecommerce permission. To approve orders, you also need Ecommerce Approvals. An administrator grants both on your Flourish role.
- Your items need e-commerce categories and active prices before they can be listed. See List Items on Your Buyer Portal Menu.
Step 1: Create your menu
- Go to Settings > Ecommerce. The Menus tab opens.
- Click Create New Menu.

- Under Menu type, select B2B Wholesale.
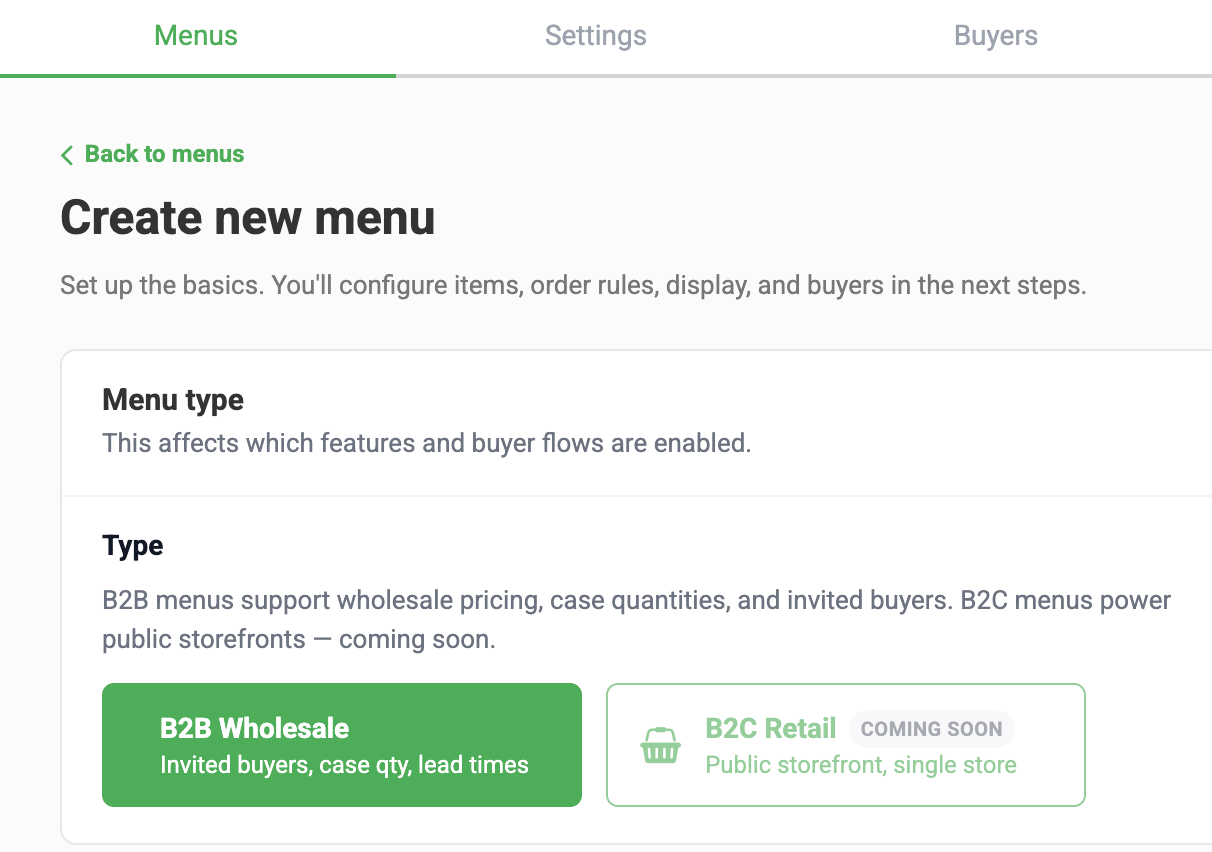
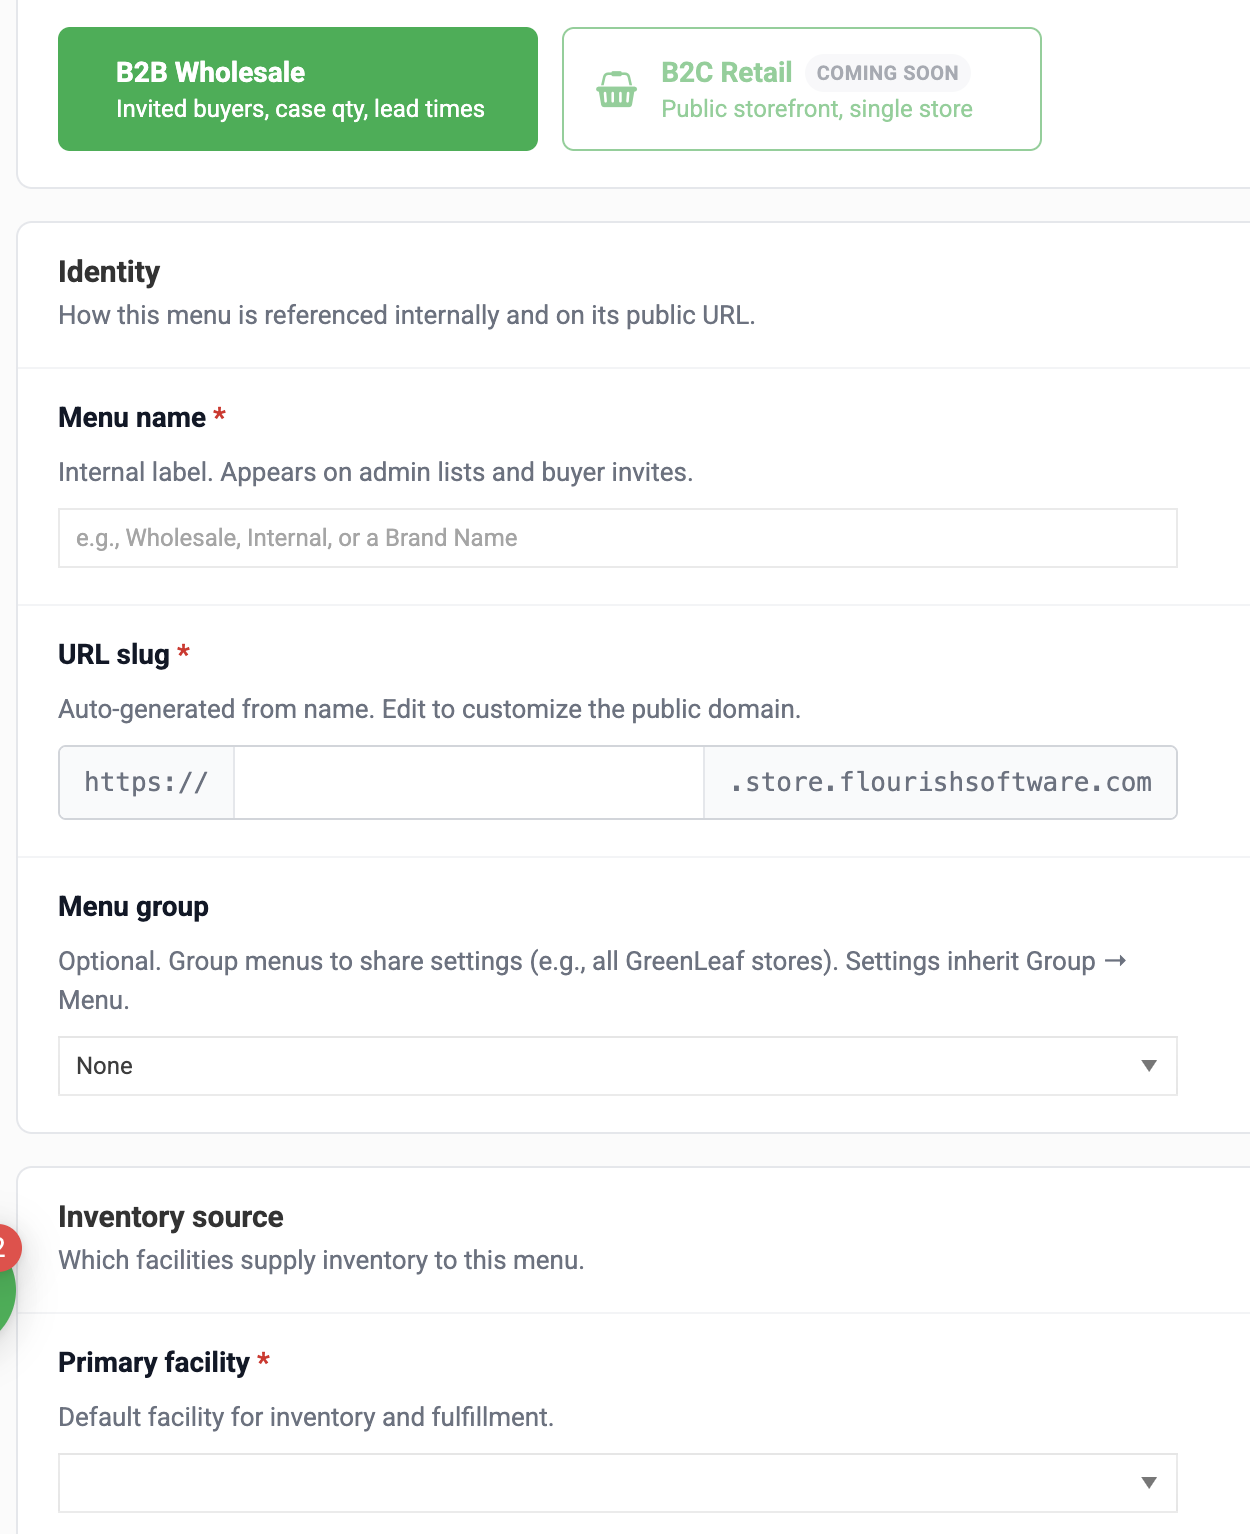
- Enter a Menu name. Buyers see this name in their invites.
- Review the URL slug. It sets your menu's web address, for example yourcompany.shop.flourishsoftware.com.
- Select the Primary facility whose inventory you are selling. To sell from more than one facility, add them under Additional facilities.
- Click Create menu. To keep working before buyers can see it, click Save as draft instead.
Step 2: Add your branding
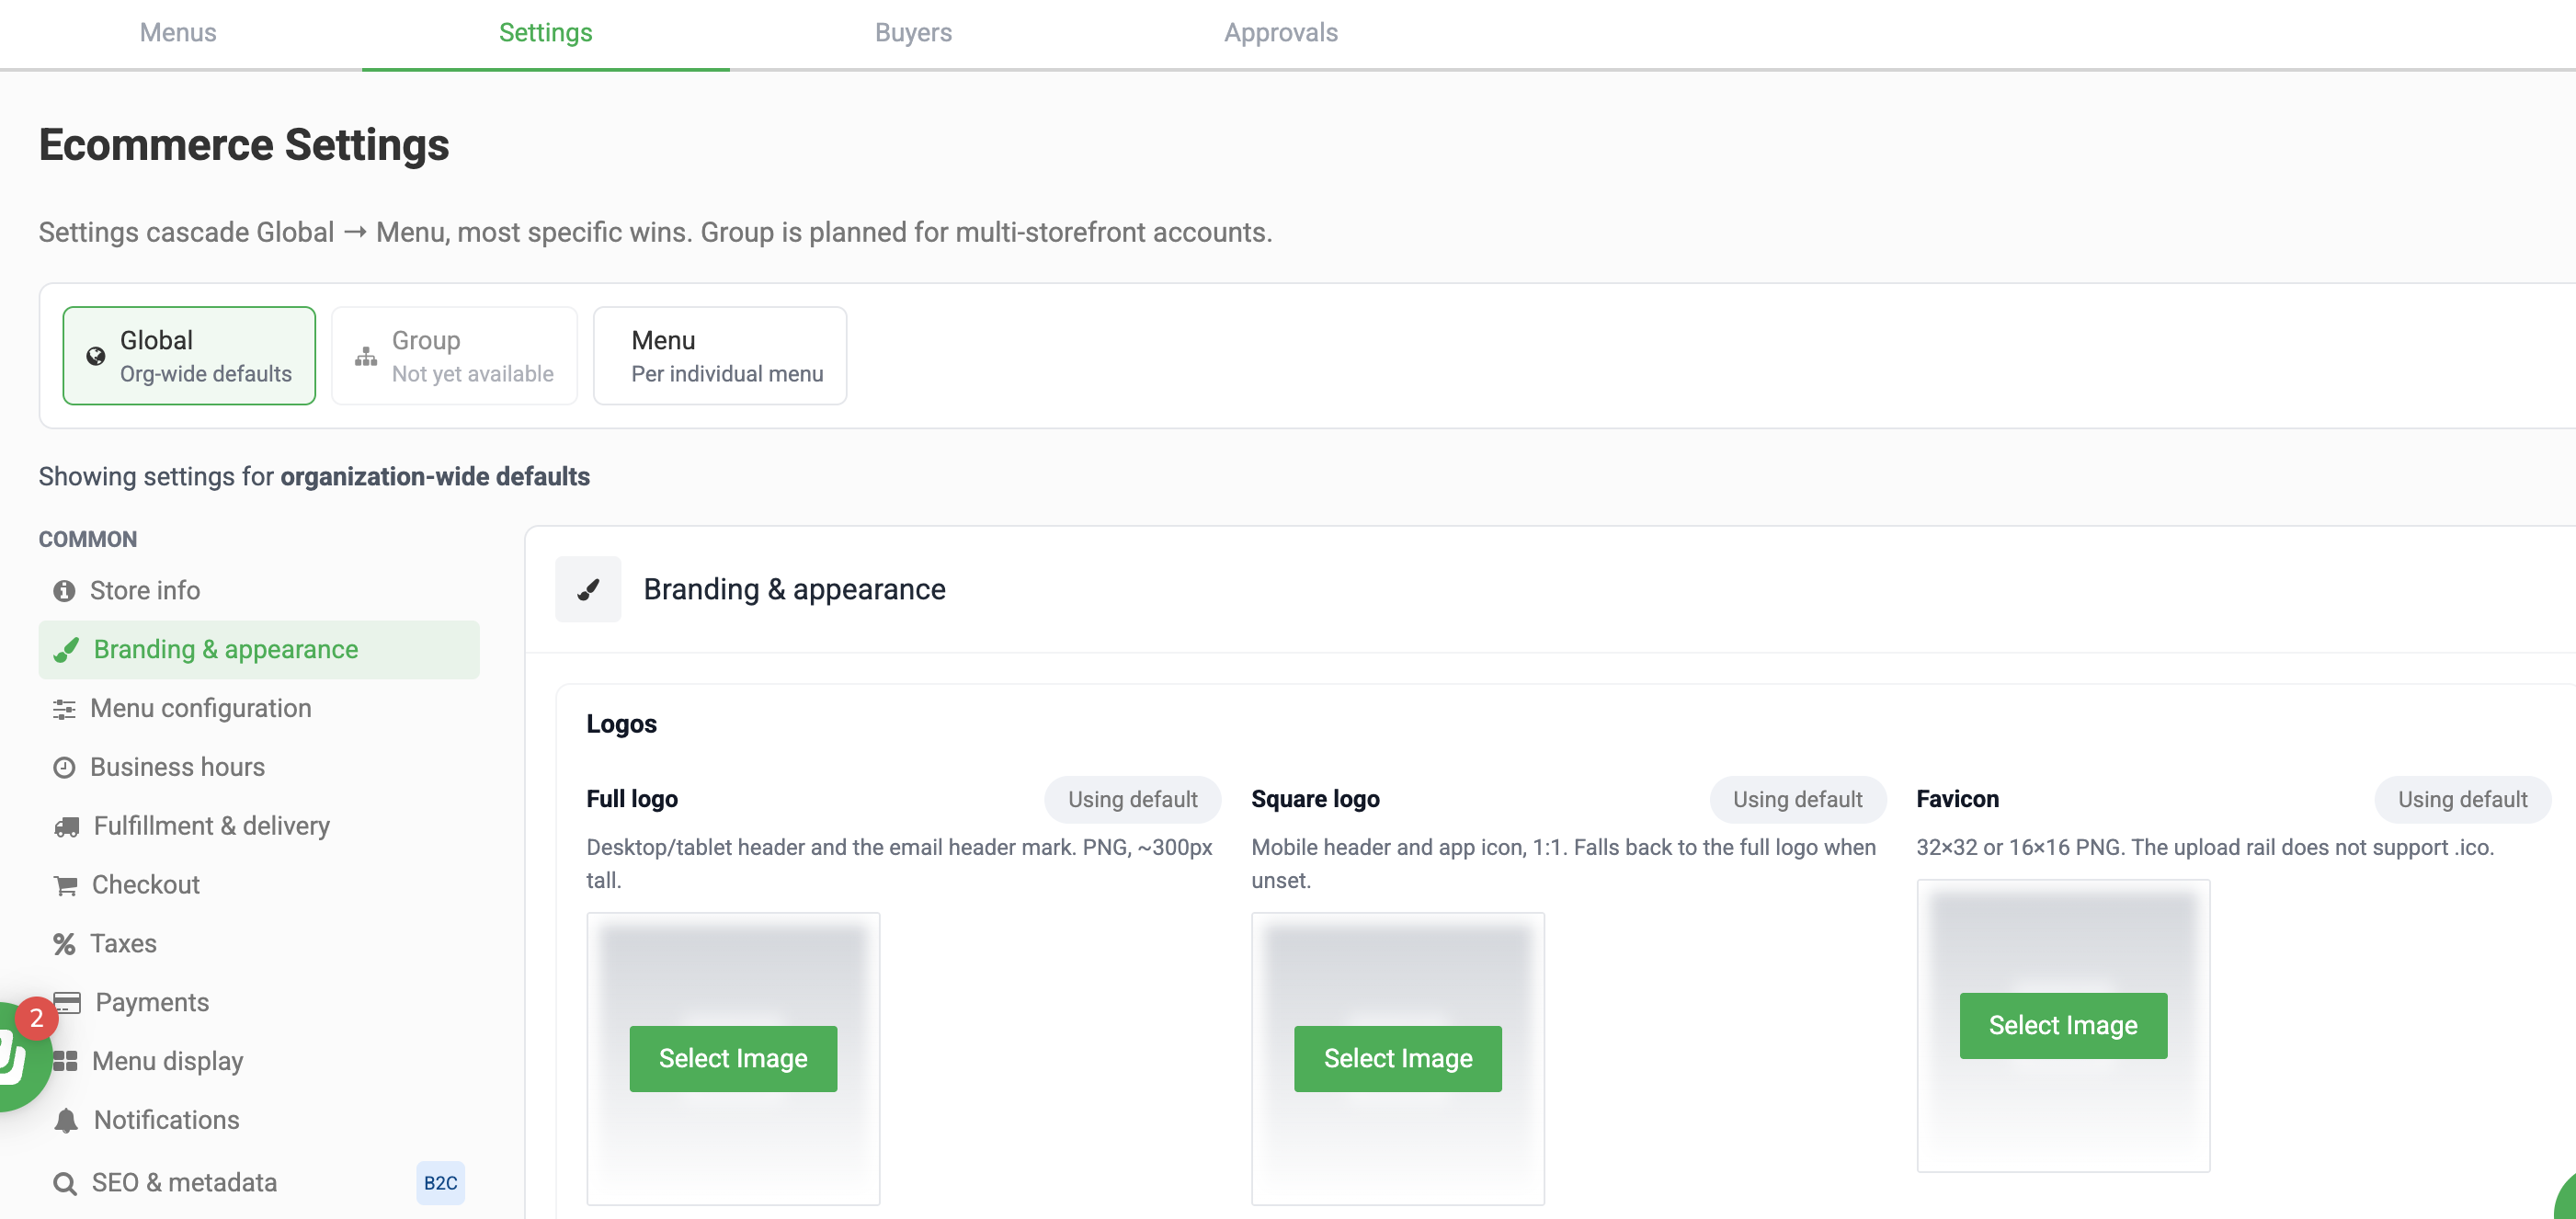
- Go to Settings > Ecommerce > Settings.
- Select Branding & appearance.
- Under Logos, upload a Full logo. It appears in the portal header and on buyer emails.
- Under Colors, set your Primary brand color. It is used on buyer emails.
- Click Save.
Step 3: Add store info and legal documents
- In Ecommerce Settings, change the scope to Menu and select your menu.
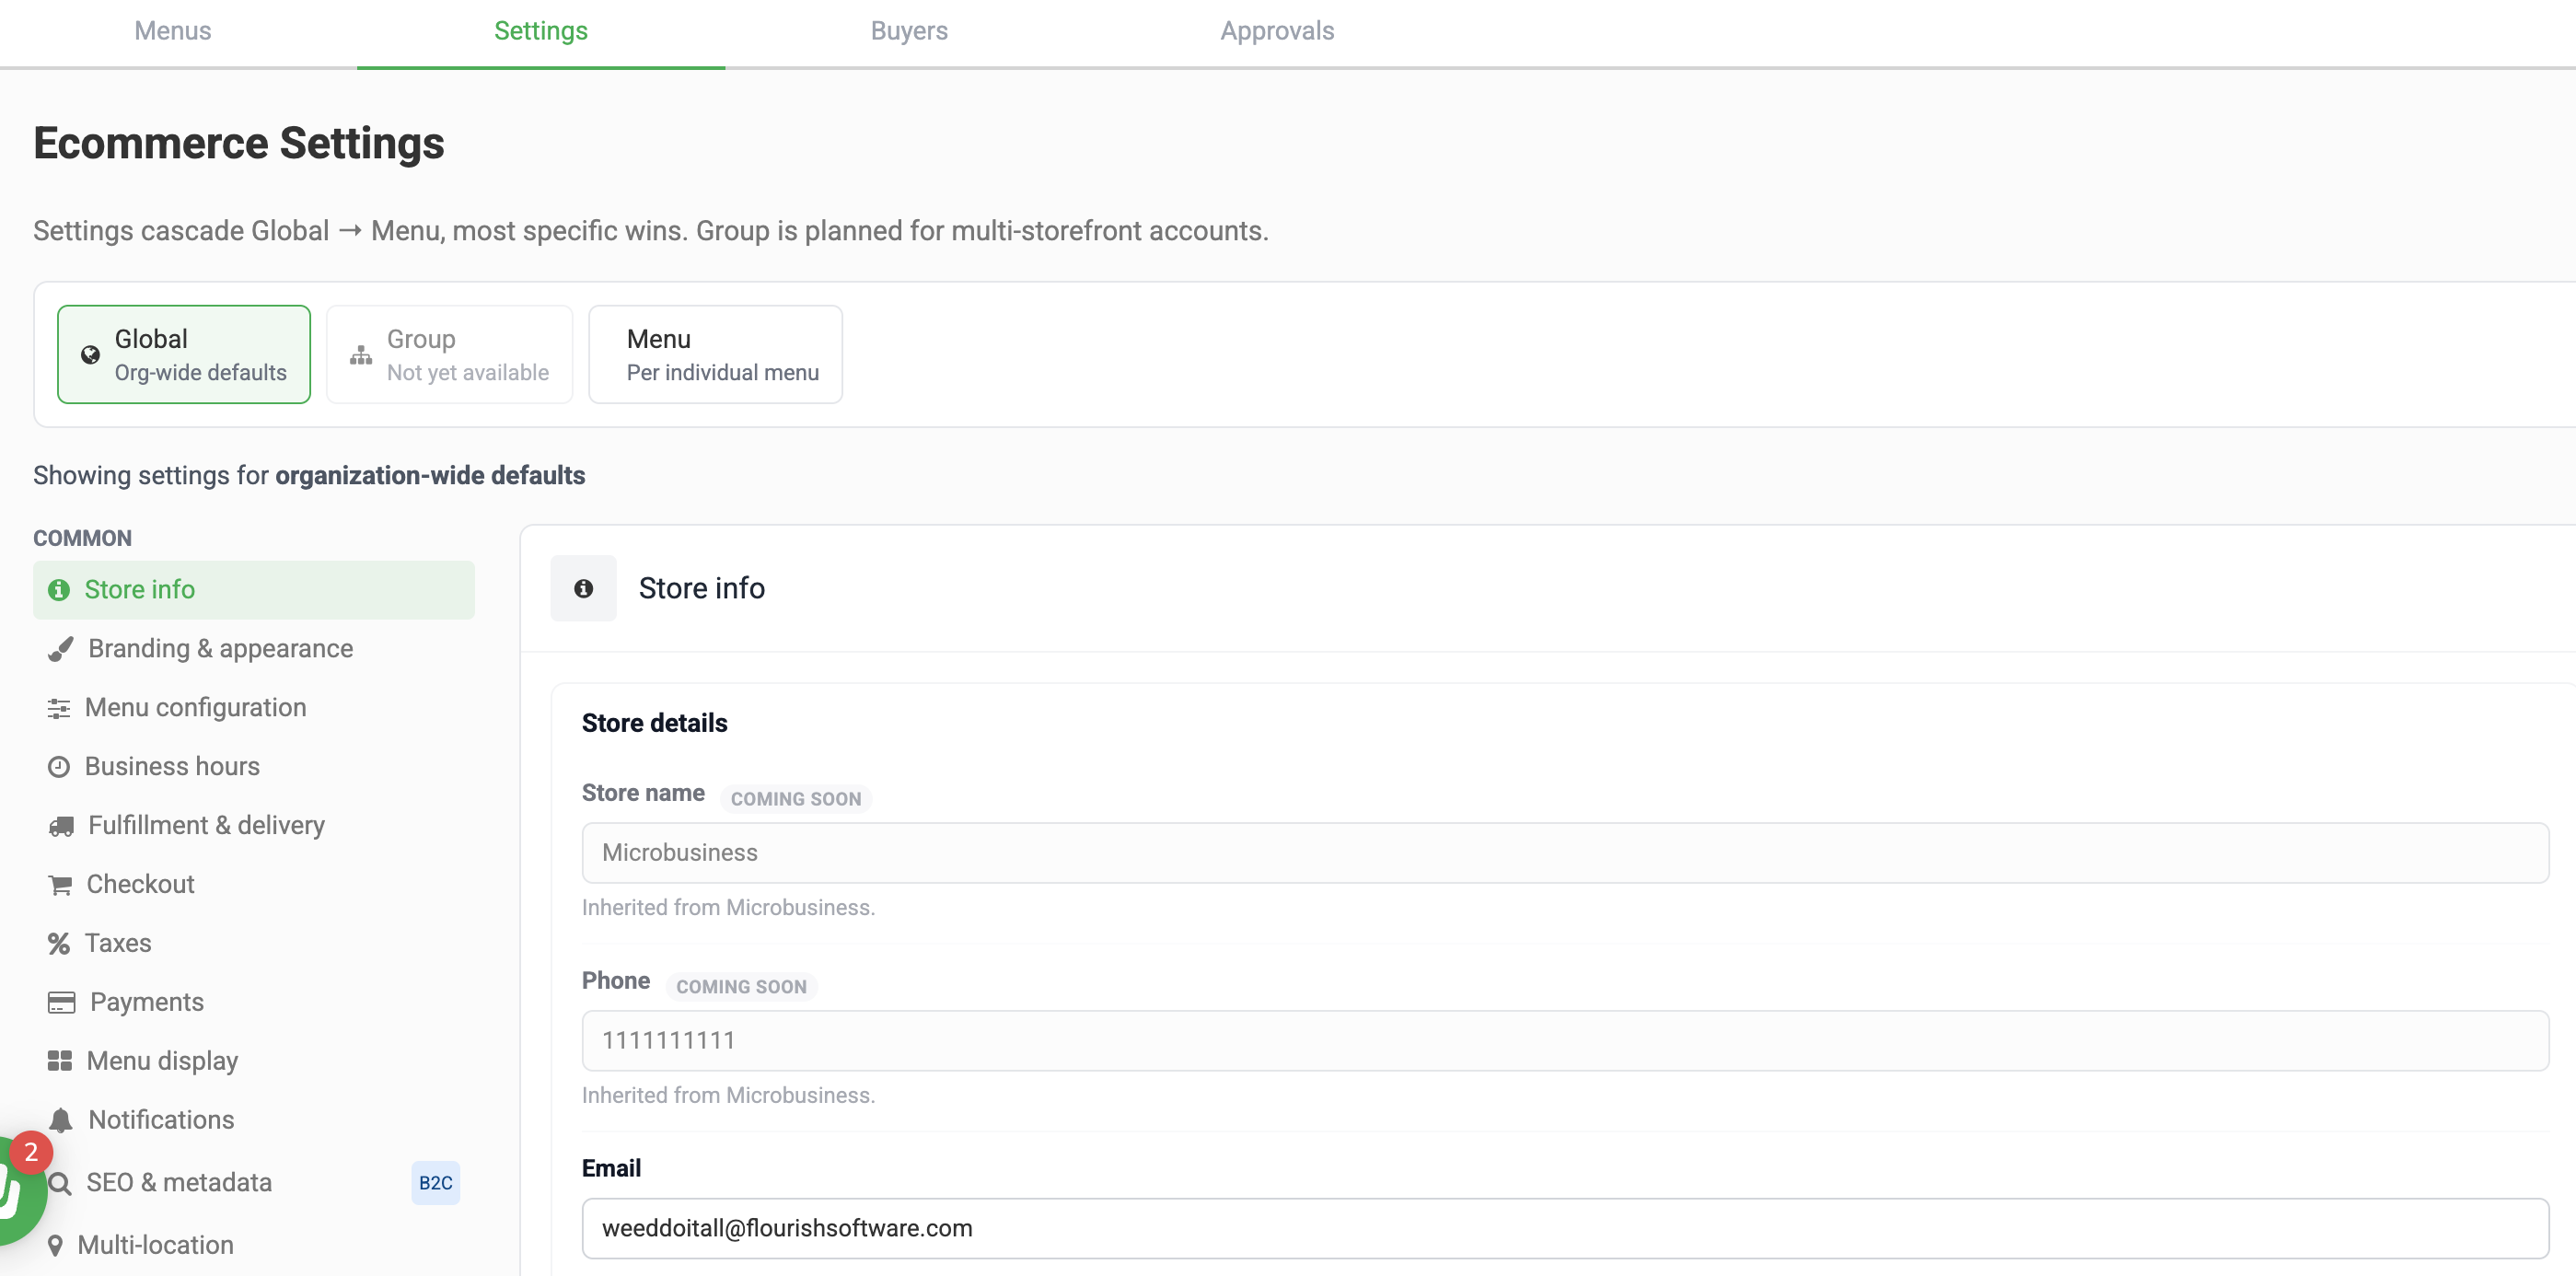
- Open Store info.
- Under Store details, enter a contact Email. If you don't set a separate reply-to address, buyer replies go here.
- Under Legal documents, add your Terms & Conditions, Privacy policy, and Return / refund policy as links (URL). Buyers see these links on their order confirmation and order email.
- Click Save.
Step 4: Set up buyer notifications
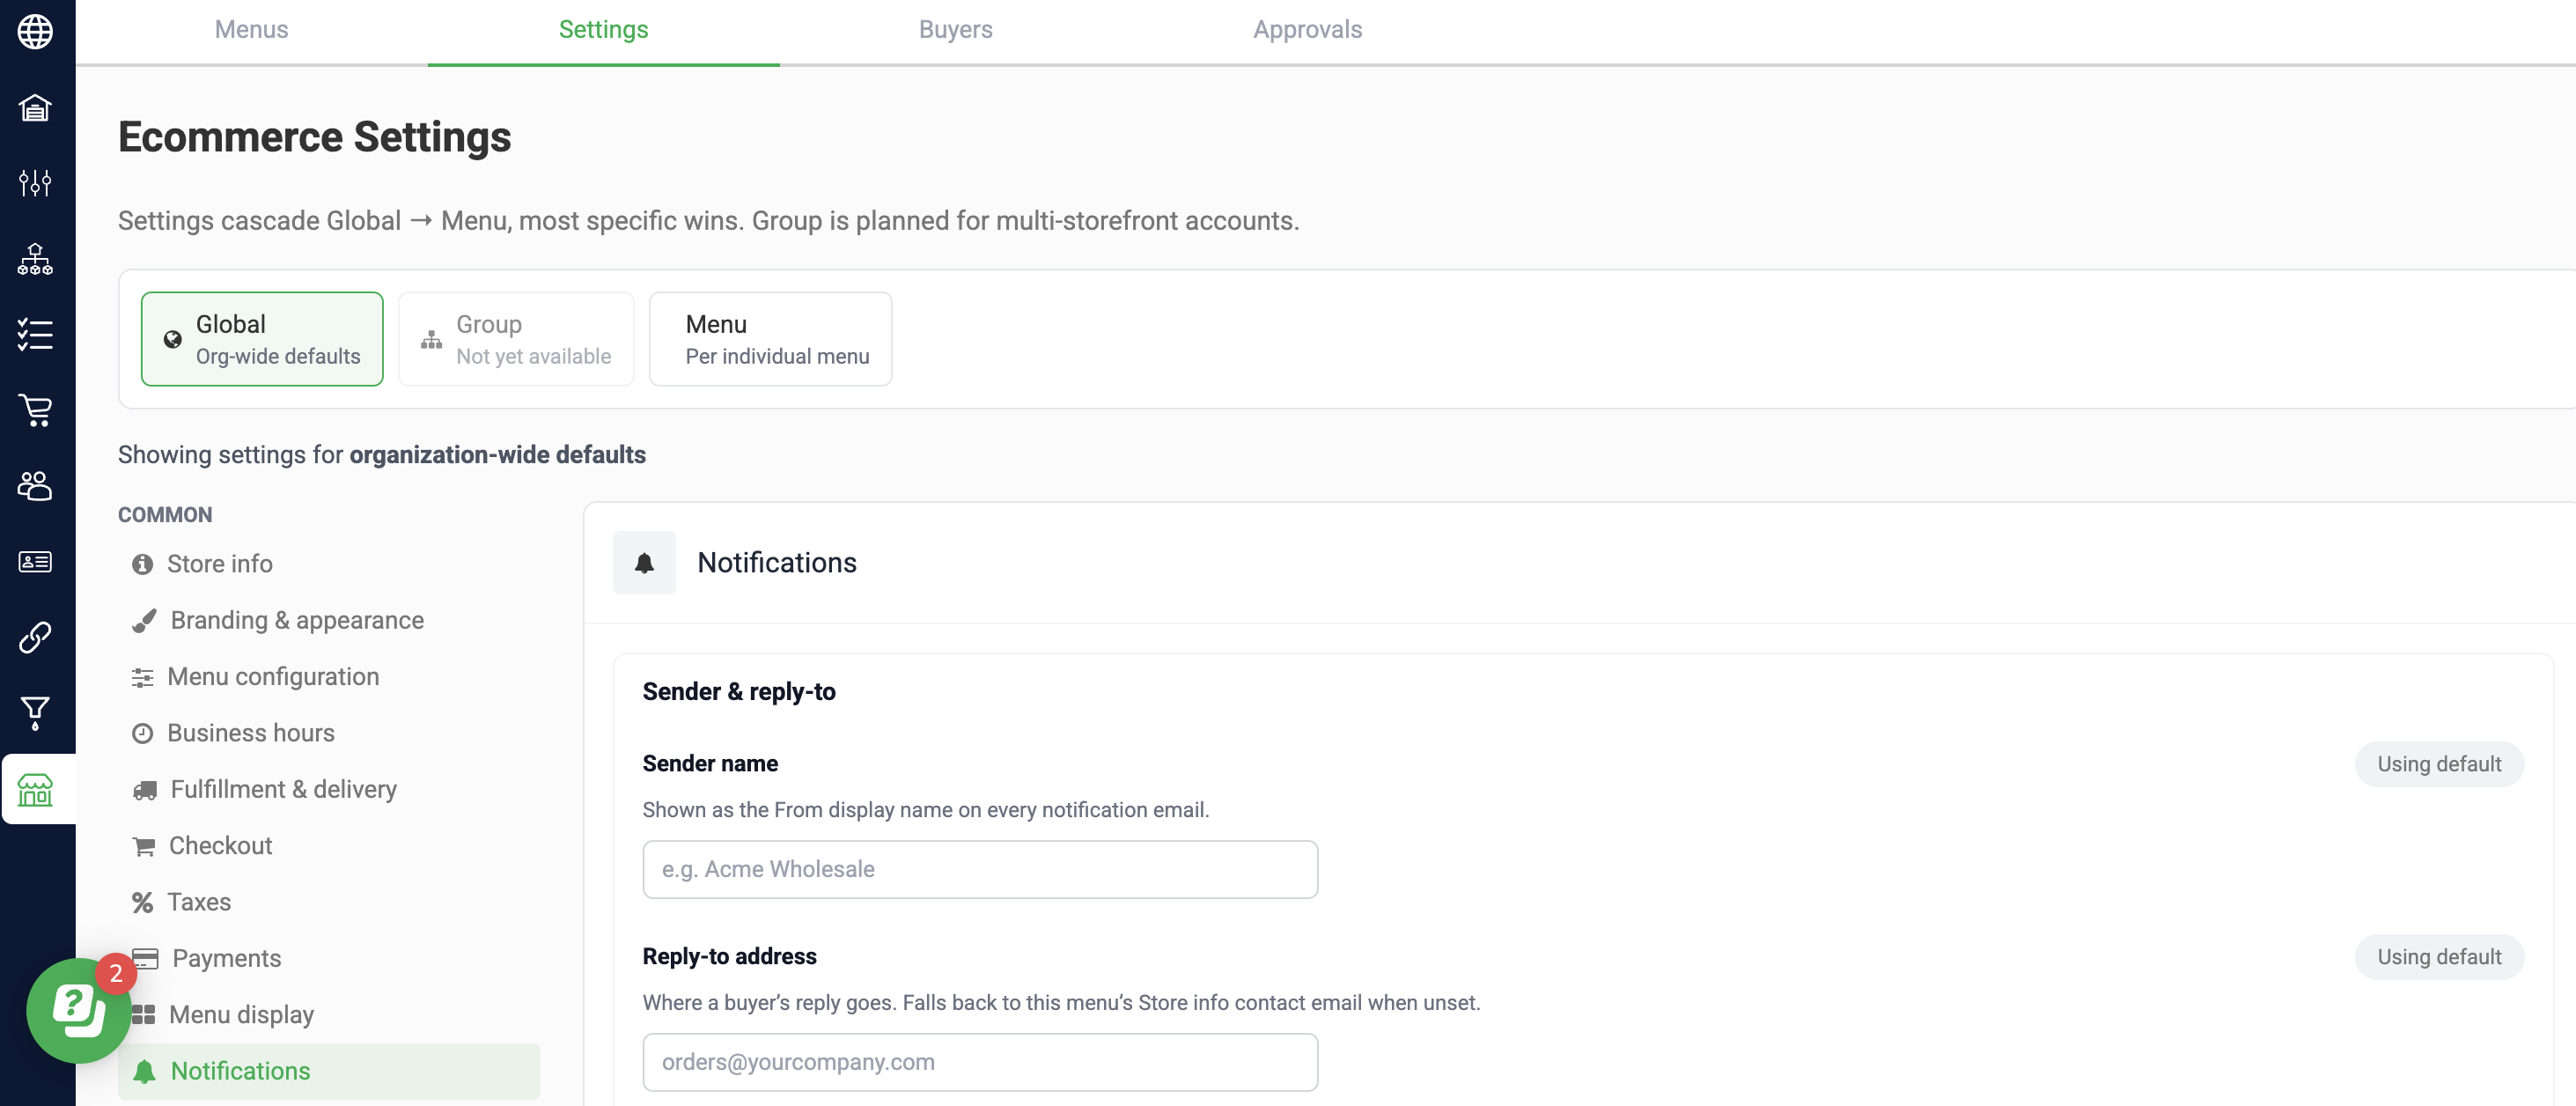
- In Ecommerce Settings, open Notifications.
- Under Sender & reply-to, enter a Sender name, a Reply-to address, and optional Footer text.
- With the Menu scope selected, use the Sent to the buyer toggles to choose which emails buyers receive:
- Order placed (confirmation)
- Order approved
- Order rejected
- Order shipped
- Payment received
- Payment failed
- Credit memo issued
- Click Save.
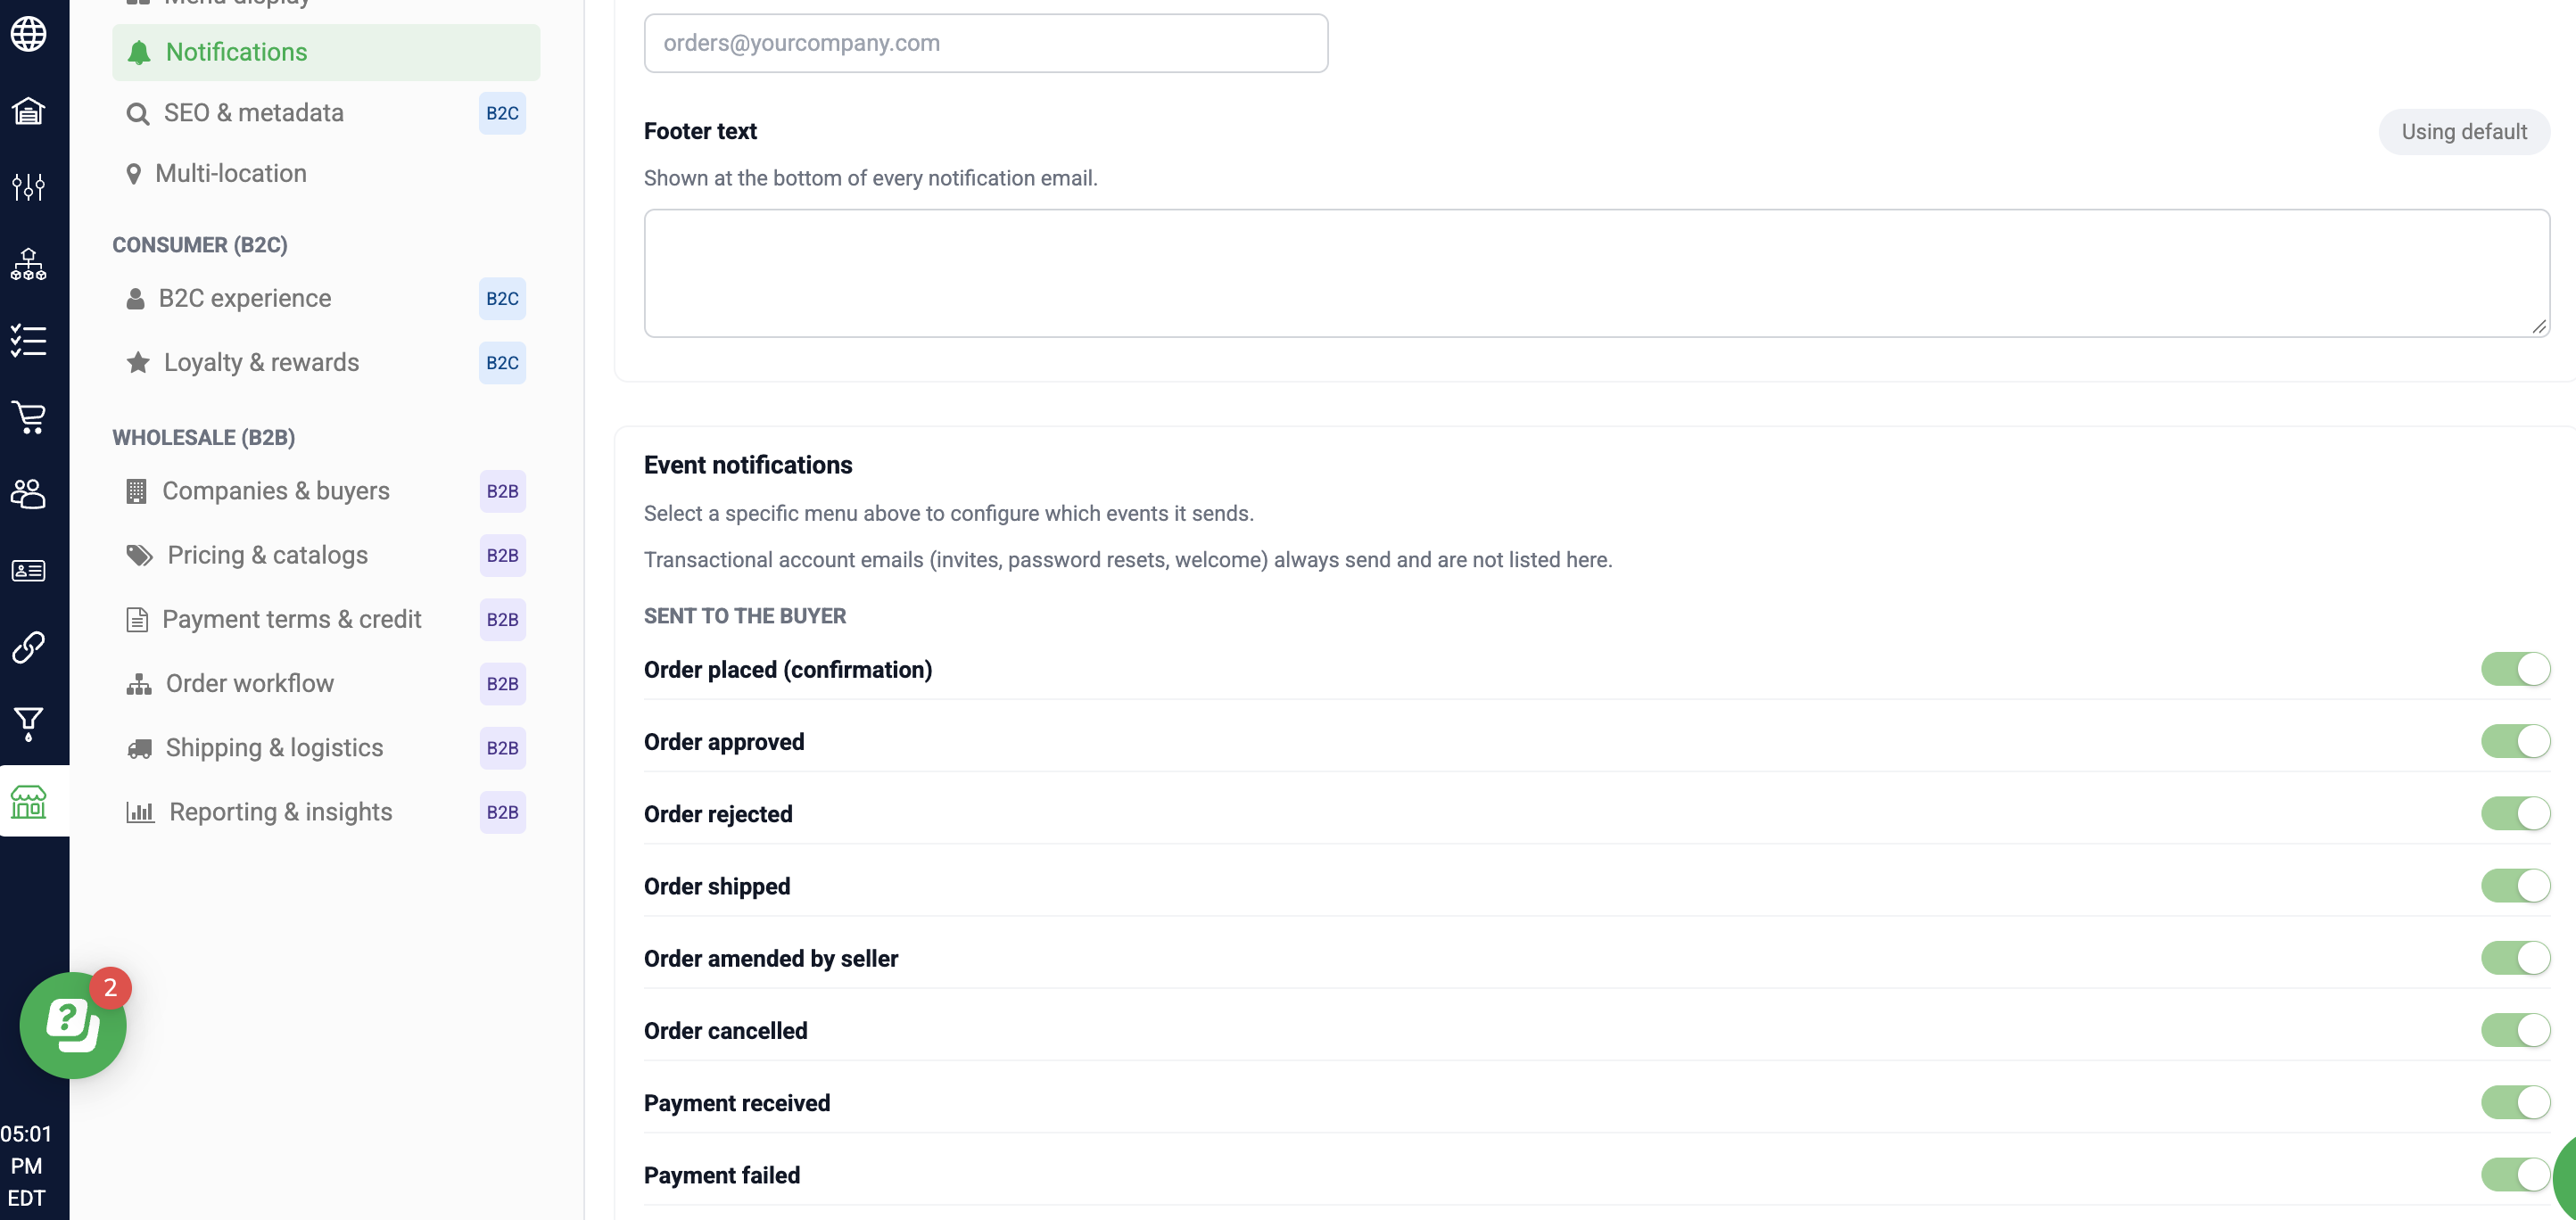
Invites, password resets, and welcome emails are always sent.
Step 5: Configure the menu and publish
- List items and set their availability. See List Items on Your Buyer Portal Menu.
- Set order rules and display options. See Configure Buyer Portal Menu Settings.
- Click Publish. The menu's Listed status changes from Draft to Listed.
- Invite your buyers. See Invite and Manage Buyer Portal Buyers.
Menus and items each have a Listed status. A listed menu is live for your invited buyers. Buyers see only the items you've also listed on that menu.
To share your menu's address, click Copy URL.
How did we do?
Flourish Buyer Portal Overview (B2B Wholesale)
Configure Buyer Portal Menu Settings (Sellers)
