Table of Contents
Retail Discount Grid and Settings
Find discounts in the Flourish retail discount grid, choose a discount type, and configure toggles, redemption limits, eligibility rules, and discount reasons.
Table of Contents
Purpose
Retail discounts can reduce an entire purchase, one order line, or a group of eligible items. You can target a discount by facility, item, customer, order, time, promo code, and redemption count. Use this article to find existing discounts and choose the right settings for a new one.
Open the Discount Grid
- Navigate to Manage Settings > Retail > Discounts.
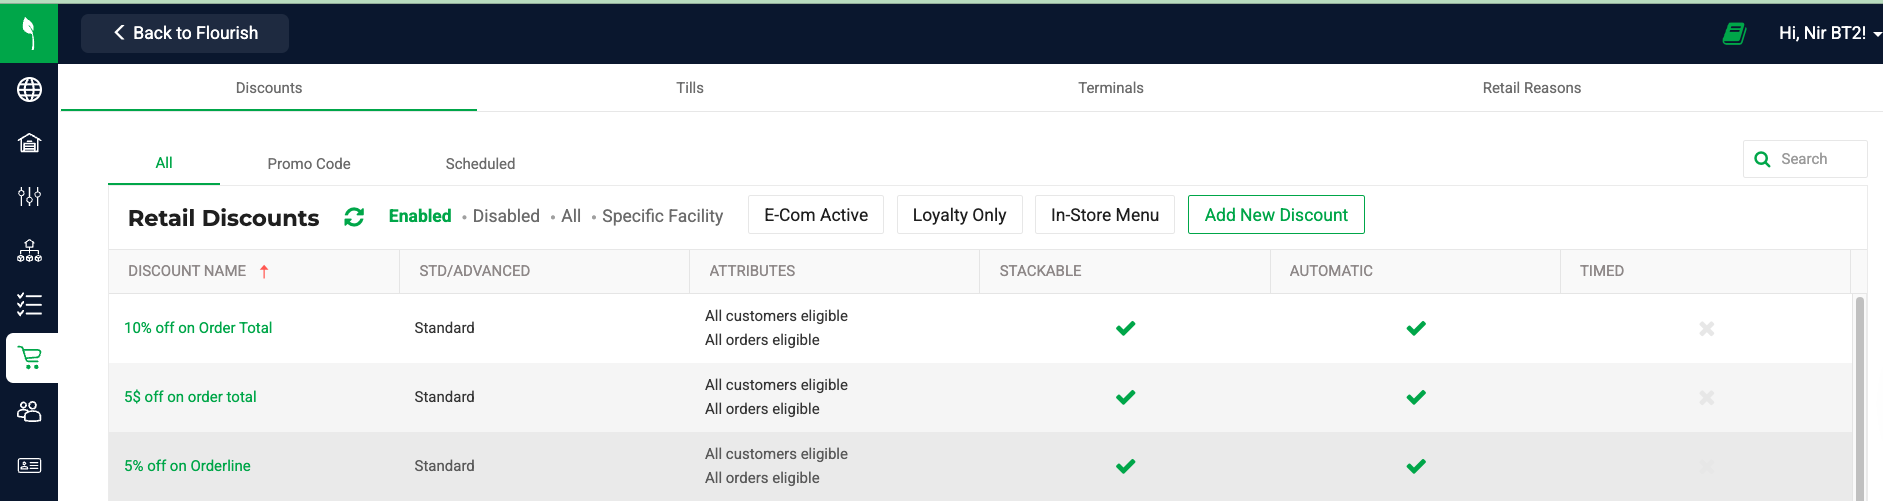
The grid shows active discounts by default. Search by name or export the list to Excel. Switch tabs to view promo codes or scheduled discounts. Check the grid before you create a discount so you don't duplicate one.
Use these filters:
- Enabled: active discounts (default).
- Disabled: disabled discounts.
- All: every discount.
- Specific Facility: discounts available at a retail or microbusiness facility.
- E-Com Active: discounts with E-commerce Eligible on.
- Loyalty Only: discounts with Loyalty Only on.
- In-Store Menu: discounts with On the in-store menu on.
Choose the Discount Type
- Standard: a dollar or percentage reduction on a purchase, an order line, or selected items.
- Advanced: the cart must meet one set of conditions before another item or group receives the deal. Use it for BOGO and bundle offers.
See Retail — Standard and Advanced Discounts.
Create a Discount
- Navigate to Manage Settings > Retail > Discounts.
- Click Add New Discount.
- Configure the discount using the settings below.
- Click Save.
For the full walkthrough, see Creating a Retail Discount. After you save, the discount is available to apply on the web and in the POS.
Discount Toggles

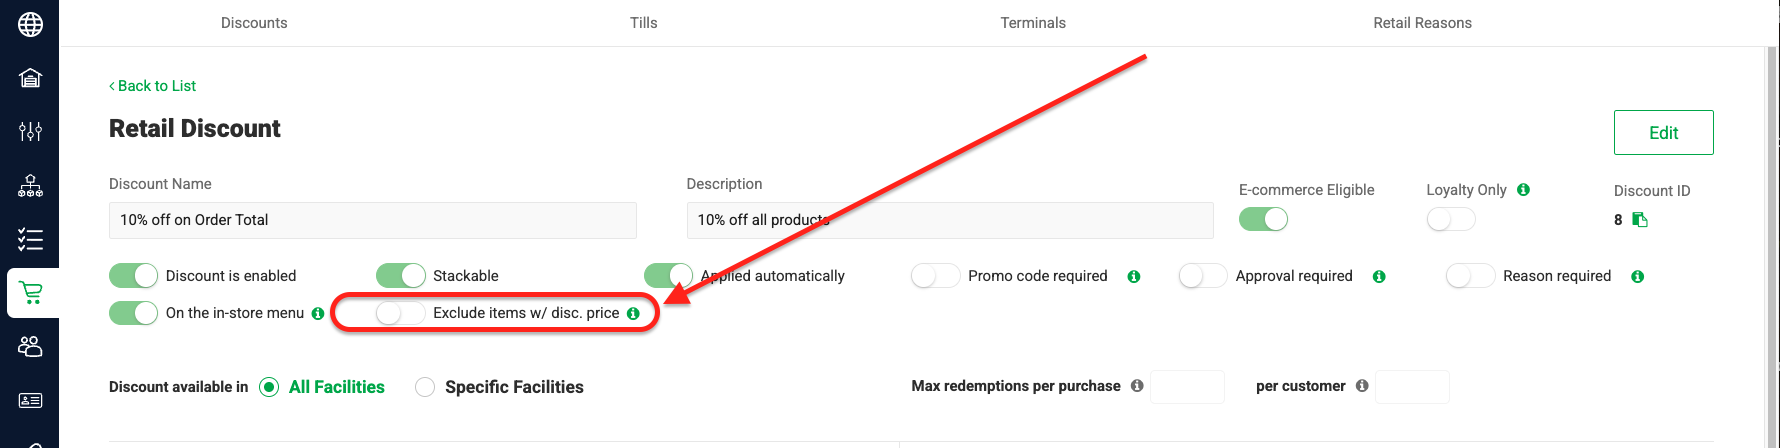
Toggles control whether a discount is active, how it's applied, and who can use it:
- Discount is active: makes the discount available.
- Applied Automatically: applies the discount to eligible carts without staff selecting it.
- Stackable: allows the discount to combine with other discounts.
- Promo Code Required: requires a promo code to apply the discount.
- Approval: requires manager PIN approval.
- Reason Required: requires staff to select a discount reason.
- E-commerce Eligible: makes the discount available to the Jane integration.
- Loyalty Only: limits the discount to loyalty redemptions. See Loyalty Only.
- On the in-store menu: shows the discount on the in-store menu.
- Exclude discounted items: skips items that already have a discounted price. See Inventory - Extended Item Price (EIP).
Loyalty Only
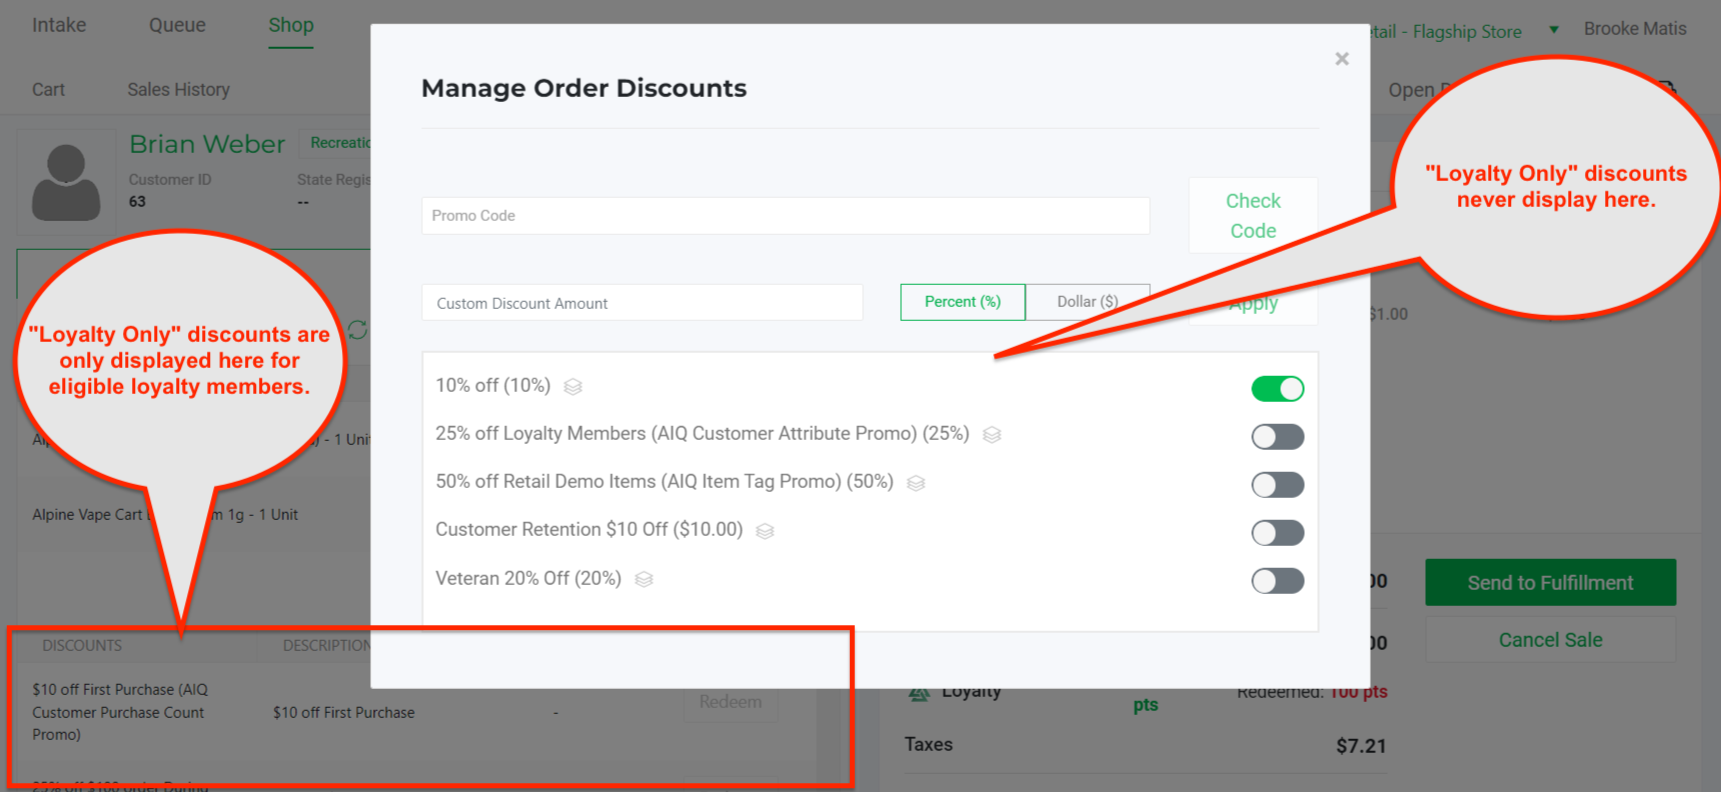
A Loyalty Only discount never appears in the POS Manage Order Discounts window. It appears on the Loyalty/Discounts tab only when the loyalty member is eligible to redeem it. See Alpine IQ: Creating & Mapping Discounts.
Redemption Limits
By default, Flourish doesn't limit how many times a customer can use a discount. Add limits as needed:
- Max redemptions per purchase: limits how many times the discount applies to one purchase. For example, this keeps a Buy 1, Get 1 Free deal from becoming Buy 10, Get 10 Free.
- Per customer: limits how many times one customer can redeem the discount across all purchases. Leave it blank for unlimited redemptions, subject to the per-purchase limit.

Limit Facility Eligibility
Limit a discount to specific facilities by facility name or facility tag.
- Select Specific Facilities.
- Click Facility or Tag.
- Search for the facility or tag.
- Select the result to add it to the Included or Excluded list.
- Click the toggle on a selection to exclude it.
- Click the eye icon
 to preview eligible and ineligible facilities.
Limit Item Eligibility
Some Standard discounts can be limited to specific items.
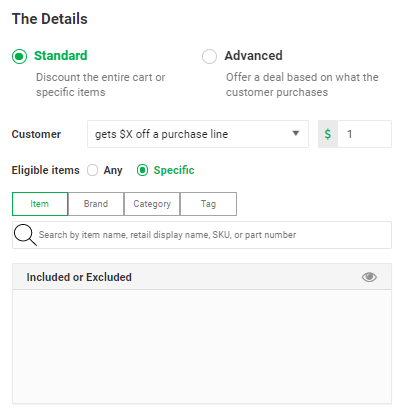
- Select Specific.
- Click Item, Brand, Category, or Tag.
- Search for and select the items to include or exclude.
- Click the eye icon
 to preview eligible and ineligible items.
Target Orders and Customers
- Order attributes target aspects of the order, such as in-store orders or a time of day. You can combine order attributes.
- Customer attributes target customers by group.
Customer groups aren't configurable. To request a new group, contact Flourish Support.
Add a Discount Reason
When Reason Required is on, staff must select a reason before applying the discount.
- Navigate to Manage Settings > Retail > Discounts.
- Click the Discount Reasons tab.
- Click Add New Discount Reason.
- Enter the reason in the Description field.
- Click Save.
You can also manage discount reasons in Manage Settings > Retail > Retail Reasons.
Test Before Broad Use
Preview eligible facilities and items, then test the discount with a representative customer and cart before you make it widely available.
Related Articles
How did we do?
Creating a Retail Discount
