Table of Contents
Allocate Cannabis Packages to Retail Orders (POS or Web)
Options to fulfill a retail order. Scan or manually allocate at POS or send to fulfillment to pack in the web app (back of house). Manually allocate or use a scanner to complete packing.
After you've built your customer's cart, you will need to associate cannabis packages with their order lines. This can be done in the POS or in the web application based on your workflow preferences and your state's requirements.
Fulfilling in the POS
If you're able to keep your product at the front of the house, you may want to fulfill your orders from the point of sale application. This allows you to add packages to your retail orders without leaving the POS, providing you with a seamless fulfillment process.
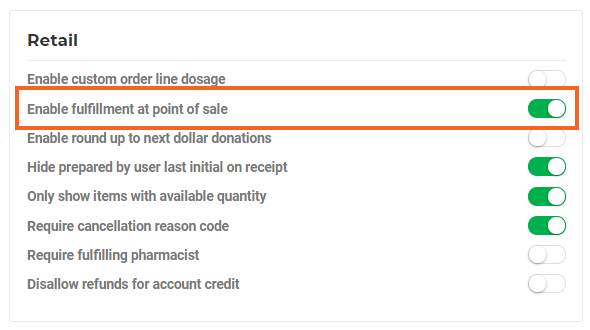
Prerequisites
You will need to enable the Admin > Configuration > Retail > Enable fulfillment at point of sale configuration before you can fulfill orders at the POS.
Now, you are ready to get to work!
- In the POS app, open your customer's order.
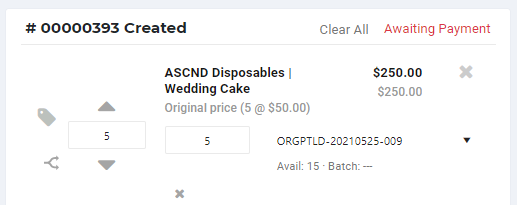
- Under the first order line, click the Add Package button.
- Click into the dropdown and select the correct package ID.
- Enter the number of allocated units in the field next to the package ID.
- Repeat steps 2 - 4 until all order lines are completely allocated.
- When you're done, click the Check Out button to complete the sale.
Fulfilling in the Web
If your state doesn't allow you to keep your product on the floor or if your workflow requires you to fulfill orders in the back of house, you can use the web application to fulfill your orders. You can allocate packages to orders either manually, or by scanning the barcode on the package label with a hand scanner
Pickup and delivery orders can be fulfilled in the web application before they can be checked out in the POS.
- From POS, send your order to fulfillment.
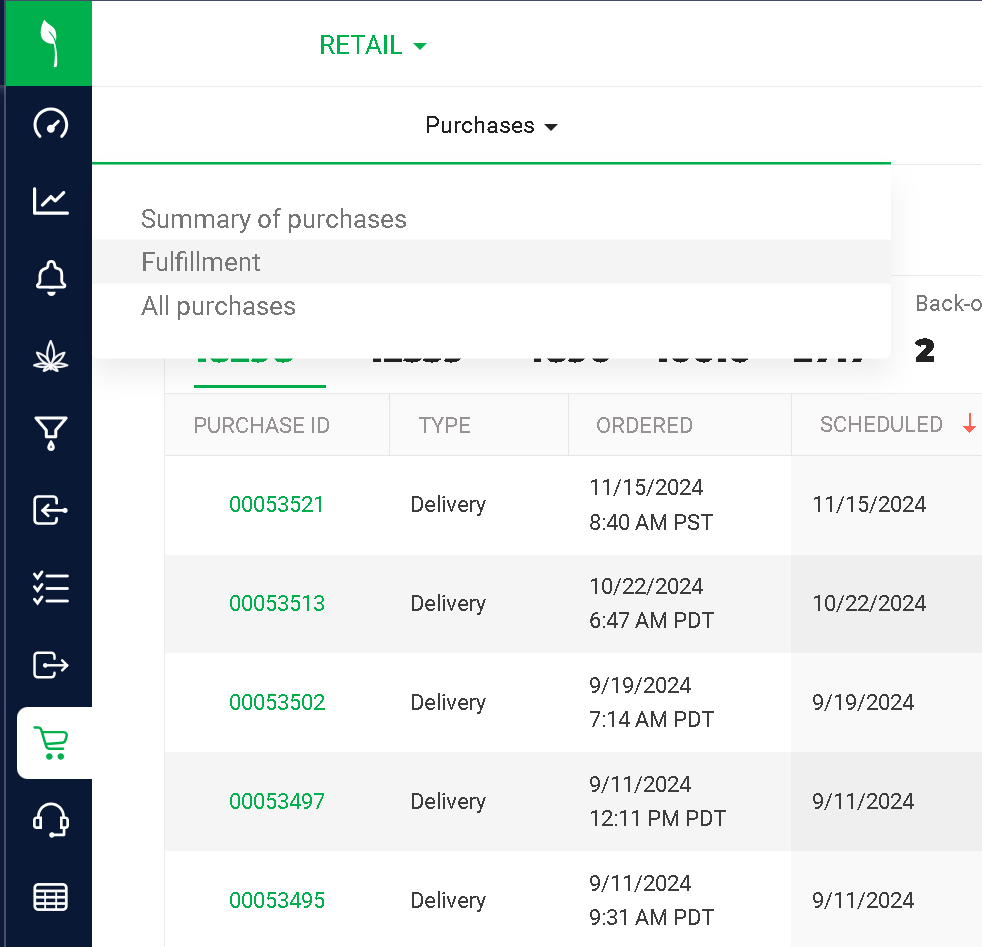
- In Flourish, navigate to Retail > Purchases > Fulfillment by Store.
- Locate the order you need to fulfill, then click the Purchase ID.
Use the Fulfillment Screen to select and pack an order and then return to the fulfillment queue after you complete the packing.
Allocating Packages Manually
If you don't have a hand scanner, allocating your packages manually is a simple alternative. Note: The order needs to be in Submitted status to be packed.
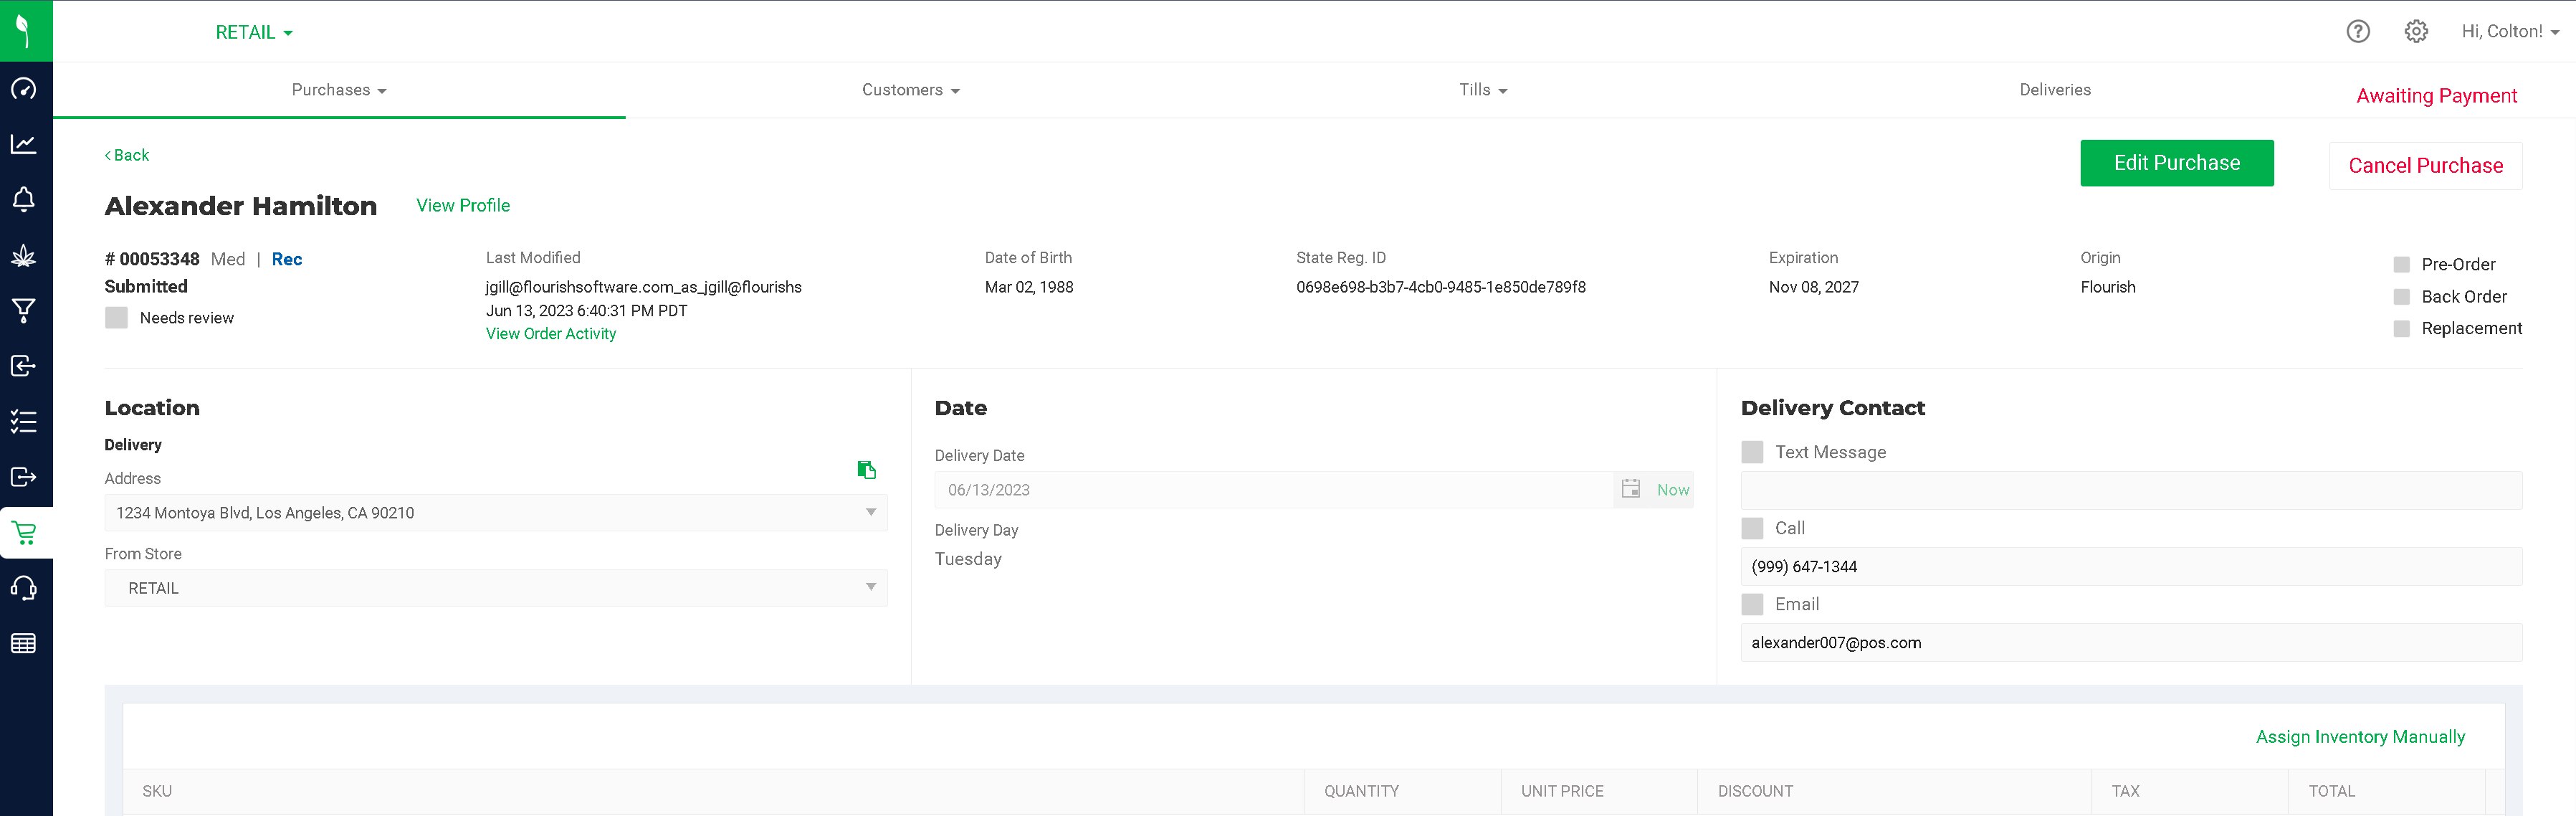
- With your order open, click on Assign Inventory Manually.
- Click the Add Package button underneath the item's name.
- Enter the quantity that you would like to allocate to that order line.
- Repeat steps 2 - 3 until all of your order lines are fulfilled.
- When you're done, click Save & Exit to save your allocated packages.
- Click the Send to Checkout button to send your order back to the POS.
Scanning Packages to Allocate
If you have a handheld scanner, you can scan the package IDs of the packages you'd like to allocate to fulfill your order.
- With your order open, begin scanning the package ID for your first order line. Each time you scan a package, one unit is allocated to your order line from the package you scanned. If you need to allocate two units from that package, scan the package ID twice.
- Continue scanning your packages until all of your order lines are fulfilled.
- When you're done, click the Send to Checkout button. If you're fulfilling a Pickup order, click the Complete Packing button.
How did we do?
Retail POS Refund a Purchase
POS Item Scanning Rules