Table of Contents
Receive Inbound Transfers and Purchase Orders (No Compliance System)
The inbound workflow is the following: Use Purchase Order to record what you need. Use Transfers to record and receive the inventory into the Purchase Orders.
General
The inbound workflow is the following:
- Use Purchase Orders to create a purchase for the inventory that you are buying.
- Use Transfers to record and receive the inventory against the Purchase Orders.
With the new ability to receive packages from transfers on Inbound Purchase Orders, you can now do the following:
- Receive packages from multiple transfers on one Inbound Purchase Order.
- Receive packages on a transfer on various Inbound Purchase Orders.
Prerequisites
If you want one user to be able to perform all the actions below, the User Role must have the following permissions toggled 'On' for the user role:
- Access to Transfers.
- Create inbound transfers.
- Receive inventory on inbound transfers.
- Assign inventory on inbound transfers to PO.
To do that:
- Click
 Settings.
 - Select User Roles.
- Make sure to select the facility you need.
- Click the
 icon to CONFIGURE.
 - Locate the Inbound Card.
- Ensure the toggle for View and Update in ON for Transfers.
- Next to the Transfers line on the Inbound Card, click
 to configure the Actions for the Inbound Transfers modal.
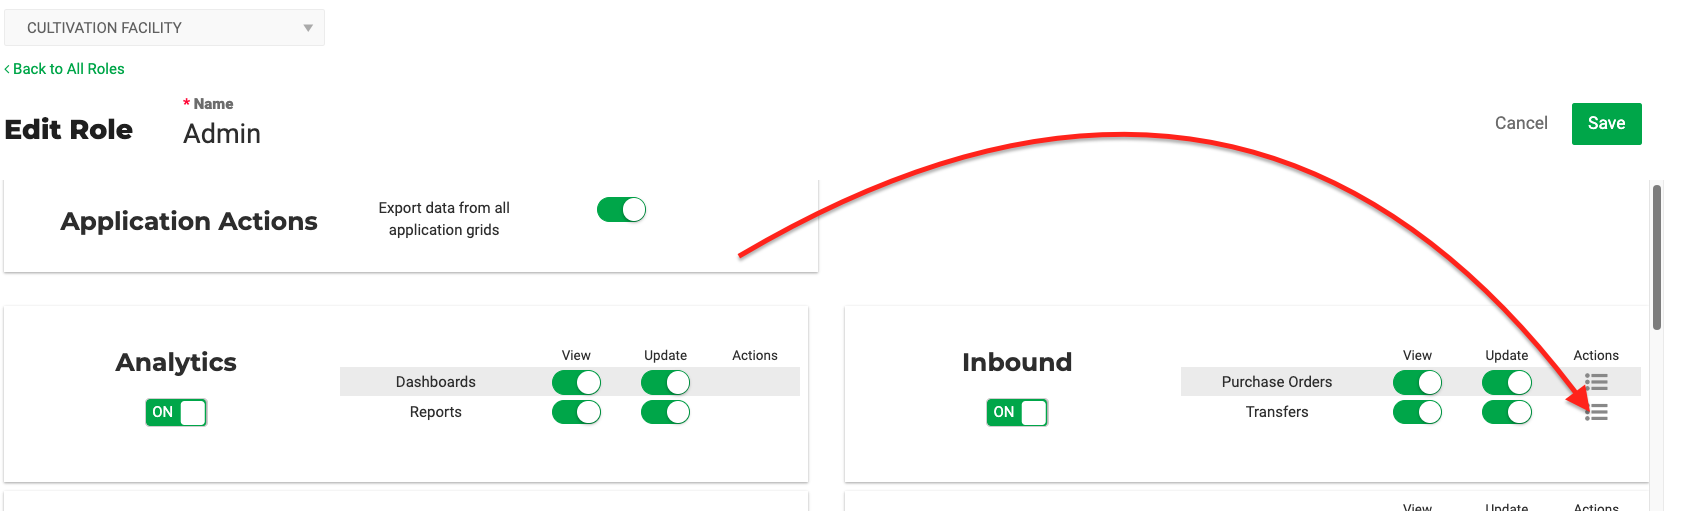
- Toggle 'On' The following:
- Assign inventory on inbound transfers to PO
- Create inbound transfers
- Receive inventory on inbound transfers

- Close the modal.
- Click Save.
Create a Purchase Order
Video
Create Inbound Transfers
- Go to Inbound.
- Click Transfers.
- Click
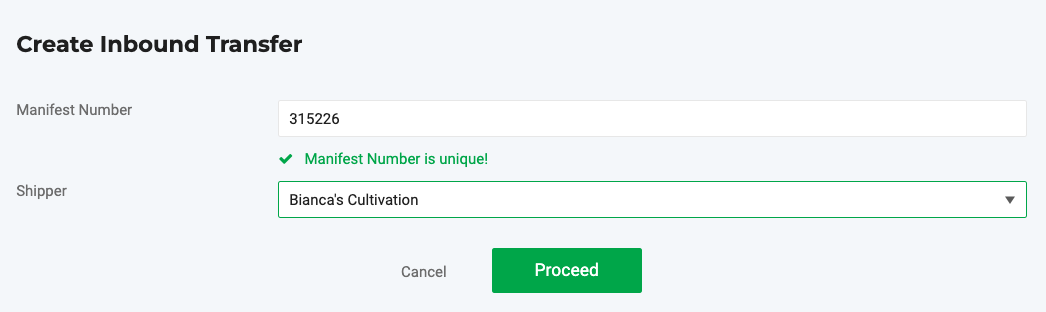
 To enter the "Create Inbound Transfer" screen:
 - Type the Manifest Number.
- Select the Shipper.
- Click
 .
.
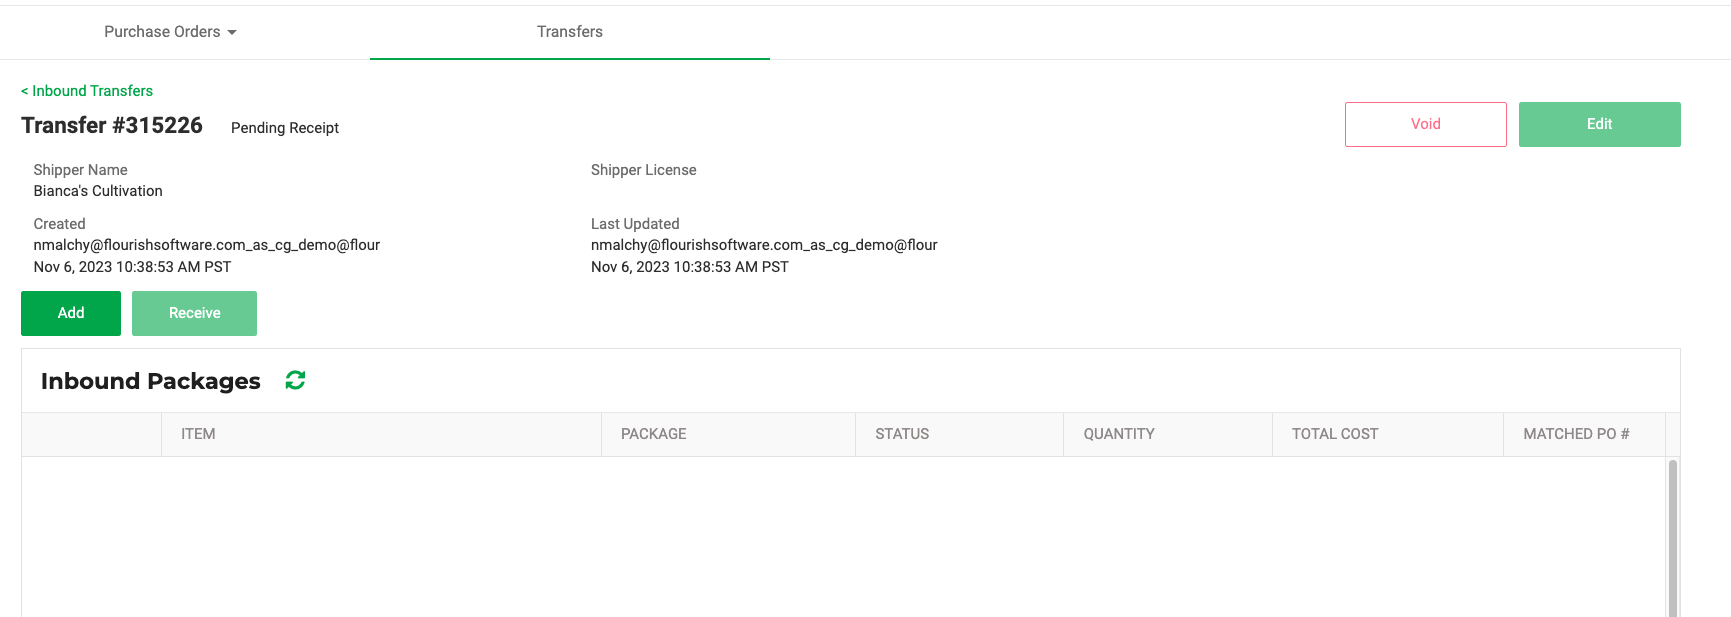
- Flourish creates a new Inbound Transfer:
Video
Record The Transfer Inventory
In this step, you record the inventory on the transfer. You have yet to receive it.
- Click Add.
- Select the item.
- Type or scan the package ID.
- Type the LOT.
- Type the QUANTITY.
- Adjust the TOTAL COST.
- Click the √ to save the line.
- Click the red X to remove the line.
Adding Non-Cannabis Items to a Transfer
The item selector includes both cannabis and non-cannabis items. Non-cannabis items behave differently from cannabis items in the following ways:
- Package ID — The Package ID field is not populated when you select a non-cannabis item. You do not need to enter a package ID for non-cannabis lines.
- Strain — The Strain field is not populated when you select a non-cannabis item.
- Lot Number — The Lot Number field is optional for non-cannabis items. If your facility is configured to auto-generate non-cannabis lot numbers, Flourish populates the field automatically when you leave it blank. Contact your administrator to enable this configuration.
- Cost — The transfer line uses the default item cost. You can enter a different Total Cost at any time, including $0.00.
To add a non-cannabis item to a transfer:
- Open the inbound transfer.
- Click Add.
- Select a non-cannabis item from the item selector.
- Enter the Lot Number, or leave it blank if your facility auto-generates lot numbers.
- Enter the Quantity.
- Adjust the Total Cost if needed.
- Click the checkmark to save the line.
Void
To Void is to remove lines from the transfer
You can do it in several ways:
A single line:
- Click the red X to remove the line
- Click to confirm.
Multiple lines:
- Select the lines you want to remove by checking the boxes next to them
- Click the Void Button on the top right to void (remove) them.
- Click to confirm.
Void the whole transfer:
- Click the Void Button on the top right to void (remove) the whole transfer.
- Click to confirm. The transfer is now Voided.
Video
Receive Inventory to PO
- Go to Inbound.
- Click Transfers.
- Click on the MANIFEST number.
- Check a box or more next to the transfer lines.
- Click Receive.
- Select the Purchase Order to receive. You can Select No PO to receive the package to your inventory without associating it with a Purchase Order.
- Select the PO ITEM to receive.
- Select the Area
- Select the Location
- Click Assign & Receive
- Click Print to print Package labels.
- Update the Purchase Order if you need
Video Basic Receive
Video Receive to multiple POs
You can find your newly received packages in your All Packages grid.
How did we do?
Tutorial: Create Purchase Order
Inbound - Receive The Whole Purchase Order In One Click