Table of Contents
Outbound Order Discounts and Charges
Learn more about Creating New Outbound Orders. In Flourish Software, you can apply discounts to your outbound orders in two levels: Order Line Discount - a discount set for an order line. Order Disco…
In Flourish Software, you can apply discounts to your outbound orders in two levels:
- Order Line Discount - a discount set for an order line.
- Order Discount - a discount for the entire order. You can apply pre-tax or post-tax discounts or post-tax charges (such as shipping).
Order Line Discount
Apply the discount
- Go to Outbound/Orders.
- Click on the Order ID.
- Click Edit Order.
- Locate the order Line.
- Type the dollar amount under the LINE DISCOUNT Cell.
- Click Tab or click out of the cell. The order line saves automatically.
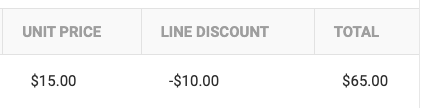
- Click Done Editing to save the changes on the order. Flourish displays the discount as a negative number:
Discount and integrated apps
Leaflink
When a user in Leaflink sets a "Sale Price" Per Unit for an order line, the difference between the "Wholesale" Price Per Unit and the "Sale" price Per Unit, multiplied by the number of the units sold, is the Order Line Discount in Flourish Software.
Leaflink Example
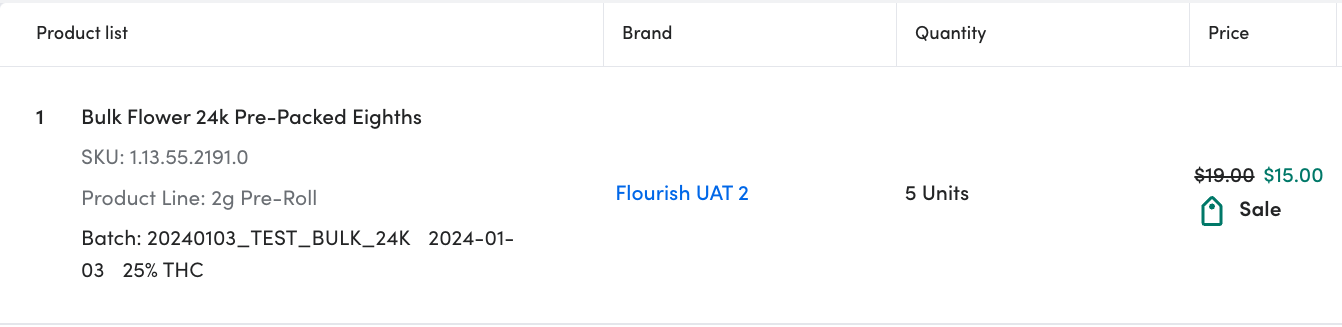
In Leaflink:
- The "Wholesale" Unit Price is $19
- The "Sale" Unit Price is $15.00
- The discount per Unit is $4.00
- The number of units sold is 5.
- The total Order Line Discount is $20.00 ( 5 units Times $4 discount per Unit):
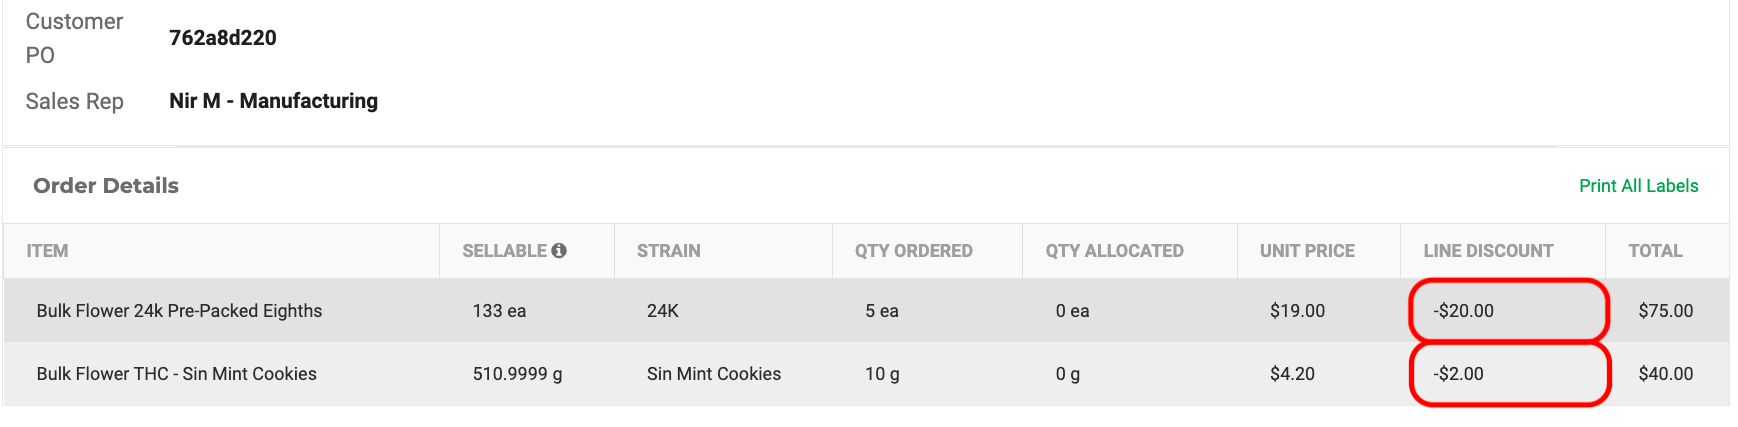
In Flourish Software:
- The total Order Line Discount is $20.00:

QuickBooks Online
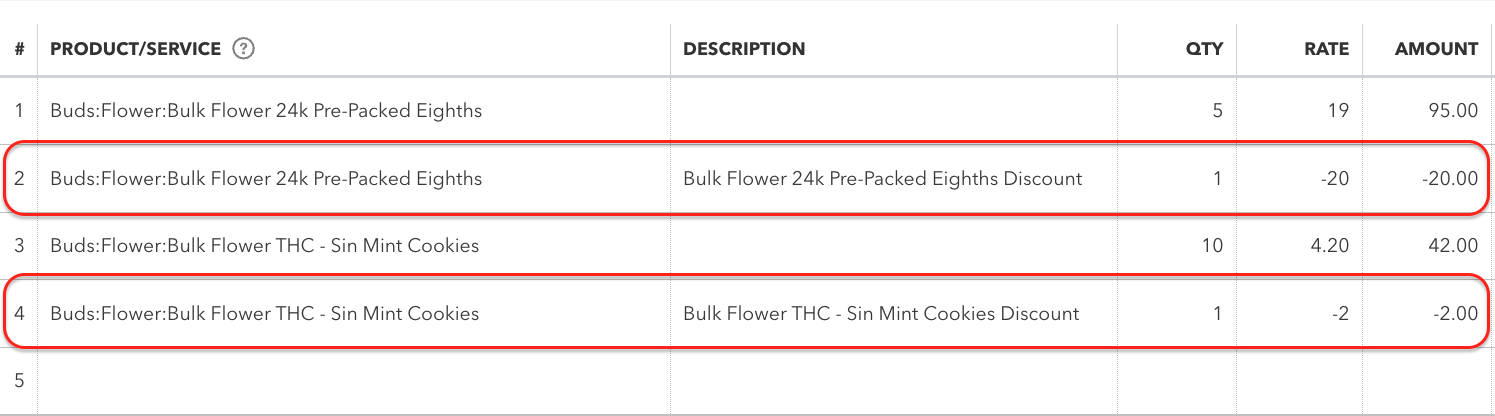
The Flourish Order line discount syncs to QuickBooks Online as a separate line item with a negative rate. The quantity is always 1.
Order Line Discount in Flourish Software |
 |
The Corresponding Order Lines in QuickBooks Online |
 |
Order Discounts
Permissions
In general, permissions are per Facility and User Role. To edit the User Role:
- Go to Manage Settings.
- Select User Roles.
- Select the Facility and the User Role to Configure.
- Locate the Outbound section of the screen.
- All users with "Order Update" permission can apply pre-set discounts or charges and make a custom discount or charge.
- Only users with "Create discounts and charges" permission can create new discounts or charges from the order.
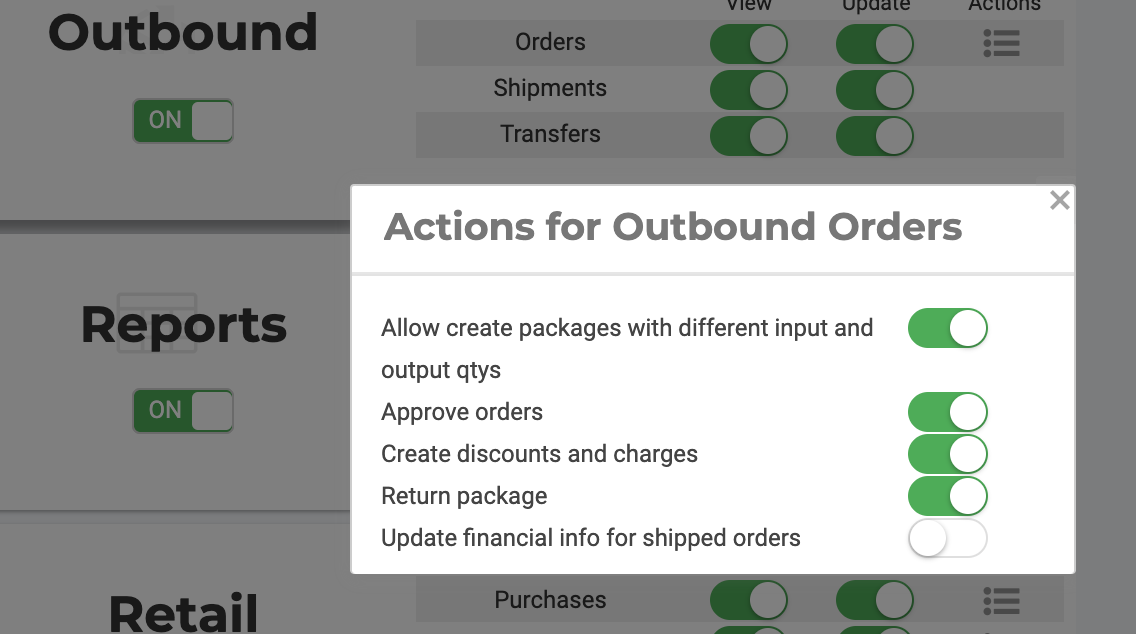
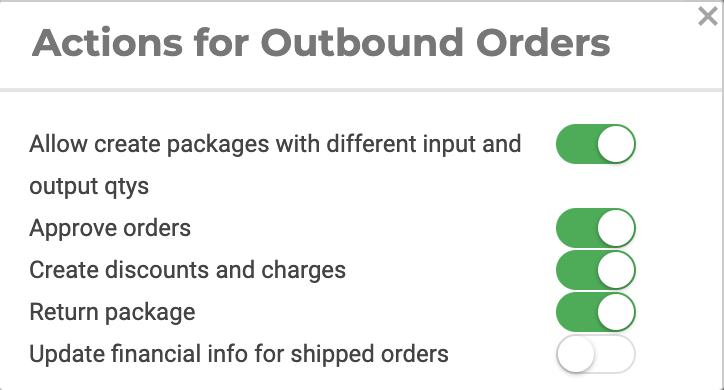
- To find the "Create discounts and charges" permission, click the Actions menu here:
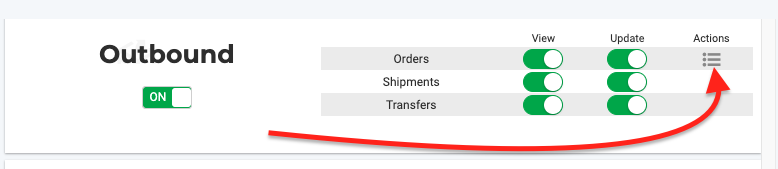
- In the menu below, toggle "Create discounts and charges"
- Save!
QuickBooks Online
Enable Shipping Charges in QuickBooks Online. This enables Flourish Software sales orders that contain charges to sync the charges to QuickBooks Online.
Add a Discount or a Charge to an Order
 in the pictures below).
To apply a Discount or a Charge to an Outbound order, please follow the steps below:
- Go to Outbound > Orders
- In the All Orders Screen find the relevant Order
- Click on the order ID and click Edit Order
- Scroll down and click the Dollar Icon
 next to “Order Discounts” or the “Charges”
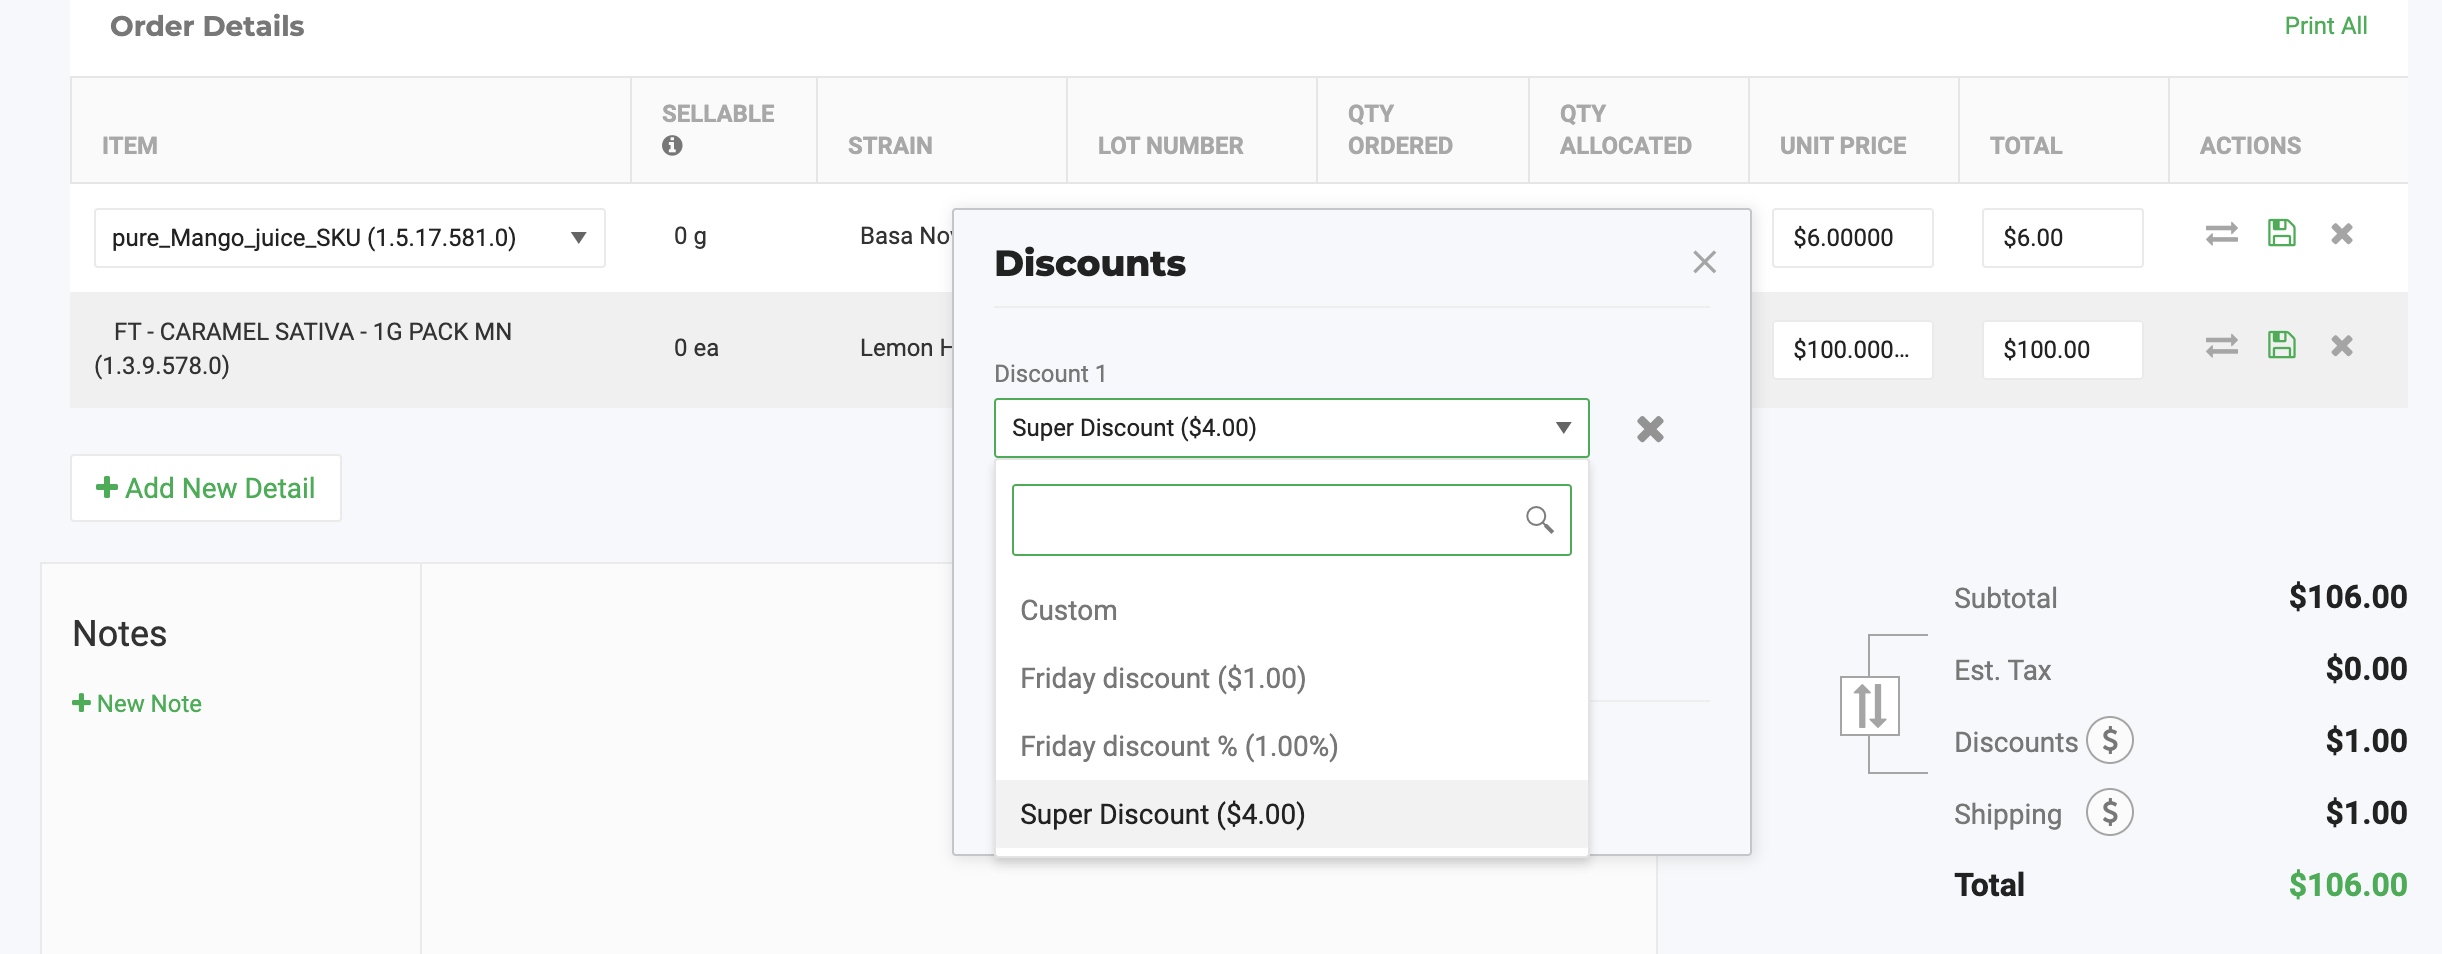
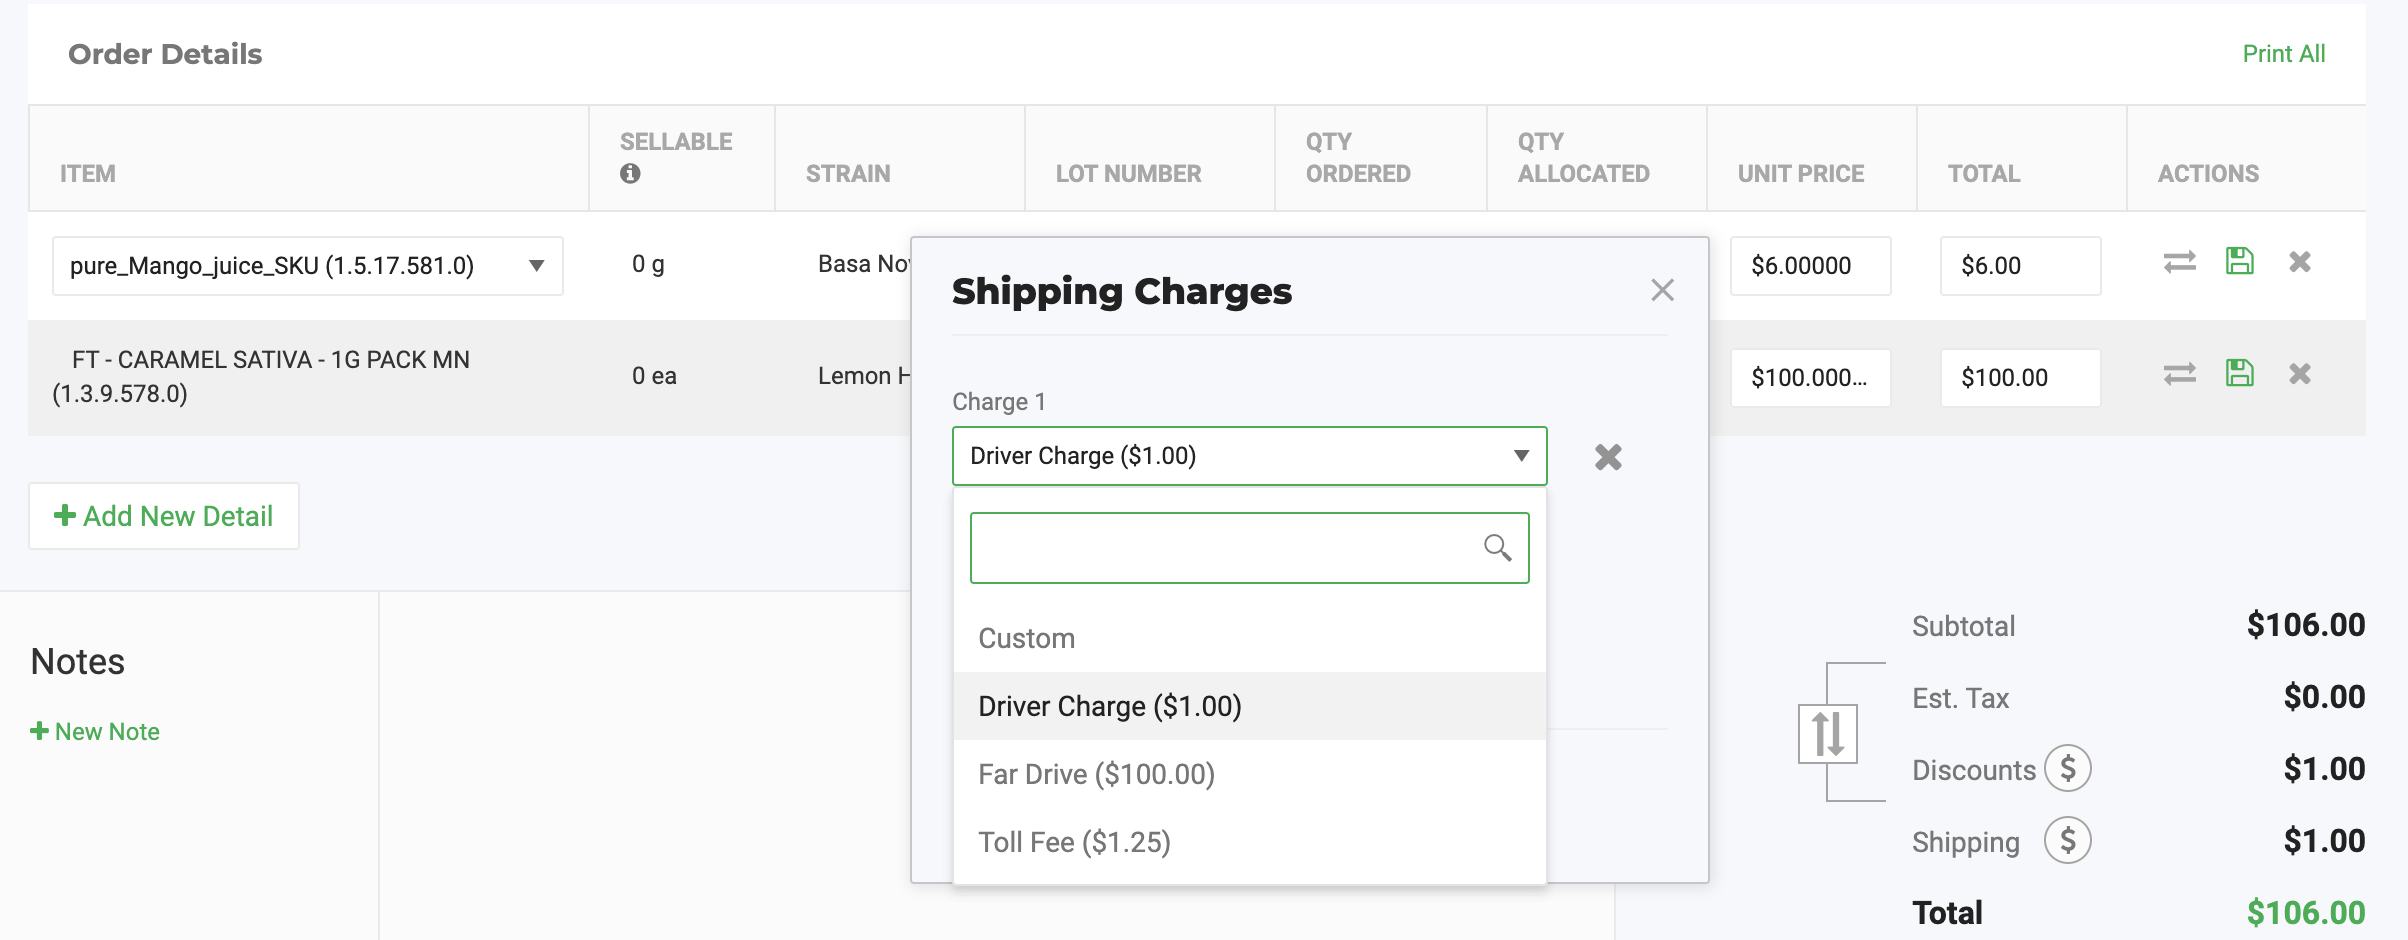
Once you click the Dollar Icon next to “Order Discounts” or the “Charges” you can do three things, depending on user permissions:
- Select from a pre-set list of discounts and charges
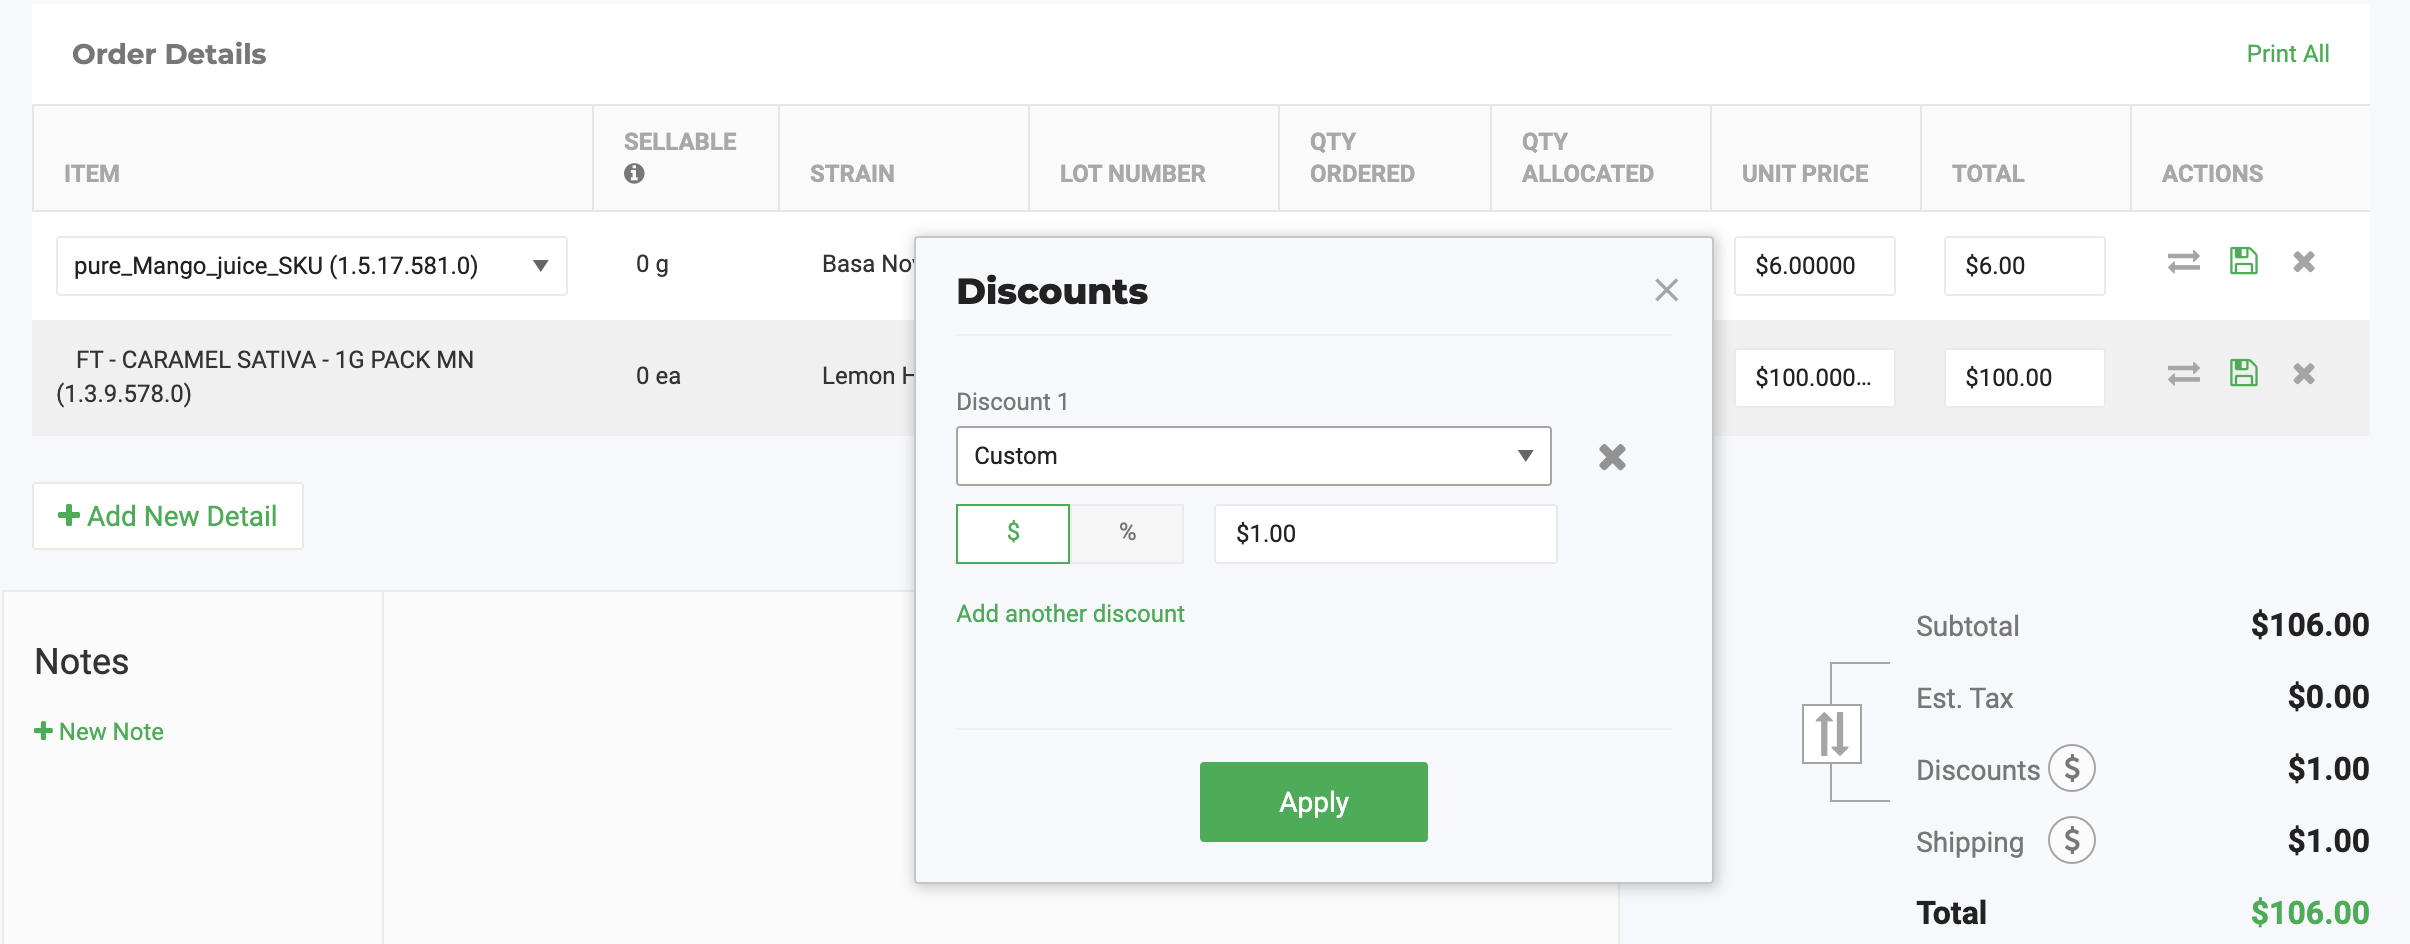
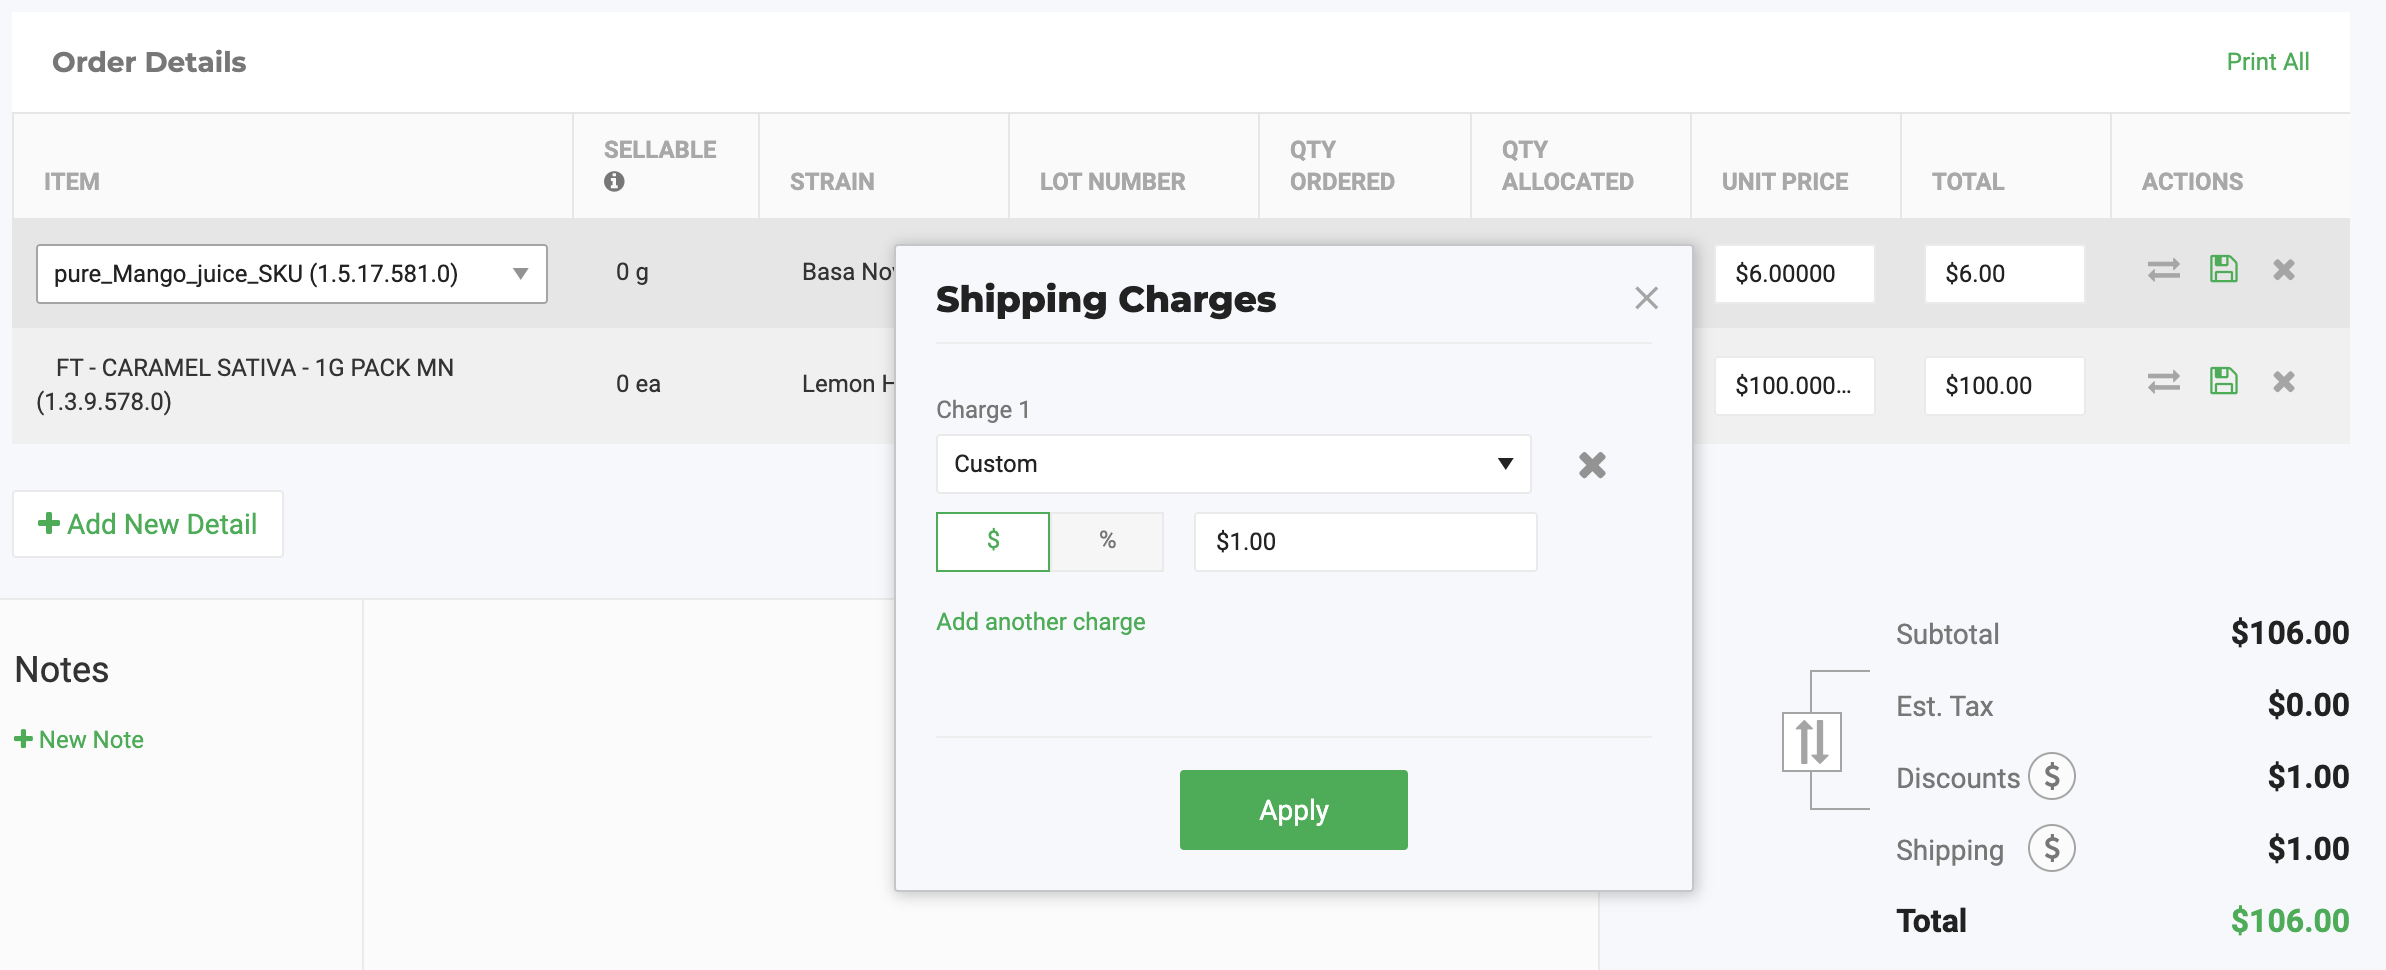
- Add a custom discount/charge (only for that order)
- Create a new pre-set discount/charge
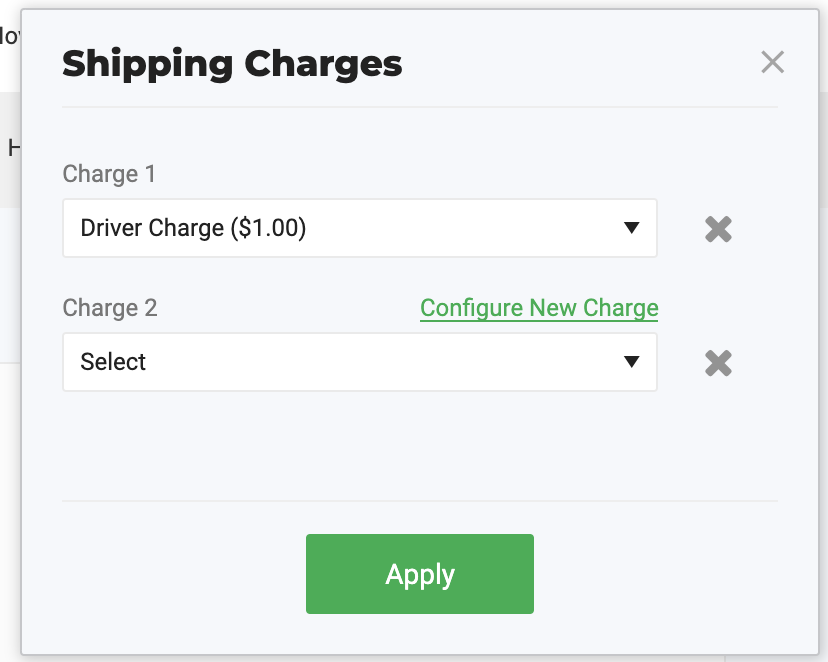
Select from a pre-set list
Select from the list and proceed.
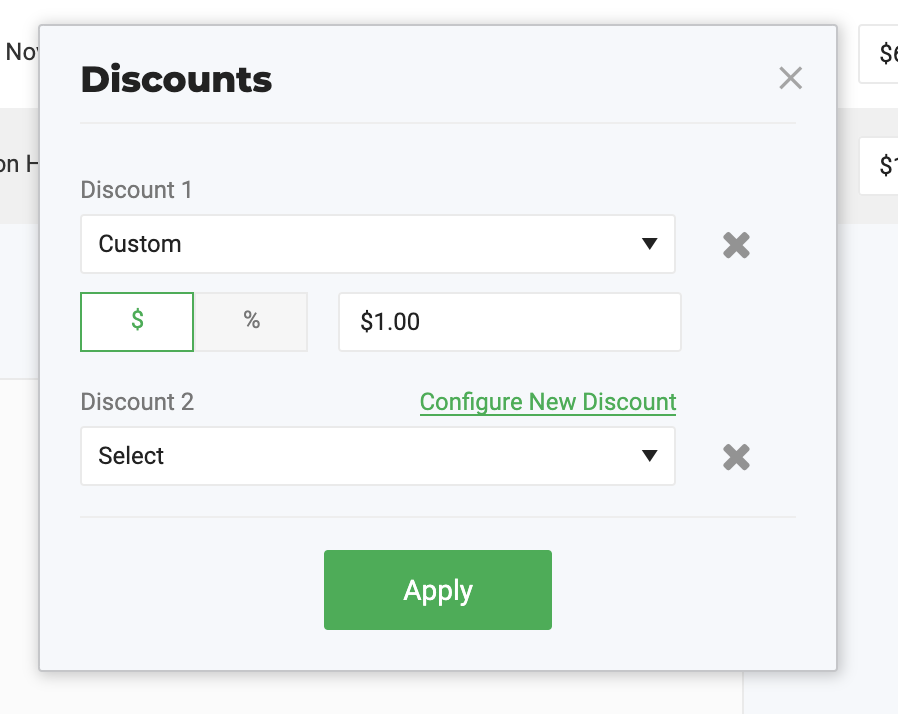
Add a custom
Select Custom from the list and proceed.
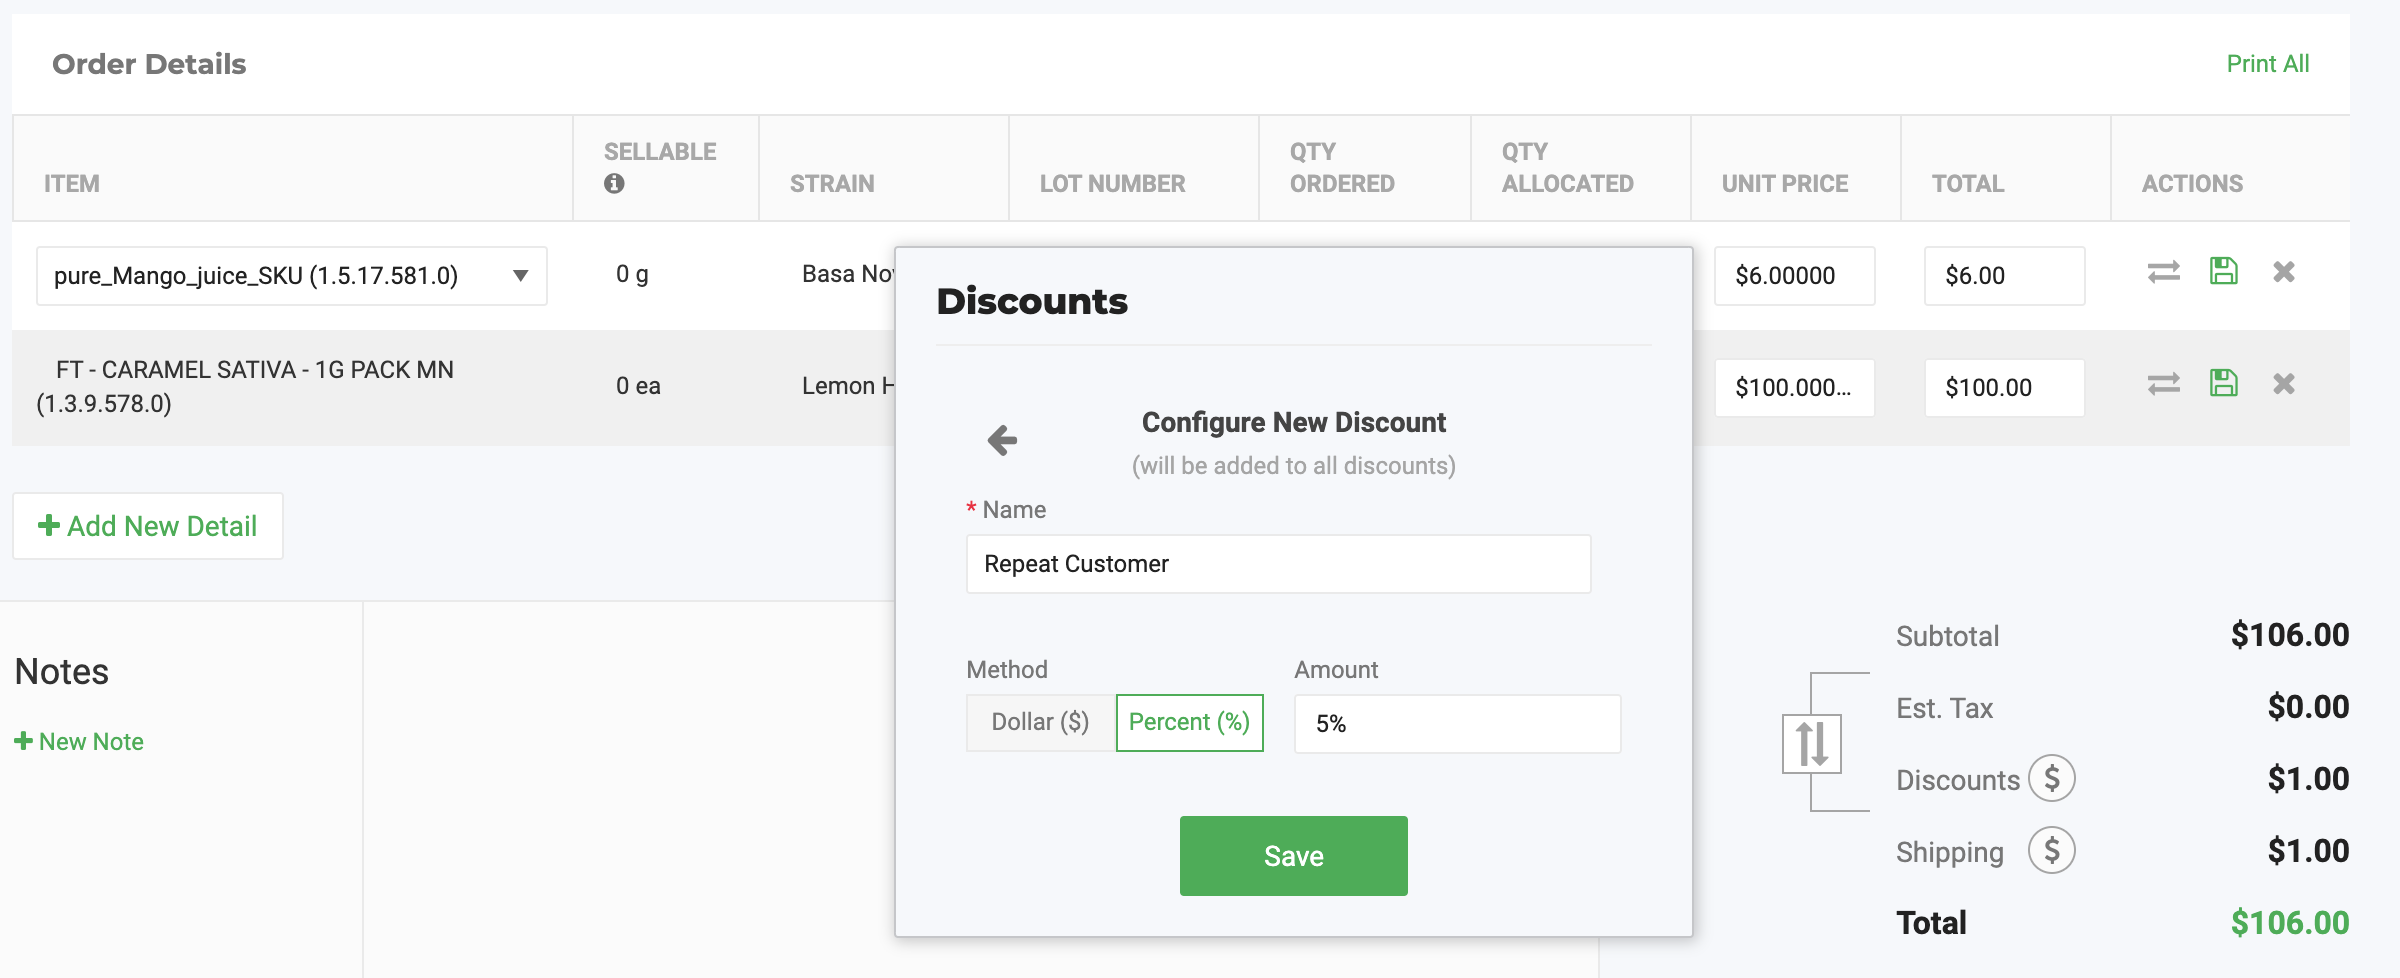
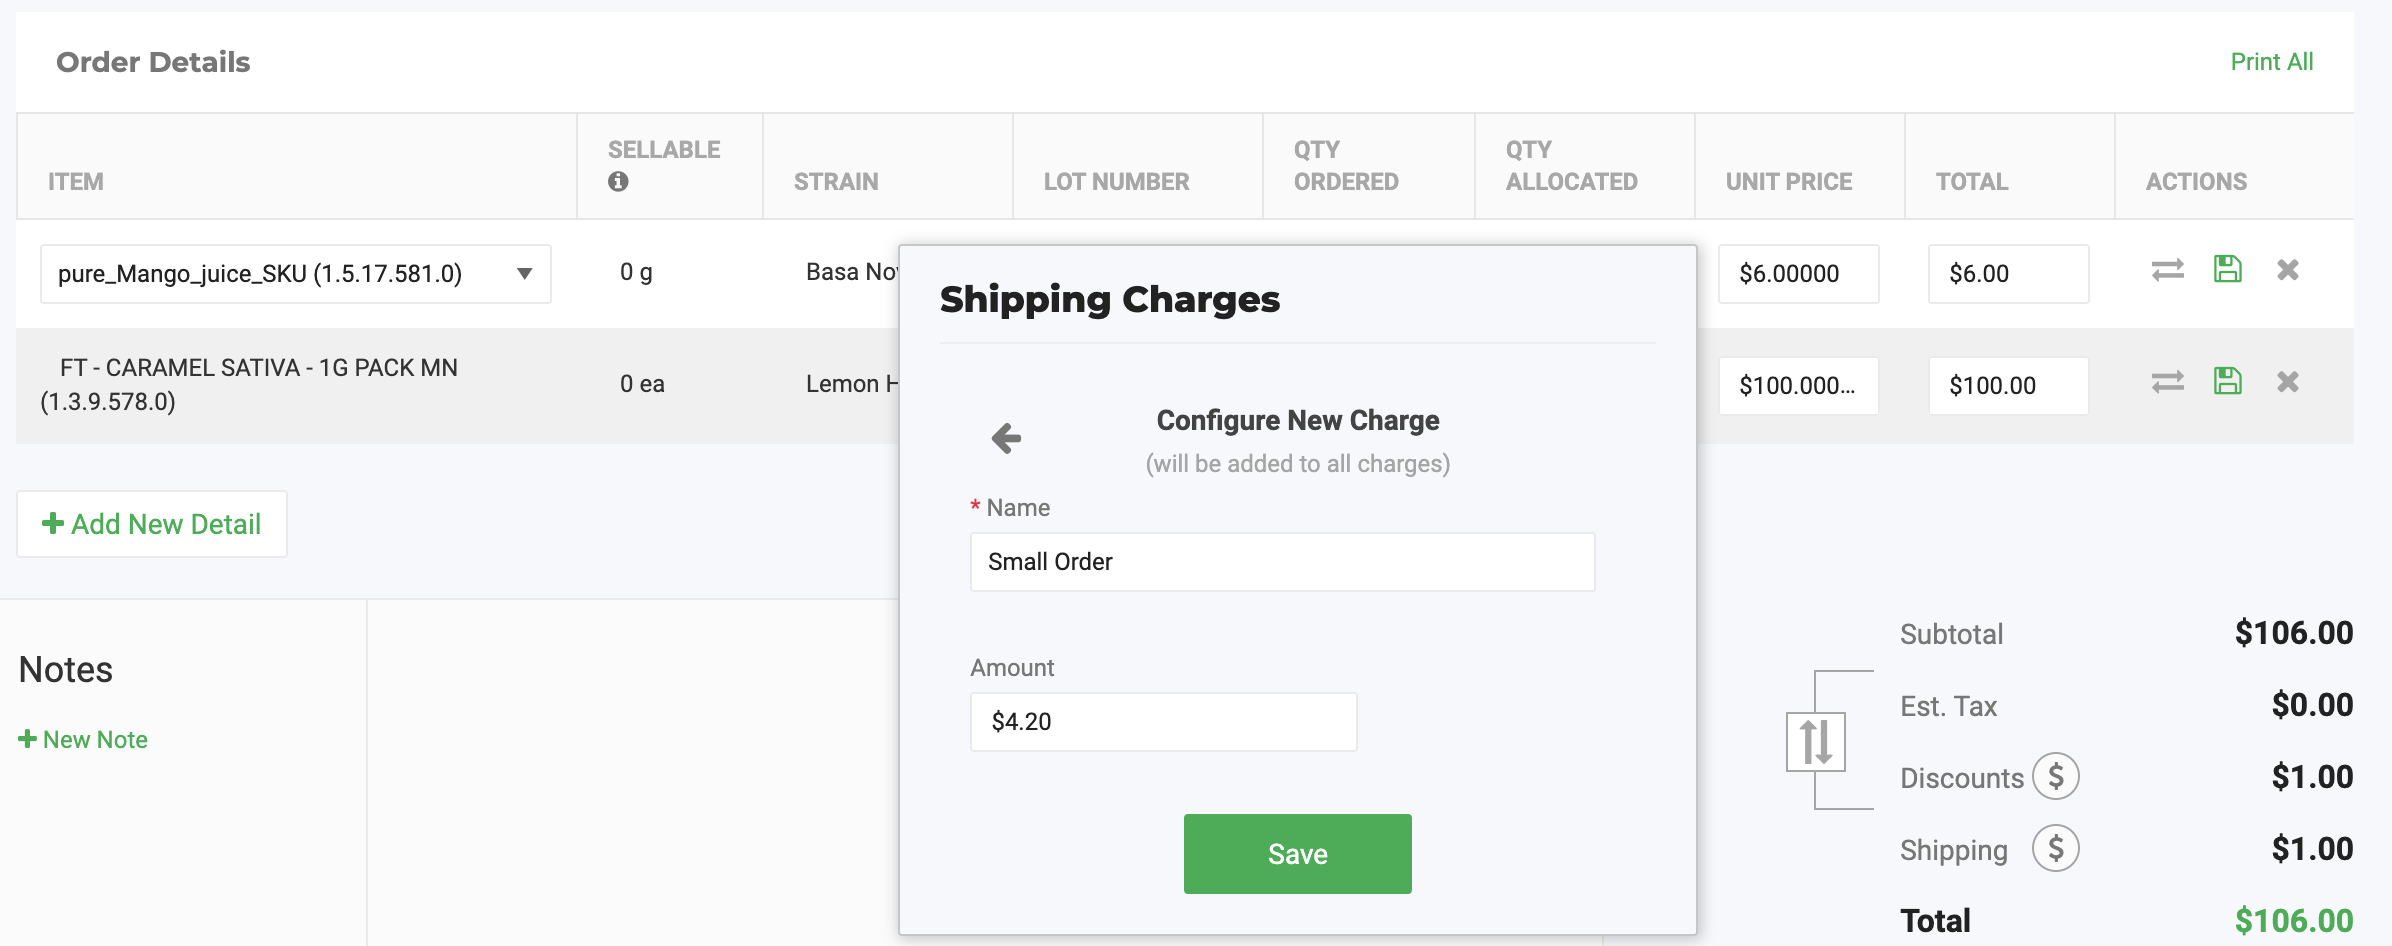
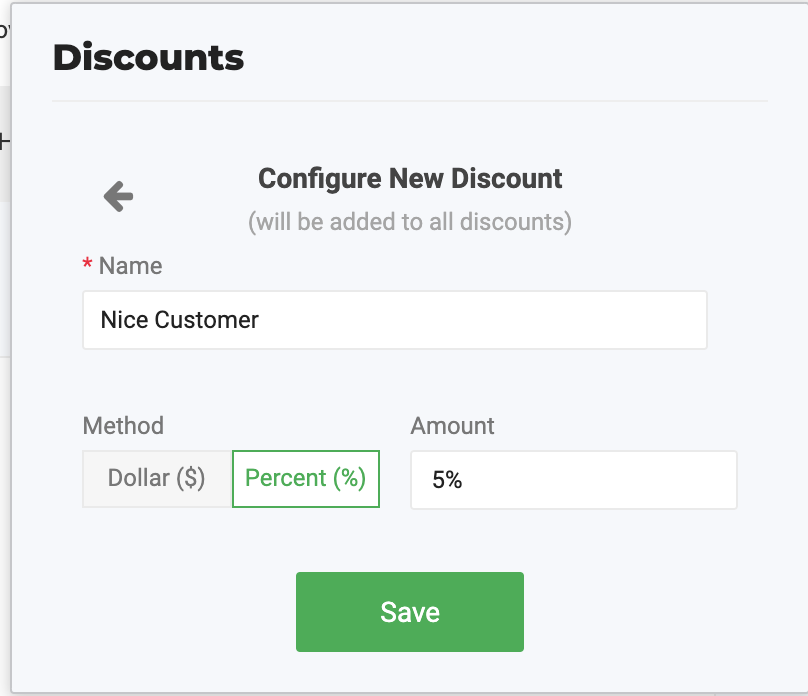
Create a new pre-set
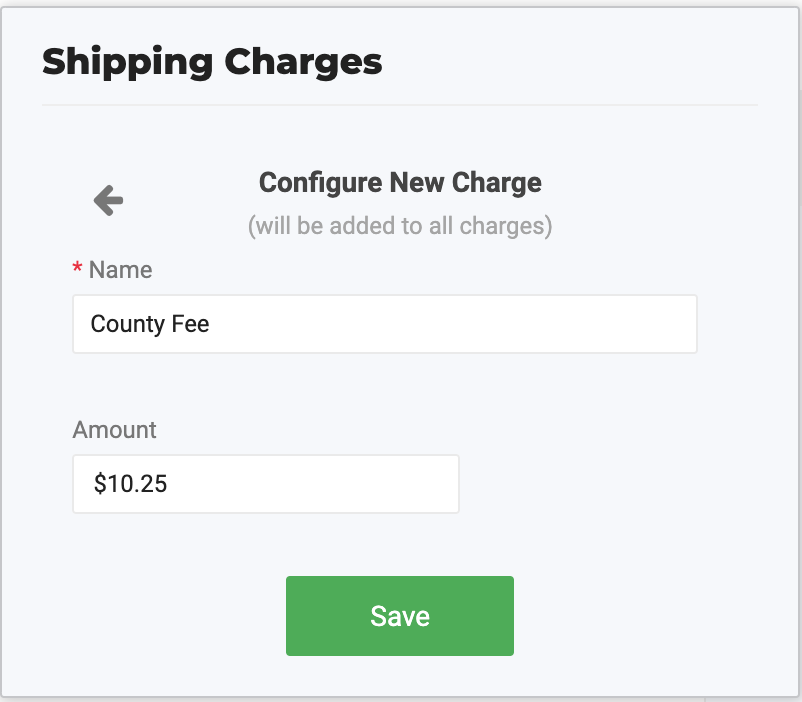
Select Configure New Discount or Configure New Charge and proceed.
Creating Discounts/Charges - via a Sales Order
Users with the Create discounts and charges permission can quickly create a new pre-set discount or charge from the pop-up modal. To do that:
- Select Configure New Discount or Configure New Charge.
- Enter the name, method (dollar or percent for discounts, charges are always dollars), the value,
- Click Save.
Creating Discounts/Charges - via the Admin section
General information
To add new Discounts or Charges from the admin section a user must have the View and Update permissions for Admin / Distribution turned on. However, users can also add new discounts or charges directly from the order if their user role has the Create discounts and charges action permission turned on.
To configure pre-set discounts and charges from the Admin section please follow the stesp below:
- Go to Manage Settings > Distribution
- Click the Discounts and Charges tab.
- Select Manage discounts or Manage shipping charges
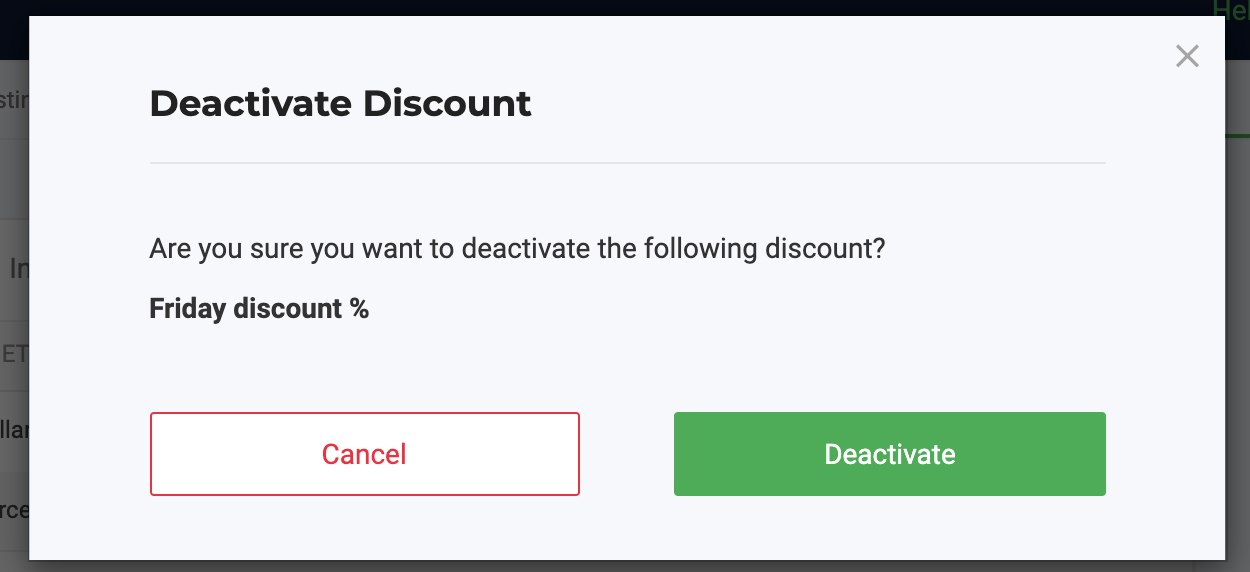
Newly created discounts and charges will be active by default.

To Deactivate a discount or charge users can toggle them off from the grid and confirm the action.
Creating Discounts
To add new discounts:
- Go to Manage Settings > Distribution
- Click the Discounts and Charges tab.
- Select Manage discounts
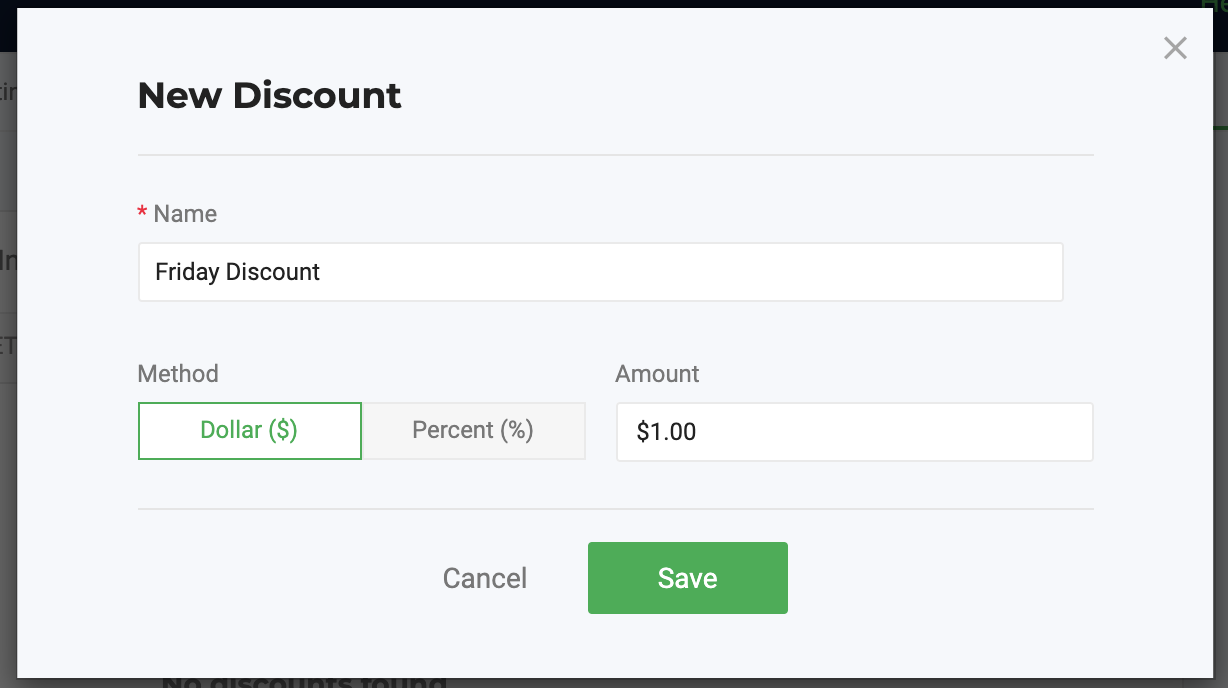
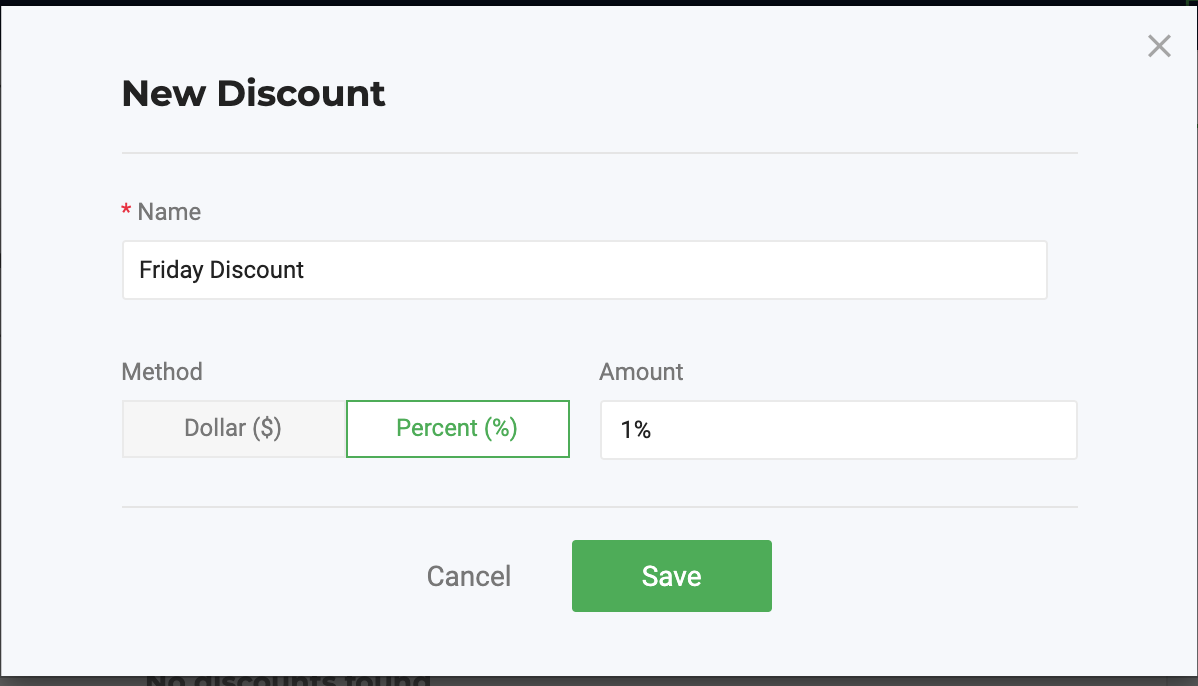
- Click on the green Add New Discount button. This will open a pop-up to enter the name of the new discount, the method of discount (dollar or percentage), and the value.

Creating Charges
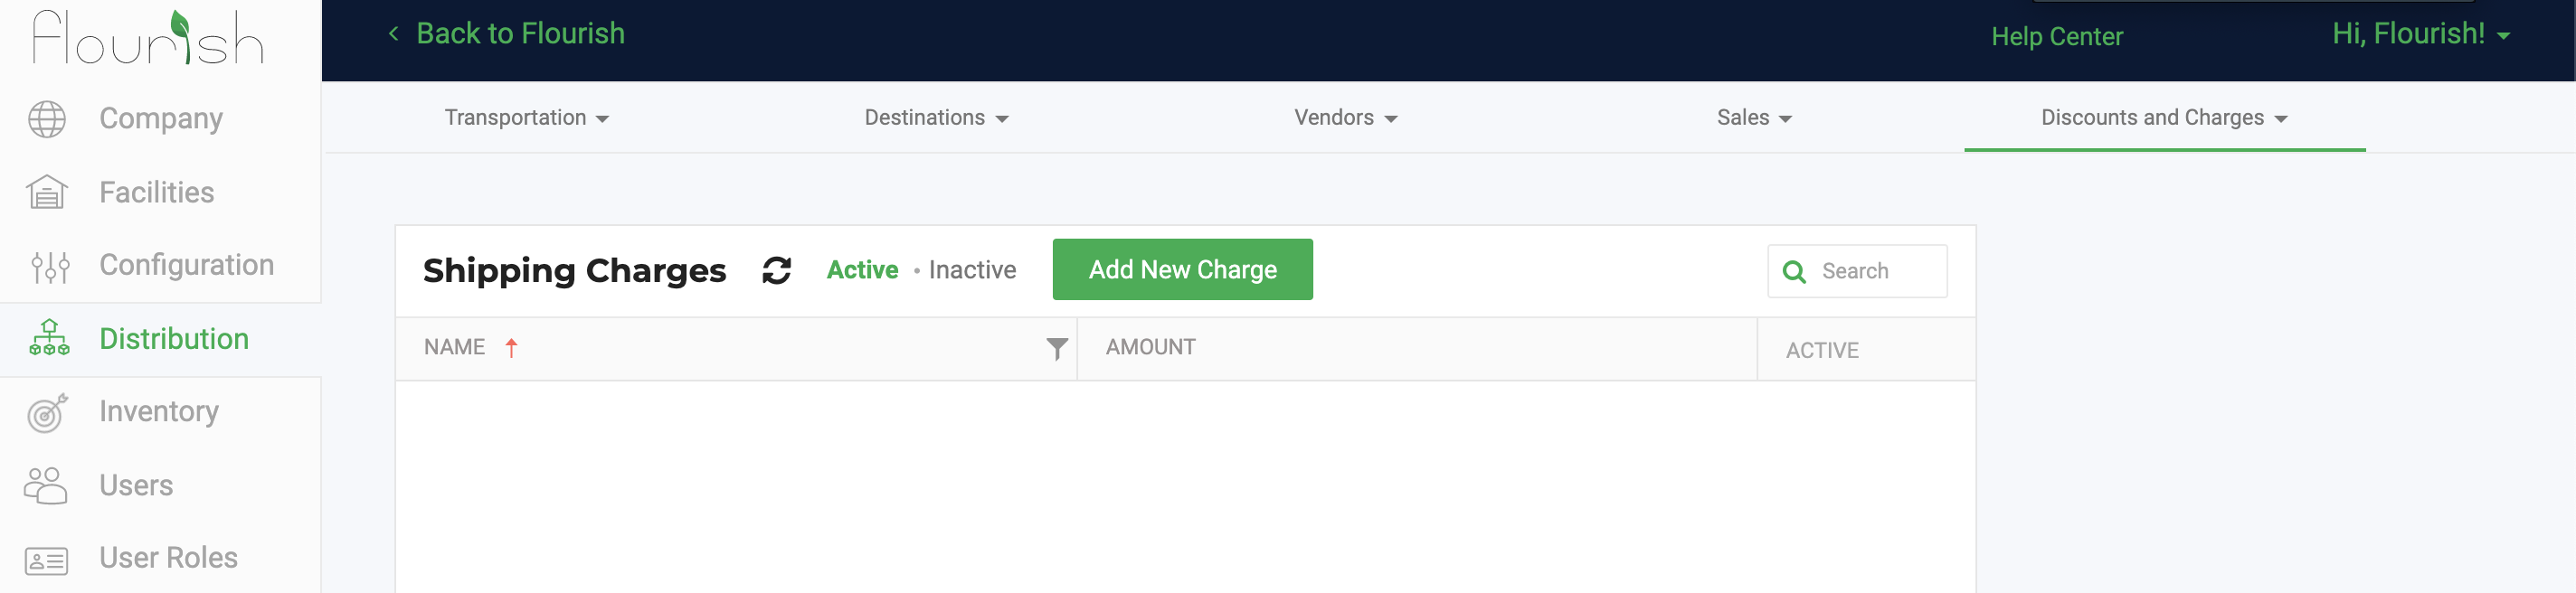
To add new Shipping Charges:
- Go to Manage Settings > Distribution
- Click the Discounts and Charges tab.
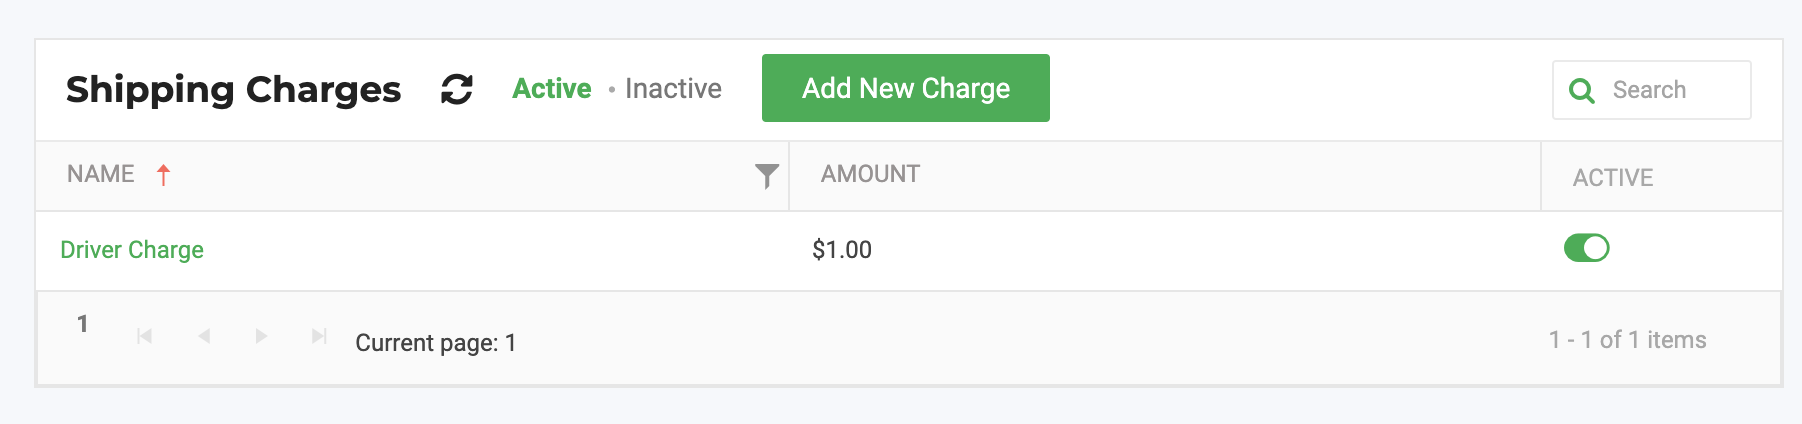
- Select Manage shipping charges
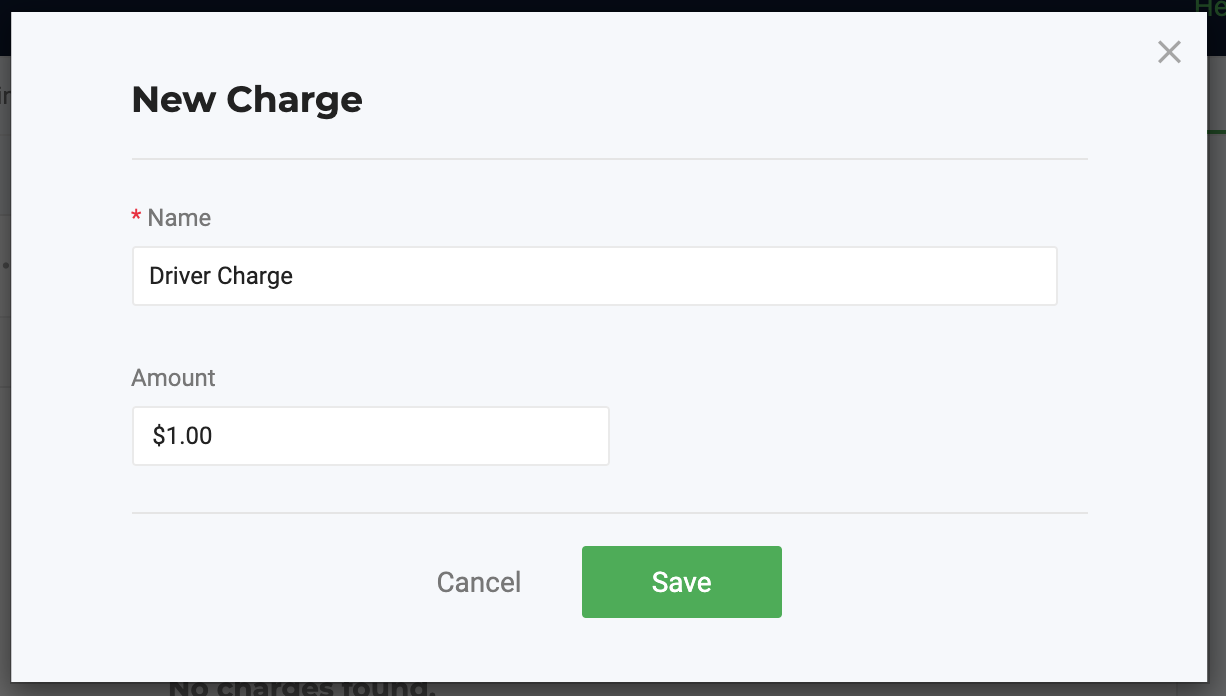
- Select Add New Charge to open the pop-up and enter the name and dollar value. Charges are only in dollars.
How did we do?
Display Payment Status on Outbound Orders
Outbound Order Notes