Table of Contents
Create a Zap to Automate Flourish Workflows
Zapier is a tool that allows Flourish Software to integrate with other applications without the need for a developer. Zapier integrates with Shopify, WooCommerce, OnFleet, and many more! These small integrations are called Zaps, and they can help to increase your productivity and streamline your workflows.
Zapier is a tool that allows Flourish Software to integrate with other applications without the need for a developer. Zapier integrates with Shopify, WooCommerce, OnFleet, and many more! These small integrations are called Zaps, and they can help to increase your productivity and streamline your workflow.
This article will walk you through creating a Zap. For more information about the Flourish <-> Zapier integration, check out this article.
Before You Begin
After you have access, be sure you've generated your External API key in Flourish and allowed Zapier to make changes to Flourish. Once that's been done, you're ready to create a Zap!
Creating a Zap
- Create an account or log in to Zapier.
- Click the Create Zap button.
- Click the pencil icon and enter a name for your Zap.
Selecting the Trigger
The trigger for your Zap is the event that starts making it work. Once the conditions for your trigger are met, the Zap will perform the action.
- In Zapier, open your Zap.
- Under Trigger > App Event, click the search bar and type the name of your app.
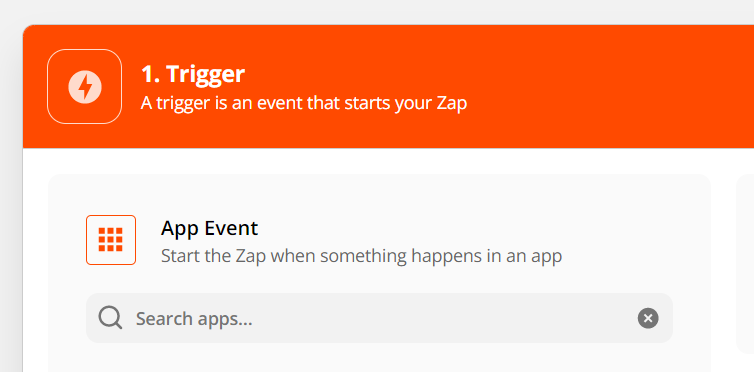
- Click the name of your app to select it.
- Click the Trigger Event dropdown and select the event that will begin your Zap.
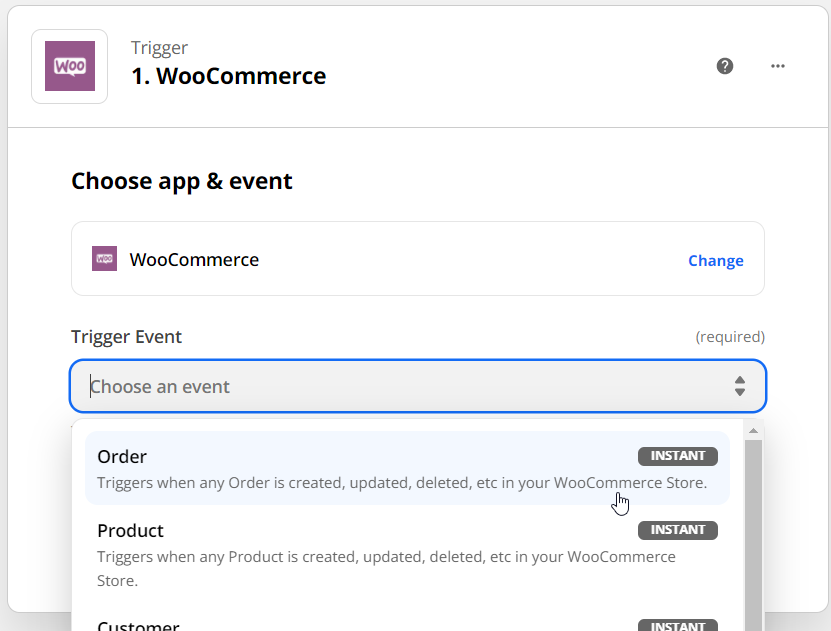
• Updated or created retail customer
• Updated or created retail order
• Updated or created outbound order
- Click the Continue button
- Click the Sign In button and enter your credentials, then click Continue.
- If you've already signed into the app in Zapier, click the dropdown to select your account, then click Continue.
- Depending on the app you're integrating, Zapier may require you to select a Trigger Rule. Click the Trigger Rules documentation link in Zapier to learn more.
- Test the trigger by clicking the Test Trigger button.
Testing your trigger ensures that Zapier is connected to the correct account and is able to access your account successfully.
Filtering the Trigger
You can add a filter to your trigger to target specific information that's flowing into or out of Flourish. This isn't a required step, but it can help you to target orders and customers in a way that makes more sense for your workflow.
For example, you can allow Flourish to send retail orders to OnFleet. You'll want to make sure to add a filter to trigger the action only when the orders are delivery orders. Without that filter, all retail orders would flow through to OnFleet.
- In Zapier, open your Zap.
- Click the plus icon between the trigger and action.
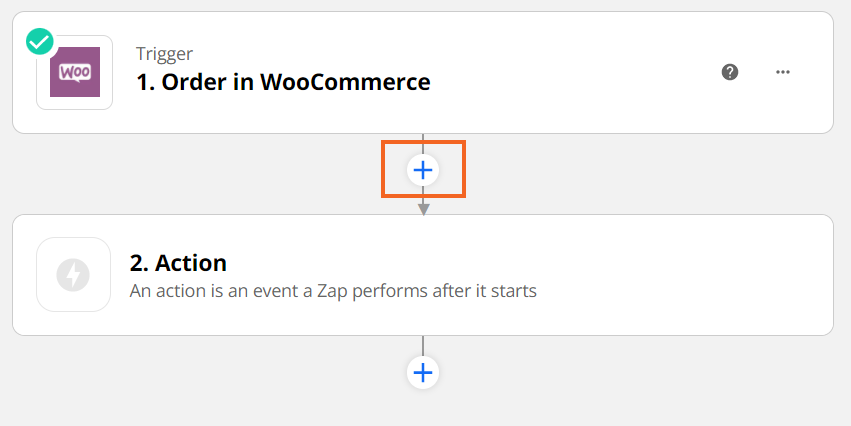
- Click the Filter button.
- Select the field, condition, and value.
- Click Continue.
Zapier will test the conditions you provided and let you know if the Zap would have continued to the action. If the Zap fails, you can revisit the conditions in your filter and try again.
Adding the Action
Zapier completes the action after the trigger and filter conditions are met, but you need to tell Zapier what action to take first.
- In Zapier, open your Zap.
- Click the search bar under Action > App Event, then type the name of your app.
- Click the Action Event dropdown and select the event.
- Click the Continue button.
- Click the Sign In button and enter your credentials, then click Continue.
- If you've already signed into that app in Zapier, click the dropdown to select your account, then click Continue.
- Set up the action by mapping the fields from one app to another.
Setting up the Action
Zapier requires you to match the fields from the data that's coming in with the data that's going out. This is the final step before testing the integration! Here's a quick example:
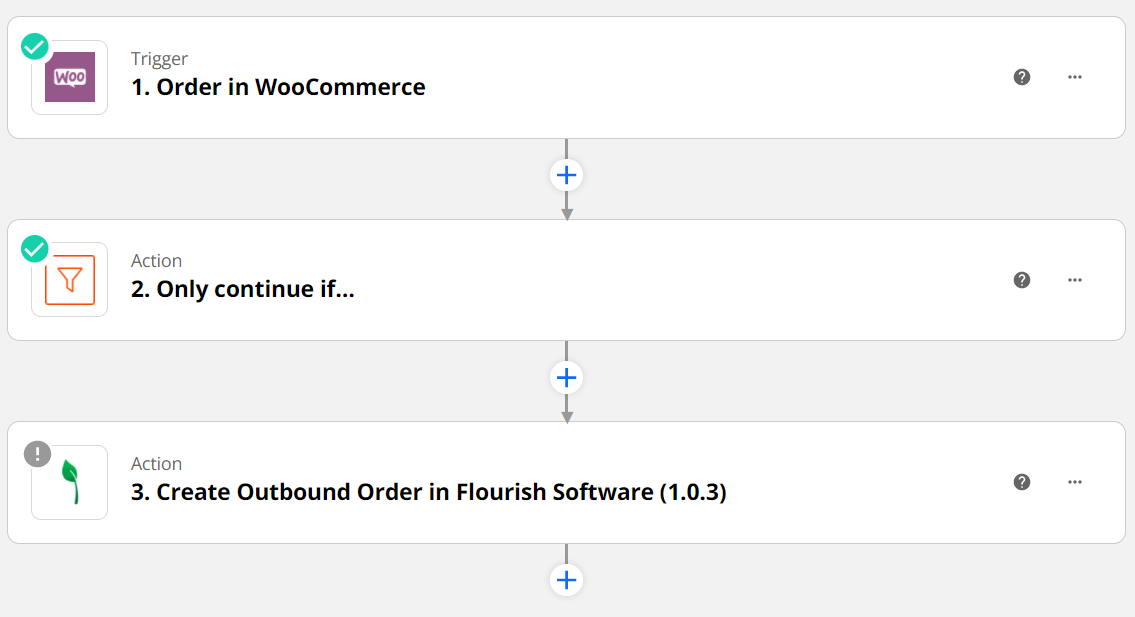
In the example above, we'll take any order placed in WooCommerce that's more than $30, and we'll use that to create an order in Flourish. That will allow us to fulfill and ship the order directly in Flourish!
- In Zapier, open your Zap.
- Click the Edit button on your Action step.
- Click the dropdown for each data point and select the data point to match it with.
- For example, you may want to match the Date Created in WooCommerce with the Invoice Date in Flourish as pictured below.

- Every field marked Required needs to be filled in before you can continue.
- When you're done, click Continue and test your action to make sure that your integration works as expected.
Need Help?
If you get stuck or have any questions, feel free to reach out to our support team — we're always happy to help!
How did we do?
Connect Flourish to Zapier for Workflow Automation
Flourish Zapier Triggers and Actions