Table of Contents
Disabling Areas
Disable and Re-enable Areas. Purpose. Disable Areas you no longer use to keep your facility setup clean, and reenable them later if you need them again. You can disable or reenable a single Area or m…
Table of Contents
Disable and Re-enable Areas
Purpose
Disable Areas you no longer use to keep your facility setup clean, and reenable them later if you need them again. You can disable or reenable a single Area or multiple Areas at once.
Prerequisites
Flourish will not let you disable an Area that contains packages, batches, or plants. Clear the Area first:
- Use Bulk Actions: Locate Packages to clear Inventory Areas.
- Move Groups and plants out of Cultivation Areas.
Disable a Single Area
- Click the gearbox icon in the top-right corner of the screen to open Settings.
- Click Facilities.
- Select the facility you need to edit.
- Click Areas.
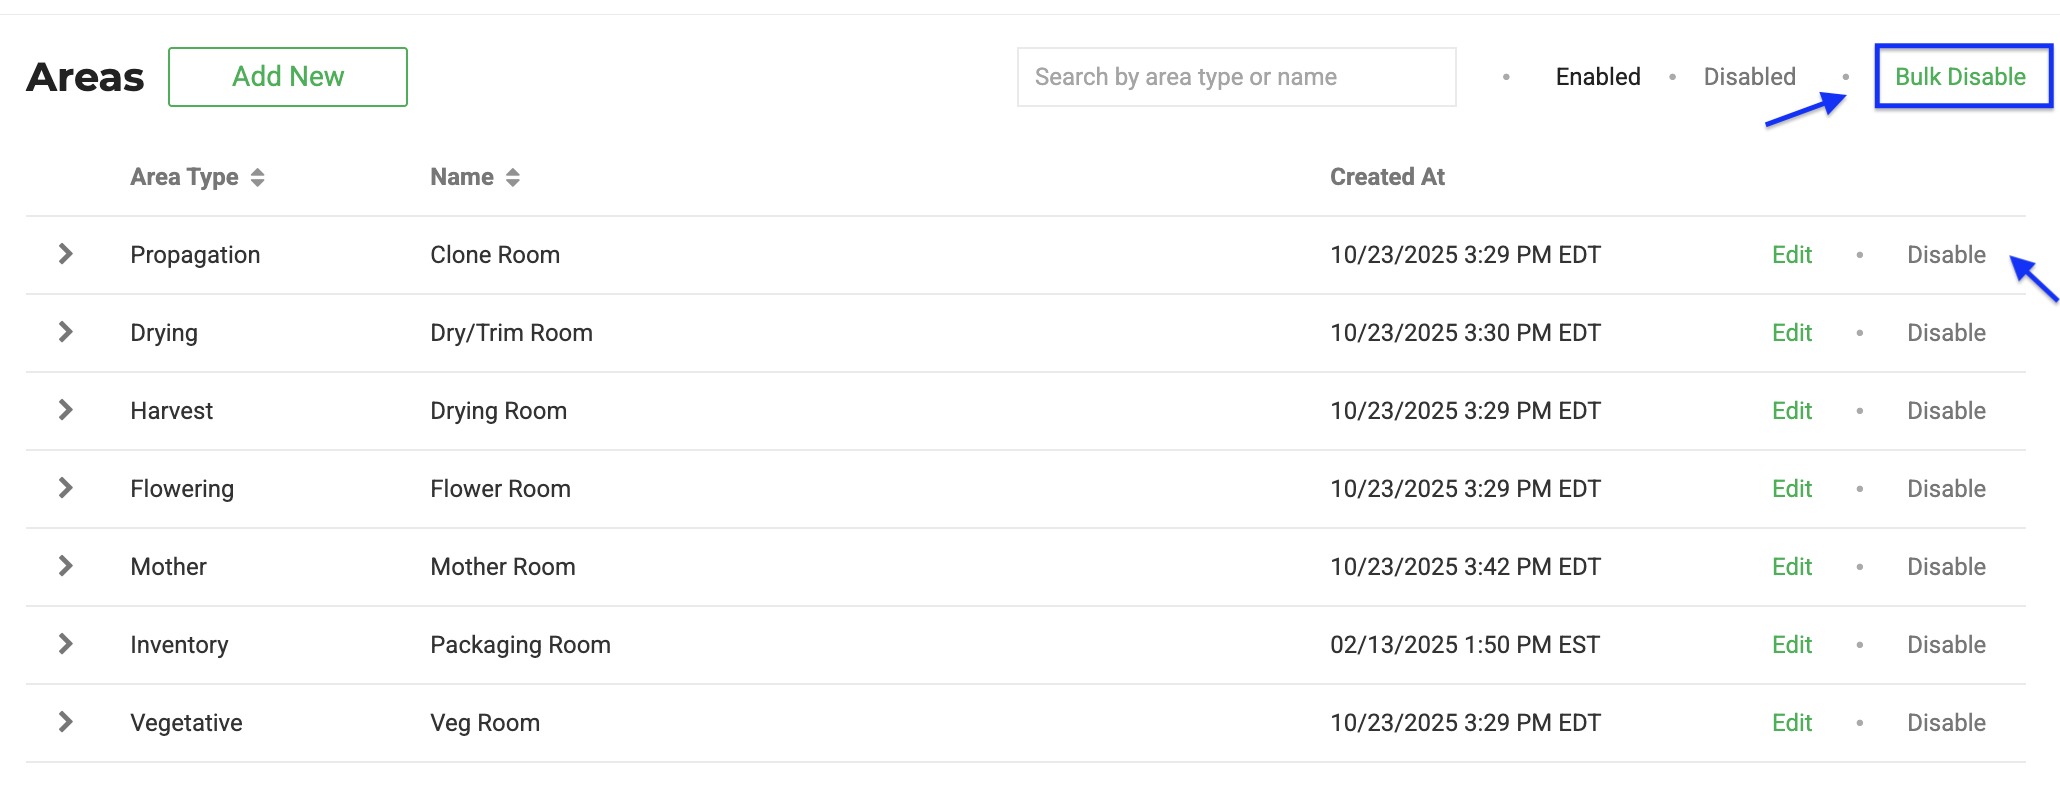
- Click Disable next to the area you want to disable.
Flourish saves the change automatically.
Bulk Disable Areas
- Click the gearbox icon in the top-right corner of the screen to open Settings.
- Click Facilities.
- Select the facility you need to edit.
- Click Areas.
- Click Bulk Disable.
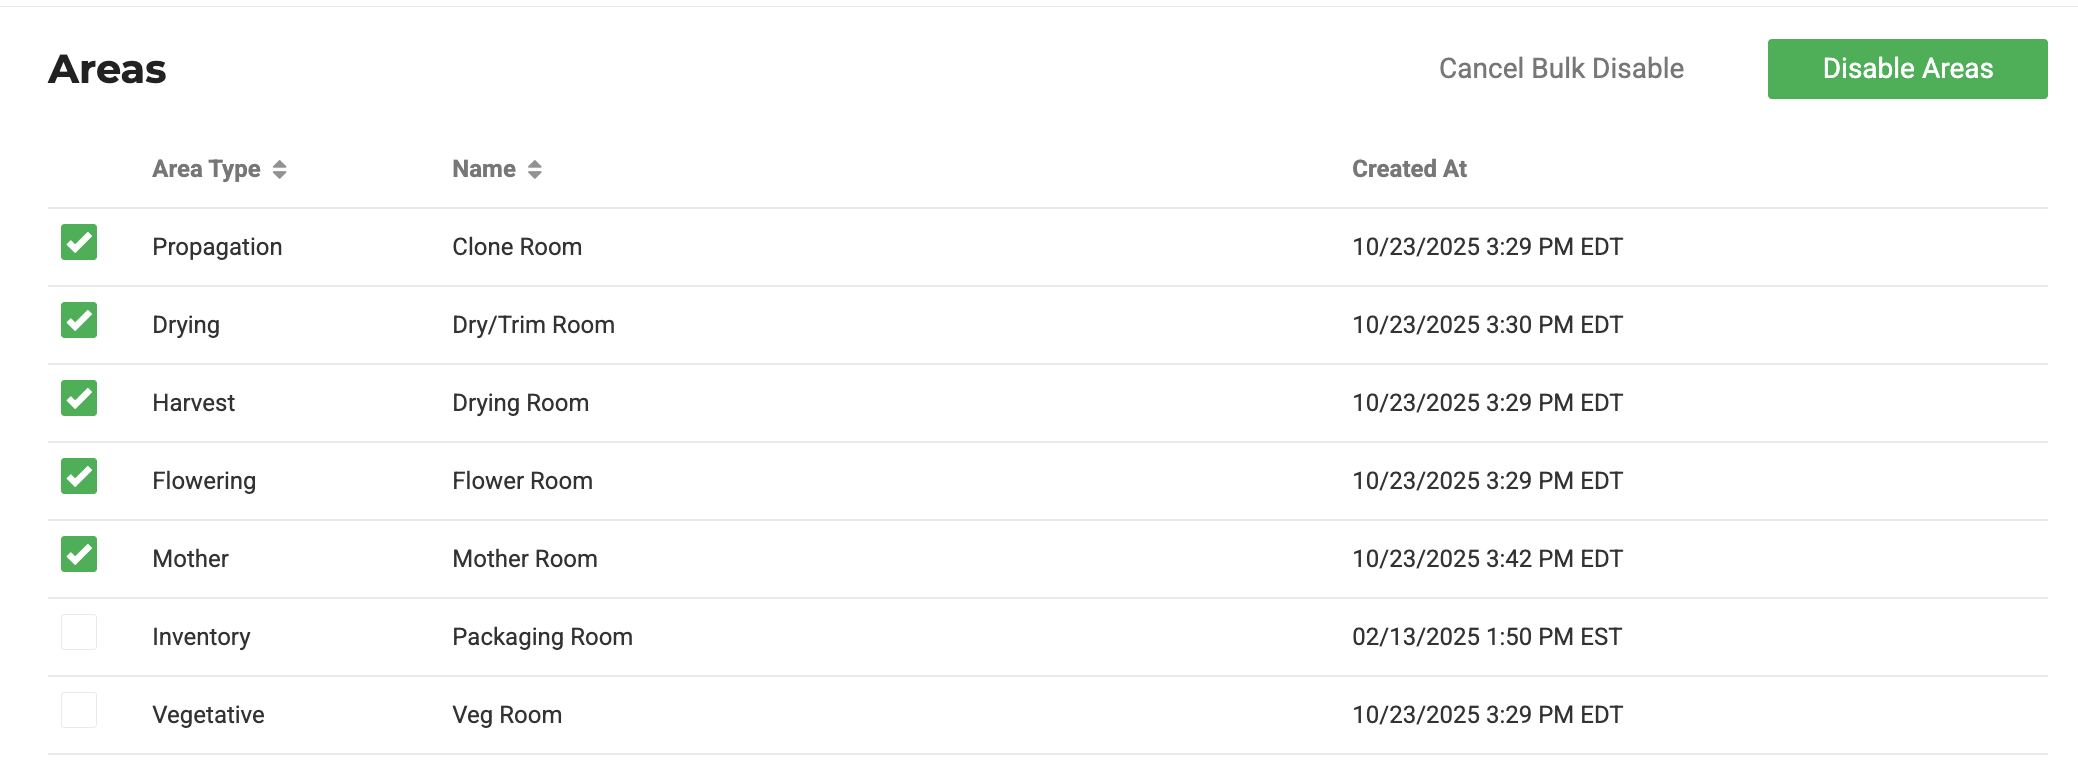
- Select the checkboxes next to the areas you want to disable.
- Click Disable.
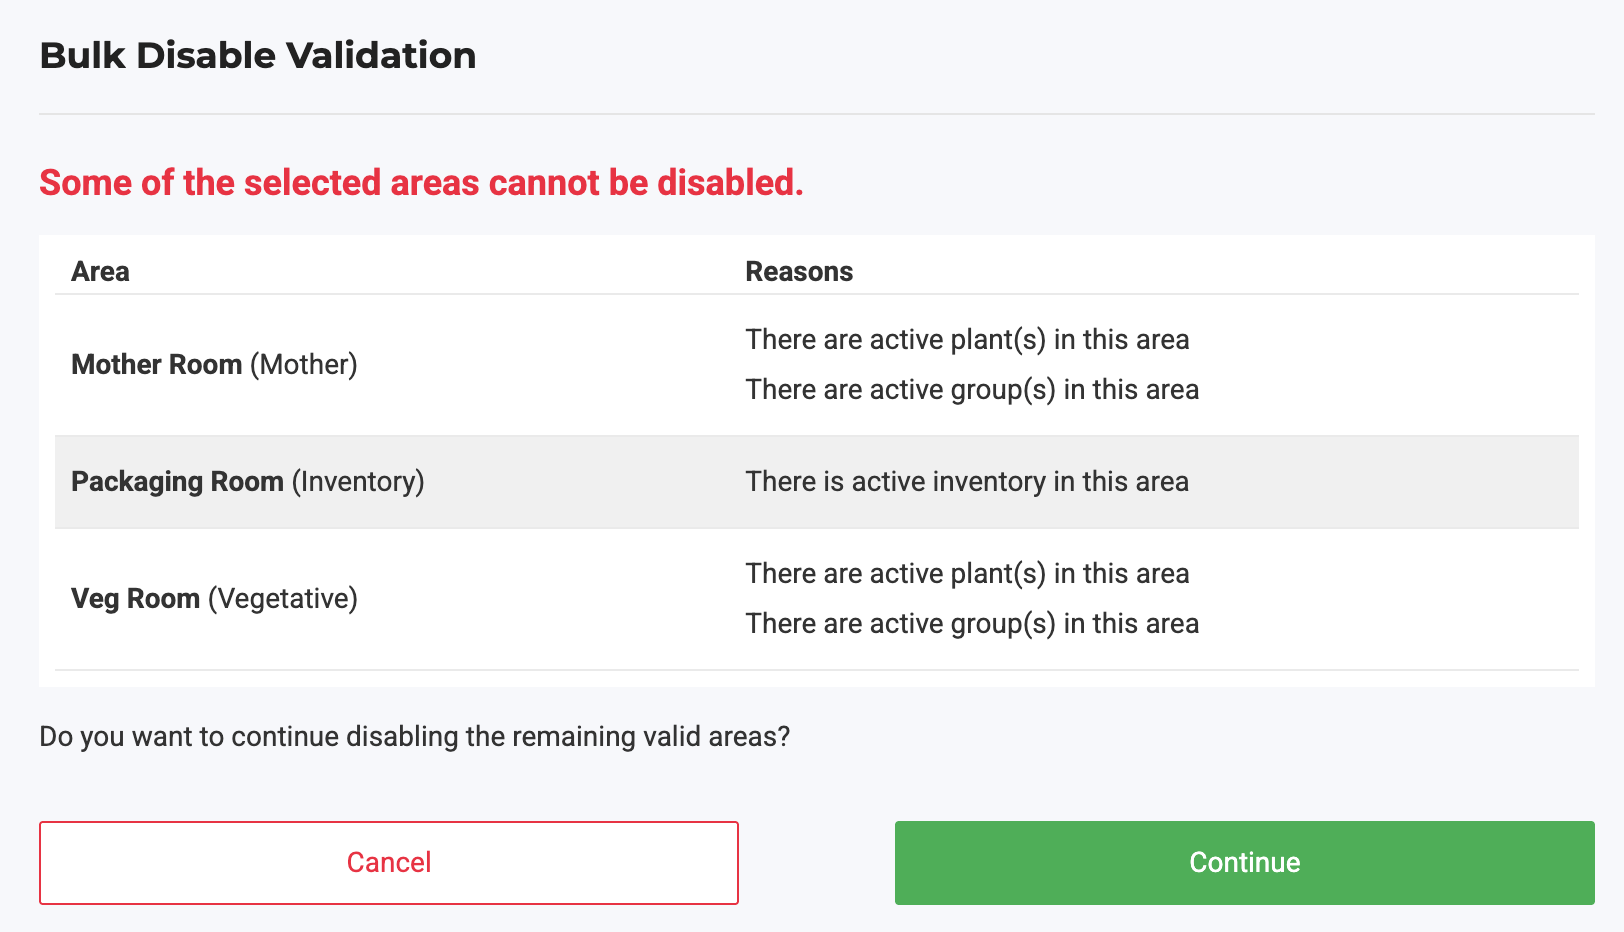
- Click Continue on the Bulk Disable Validation screen to confirm.
Flourish displays a success message, or lists any Areas it could not disable.
Re-enable an Area
- Click the gearbox icon in the top-right corner of the screen to open Settings.
- Click Facilities.
- Select the facility you need to edit.
- Click Areas.
- Click Enable next to the area you want to reenable.
Flourish saves the change automatically.

How did we do?
Organize Inventory with Classes & Categories
Clone an Existing Item or BOM
