Table of Contents
Creating and Managing Users
The Flourish team adds system admin users during account creation. You can follow these steps as a system admin to create new users. User management is crucial for maintaining security, controlling a…
The Flourish team adds system admin users during account creation. You can follow these steps as a system admin to create new users. User management is crucial for maintaining security, controlling access, and personalizing experiences within the application. Please don't share logins.
Viewing All Users
- Navigate to Settings
- Click on Users on the left menu bar to see all users within the system.
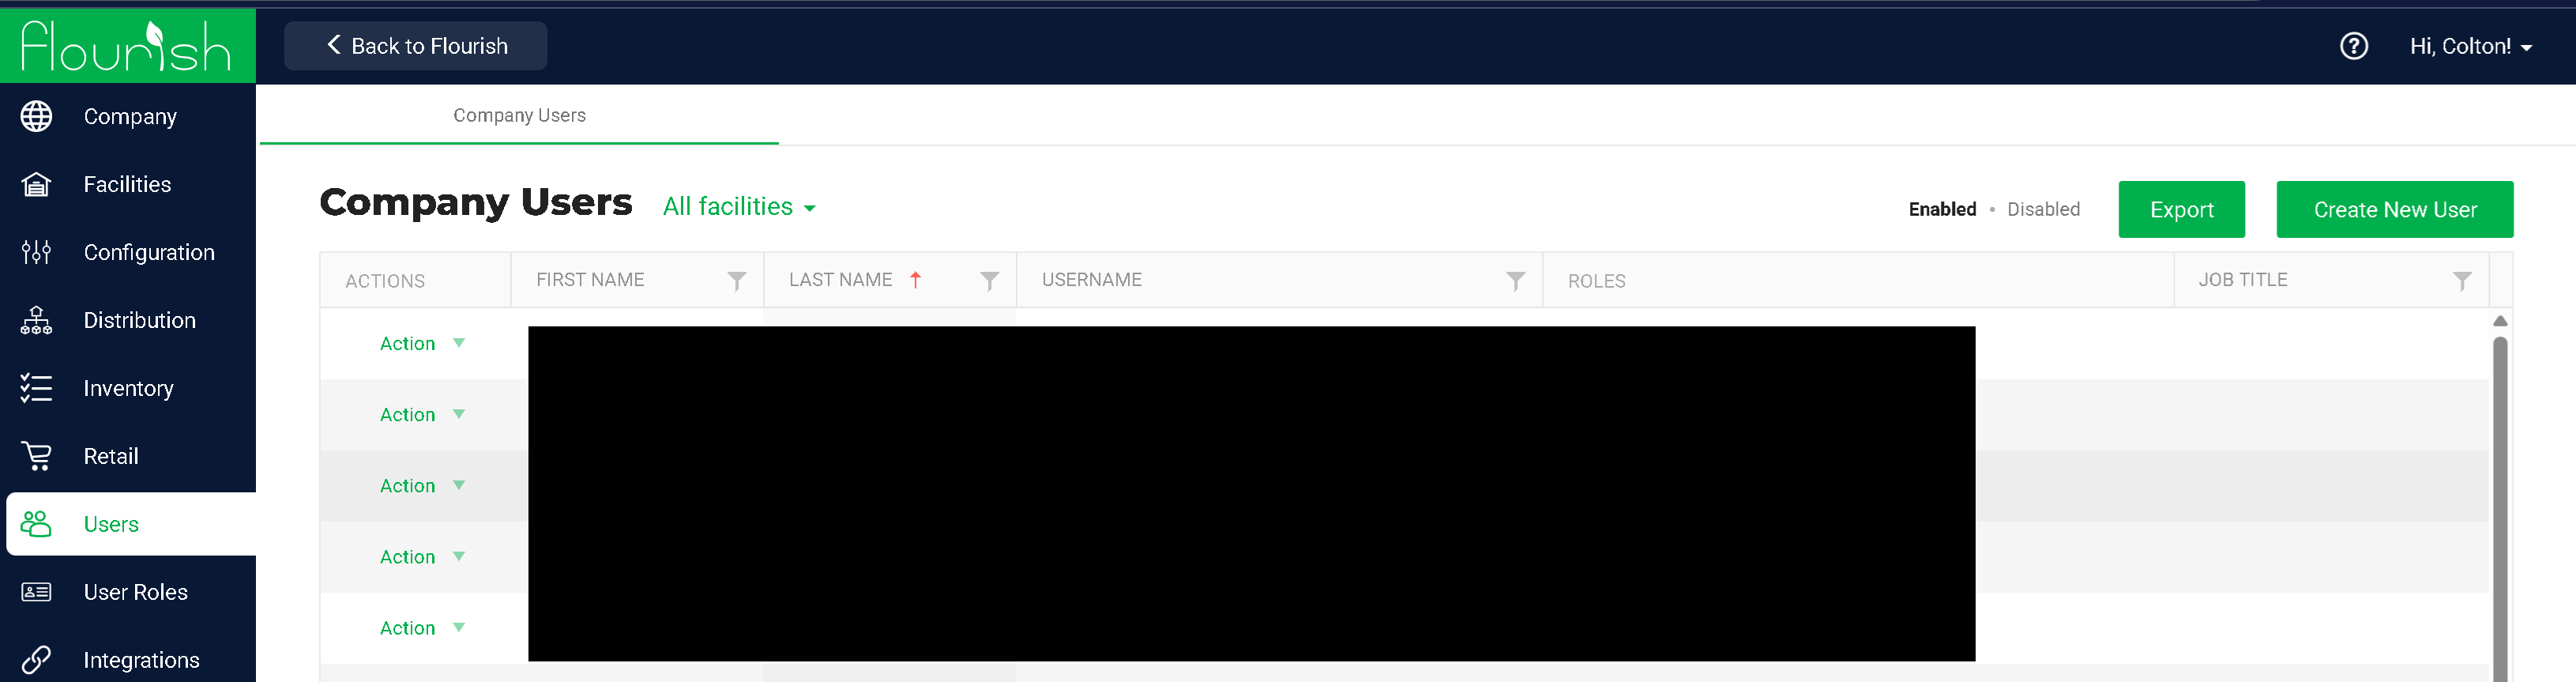
- Use the filter within the grid to search by name, email, title, etc.
- Click on the email (Username) to navigate directly to the user's profile
- Click on the Action button to take various actions as described below
Actions on a User
Action | Description |
Creates a new user within Flourish. | |
Deletes the user from Flourish. | |
Disables the user from logging into Flourish indefinitely. | |
Edits the user profile to update any attribute or permission for the user. | |
Views the user profile. |
Add New User
To create a new user, follow these steps:
- Navigate to the "Manage Settings" section in the application.
- Select "Users" from the menu.
- Click on the "Create New User" button.
- If your system is not integrated with a state track-and-trace system (such as METRC or BioTrack), you can proceed directly to creating the user.
- If your system is integrated, you will see a screen prompting you to manage compliance system credentials. Follow the instructions below Compliance Credential Options before clicking “Proceed.”
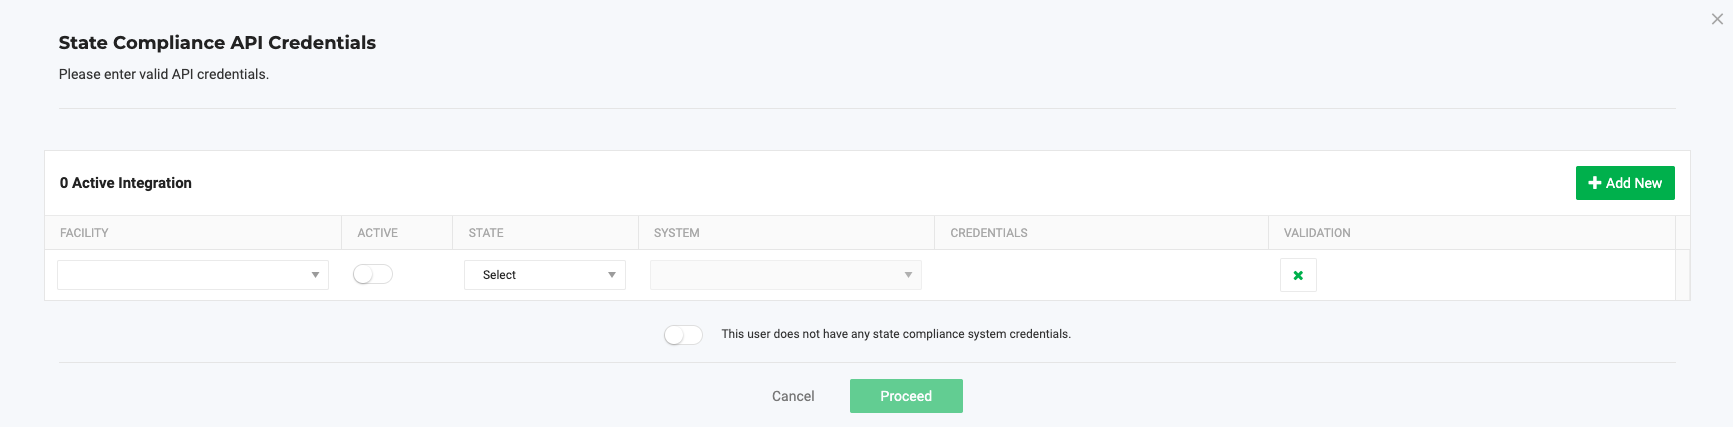
Compliance Credential Options
You have two options when setting up a user:
- Enter the User’s API Credentials
Provide the relevant API Key for the state compliance system: - Toggle On: “This user does not have any state compliance system credentials.”
Use this option if you want to create a user who can access Flourish Software but should not interact with the state compliance system.This is commonly used for administrative, support, or marketing roles who don’t perform compliance-related actions.
If you're unsure which option to select or need help with user roles, please contact Flourish Software Support for assistance.
User profile
Field | Description | Required |
Email to log in with. | Yes | |
First Name | First name of the user. | Yes |
Last Name | Last name of the user. | Yes |
Employee ID | Optional employee identification. | No |
Cell Phone | Optional cell phone number. | No |
Job Title | Optional job title of the user. | No |
Location | Optional user's location. | No |
Facility Permissions | User Role(s) for the Facility(ies) | Yes |
Delete User
To delete a user, follow these steps:
- Navigate to the "Manage Settings" section in the application.
- Select "Users" from the menu.
- Click on the "Action" drop-down and Select "Delete User"
Disable User
To disable a user, follow these steps:
- Navigate to the "Manage Settings" section in the application.
- Select "Users" from the menu.
- Click on the "Action" drop-down and Select "Disable User"
Edit User
To edit a user, follow these steps:
- Navigate to the "Manage Settings" section in the application.
- Select "Users" from the menu.
- Click on the "Action" drop-down and Select "Edit User"
View User Detail
To view a user account, follow these steps:
- Navigate to the "Manage Settings" section in the application.
- Select "Users" from the menu.
- Click on the "Action" drop-down and Select "View User Detail"
Facility Permissions
Once a user role is created as described in the User Roles and Facility Permissions
You can assign a user the role by navigating to the Facility Permissions within the selected user profile and selecting the User Role(s) for the Facility(ies) you want to grant permissions to.
My Profile
To access and make changes to your profile, follow these instructions:
- Click on the menu option located at the top right corner of the screen.
- From the dropdown menu, select "My Profile" or choose "View User" from the user list.
- Once you are on the profile screen, you can modify the following information:
- Update your first name, last name, and phone number.
- Set your Default Facility, specifying your primary location or department.
- Choose your default Home Page, the landing page you want to see upon logging in.
- Note: Ensure that you have the appropriate permissions to access and modify this page.
- Additionally, you can change your password from the profile screen. It is important to periodically update your password for security reasons.
By following these steps, you can access your profile and make desired changes to personalize your account settings and information

How did we do?
User Roles and Facility Permissions
Setting Up Users for Mobile Access