Table of Contents
Checking In a Customer
Check In Process. If you've created your customer's profiles and they're ready to make a purchase, you'll need to check them in first. This process is called Intake or Check-in , and it adds the cust…
Check In Process
If you've created your customer's profiles and they're ready to make a purchase, you'll need to check them in first. This process is called Intake or Check-in, and it adds the customer to the Queue to help build their order.
- In the POS app, navigate to Intake > Search Customers.
- Use the fields at the top to search for the customer. You can search by name, email, phone number, date of birth, or state registry ID.
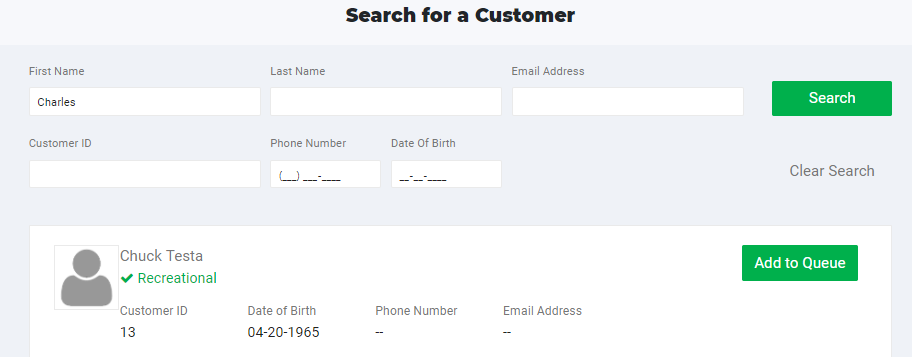
- If you can't locate your customer, you may need to create a customer profile for them.
- When you locate your customer, click the Add to Queue button.
You can also add a customer to the queue from their profile:
- Locate the customer.
- Click on their name to enter the customer profile.
- Click on Purchases.
- Click on Add to Queue.
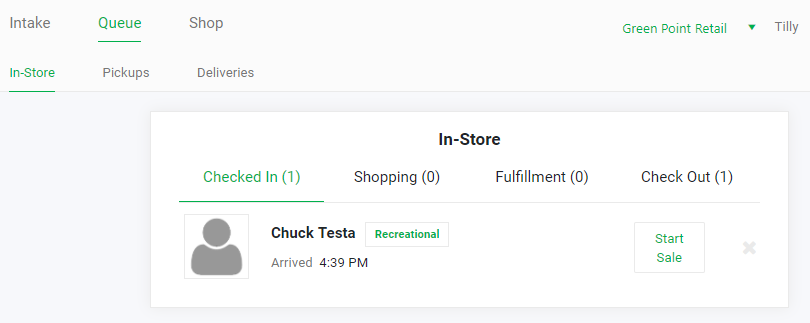
Your customer is now listed under Queue > In-Store > Checked In. You can click Start Sale to begin building their cart.
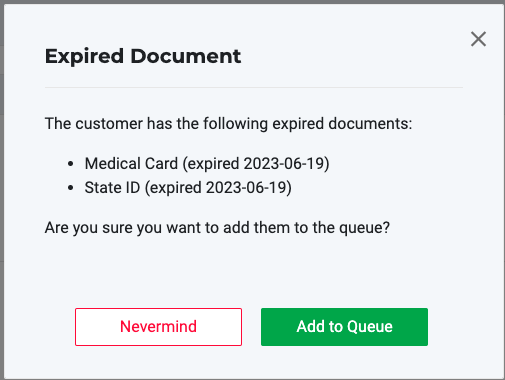
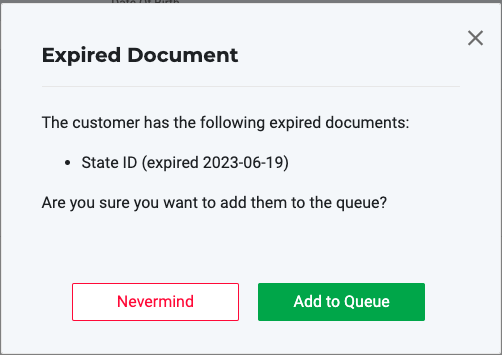
Expired Document Alert
When you chew in a customer, Flourish verifies the expiration dates of the following documents:
- State Registry ID (Medical Card)
- State ID (State ID)
If one or both documents are expired, the system will alert you.
When you click "Add to Queue," Flourish displays a message like the ones shown in the examples below.
- Click "Add to Queue" to add the Checked-in queue
- Click "Nevermind" to stop the intake process.
 |  |
How did we do?
Retail POS Printing Customer Labels
METRC Retail Delivery: Edit order after marking “Out For Delivery”