Table of Contents
Create and Manage Vehicles
How to Create and Manage your Vehicles in Flourish Software to assign to your outbound shipments.
Assigning the right vehicle to the right shipment or delivery is essential for efficient operational logistics. This document explains the process for creating and managing vehicles.
Access Vehicles Management
To view your Vehicles management page, simply navigate here:
- Go to Settings.
- Select Distribution.
- Click Vehicles.
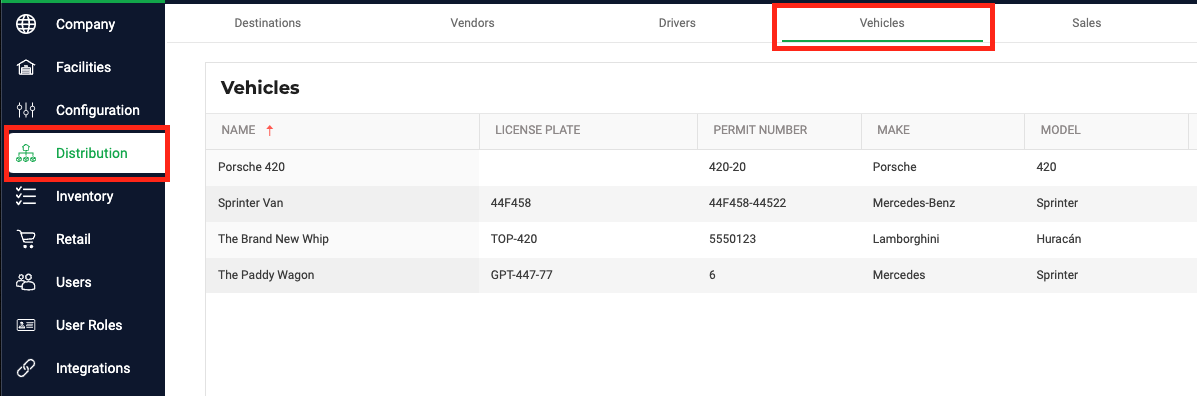
Actions on Vehicles
Action | Description |
Creates a new vehicle within Flourish. | |
Editing a vehicle allows you to update any attribute or information related to the vehicle. | |
Deactivates a vehicle from Flourish. | |
Reactivates a vehicle from Flourish | |
Assign a vehicle to a specific facility. |
Adding New Vehicles
To create a new vehicle from the vehicles management page, follow these steps:
- Select Add New on the right side of the screen.
- Add the Vehicle's information where applicable.
- Required Fields:
- Vehicle Display Name;
- Make;
- Model;
- Permit Number.
- Required Fields:
- Click Save. That is it! Your new Vehicle is now created and ready to use.
Create a "New Vehicle" directly from the Shipment
Alternatively, you can create your new vehicle directly on the Shipment instead of going to your Settings. Here is how:
- While creating a new Shipment or editing an existing one, click "New Vehicle" as seen above the Vehicle dropdown menu:
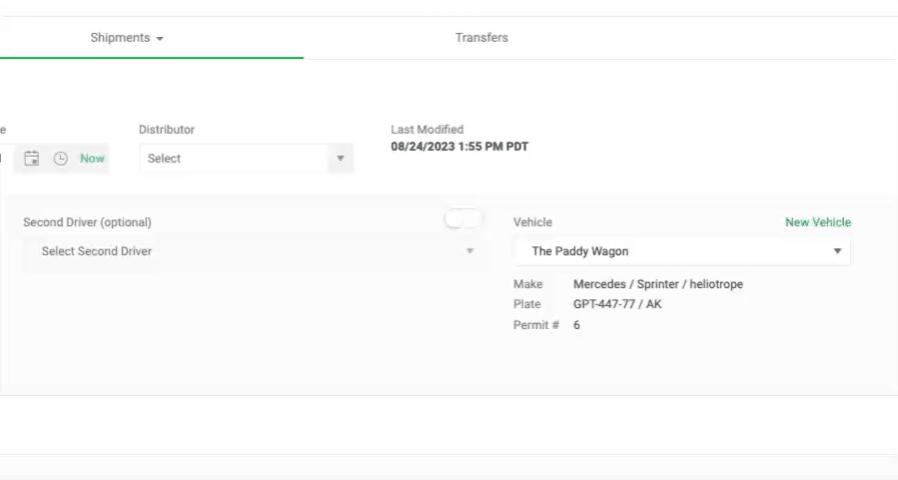
- Add the Vehicle's information where applicable.
- Required Fields:
- Vehicle Display Name;
- Make;
- Model;
- Permit Number.
- Required Fields:
- Click Save. That is it! Your new Vehicle is now created and ready to use.
Editing Vehicles
To edit a Vehicle from the vehicles management page, follow these steps:
- Click on the CONFIGURE icon
 on the Vehicle you want to Edit.
 - Make desired edits.
- Click Save. That is it! You should receive a message confirming that the edits were successfully made:

Deactivating Vehicles
To deactivate a Vehicle from the vehicles management page, follow these steps:
- Click on the CONFIGURE icon
 on the Vehicle you want to Deactivate.
 - Select Disable.
- The system will display a prompt, "This vehicle will be deactivated. Do you wish to proceed?"
- Toggle the slider ON.
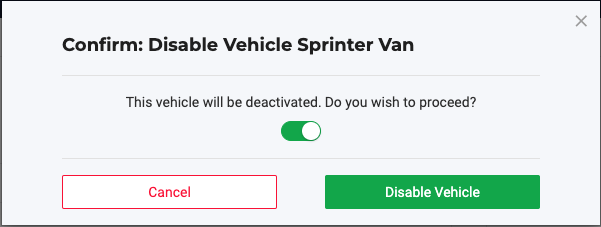
- Toggle the slider ON.
- Select Disable Vehicle
- That's it! You will receive a success message confirming that the Vehicle is now disabled.

Deactivating Vehicles: Troubleshooting Error Message
- If the Vehicle is still assigned to an active Shipment, then you still see this error message when attempting to deactivate it:

- "Active" Shipments are any Shipments not in the status of "Shipped"
- If this happens, then navigate back to the front end of the application and go to Outbound > Shipments > All Shipments, where you will filter for the desired Vehicle:
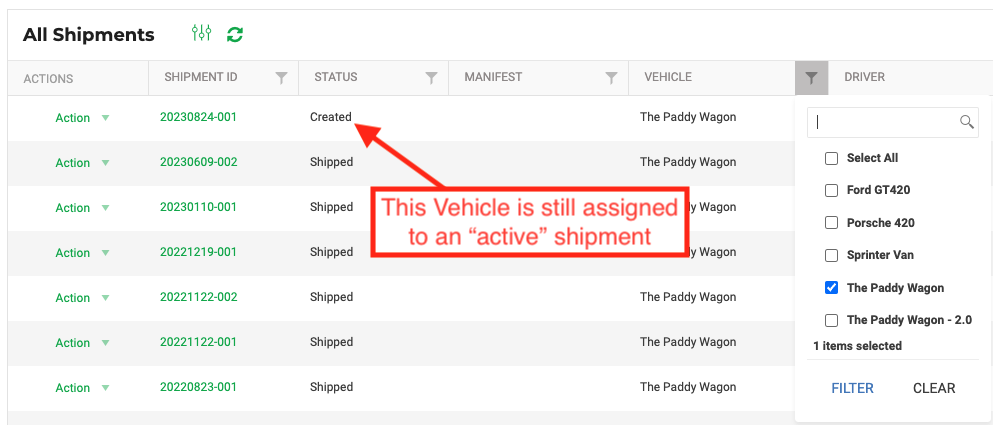
- Review the active Shipments and resolve the issue by doing one of the following actions:
- Ship the Shipment;
- "Edit" the shipment to change its assigned vehicle;
- or "Cancel" the Shipment.
- Once the Vehicle's active shipments have been addressed, then you may go back to your settings and retry disabling it again.
Reactivating Vehicles
To reactivate a driver, follow these steps:
- On the vehicles management page, select Disabled from the upper right corner of the Vehicles grid
- Click on the CONFIGURE icon
 on the Vehicle you want to Reactivate
 - Select Enable.
Tagging Vehicles
Tagging Vehicles is used for multi-facility companies for managing which vehicles are available to select when creating New Shipments for each Flourish facility. For more information on Tags and how they are used, please see our articles on Item Tagging Functionality & Facility Tag Settings.
Here is how to apply a Tag to your Vehicles:
- Click on the CONFIGURE icon on the Vehicle you want to tag
- Click on the dropdown to select the tag click on the tag to select.
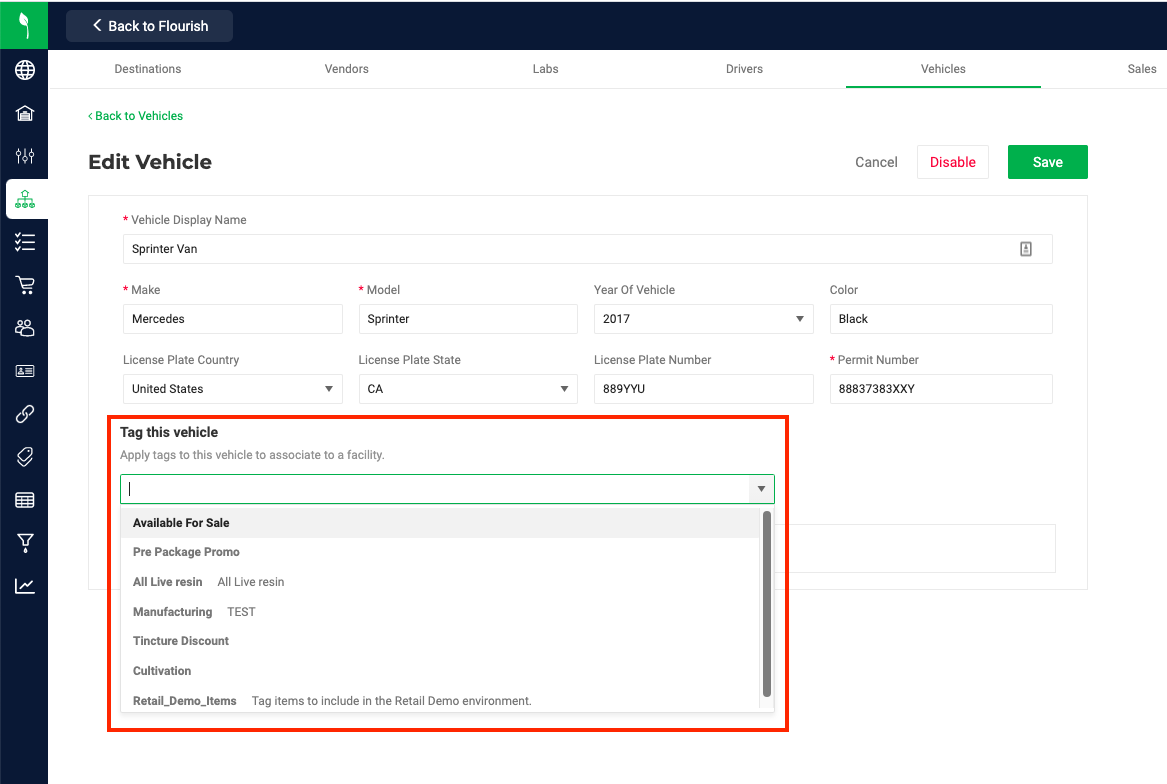
- Click Save. That is it! The vehicle will now only be available to use at the tagged facility.
How did we do?
How to Tag Drivers
Configure Distribution Endpoints, Drivers & Vehicles