Table of Contents
Adding Payment Terminals & Assigning to a Till
Payment Terminals are used in conjunction with Tills to support the Point of Banking (POB) integrated payment method. Learn more about Creating Tills. Add new Payment Terminals. Click the gearbox in…
Payment Terminals are used in conjunction with Tills to support the Point of Banking (POB) integrated payment method. Learn more about Creating Tills.
Add new Payment Terminals
- Click the gearbox
 in the top right to navigate to Manage Settings.
 - Click Retail
 .
. - Select Terminals/Add New Terminal
 .
. - Fill out Terminal Name and Serial Number, the click Save
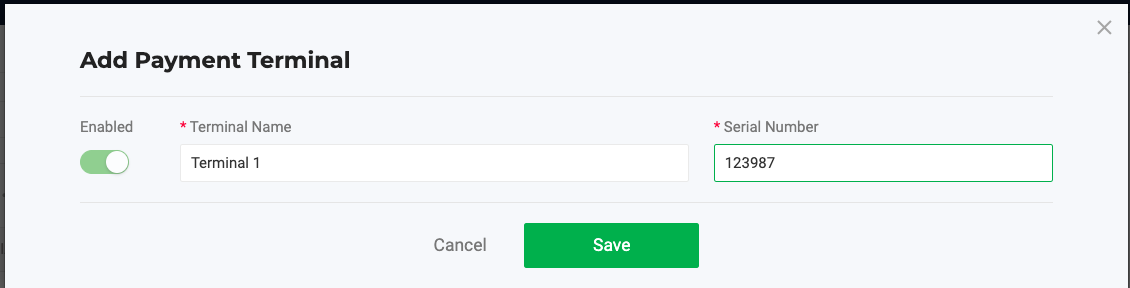 .
. - You are done!
Choosing Default Facility
After creating a Payment Terminal, select the Facility to associate the terminal with by clicking the dropdown under the Facility column 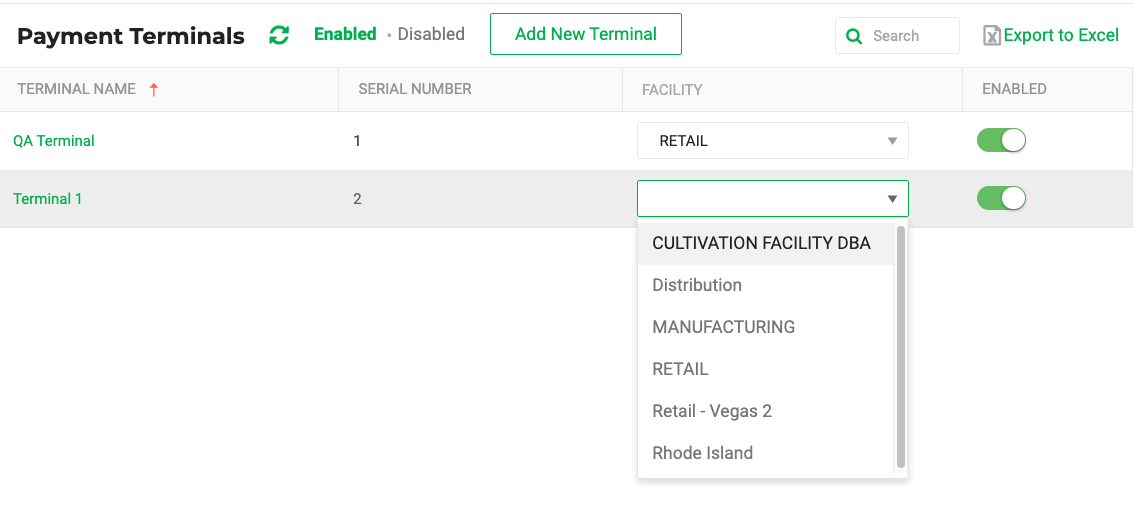 .
.
The facility selected is used to link the terminal to a Till associated with that facility.
Linking Till with Payment Terminal
Once a Payment Terminal is assigned to a Facility, you can link a Till with the terminal to record Point of Banking (POB) transactions.
- Click the gearbox in the top right to navigate to Manage Settings.
- Click Retail .
- Click Tills and select the Facility with the Till you want to link to.
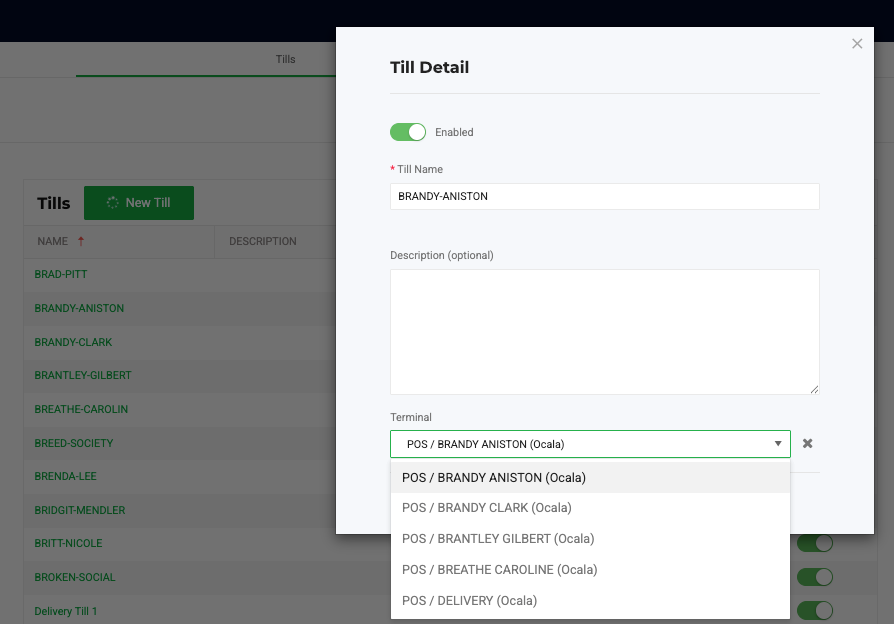
- Click the name of the Till you wish to link to a Payment Terminal.
- In the pop-up, click Edit
 .
. - Select the desired Terminal.
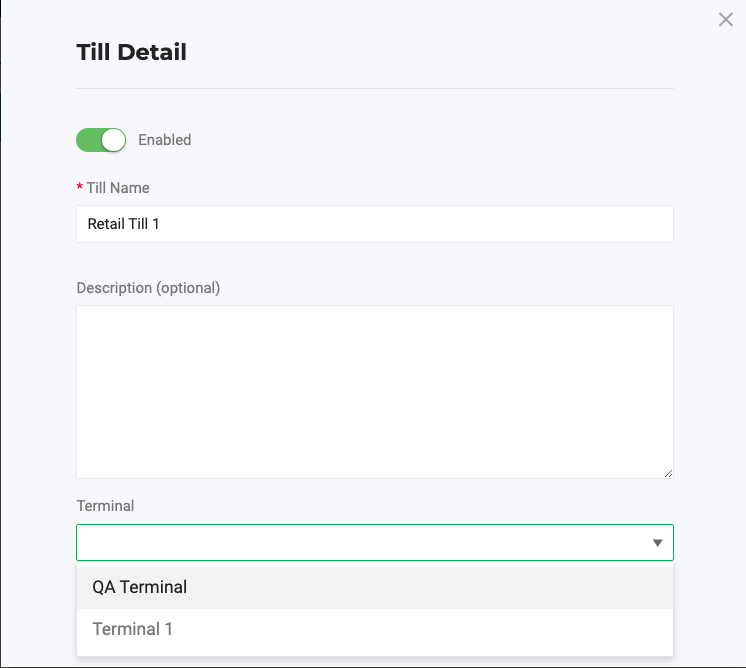
- Click Save
 .
. - That Till is now associated with the selected Payment Terminal and is ready to be used for Point of Banking (POB) transactions!
Change/Unlink a Payment Terminal for a Till
- Click the gearbox in the top right to navigate to Manage Settings.
- Click Retail .
- Click Tills and select the Facility with the Till you want to link to.
- Click the name of the Till you wish to link to a Payment Terminal.
- In the pop-up, click Edit .
- To unlink: Click the X next to the Terminal to dissociate it from the Till.
- To link with a different Terminal, select the desired Terminal.
- Click Save .
Edit Terminal
- Click the gearbox in the top right to navigate to Manage Settings.
- Click Retail .
- Click Terminals and use the "Filter by Facility:" to select the Facility with the Terminal you want to edit.
- Click the name of the Terminal.
- In the pop-up, click Edit .
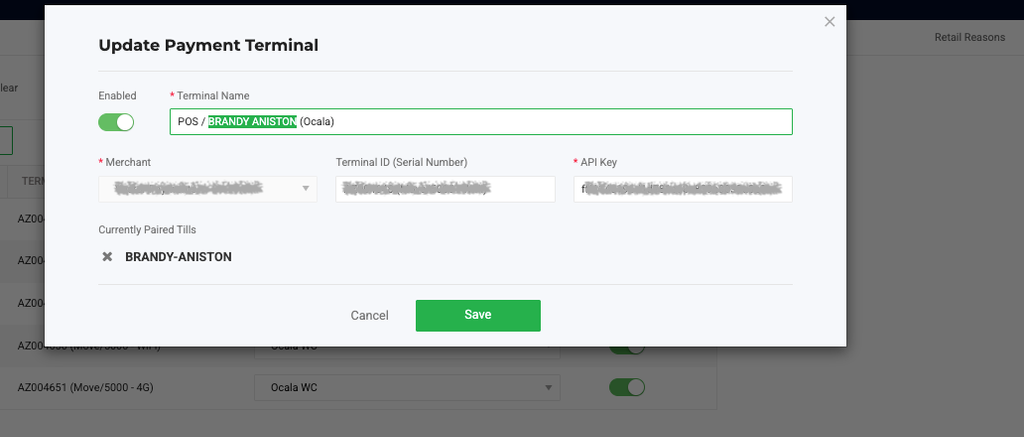
- Edit the details.
- Click Save .
How did we do?
Retail Pre-Orders, Backorders, and Replacement Orders
Retail - Customer State ID, Medical ID data and expiration