Table of Contents
Package Harvests Data Management
With Flourish Software, you can manually edit the harvest data for individual packages directly from the Inventory module.
You can manually edit harvest data for individual packages in the Inventory module by opening the Package Attributes modal.
Harvest information now saves at the company level, not just the facility. When you transfer packages between facilities under the same company, the original harvest data carries over and stays consistent.
You can also view and manage harvest details directly in the Package Attributes modal without extra steps, giving you more flexibility and control.
Access the Harvest Data
- Go to Inventory.
- Use the search bar to locate your package by Package ID.
- Click on Action > Edit attributes.
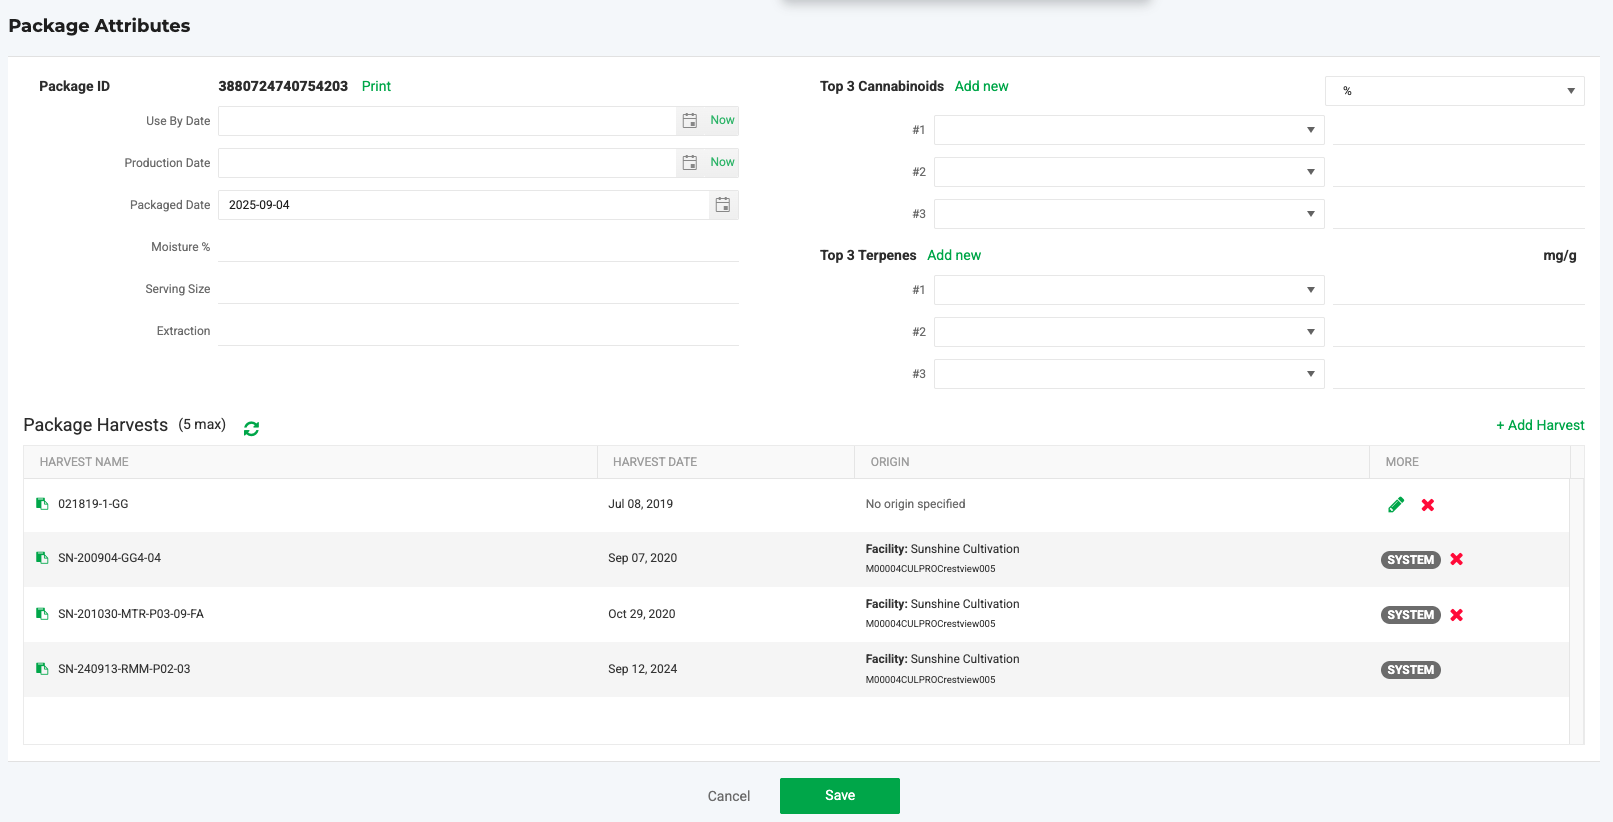
- In the Package Attributes window, locate the Package Harvests section.
- Make your edits.
- Click Save.
Package Harvests Section Description
Data Fields
- Harvest Name.
- Harvest Date.
- Origin - A cultivation facility or a Vendor
- More - Description and available actions:
Icon | Description and actions |
 | A system-generated Harvest. Displays for a harvest package or a descendant of a harvest package. You cannot remove this harvest record. |
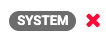 | A system-generated Harvest. Denotes a harvest that was recorded in Flourish Software or synced from a compliance system. You can remove this harvest record. |
 | A user-created harvest record. This is a harvest record that a user added and can modify or remove. |
Manage Harvest Data in Packages
Before you start editing or managing harvest data in packages, keep these key points in mind:
Essential Facts About Harvest Data in Packages
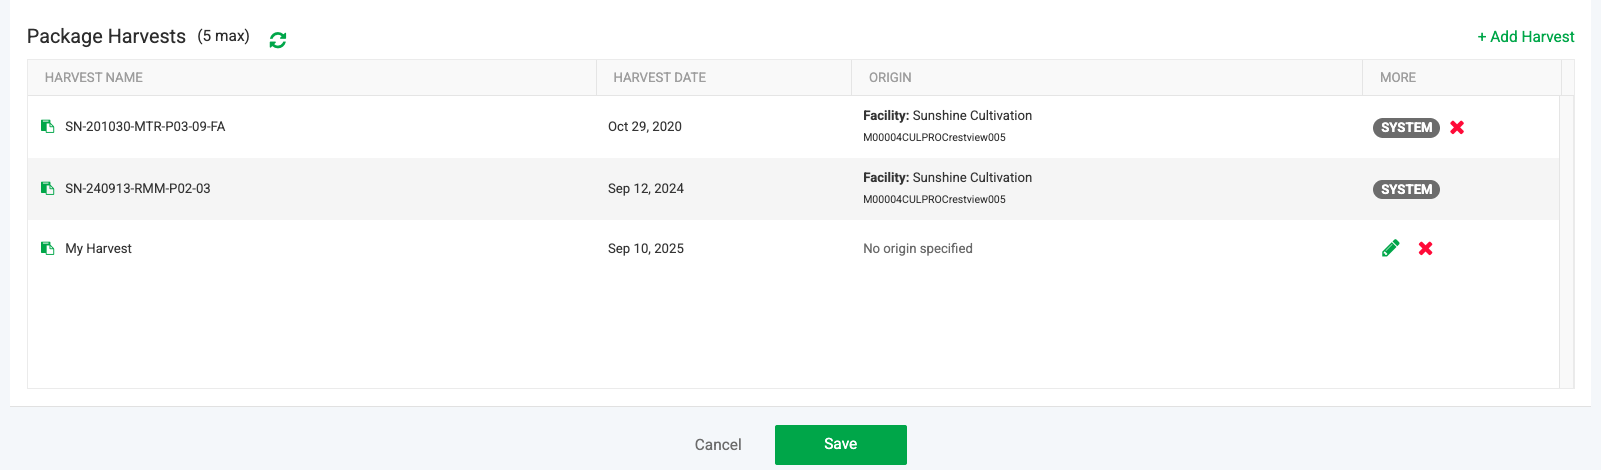
Packages Grid & Attributes
- Open the Package Attributes modal to see the new Package Harvests grid.
- Add up to 5 harvest mappings for a package.
- Remove harvest mappings, even if they were system-generated.
- Add custom harvests with your own harvest date.
- Edit the name, date, and vendor for non-system-generated harvests. (System-generated harvests stay locked.)
- Changes apply to every package linked to that harvest.
Creating Packages, Manufacturing Runs, Work Orders, and BOMs
- Harvest mappings roll forward from package to package as you create them.
- If a package has more than five harvests, the system automatically marks it as “Mixed.”

* Consider adding an origin harvest record for this package to ensure it — and any resulting splits — include proper harvest and harvest date data.
Purchase Orders
- You can still enter harvest data on Inbound Purchase Orders.
- When you enter harvest data during the inbound process, Flourish Software creates a user-created harvest record.
Video
Add Existing Harvests to a Package
- Click "+ Add Harvest" in the Package Harvests grid.
- Select from the dropdown of existing harvests. Selecting a Harvest populates the Harvest Date and Origin data.
- If you want to remove the line and start over, click
 .
. - Click the save icon
 .
. - Click Save.
Add Custom Harvests
- Click "+ Add Harvest" in the Package Harvests grid.
- Toggle the 'New' ON.

- Type the harvest name.
- Select the harvest date.
- Select the origin.
- If you want to remove the line and start over, click .
- Click the save icon .
- Click Save.
Remove a Harvest
- Select the harvest mapping in the grid.
- Click the
 icon.
icon. - Confirm the action in the Remove Harvest screen.
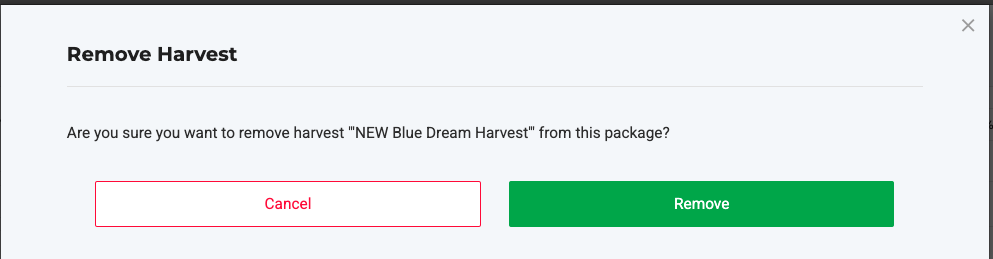
- You can even remove system-generated harvests if needed.
How did we do?
Assign Package Attributes for Cannabis Labels