Table of Contents
Create a Retail Delivery Route in Flourish
If you’re delivering a retail order to a customer, you’ll need to create a Retail Delivery Route to process the sale in Flourish.
Table of Contents
Create and Dispatch a Retail Delivery Route
Purpose
Create a delivery route after your customer orders are packed. Add the orders that will travel together, confirm the route details, then mark the route Out for Delivery when the driver is ready to leave.
A retail delivery route is also called a Sales Delivery in METRC.
Prerequisites
- Create the delivery order and confirm its delivery date.
- Pack the order. Only Packed orders can be added to a route.
- Make sure the driver and vehicle are set up and available in Flourish.
- Confirm the route's planned departure time.
- Required permissions: The user must have permissions turned ON to View and Update Deliveries in both the web app and POS user roles in Manage Settings > User Roles.
- If your facility uses METRC, MMUR, or BioTrack, review the applicable compliance article before dispatch: Florida MMUR Automatic Dispensation for Delivery Orders, Florida BioTrack Retail Delivery, or, for METRC, Edit a METRC Delivery Order After Dispatch.
Create the Route
- In Flourish Web, select Retail > Deliveries.
- Click Create New Route.
- Use the date picker to select the delivery date.
- Enter the approximate departure time.
- Select the vehicle.
- Select the driver.
- Click Create.
The route date controls which delivery orders are available to add. An order's delivery date must match the route date.
Add Orders to the Route
- In Flourish Web, select Retail > Deliveries.
- Find the route, then click Action > View Delivery.
- Click Add Purchase.
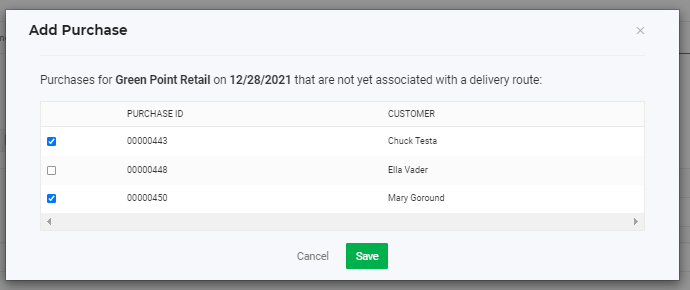
- Select the checkbox next to each order to add to the route.
- Click Save.
- Optional: Enter the Est. Arrival Time for each stop.
- Enter the route in the Planned Route field.
- Click Save.
An order appears in the Add Purchase list only when it is Packed, its delivery date matches the route date, and it does not already belong to another route.
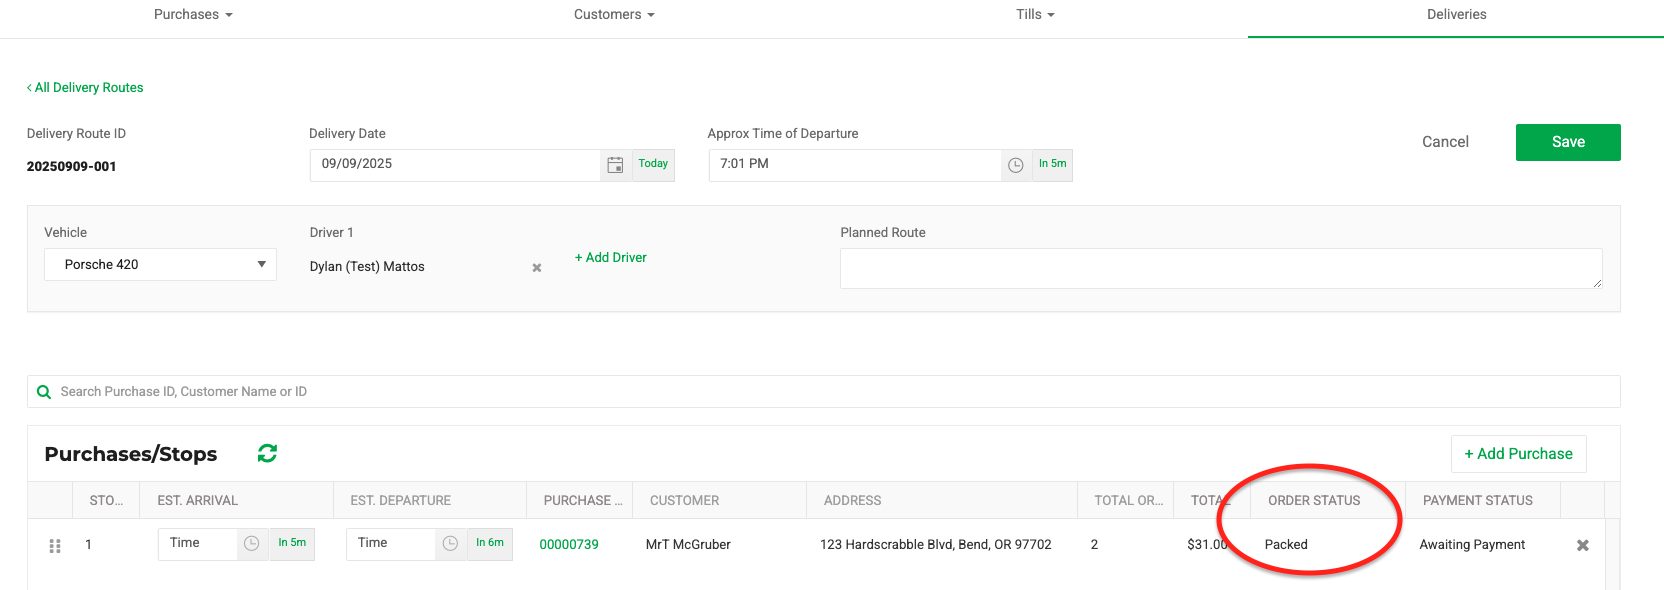
After you add orders, the route status changes from Created to Orders Assigned.
Review the Route Before Dispatch
Before the driver leaves, confirm:
- Delivery date and departure time.
- Vehicle and driver.
- Every expected order and stop.
- Delivery addresses and estimated arrival times.
- Planned route.
- Any integration-specific manifest or validation step.
Do not dispatch a route that still contains a cancelled order. Flourish blocks a route with a cancelled order from moving to Out for Delivery.
Mark the Route Out for Delivery
- In Flourish Web, select Retail > Deliveries, then find the route.
- Click Action > Edit Delivery.
- Click Out for Delivery.
- Select the till that will receive the delivery payment.
- Click Select It to confirm.
The route and its orders now show an Out for Delivery status in Flourish.
Expected Result
The route shows an Out for Delivery status, and its orders are available to the delivery team. After each stop, complete the retail delivery order or, if the stop can't be completed, mark the order Undeliverable.
Common Issues
An order is missing from Add Purchase Check its status, delivery date, and current route assignment. See Route Cannot Go Out for Delivery for the full checklist.
The route contains a cancelled order Open the route and remove or resolve the cancelled order before dispatch.
A compliance validation fails Stop and follow the article for your integration. Do not repeatedly dispatch or recreate the route until you know how the external record was affected. See Route Cannot Go Out for Delivery.
Related Articles
- Create a Retail Delivery Order
- Complete a Retail Delivery Order
- Handle an Undeliverable Retail Order
- Route Cannot Go Out for Delivery
- Choose how to pack a retail order
- Retail order and payment statuses
- Create and manage vehicles
- Edit a METRC delivery order after dispatch
- Manage delivery routes in the mobile app
How did we do?
Retail POS Printing and Reprinting Receipts
Retail POS Printing Customer Labels
