Mobile Inventory Counts: Scan Packages per Item
Scan packages per item using the Flourish mobile app to identify inventory discrepancies in distribution warehouses; discover unscanned packages and update their availability status.
Learn more about our 3 inventory count types using the Flourish mobile app
Count type 2: Scan Packages per Item
- In this workflow:
- Users scan packages per item to quickly discover if there are any discrepancies in the number of packages of the item
- If an item has packages that were not scanned, users will see those as discrepancies
- Users investigate and try to physically find the unscanned packages. Once found, users will enter the quantities of each package as Available, Not Available, or that are already Assigned to an order
- Just as in count type 1, for the discrepancies, the quantity that the user enters per package (Available, Not Available, or Assigned) will update that package's inventory after the count has been marked as Completed
- Typically this is not used in retail, so all contents of the package will be either Available, Not Available, or Assigned
- Users don’t open packages and count their individual contents (unless a package is already opened, damaged, etc)
- Users can select as many items as they like and scan packages per item
- Multiple users can perform the count using Android mobile devices simultaneously
- All scanning actions are performed via the Flourish Android Mobile App
- All actions to submit, review, complete, and cancel the inventory count are performed via the Flourish Web App
- Used typically in a distribution warehouse or facility
User permission needed:
- Settings > User Roles > Select Role > Mobile Application > Inventory > Enable Inventory Settings
Actions to perform via the Flourish Android Mobile App:
- From the Android mobile app home screen, navigate to the Inventory Counts module:
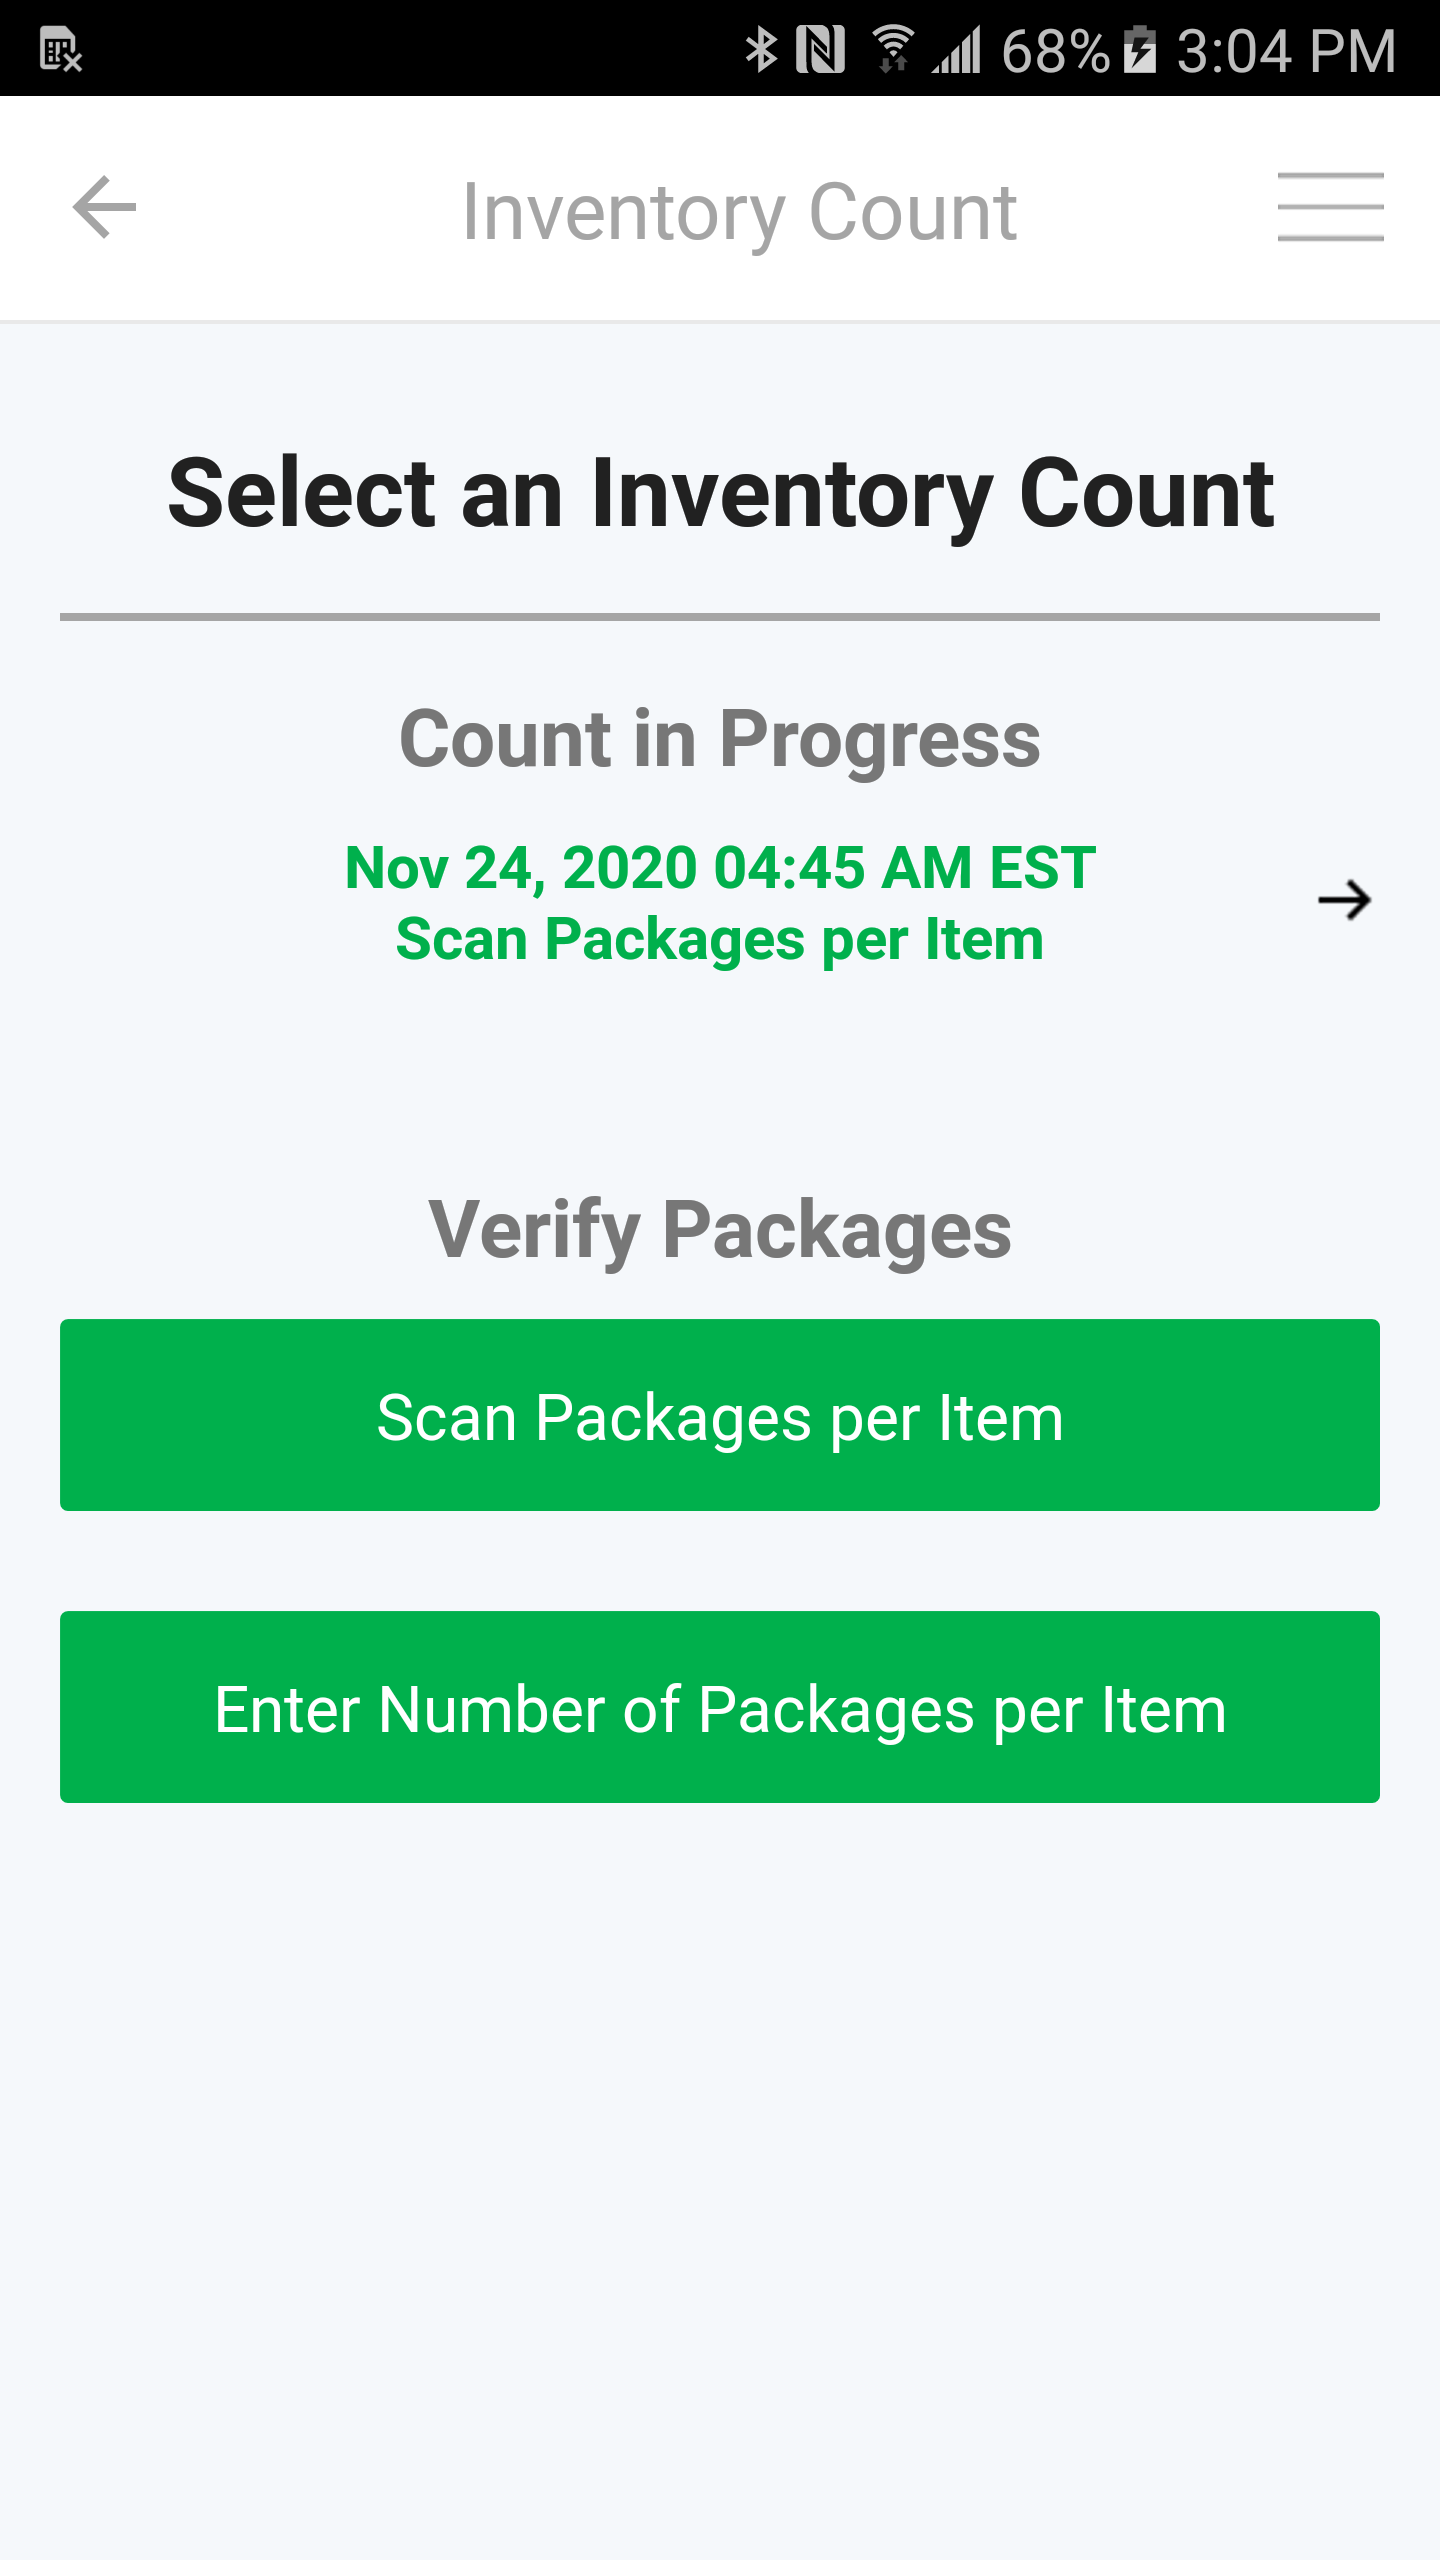
- Tap the 'Scan Packages per Item' button to start the new count.
- Only one inventory count can be performed at a time.
- If there is a count currently in process, a message will ask if you would like to cancel the current count.
- If a user wants to join the existing count, they will tap/select the title of the count in progress above the three green buttons.
- Only one inventory count can be performed at a time.
- After starting the new inventory count via the Android mobile app:
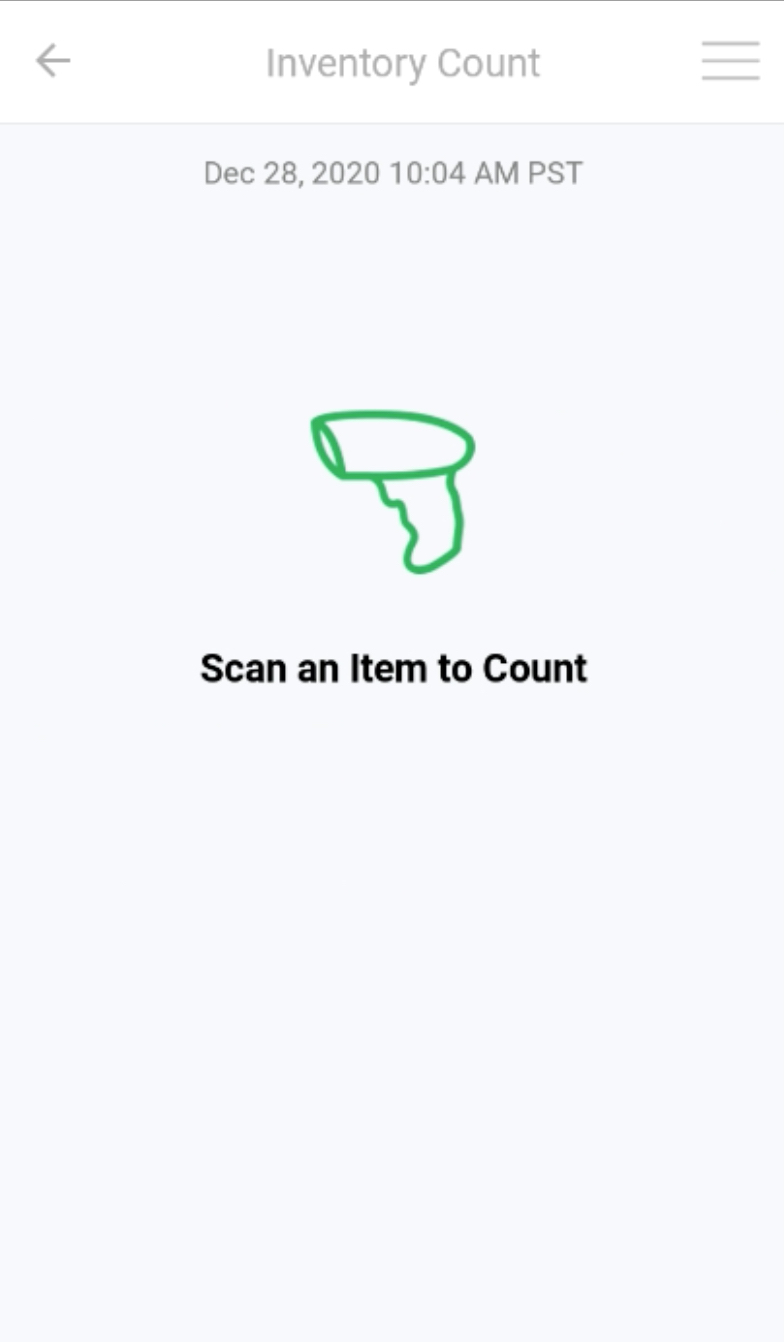
- Scan the first package, which will automatically select the first item you'd like to scan all packages for in the facility.
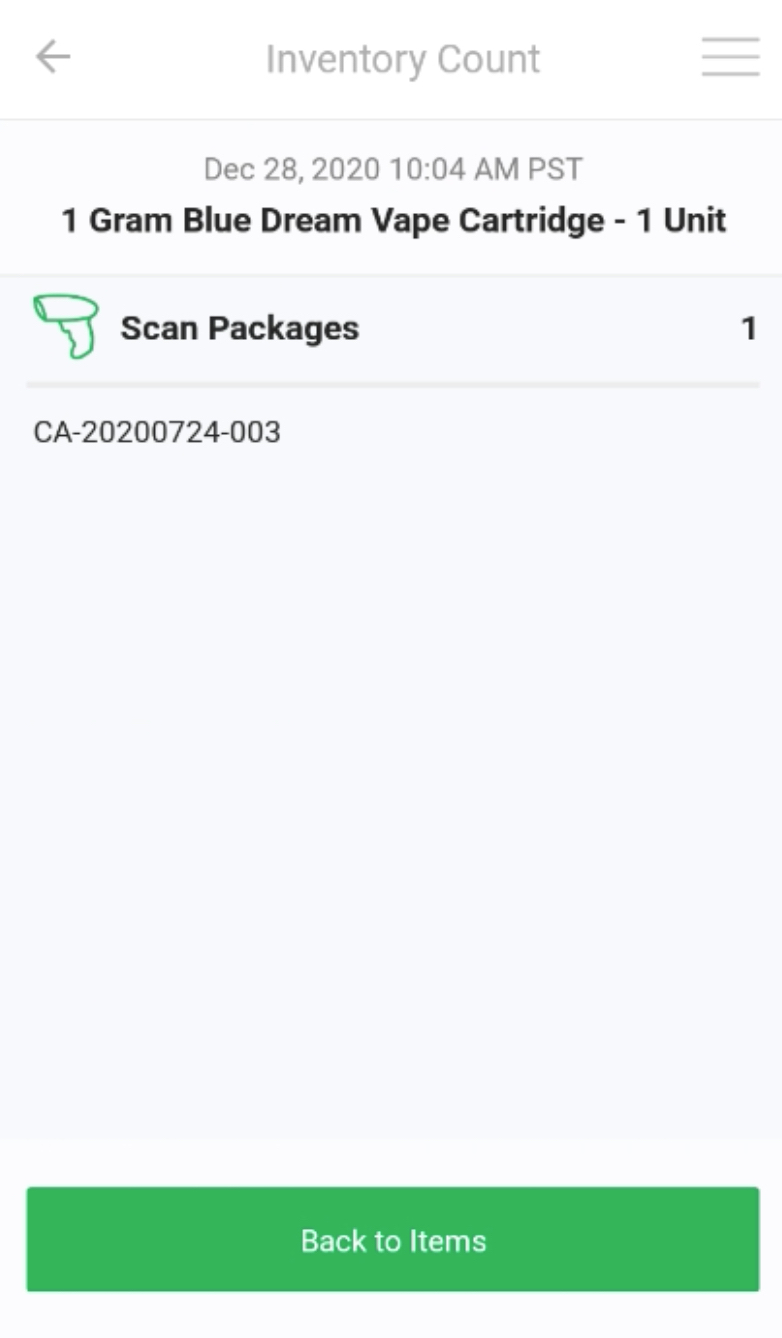
- Continue scanning all of the packages of that item that are in the facility:
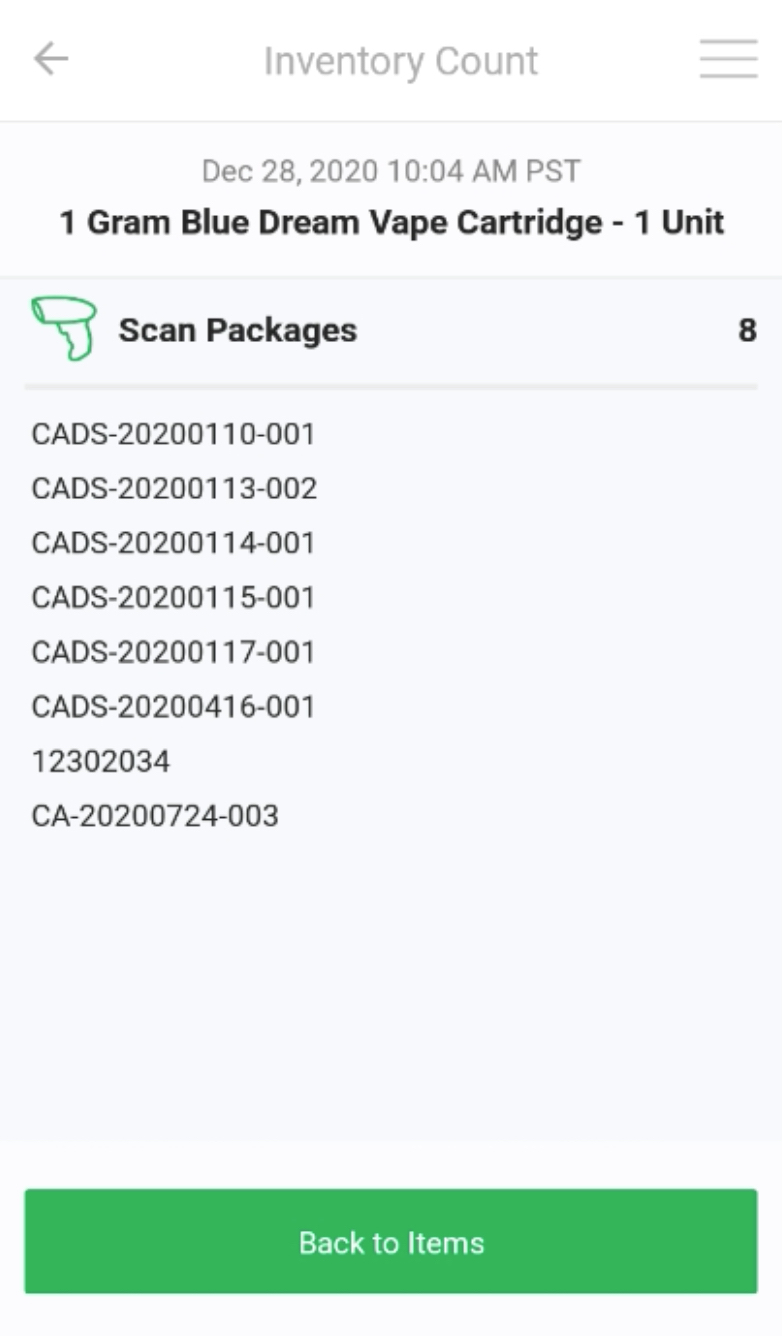
- After scanning all of the packages, tap the 'Back to Items' green button. Users can tap on the item and scan more packages of that item as needed.
- If you are done adding items and scanning packages of the item, tap the Exit Count button.
- If you would like to include another item in this count, simply scan another package to automatically select the new item, then repeat #4-5 above. After you've scanned packages for all of the items you want to include in this count, tap the Exit Count button.
Steps to perform via the Flourish Web App:
- The user can review the items and scanned packages prior to submitting the count:
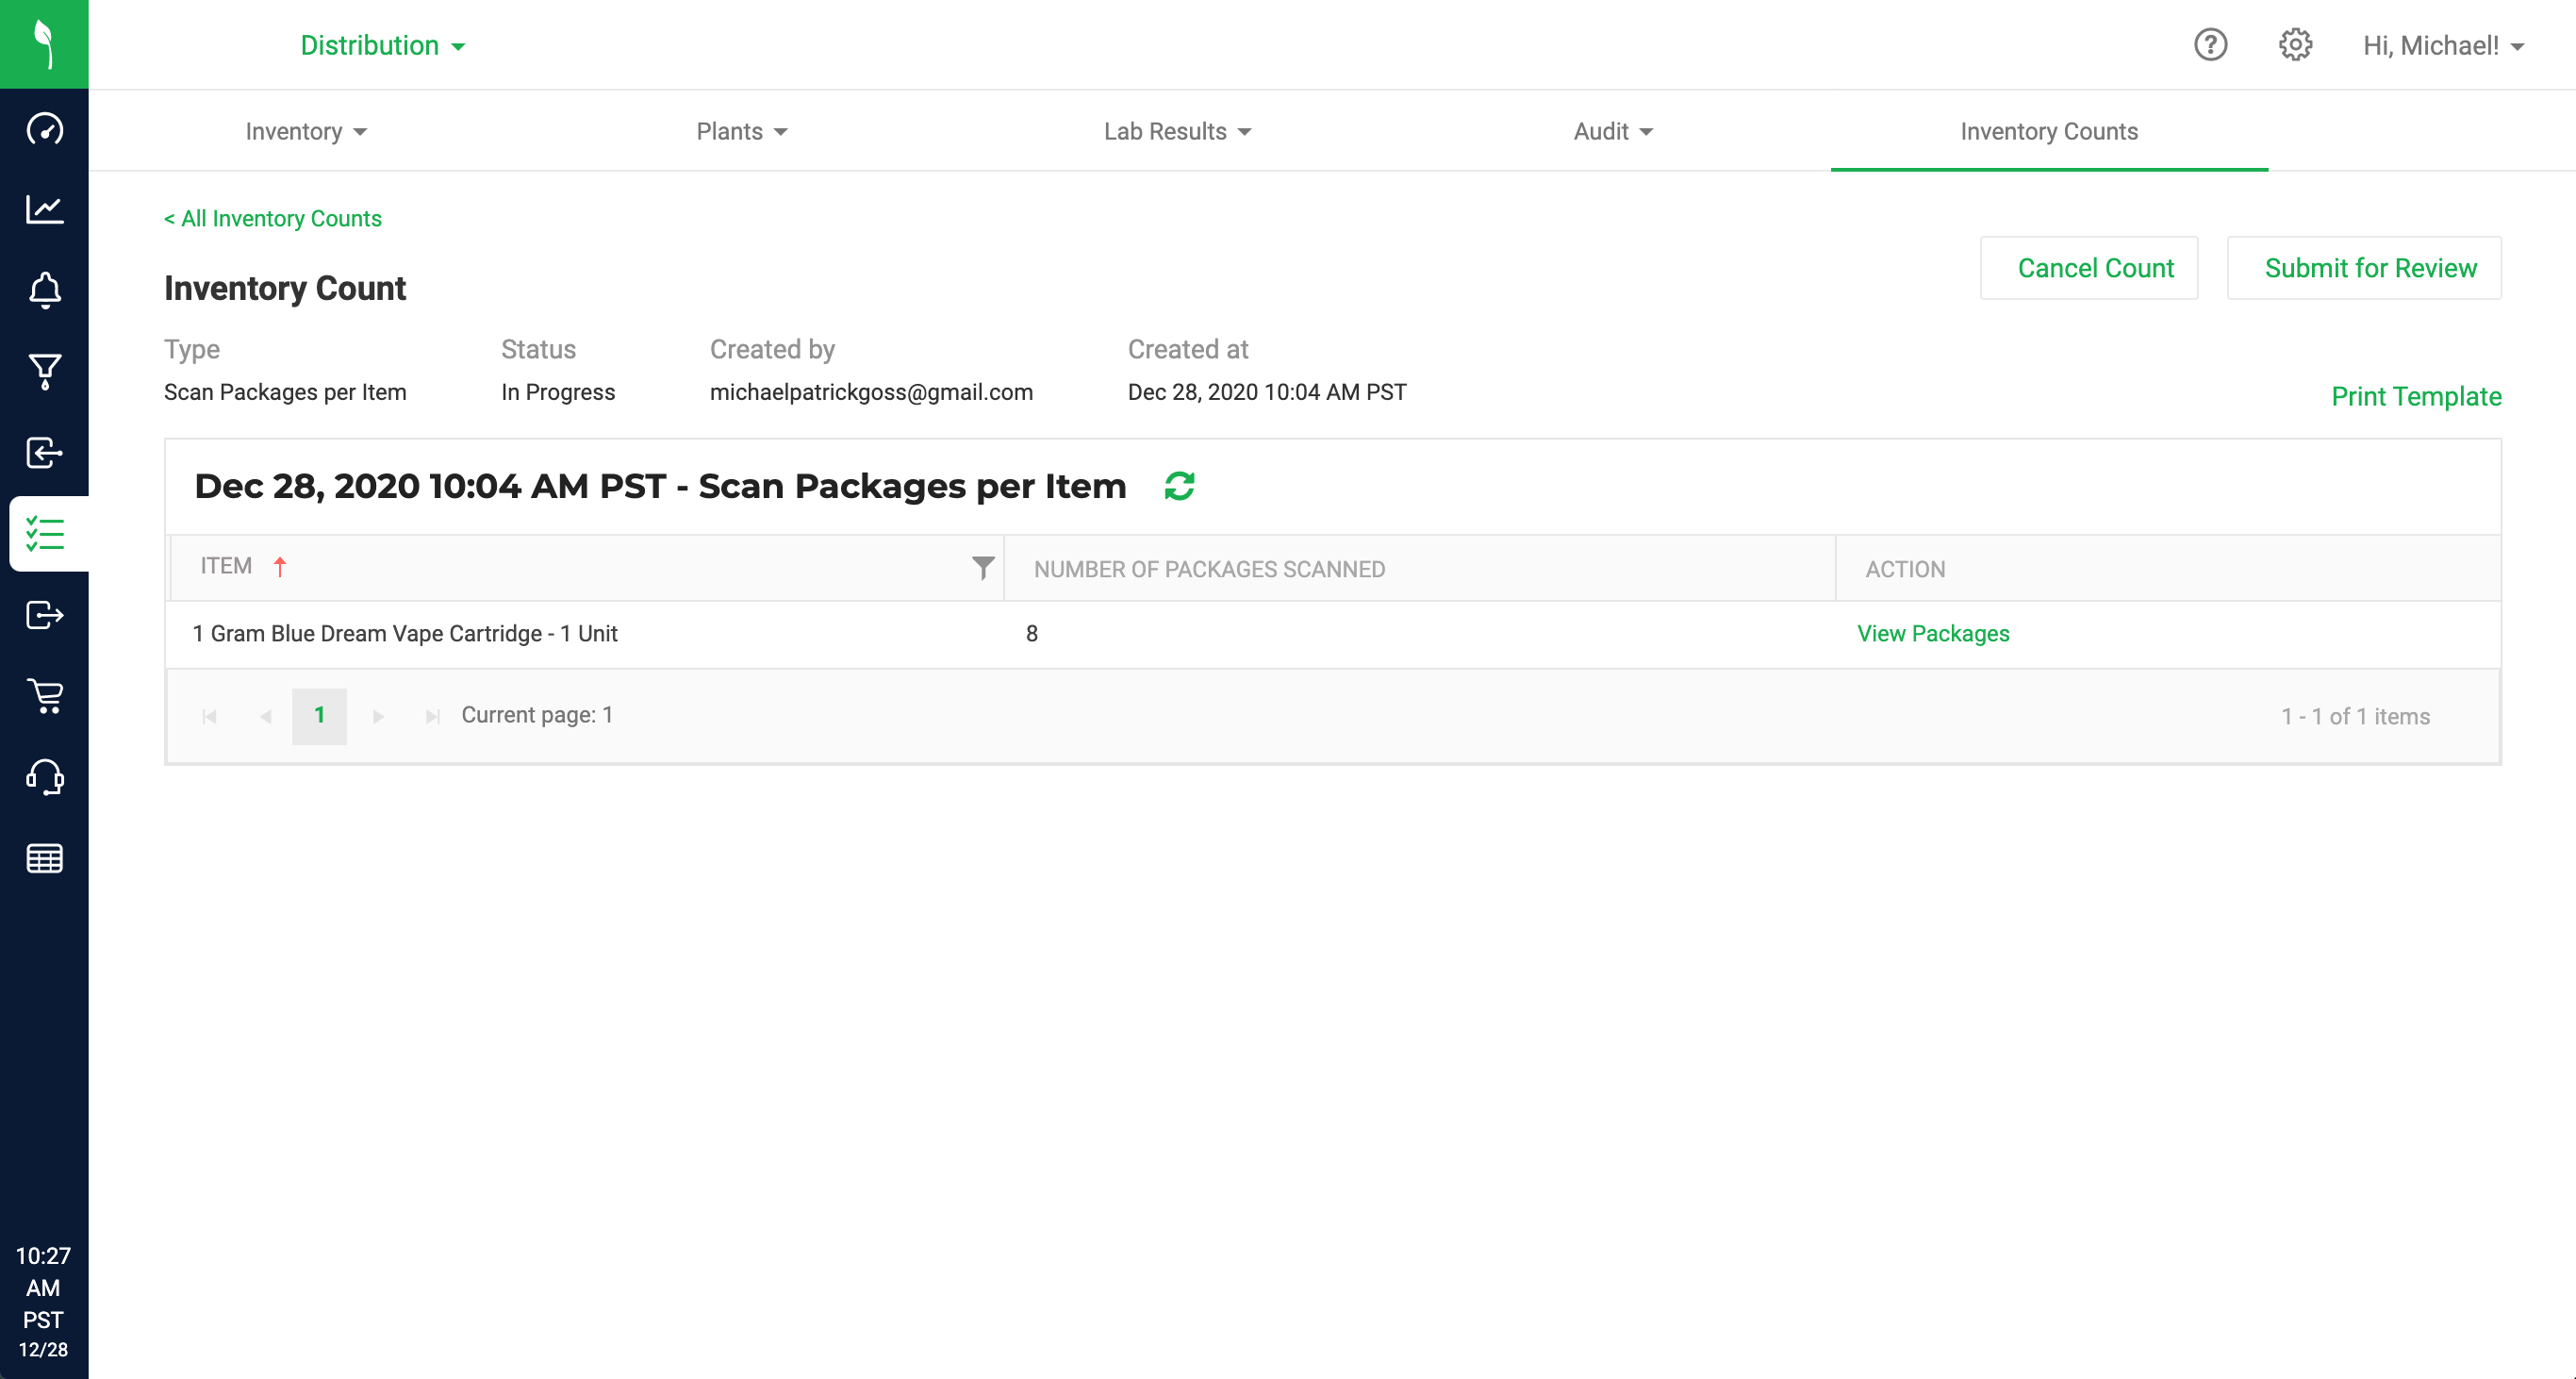
- Click on the 'View Packages' link. A modal will appear with two tabs: All Packages Scanned and Packages by Lot (and clicking on a package ID in the modal will reveal the Audit Log for that package):
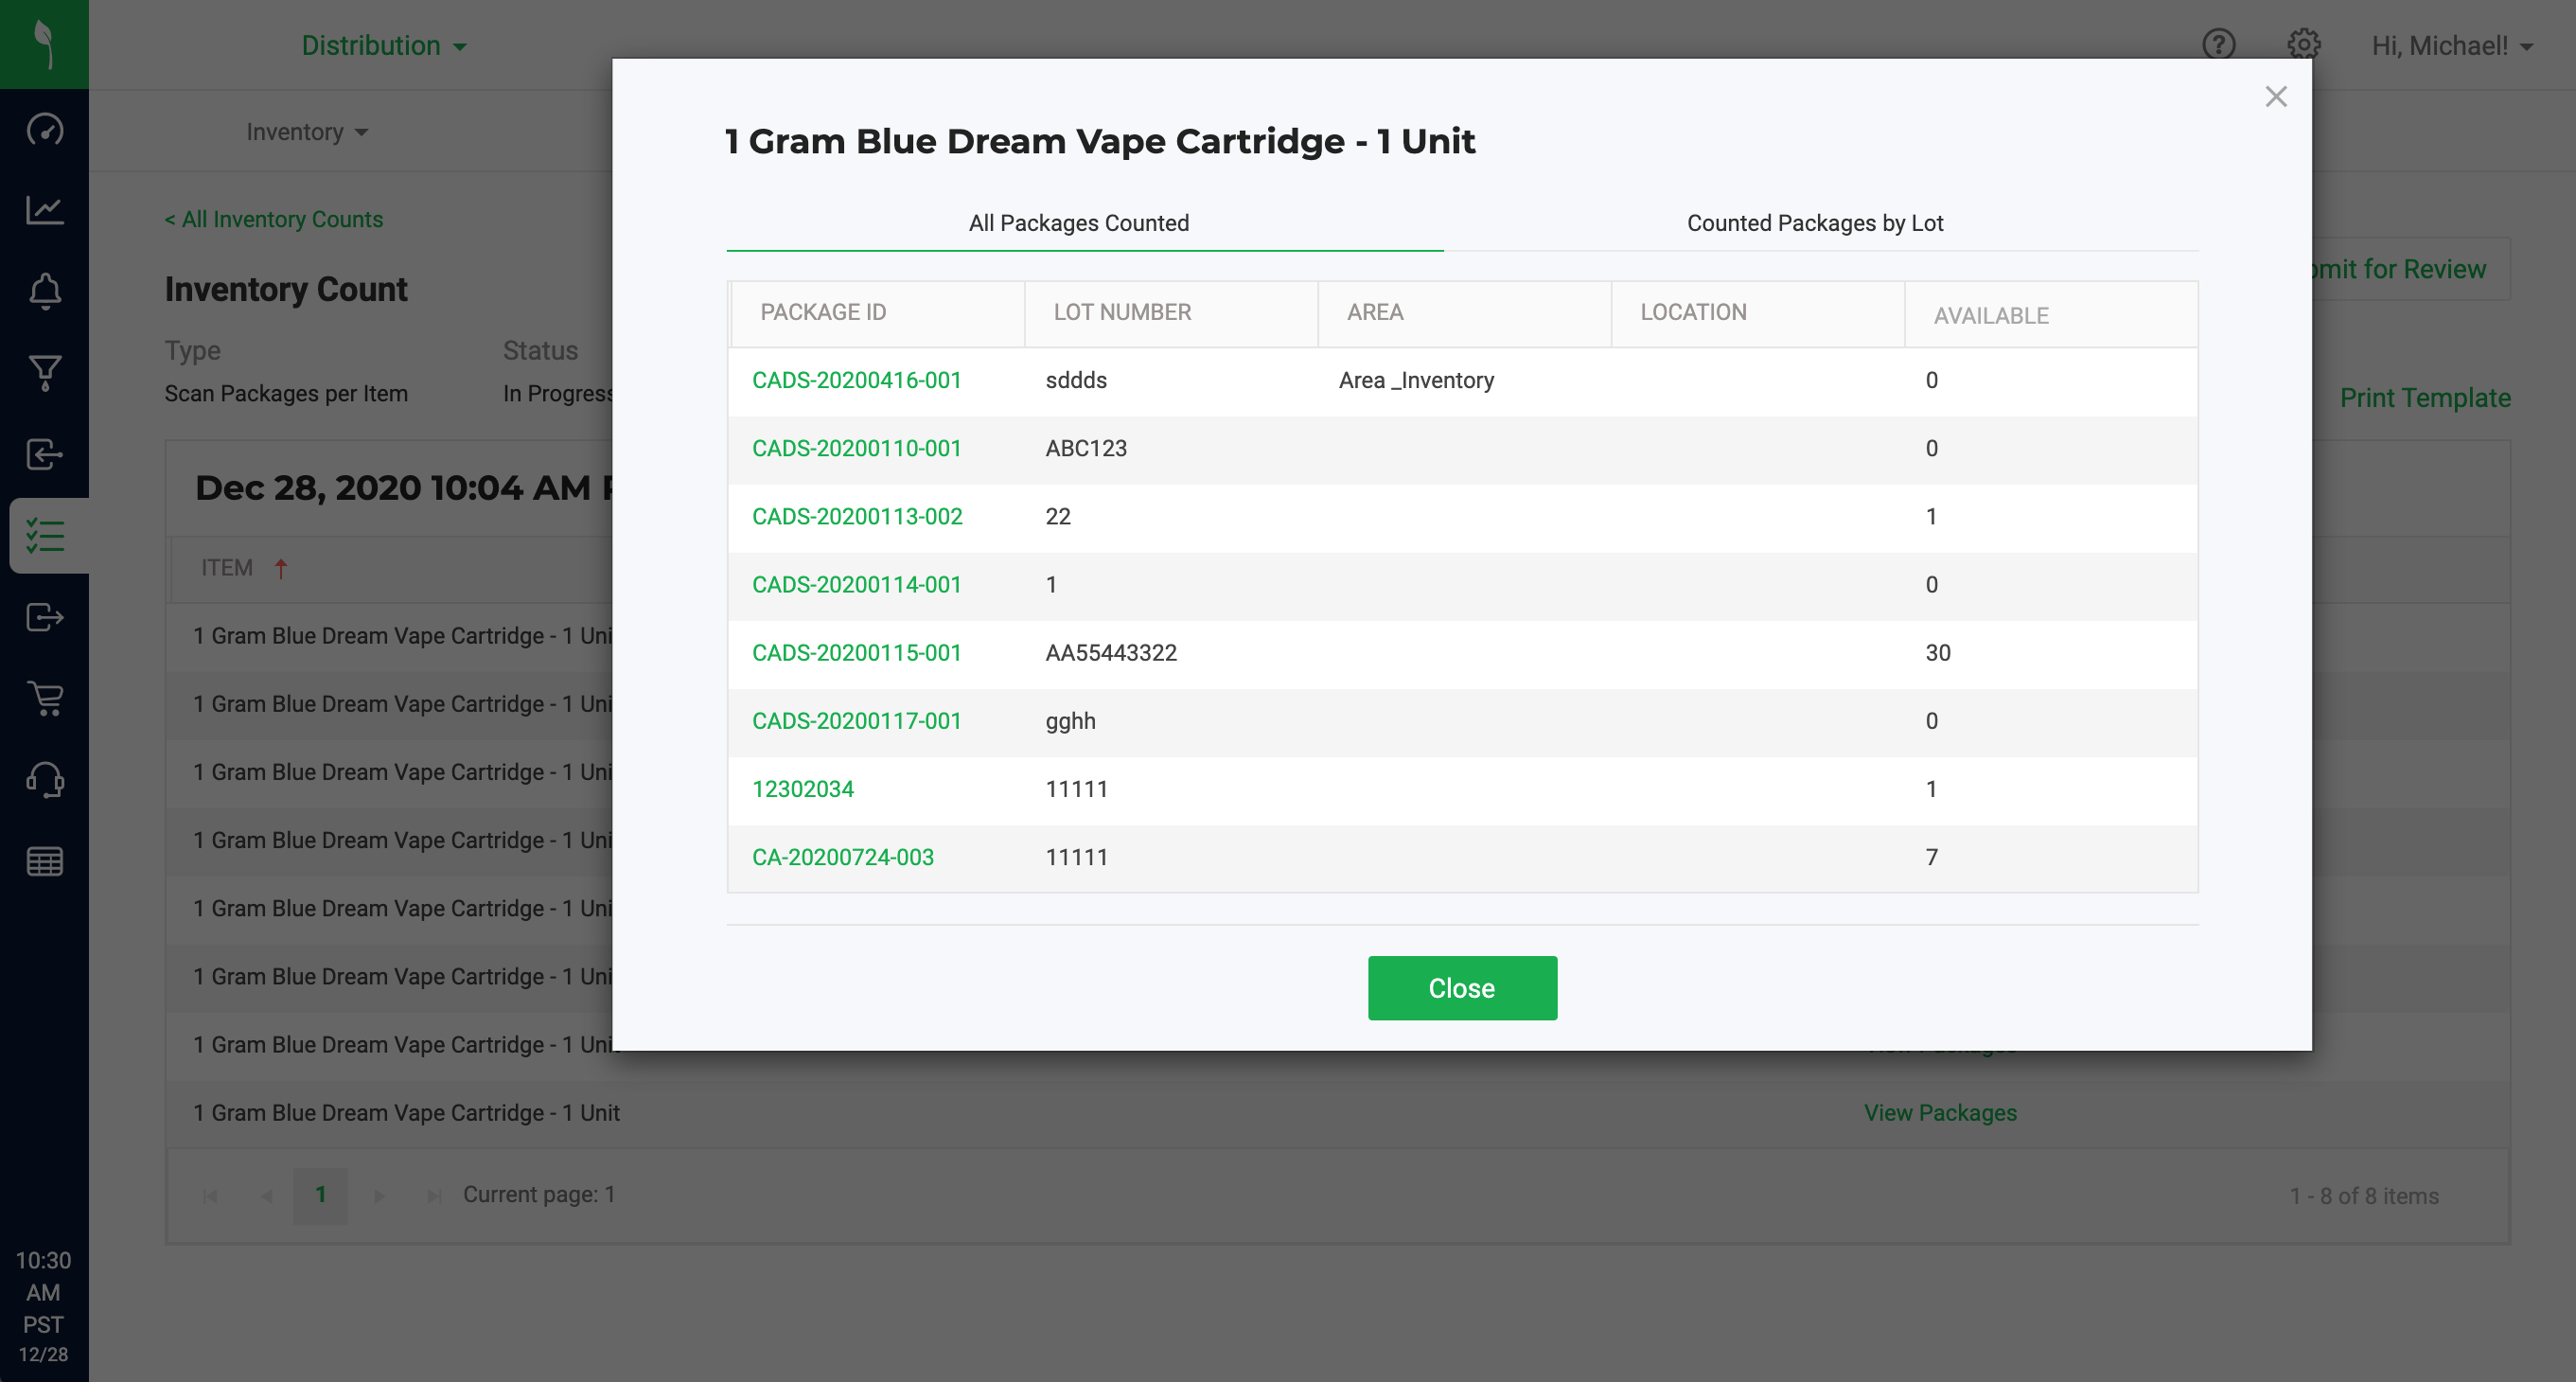
- If all scanned packages look correct, the user closes the modal and submits the count for Manager review by clicking the 'Submit for Review' button.
- Manager opens the submitted count and can filter through the Items using All - Counted - Discrepancies. Clicking on the Discrepancies filter will display all of the Items with discrepancies:
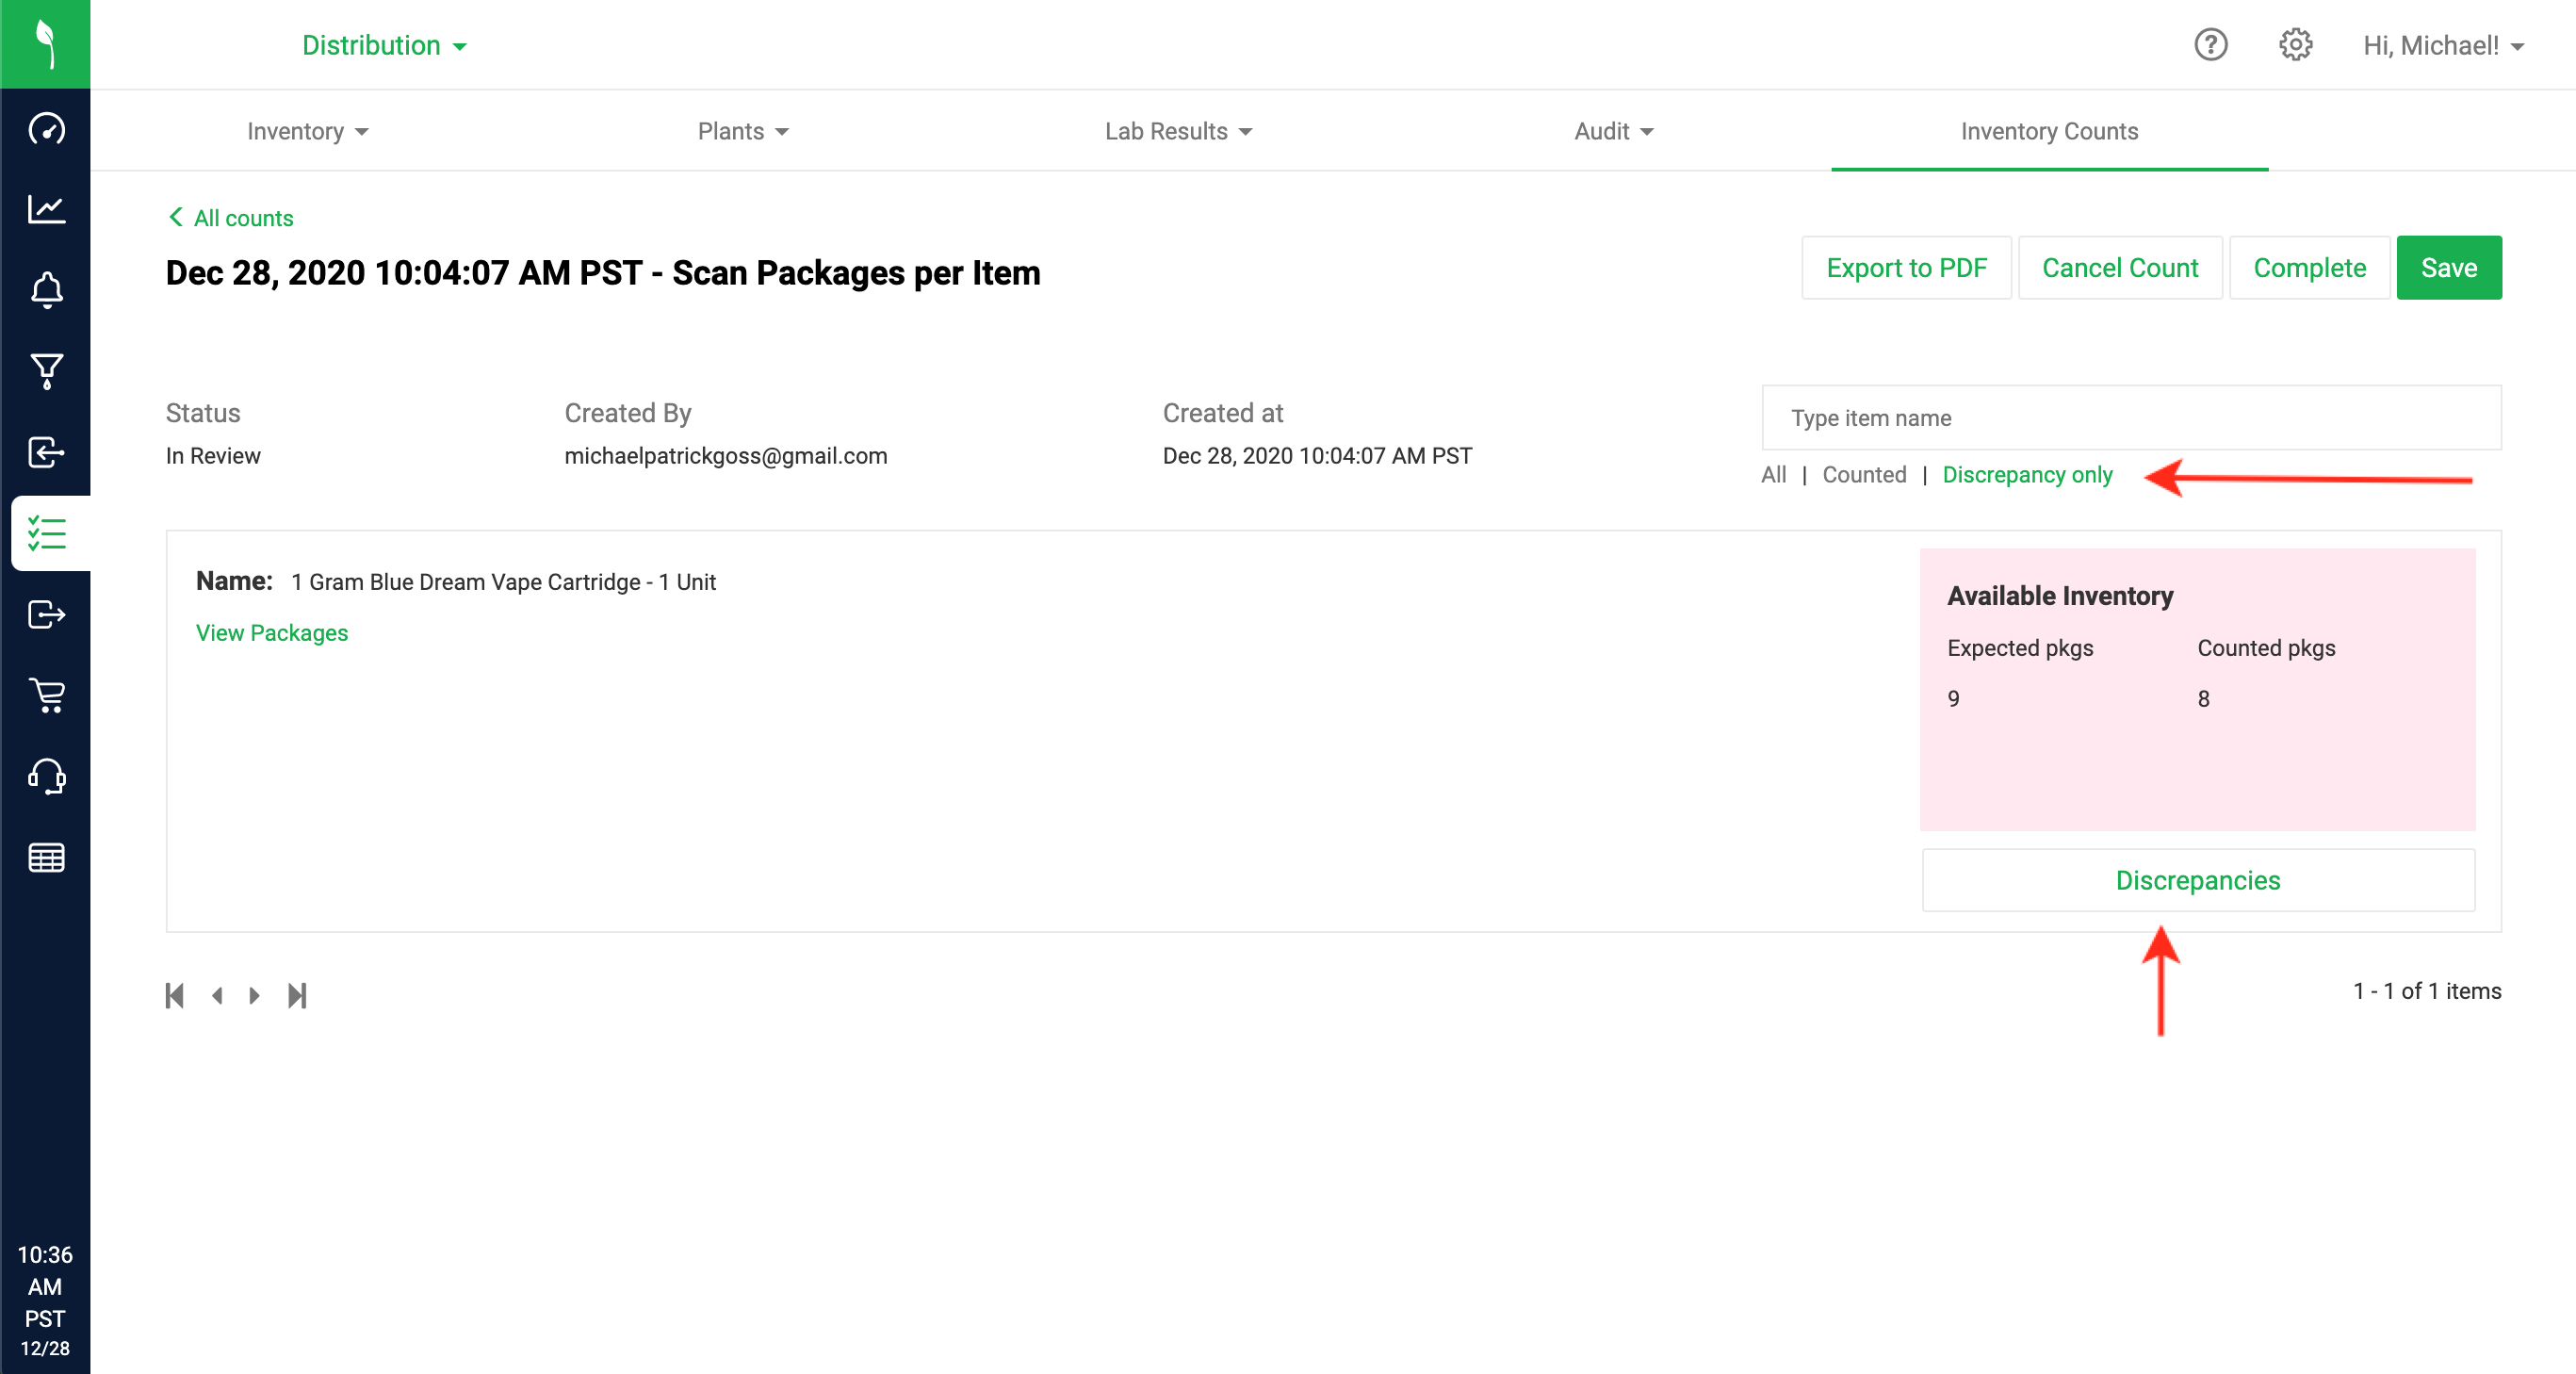
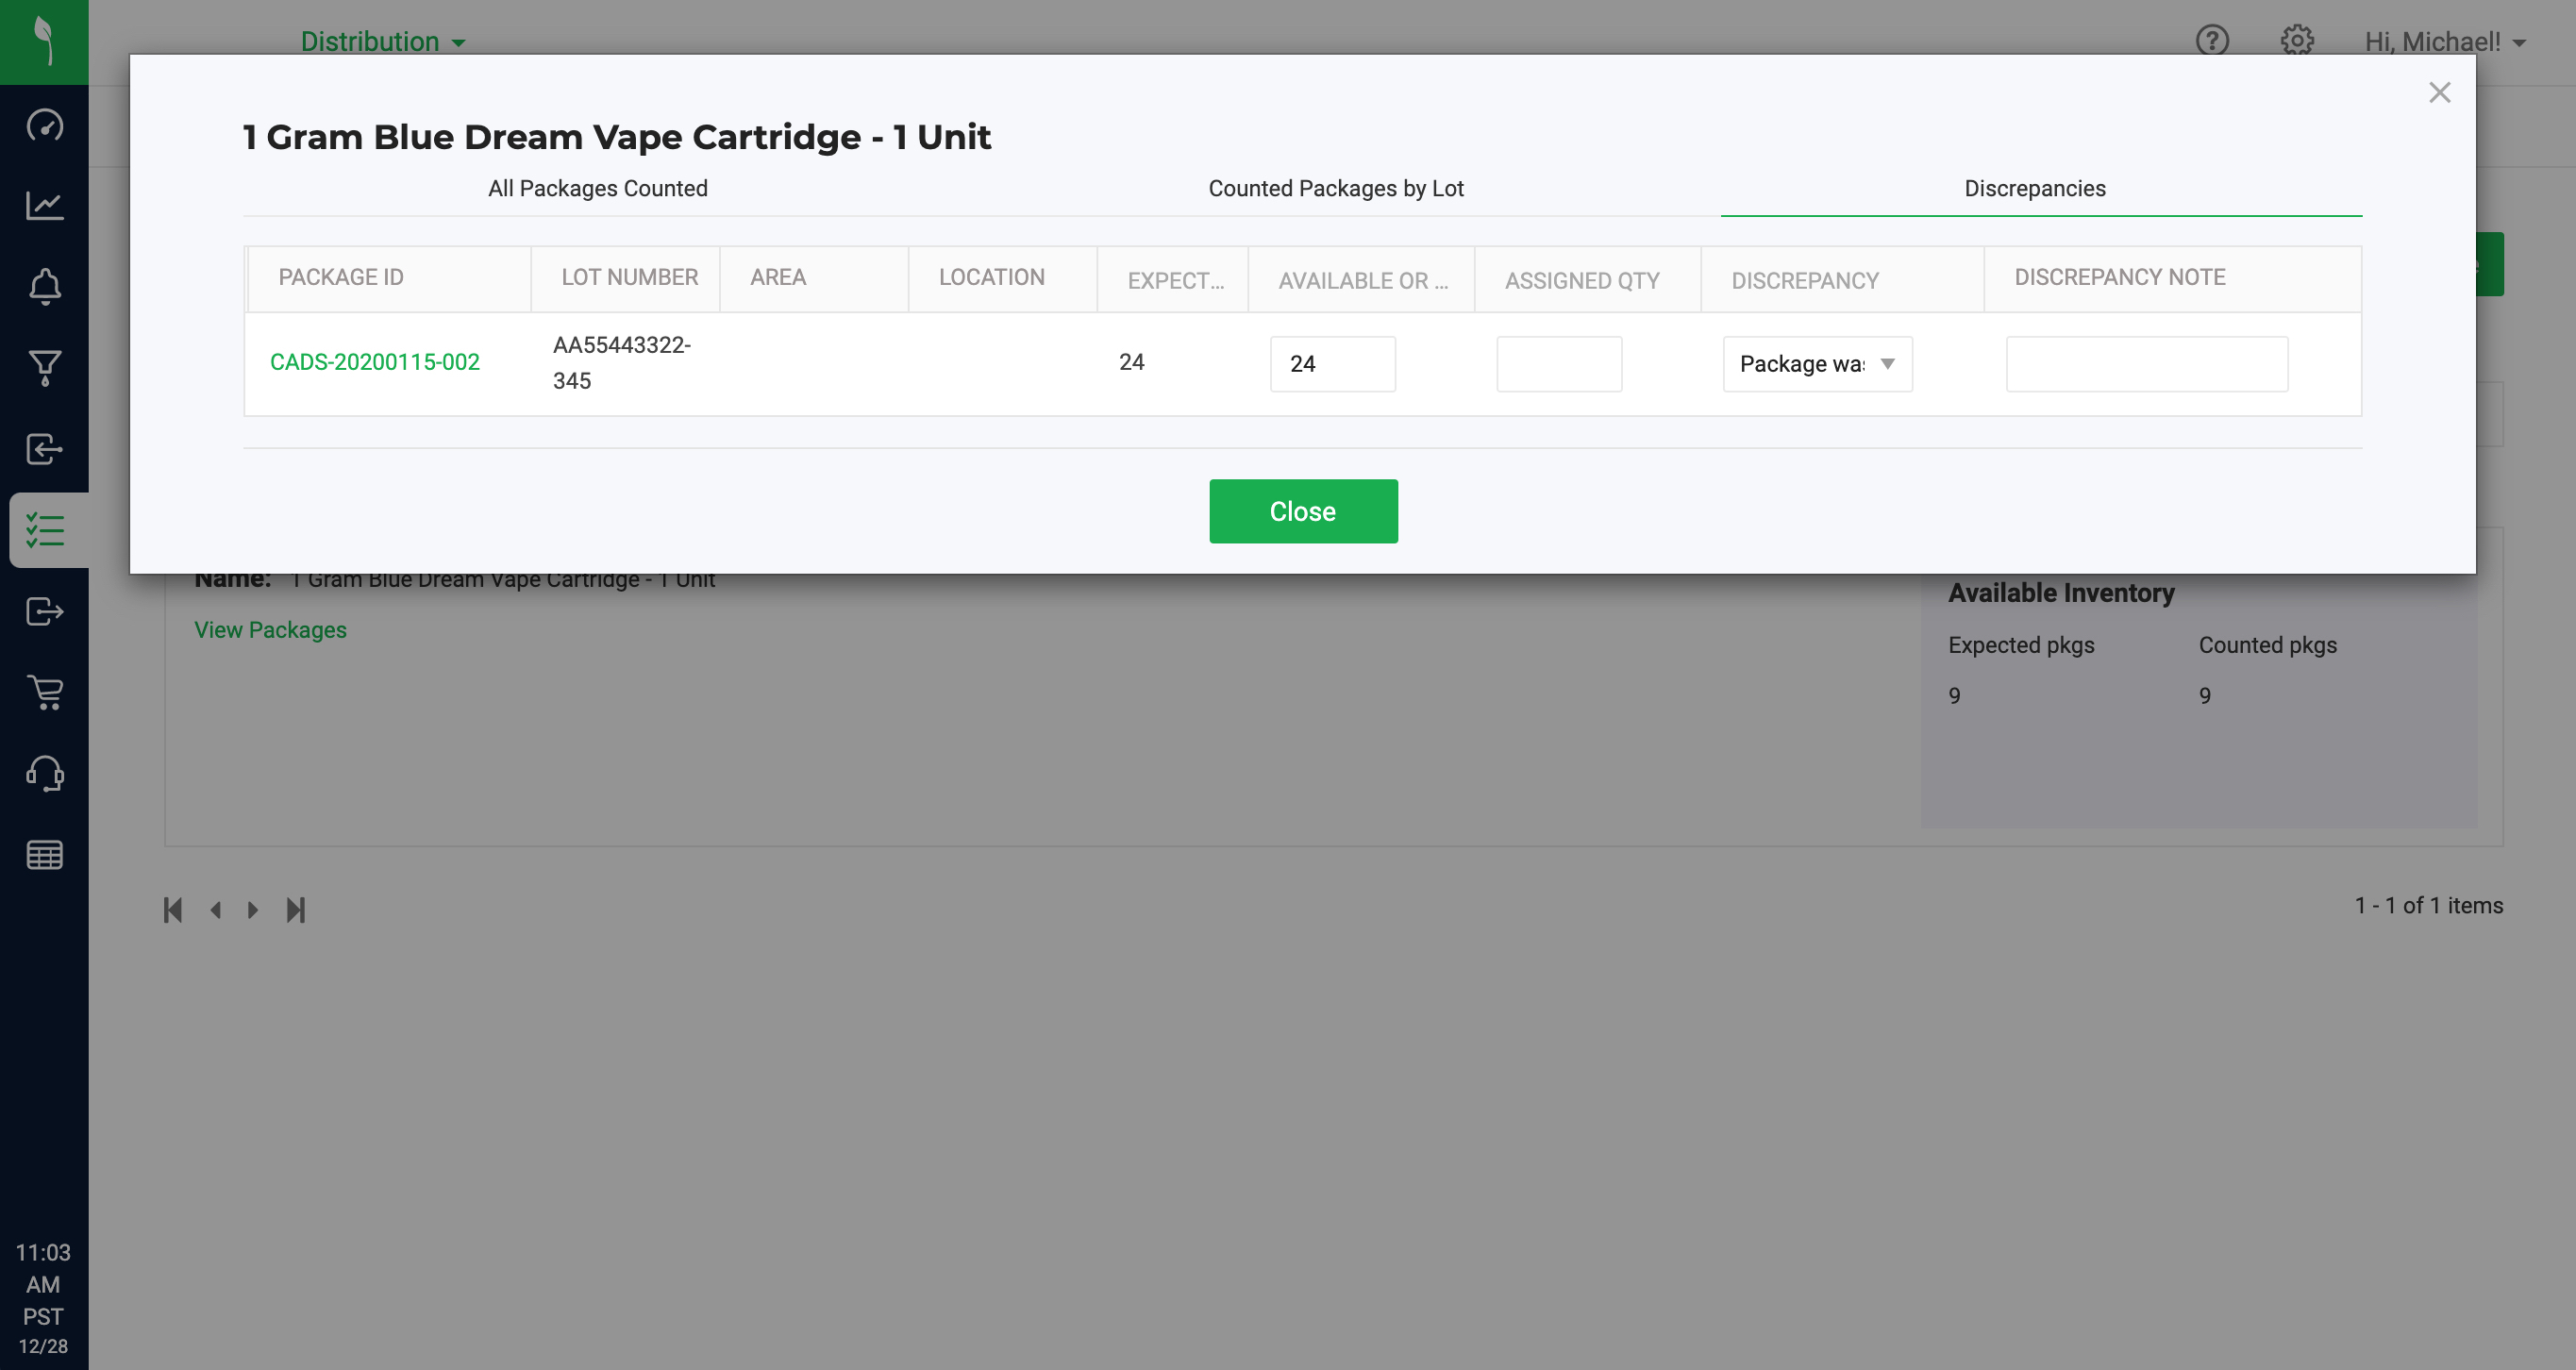
- For each item row, user clicks on the Discrepancies button and a modal will launch that has three tabs: All Packages Scanned, Packages by Lot, Discrepancies.
- The All Packages Scanned and Packages by Lot tabs are similar to the pre-submitted tabs, but they include the expected quantities.
- The Discrepancies tab displays all of the packages that are expected in the facility and were not scanned:
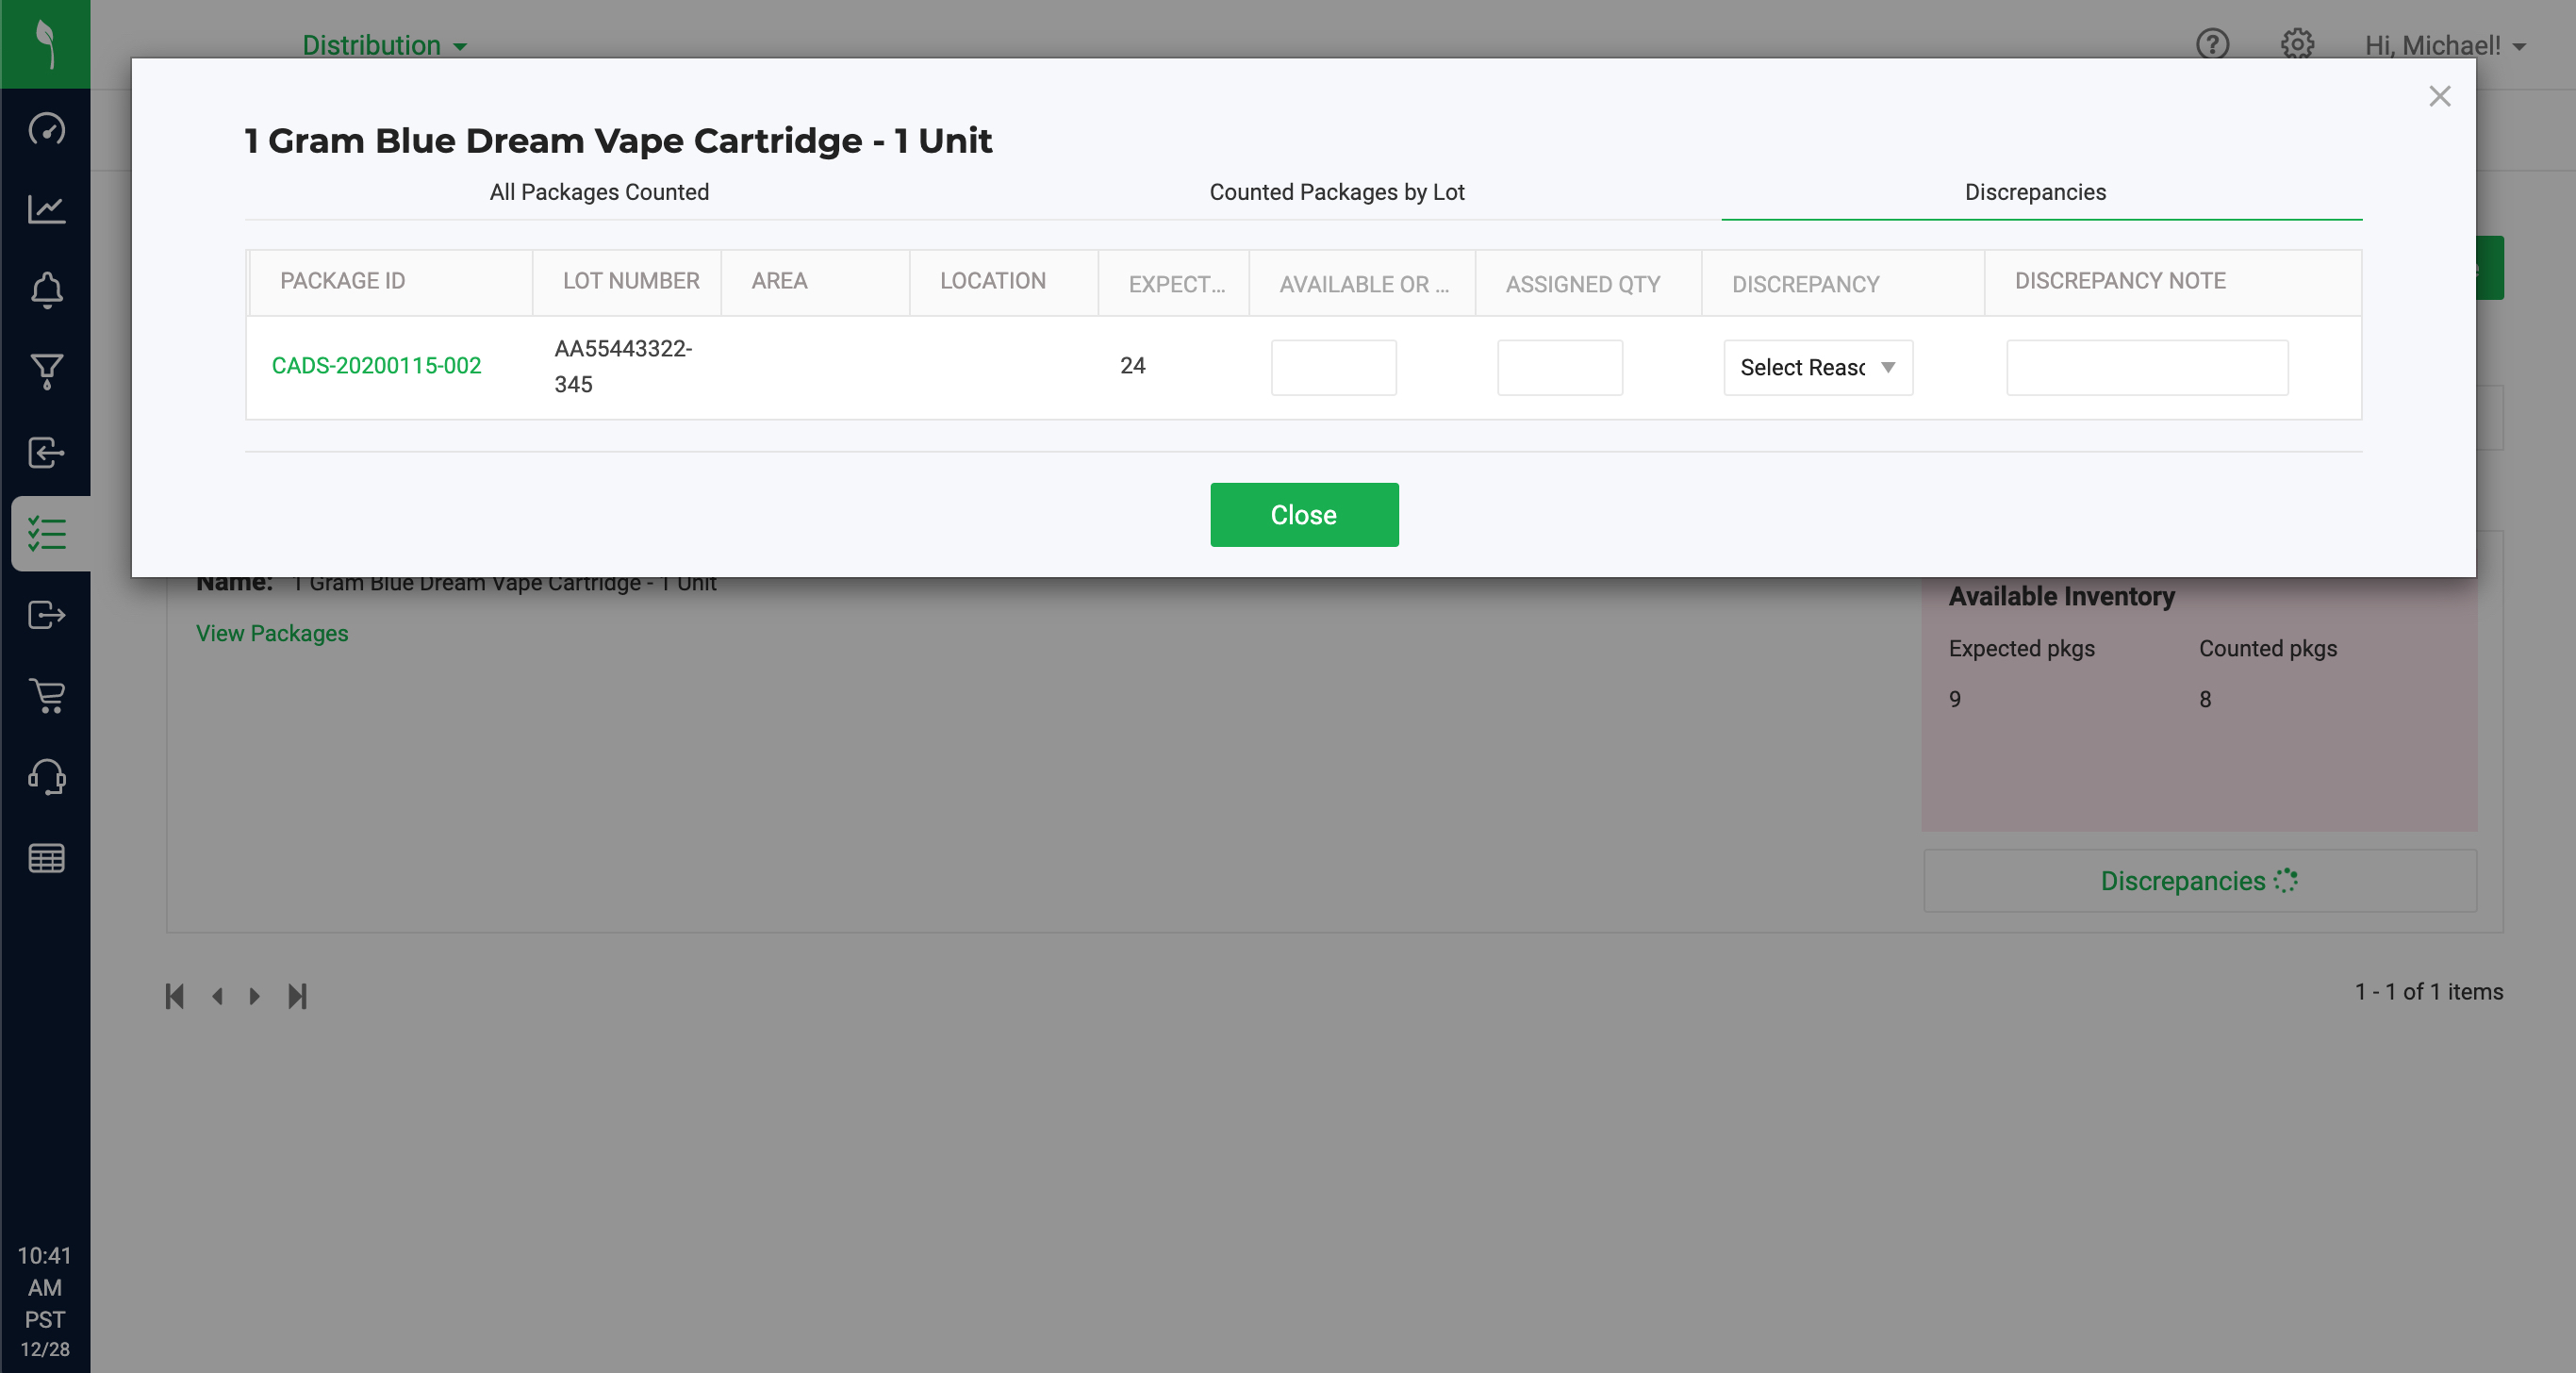
- For each package discrepancy row for each item, the user investigates where the package is and:
- If the package is unopened, undamaged, etc, user does not need to open the package. Simply read the inside quantity from the package label and enter it into the correct input based on the package's status:
- If the package is Available or Not Available (locked), enter the quantity of the content inside the package in the 'Available or Not Available' column.
- If the package is already assigned to an order, but not yet shipped out, enter the quantity of the content inside the package in the 'Assigned' column.
- If the found package is opened, lots, damaged, etc, the user can open the package and count the contents inside to determine how many of the contents are sellable and then enter that quantity into the correct inputs based on the package's status:
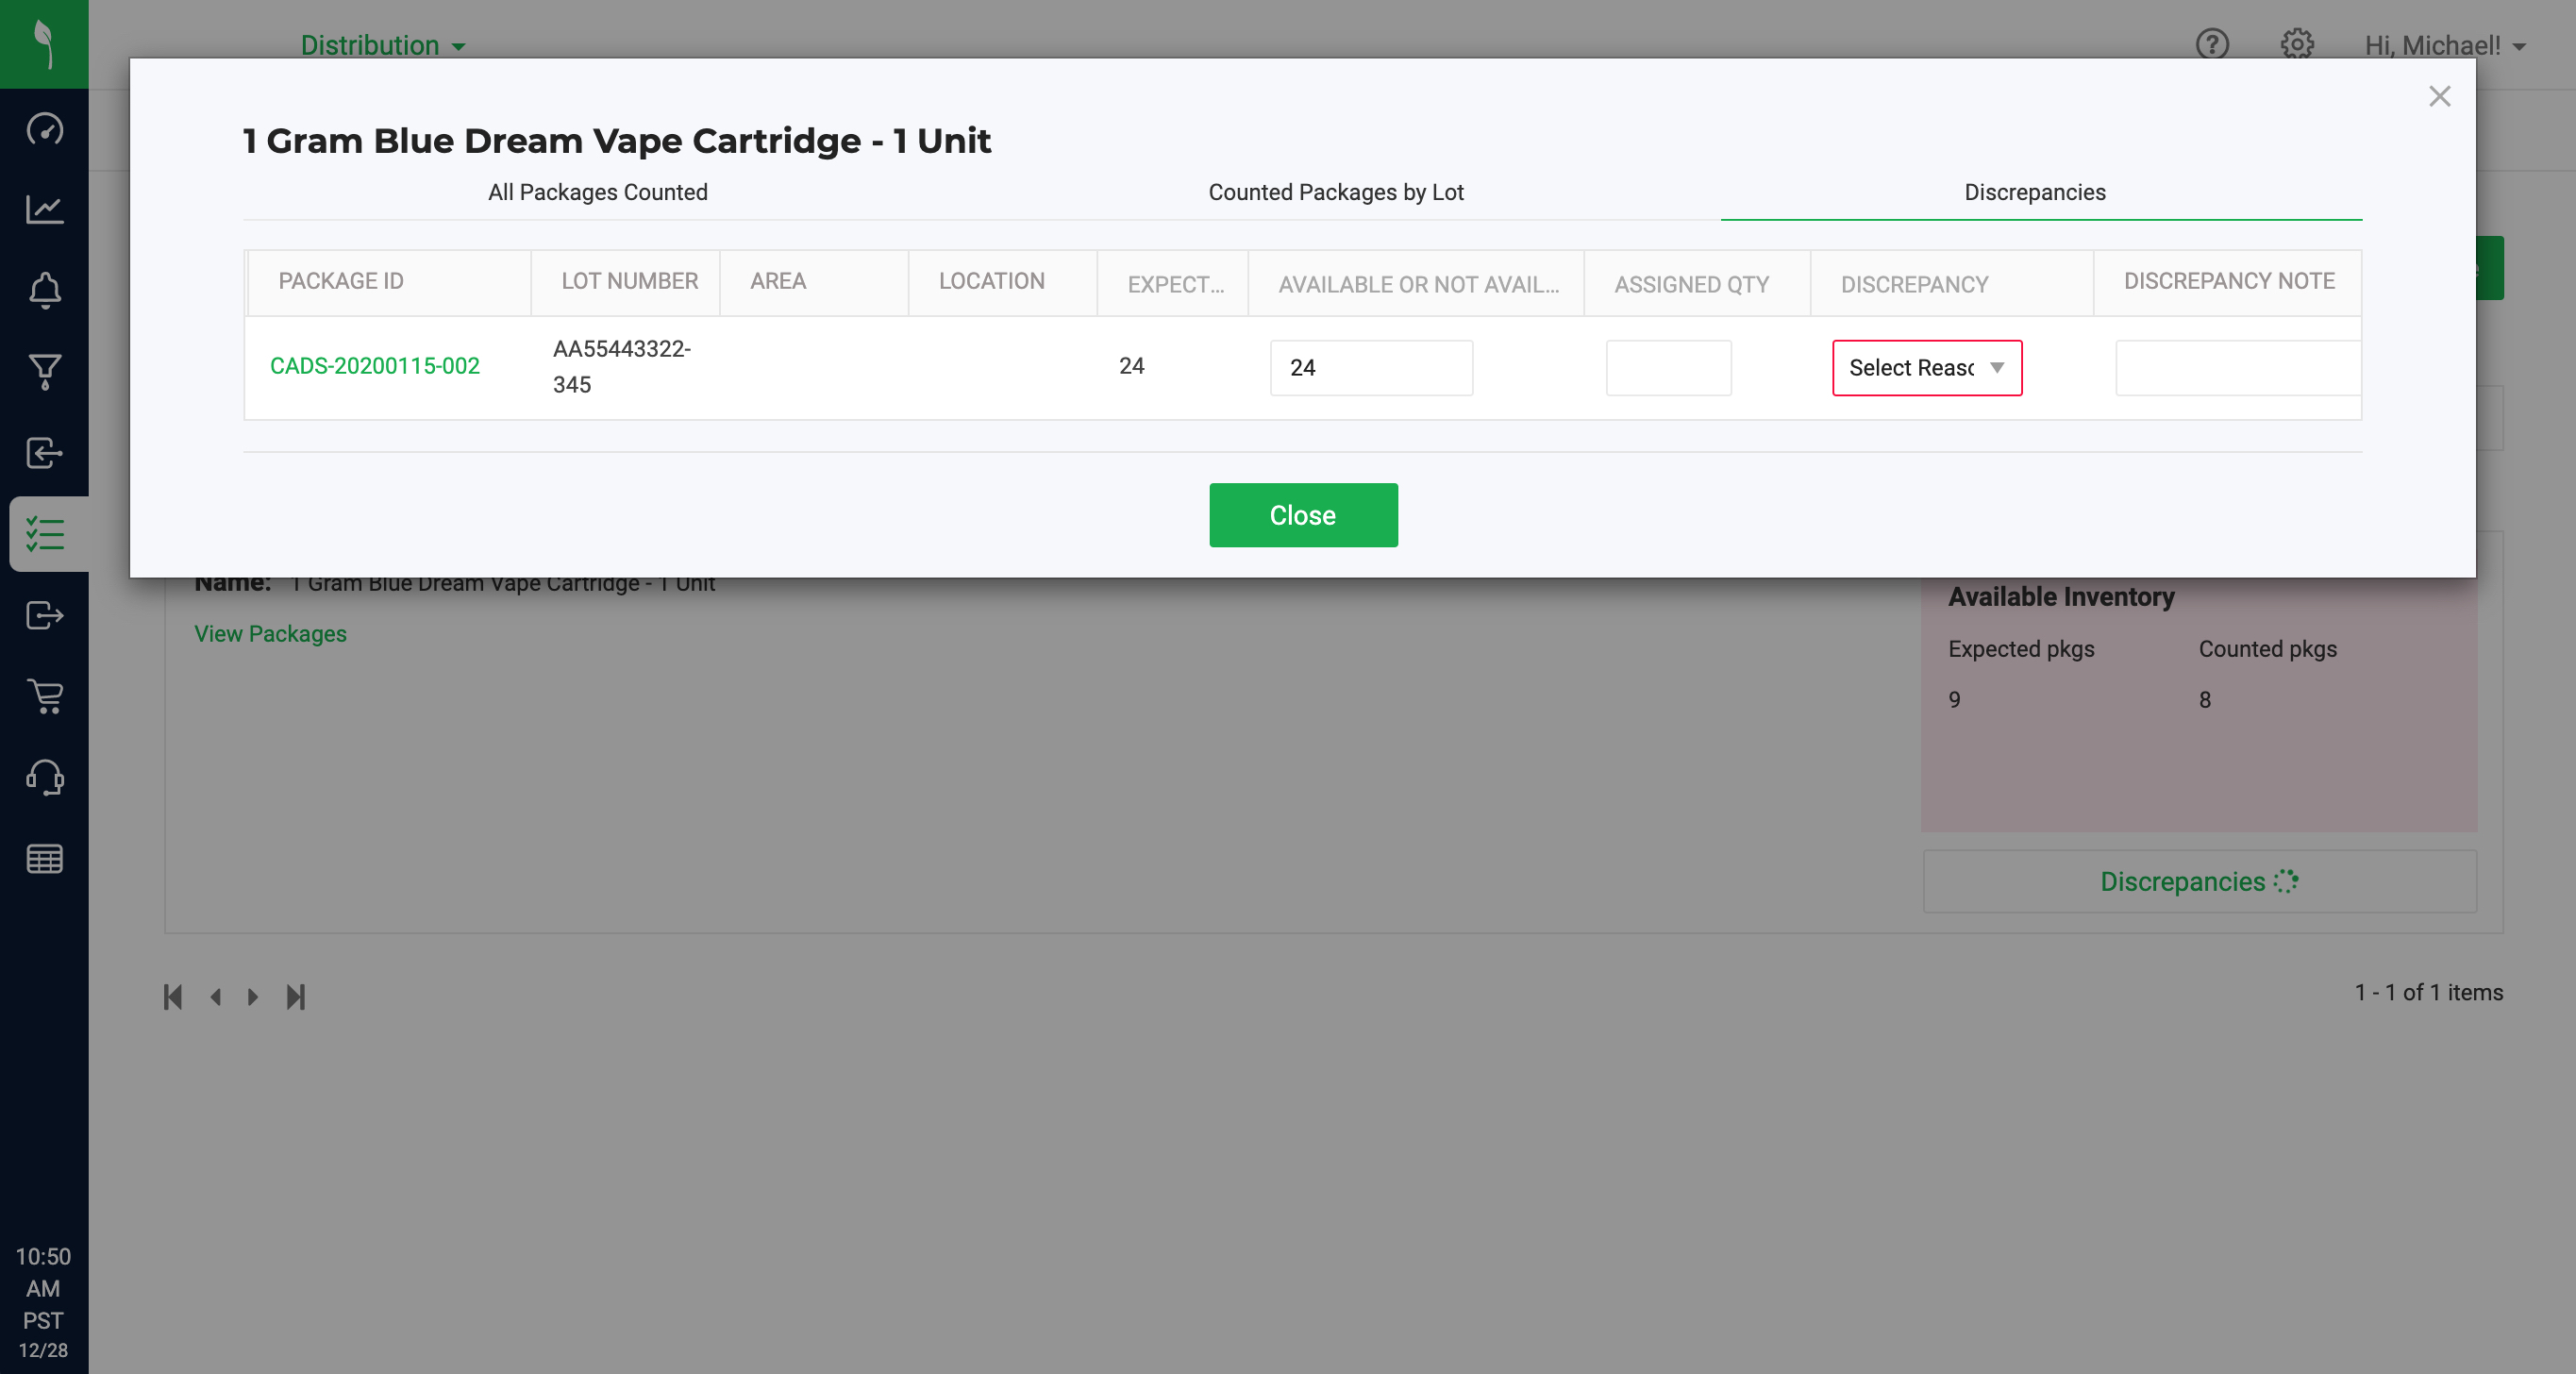
- After entering in the quantity of the package contents, select a Reason:
- If the package was found and is unopened and undamaged, user will select 'Package was found' (will need to be set up as a Package Adjustment Reason in Settings) for the reason (or select another reason).
- Entering a quantity AND selecting a reason is required for each discrepancy (entering a note is optional):
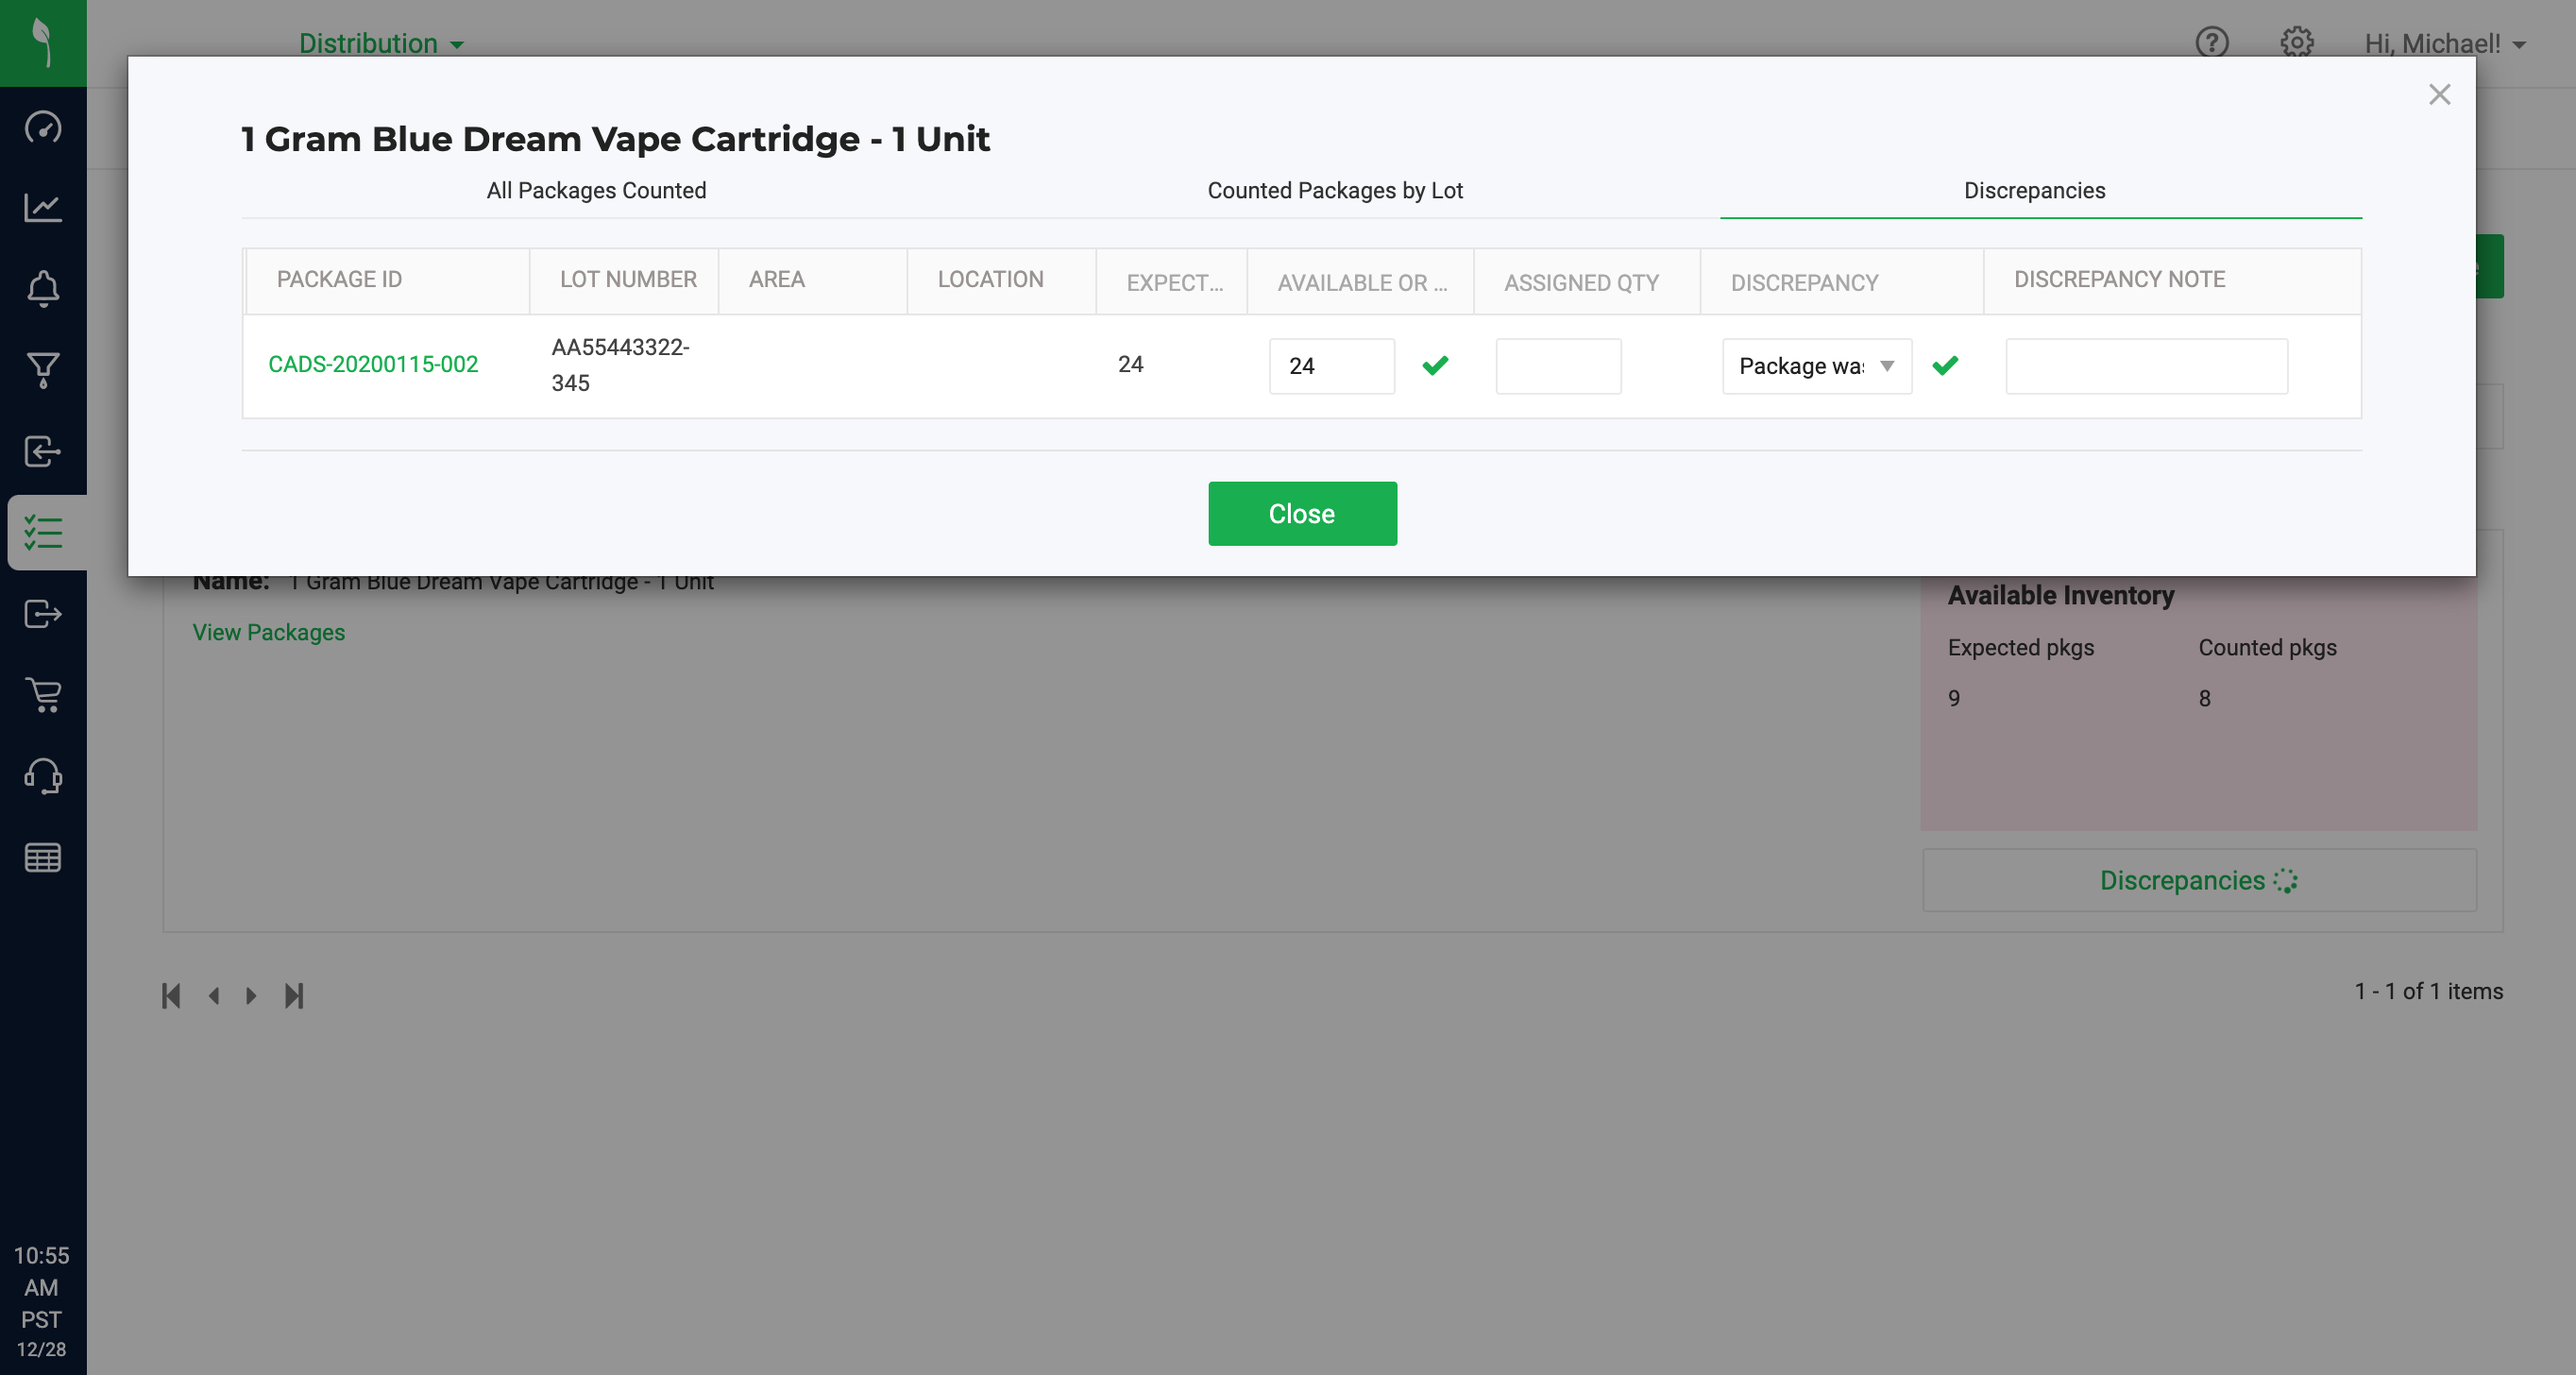
- Repeat these steps for all discrepancy rows.
- Toggling over to the All Packages Counted tab, you will see that the discrepancy packages that have a quantity entered and a reason selected have been submitted:
- If the package is unopened, undamaged, etc, user does not need to open the package. Simply read the inside quantity from the package label and enter it into the correct input based on the package's status:
- After repeating these steps and entering quantities and reasons for all discrepancy packages for each item, the discrepancies will be cleared out:
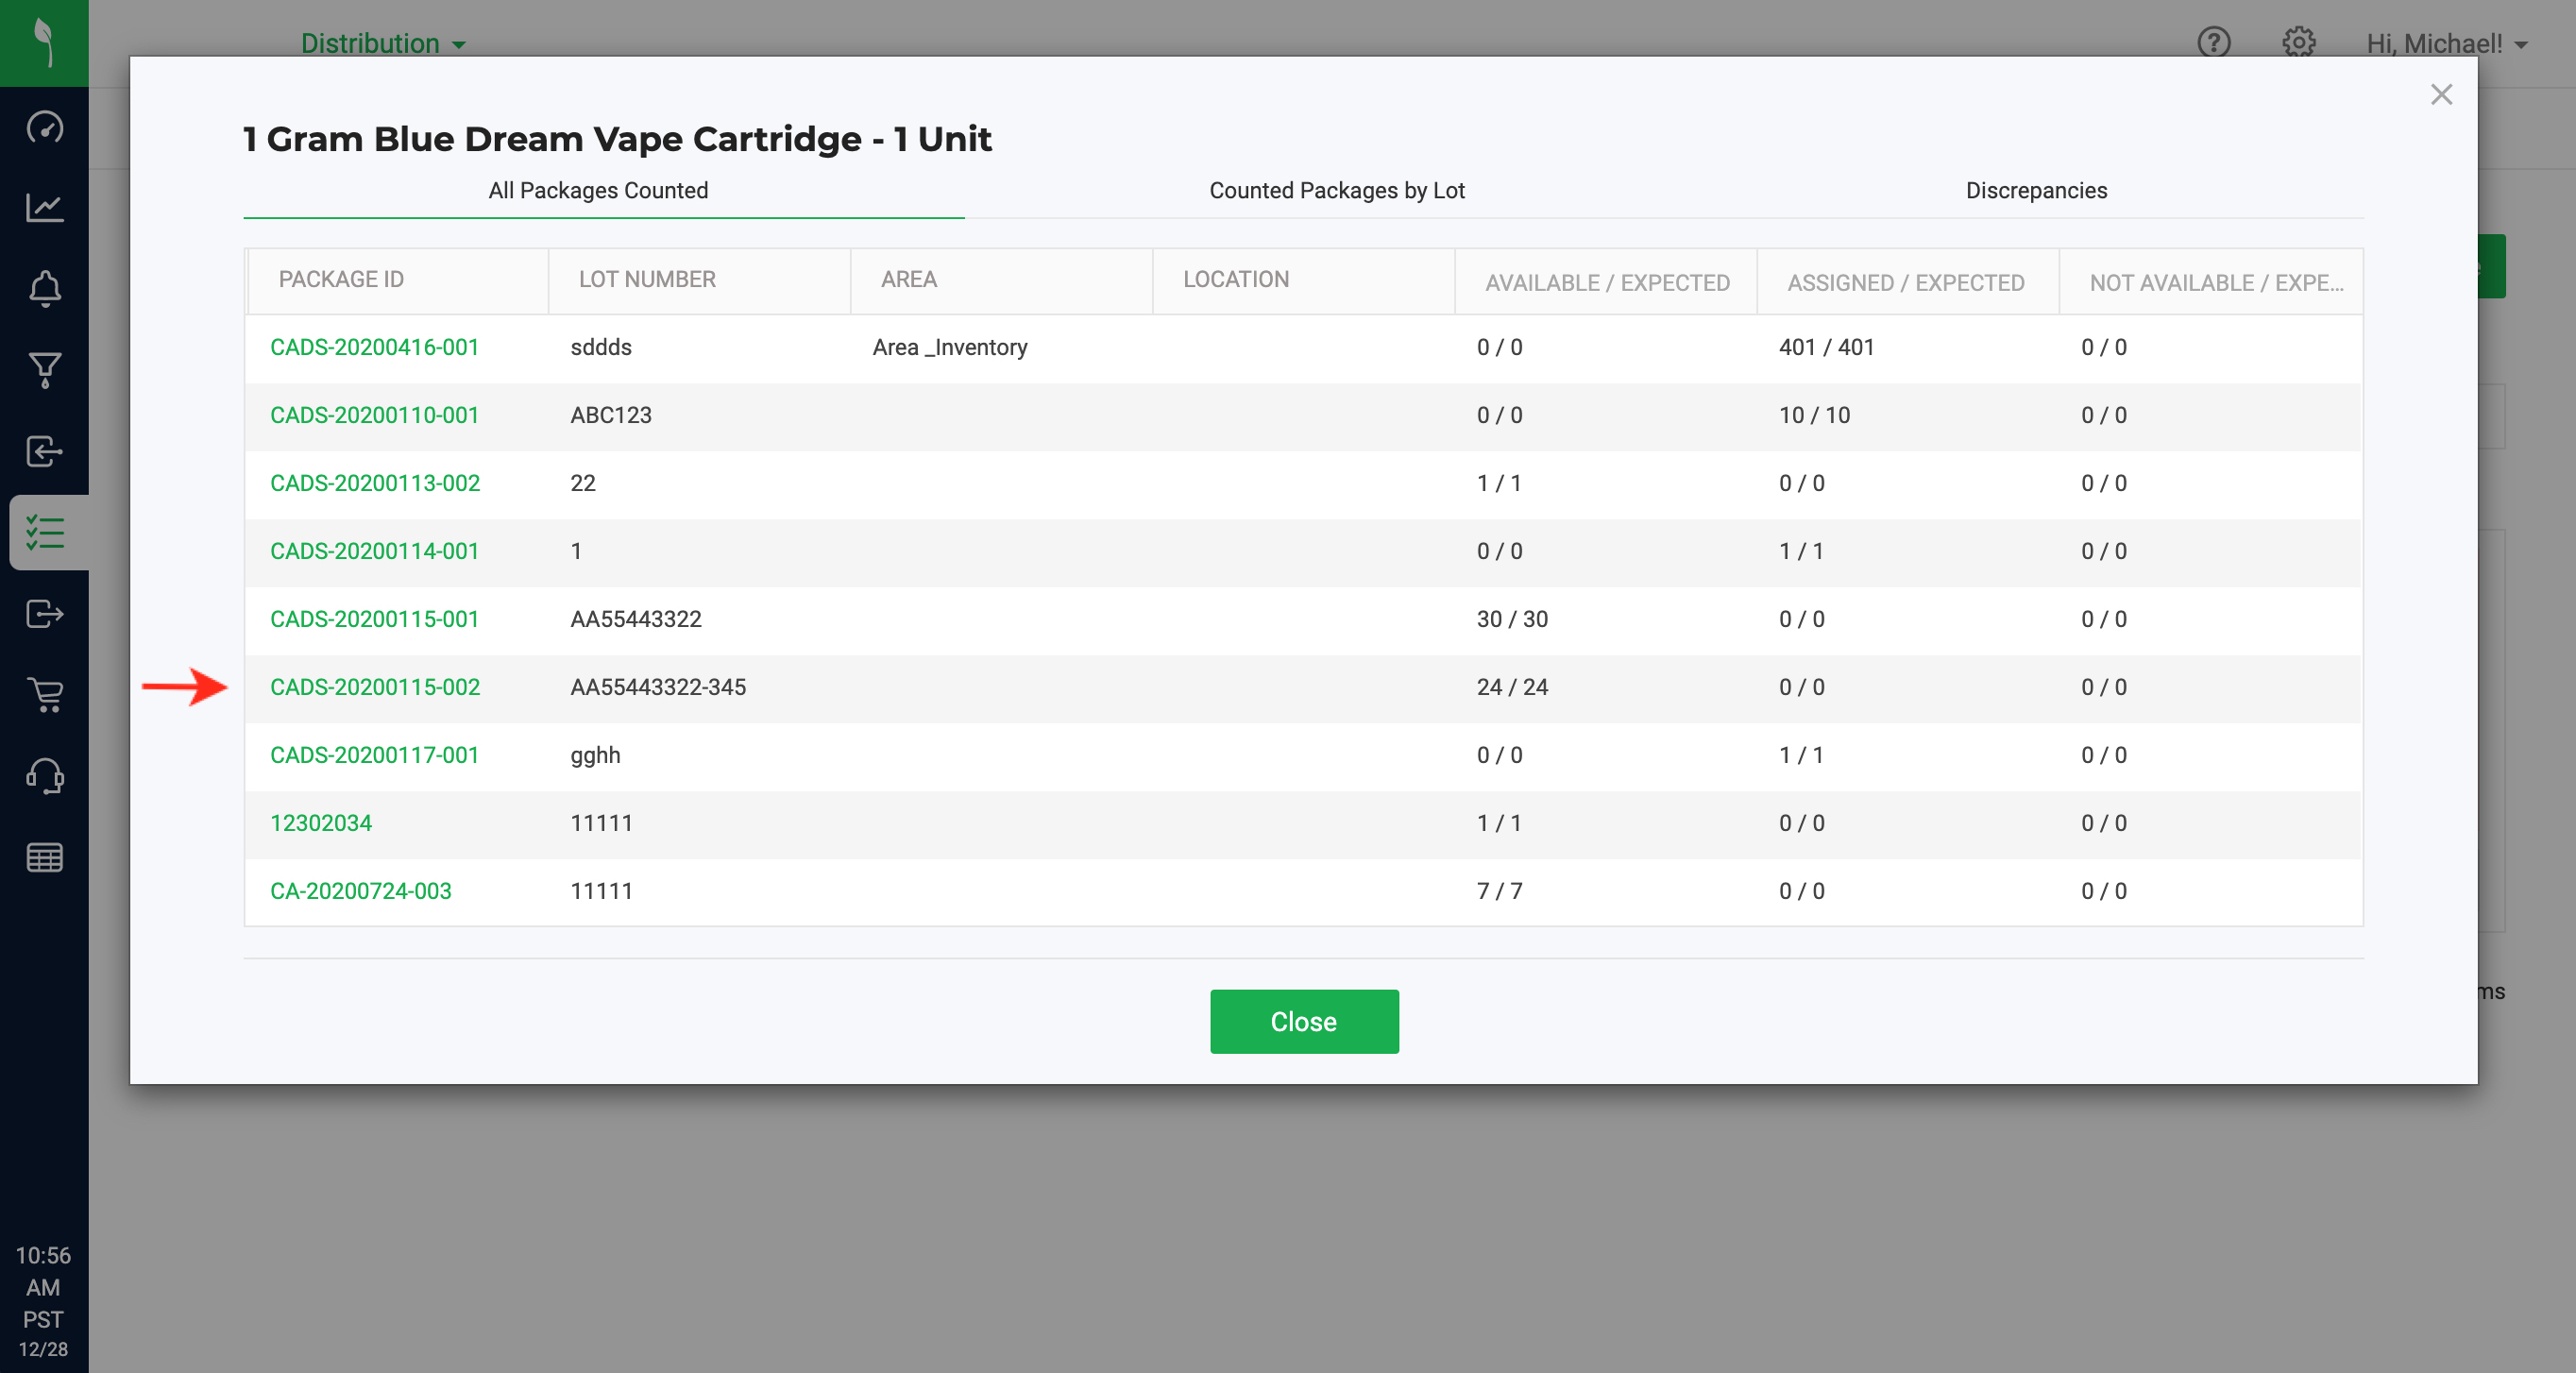
- If the user wants to see what packages for each item that originally had discrepancies, simply click the 'Counted' filter, and then click on the 'View Packages' in each of the counted Item rows...
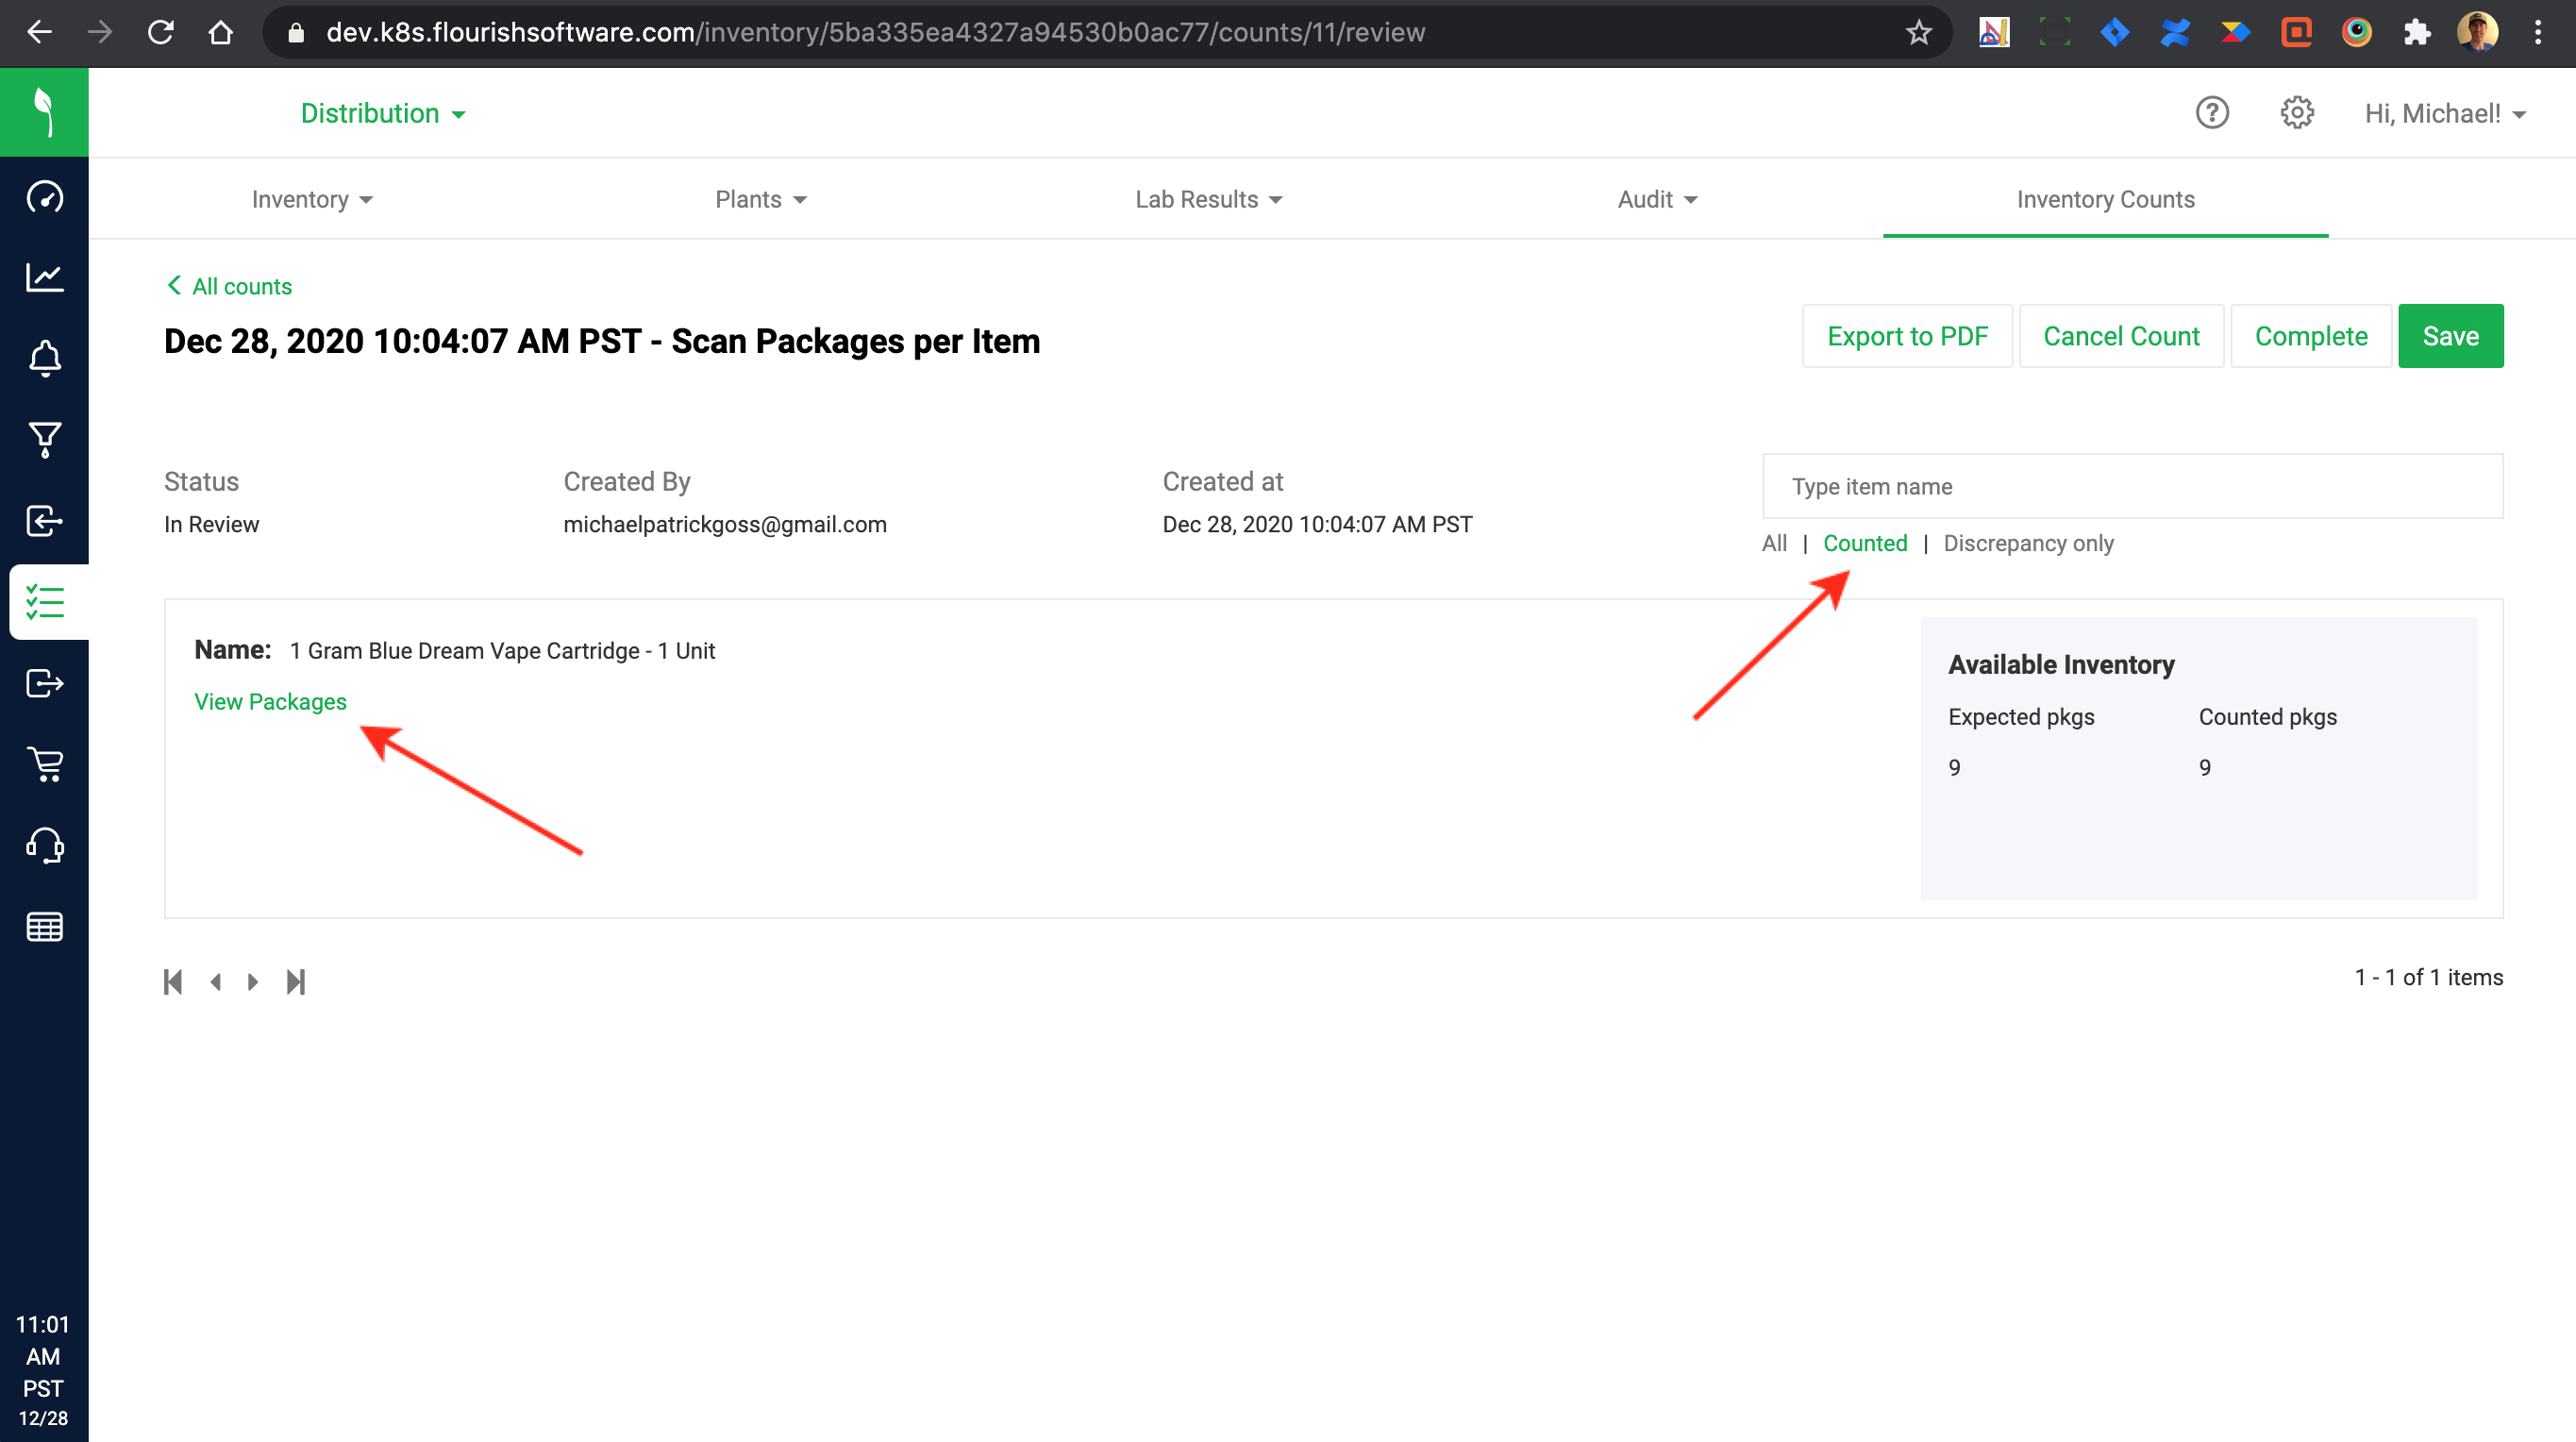
- ...and you will see the same modal and can navigate to the 'Discrepancies' tab. Quantities and Reasons can be adjusted prior to completing the count:
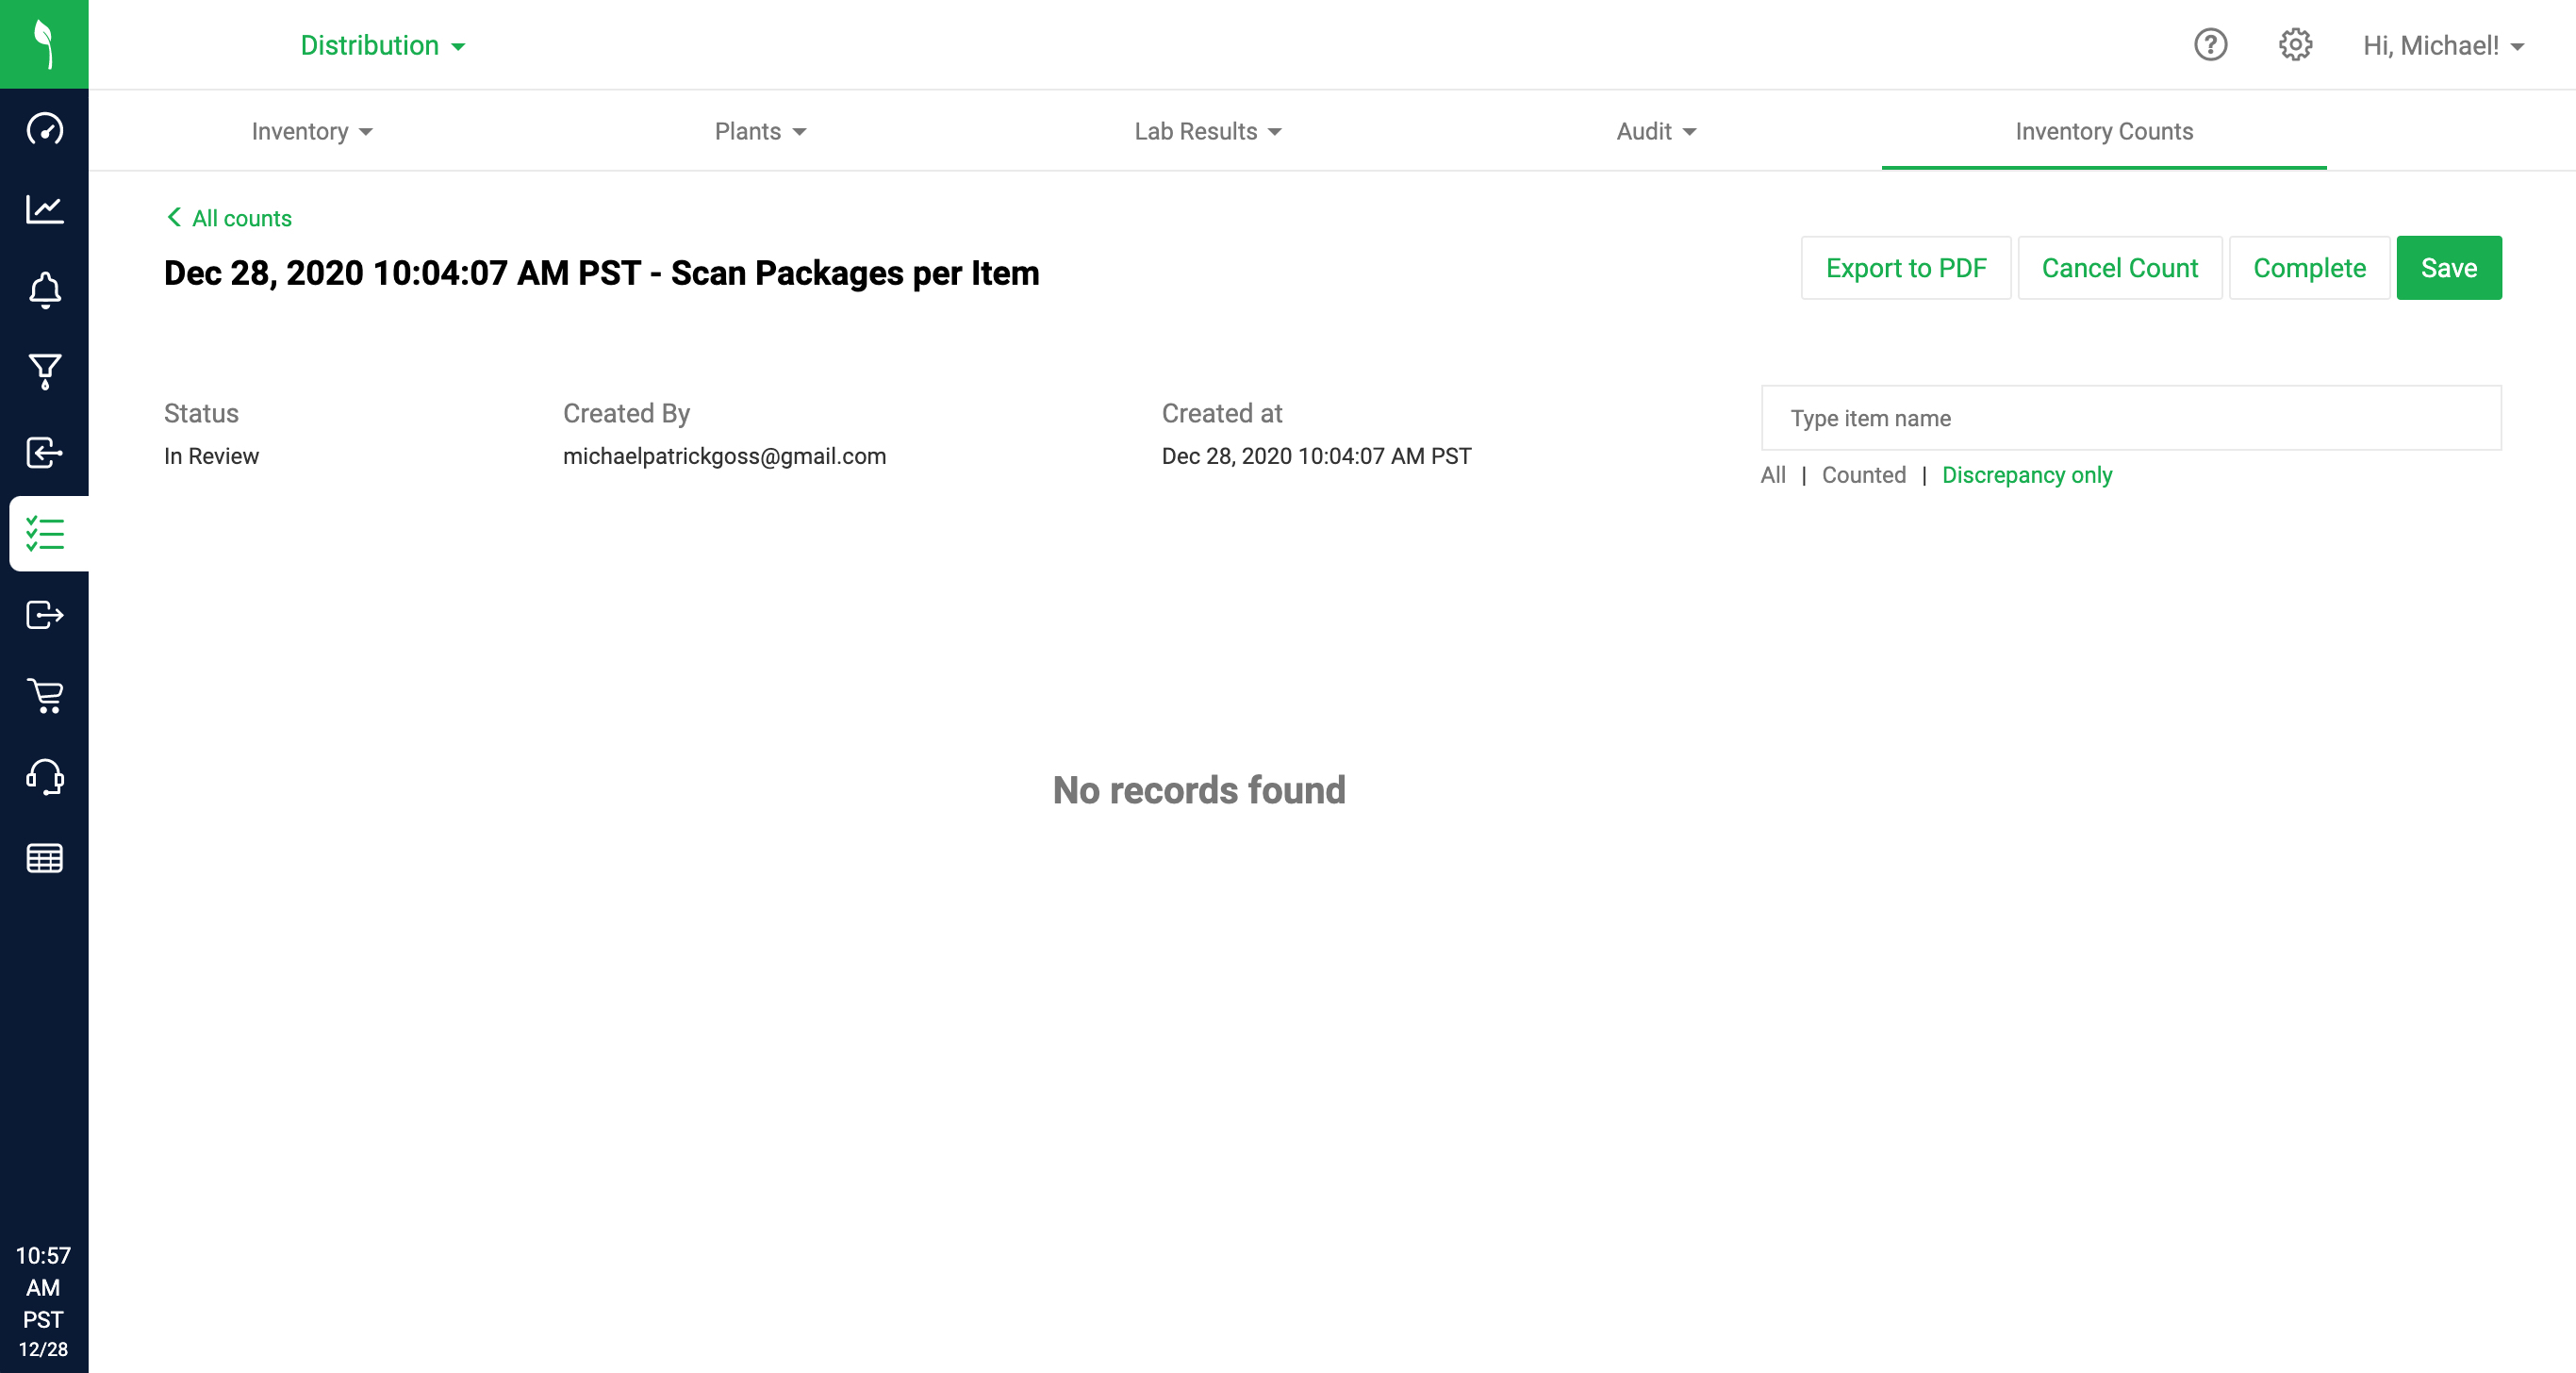
- The manager closes the modal and completes the count by clicking the Complete button.
- The inventory count has now been completed!
- All packages that were scanned into the count and were not discrepancies will retain their quantities that were in Flourish (and can be seen on the App Packages Count tab).
- All packages that had discrepancies will have updated inventory based on the quantities entered in this inventory count.
How did we do?
Mobile Inventory Count - Enter the Number of Packages per Item
Mobile RFID Inventory Counts