Table of Contents
Editing Items after Creating Packages
Maybe you're updating your naming convention, or maybe you've made a mistake. Whatever the reason, making changes to an item after you've created packages of it is limited — but here are some quick tips on how to convert packages to new items.
So you've created packages of an item, but maybe you want to make some changes to that item — whether that's the strain, category, or even the item's name.
To uphold the integrity of seed-to-sale tracking, we don't allow changes to be made to all item information after packages have been created. No worries — we have a way to maintain your data's integrity and make changes to an item.
Before We Begin
You can accomplish this change in many different ways, and the way you go about will depend on your specific use case. We’ve detailed three methods and their pros and cons below to help you make the best decision for your business (Click to expand).
1. Sell out of your current packages, then create the new item.
Pros:
• You're never working with more than one item.
• Ease and accuracy of reporting.
Cons:
• You will not be able to make new packages of this item while you're selling out of it.
2. Create a new item, sell out of the old one, and create packages from the new one.
Pros:
• You can continue operations while migrating old packages to the new item.
Cons:
• While two similar items are active, a significant entry error is possible. A user may create packages of the old item that you want to sell down.
• Syncing inventory to LeafLink or QuickBooks Online can be confusing with two items running at once.
• Reporting can be more difficult to read with two items running simultaneously.
3. Create a new item and convert all existing packages.
Pros:
• Changes are implemented immediately.
• Ease of accuracy of reporting.
• Reduces risk of entry errors when creating new packages.
Cons:
• This can be labor intensive with many active packages.
• Can also be expensive if you pay for METRC tags, as each active package receives a new tag.
Overview
This overview is for the third method listed above. It's a bit resource-intensive, so if you run into any issues or have any questions, please reach out to Support.
- Duplicate your item and make the desired changes.
- Convert your active packages to the updated item.
- Disable the old item so you can't use it again.
Duplicate your Item
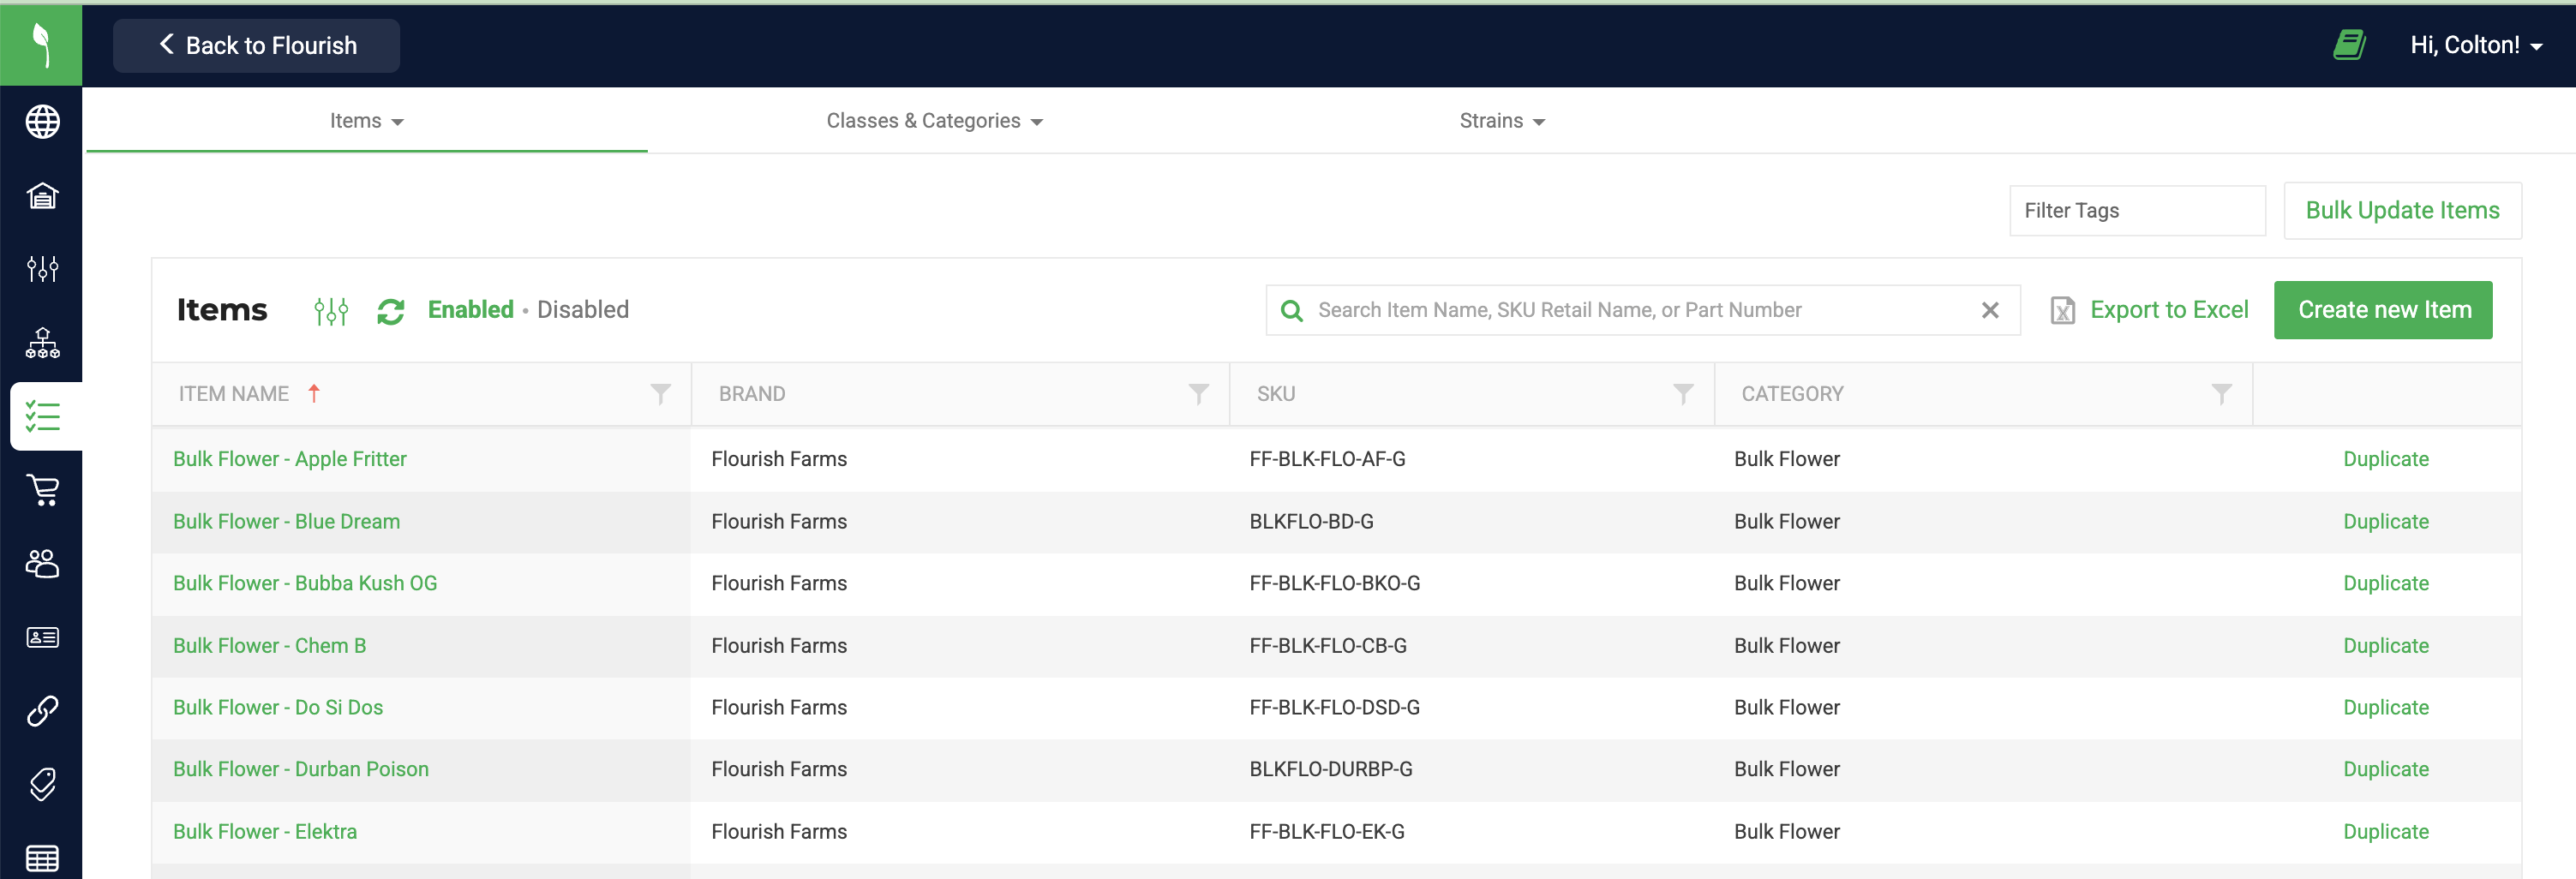
- In Flourish, navigate to Settings > Inventory.
- Enter your item's name in the search bar to locate it in the grid.
- On the right-hand side of the grid, select Duplicate.
Cloning an item duplicates everything. You'll need to change the item name and retail display name.
- Make the desired changes to your item.
- Review the new item for accuracy, then click Save.
Convert Your Packages
To disable the old item later, you must convert all the active packages from the old item to the new item.
- In Flourish, navigate to Inventory > All Packages.
- Enter the name of the old item in the search bar.
- For each package, click Actions > Create Package.
- Under the New Package dropdown, select the new item name.
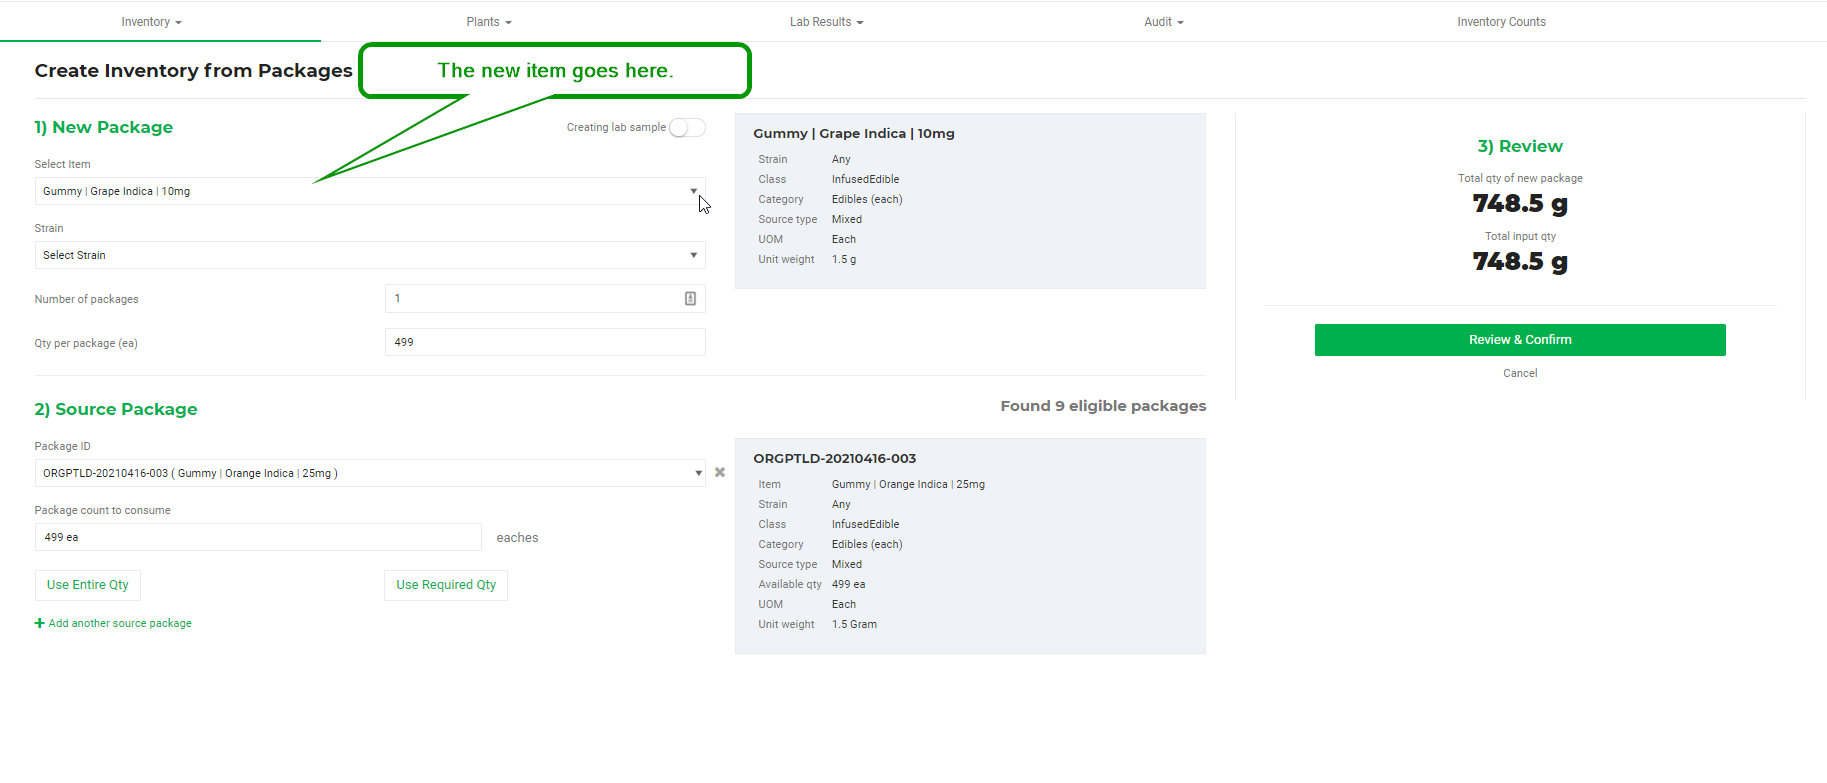
- Review all of the details, then select the Review and Confirm button.
- Enter your created date/time, lot number, and reference fields as needed in the Confirm New Package modal.
- When everything looks good, click Create New Package.
- Repeat these steps for all active packages of the old item at all facilities until there are none left.
METRC: Convert your Packages
METRC clients have the option to use the Convert Packages feature instead of the Create Packages feature. When converting packages, the source package's quantity is always consumed.
- In Flourish, navigate to Inventory > All Packages.
- Enter the name of the old item in the search bar.
- For each package, click Actions > Convert Package.

- Under the New Package dropdown, select the new item name.
- Review all of the details, then select the Review and Confirm button.
- Enter your created date/time, lot number, and reference fields as needed in the Confirm New Package modal.
- When everything looks good, click Create New Package.
- Repeat these steps for all active packages of the old item at all facilities until there are none left.
Disable the Old Item
When all packages have been converted to the new item, it's time to disable the old one. This step is optional, but it prevents others from creating packages of the old, possibly incorrect item.
- In Flourish, navigate to Settings > Inventory.
- Enter the name of the old item in the search bar.
- Click on the name of the item, then click Edit.
- Underneath the item name, click on the Active Toggle.
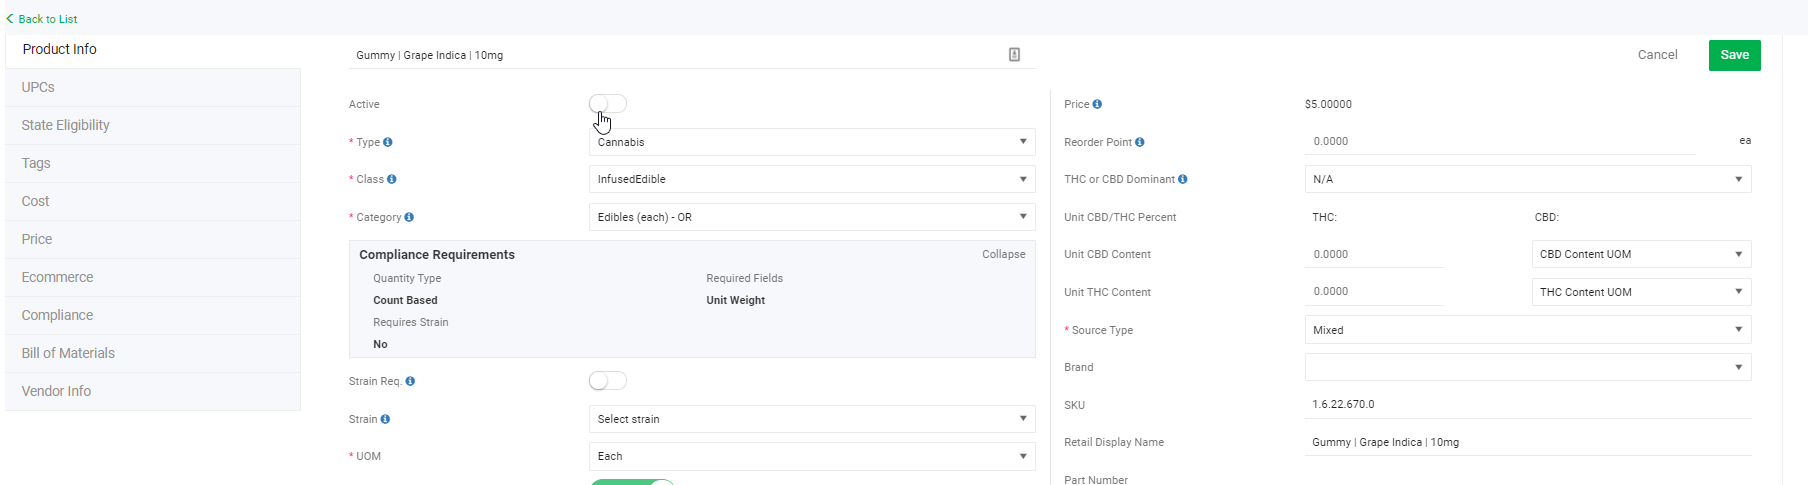
- When you've toggled that off, click Save in the right-hand corner.
Still need help?
Please reach out to our support team — we're always happy to help! Let us know the following:
- What changes are you attempting to make?
- Where are you getting stuck?
- Are there any other questions we can answer?
How did we do?
Inventory Audits