Table of Contents
Florida BioTrack Harvesting
Florida BioTrack Harvesting guide. Create a regular and manicure harvest. Log wet weights. Log dry weights and "cure" the harvest quantities into inventory. Handle exceptions.
This guide provides instructions on how to harvest within Flourish's Cultivation Module aligned with the Florida BioTrack system.
- Refer to the Florida BioTrack Propagation help document for instruction on how to create clones, plant tissue, and seeds as well as how to plant plants.
- Refer to the Florida BioTrack Cultivation Management help document on how to manage plants within the Cultivation Module.
Configuration Settings
Be sure to have these settings configured for the cultivation facility in Settings > Configuration. BioTrack accepts three "buckets" of weight:
- Flower
- Other Material (Trim)
- Waste.
HarvestThe editable reference column is optional. | ProcessingThe editable reference column is optional. |
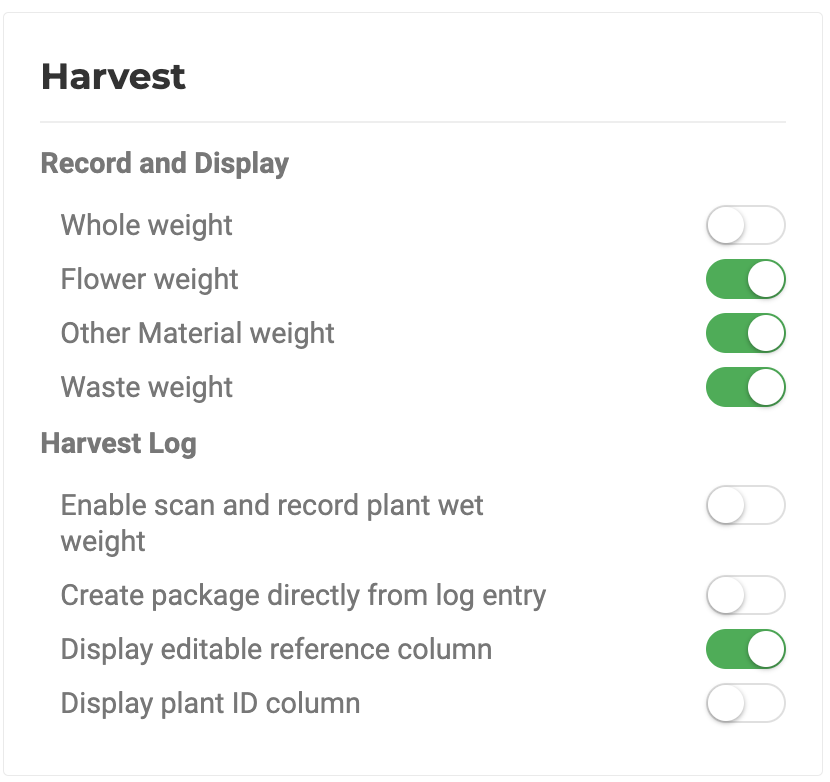 | 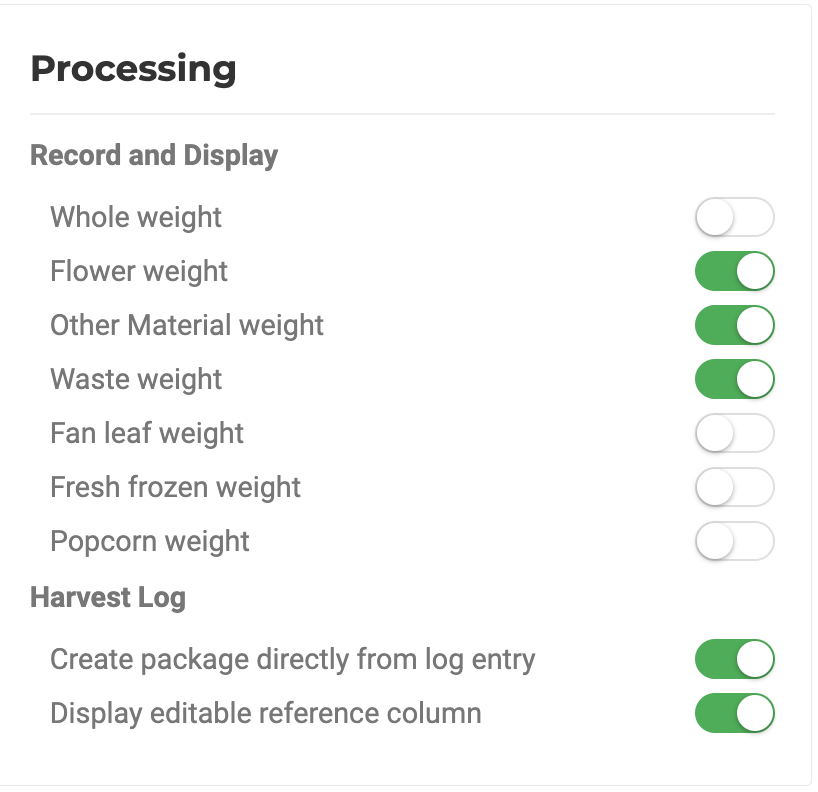 |
Creating a Harvest
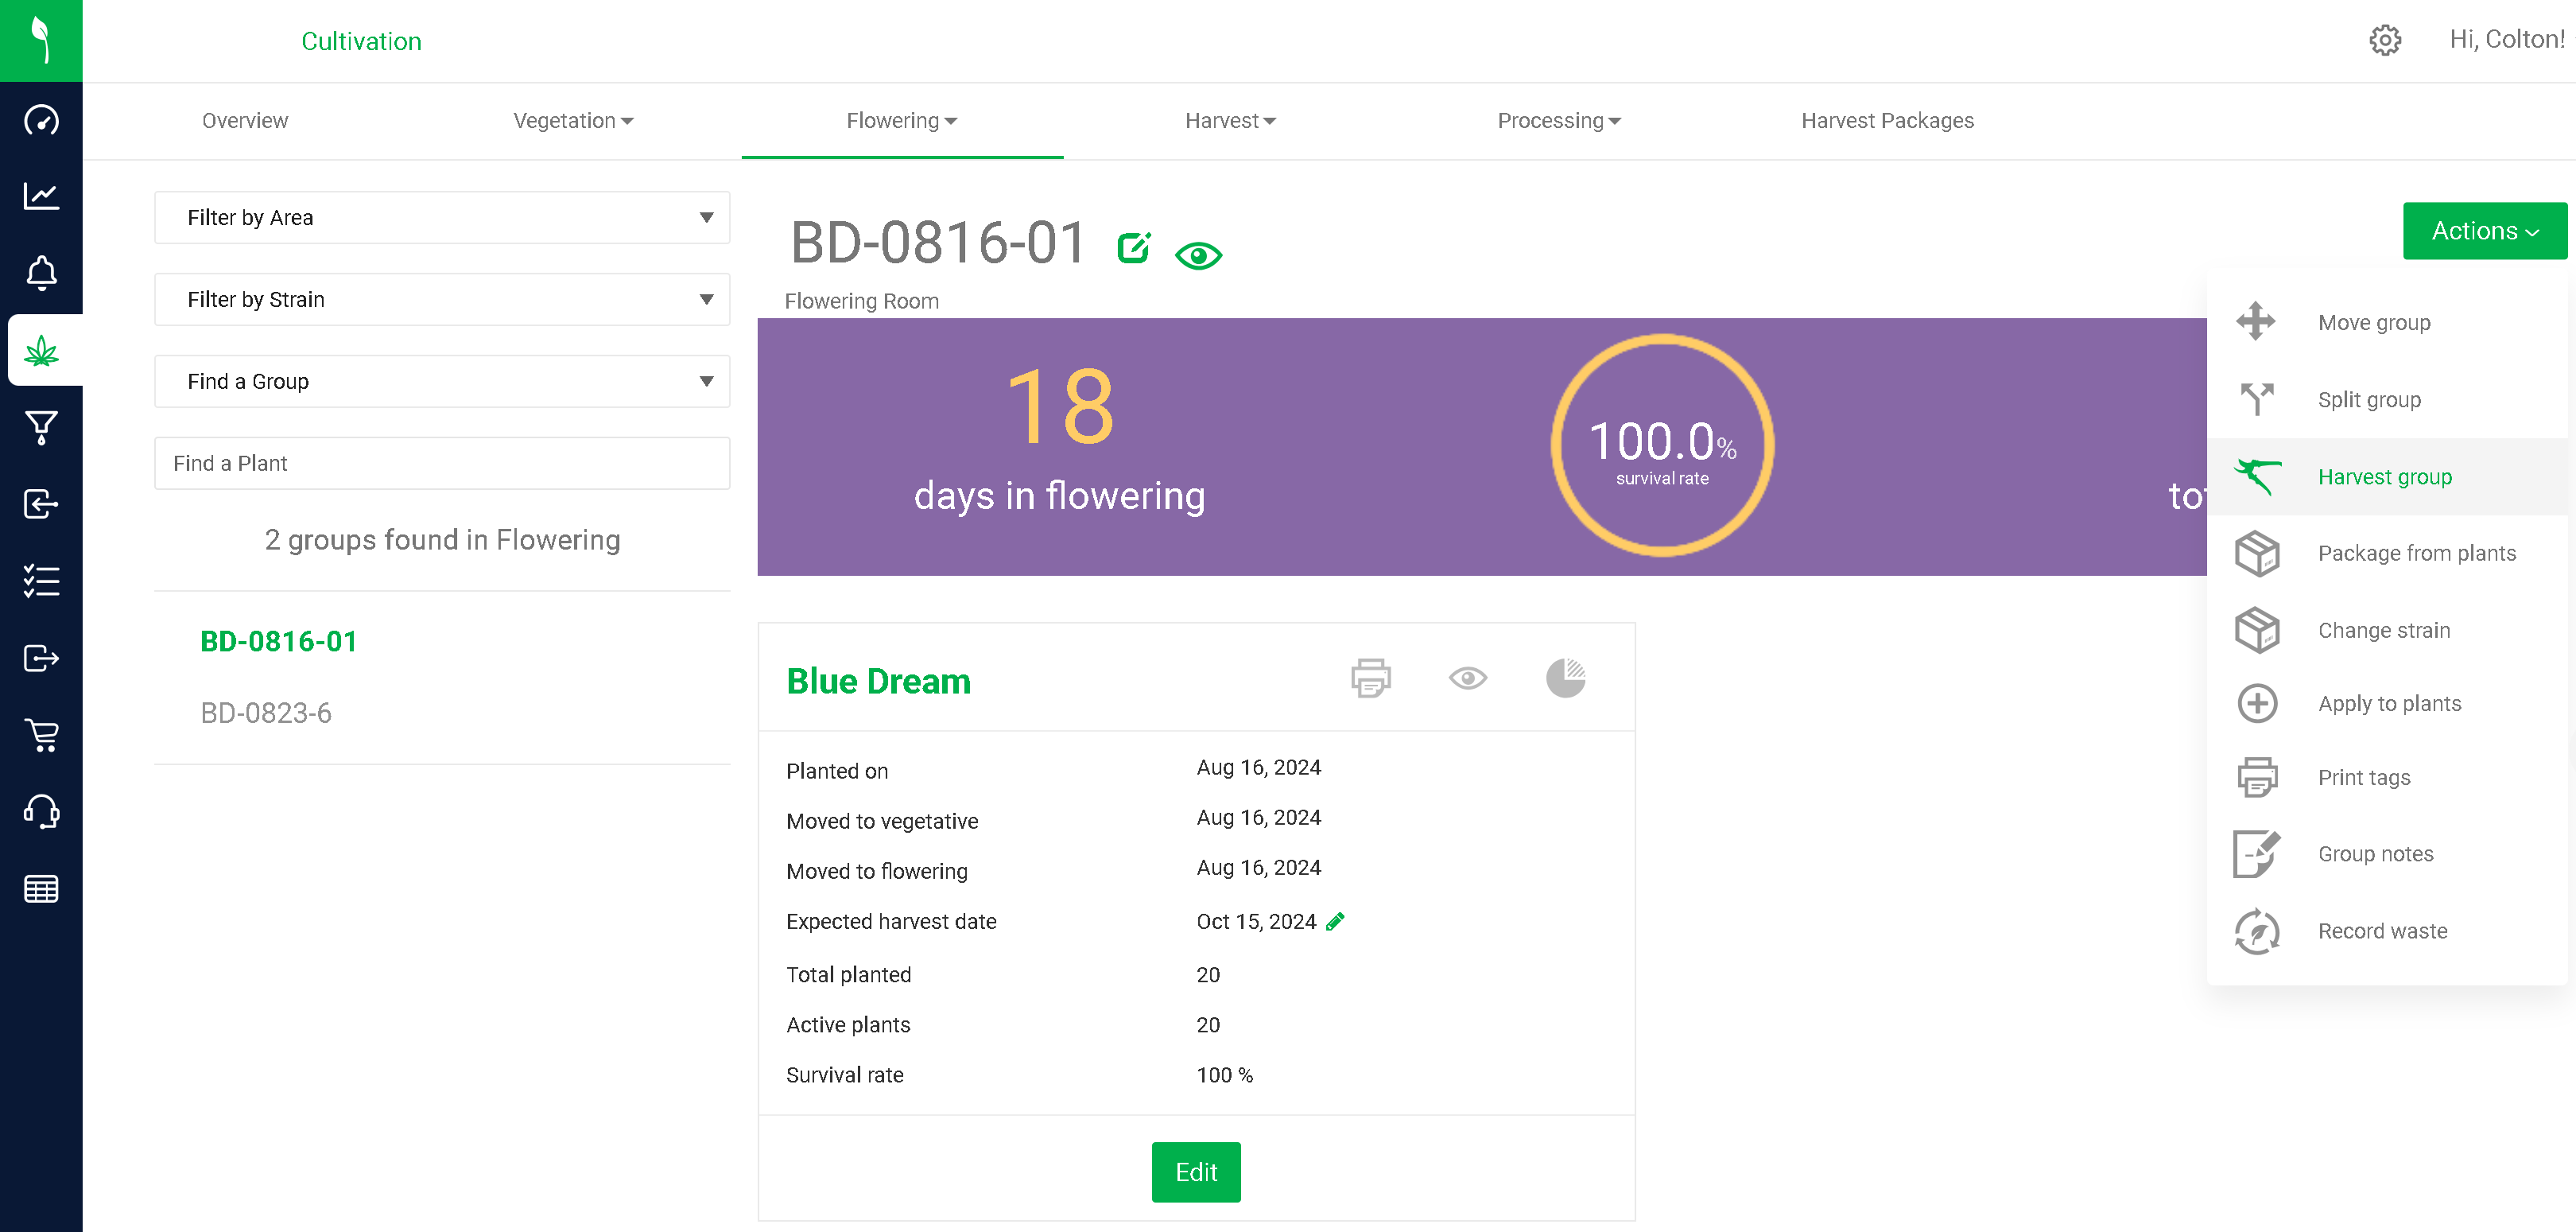
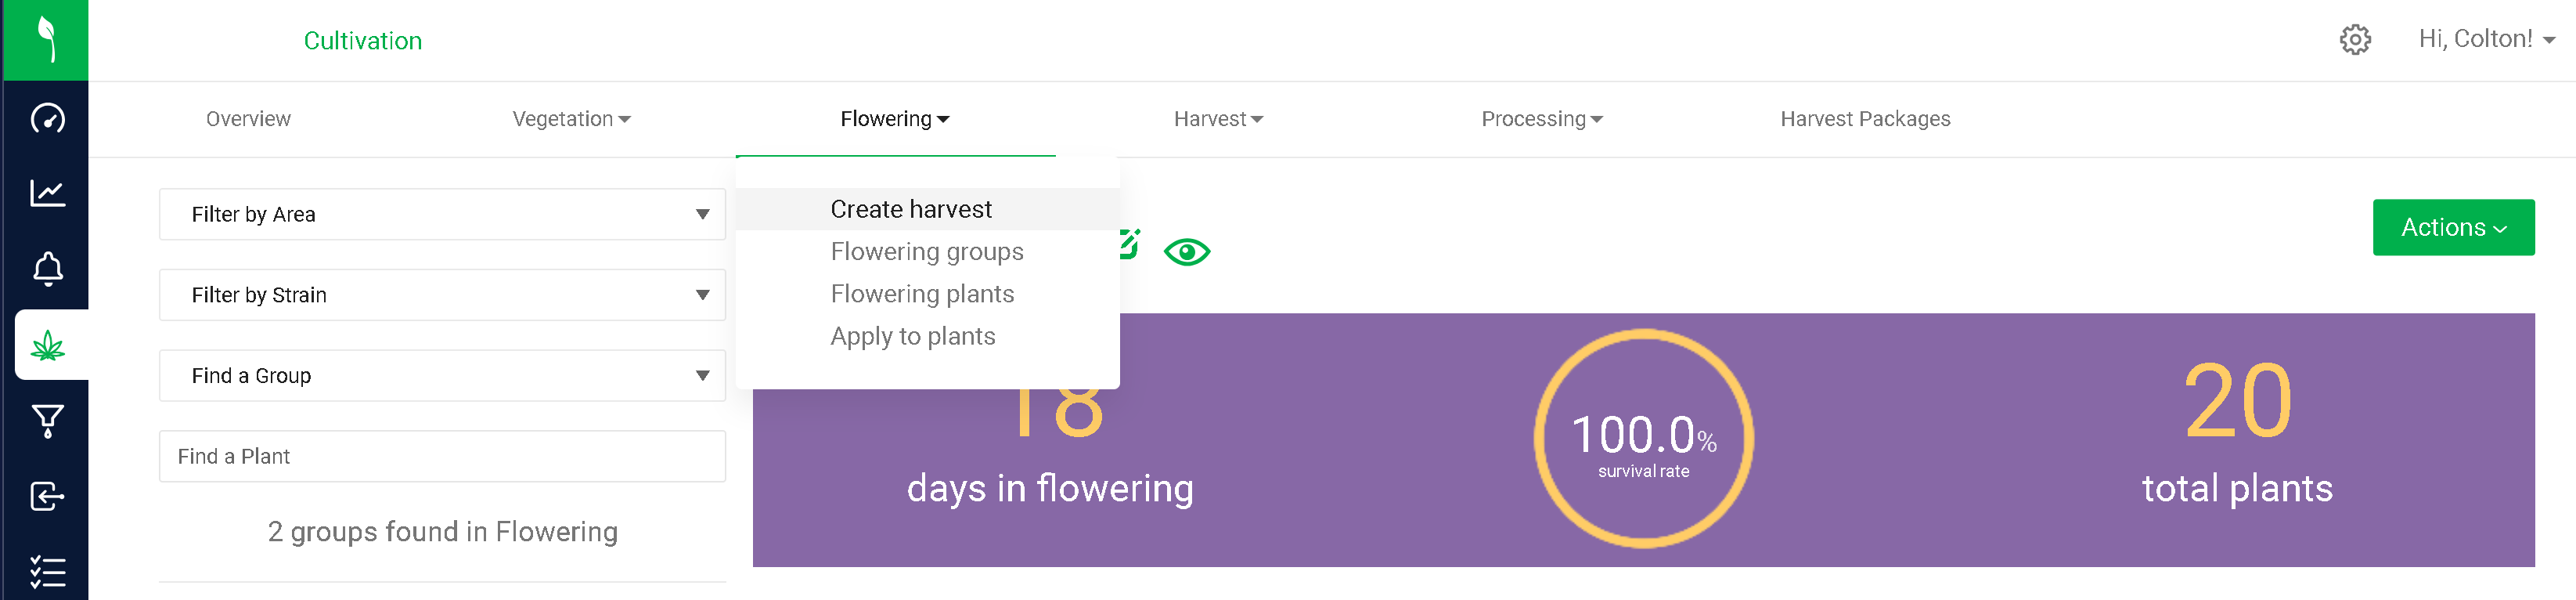
- Navigate to the Group within the Cultivation Module and use the "Harvest group" menu action to start this process. The "Create harvest" menu option is also available.
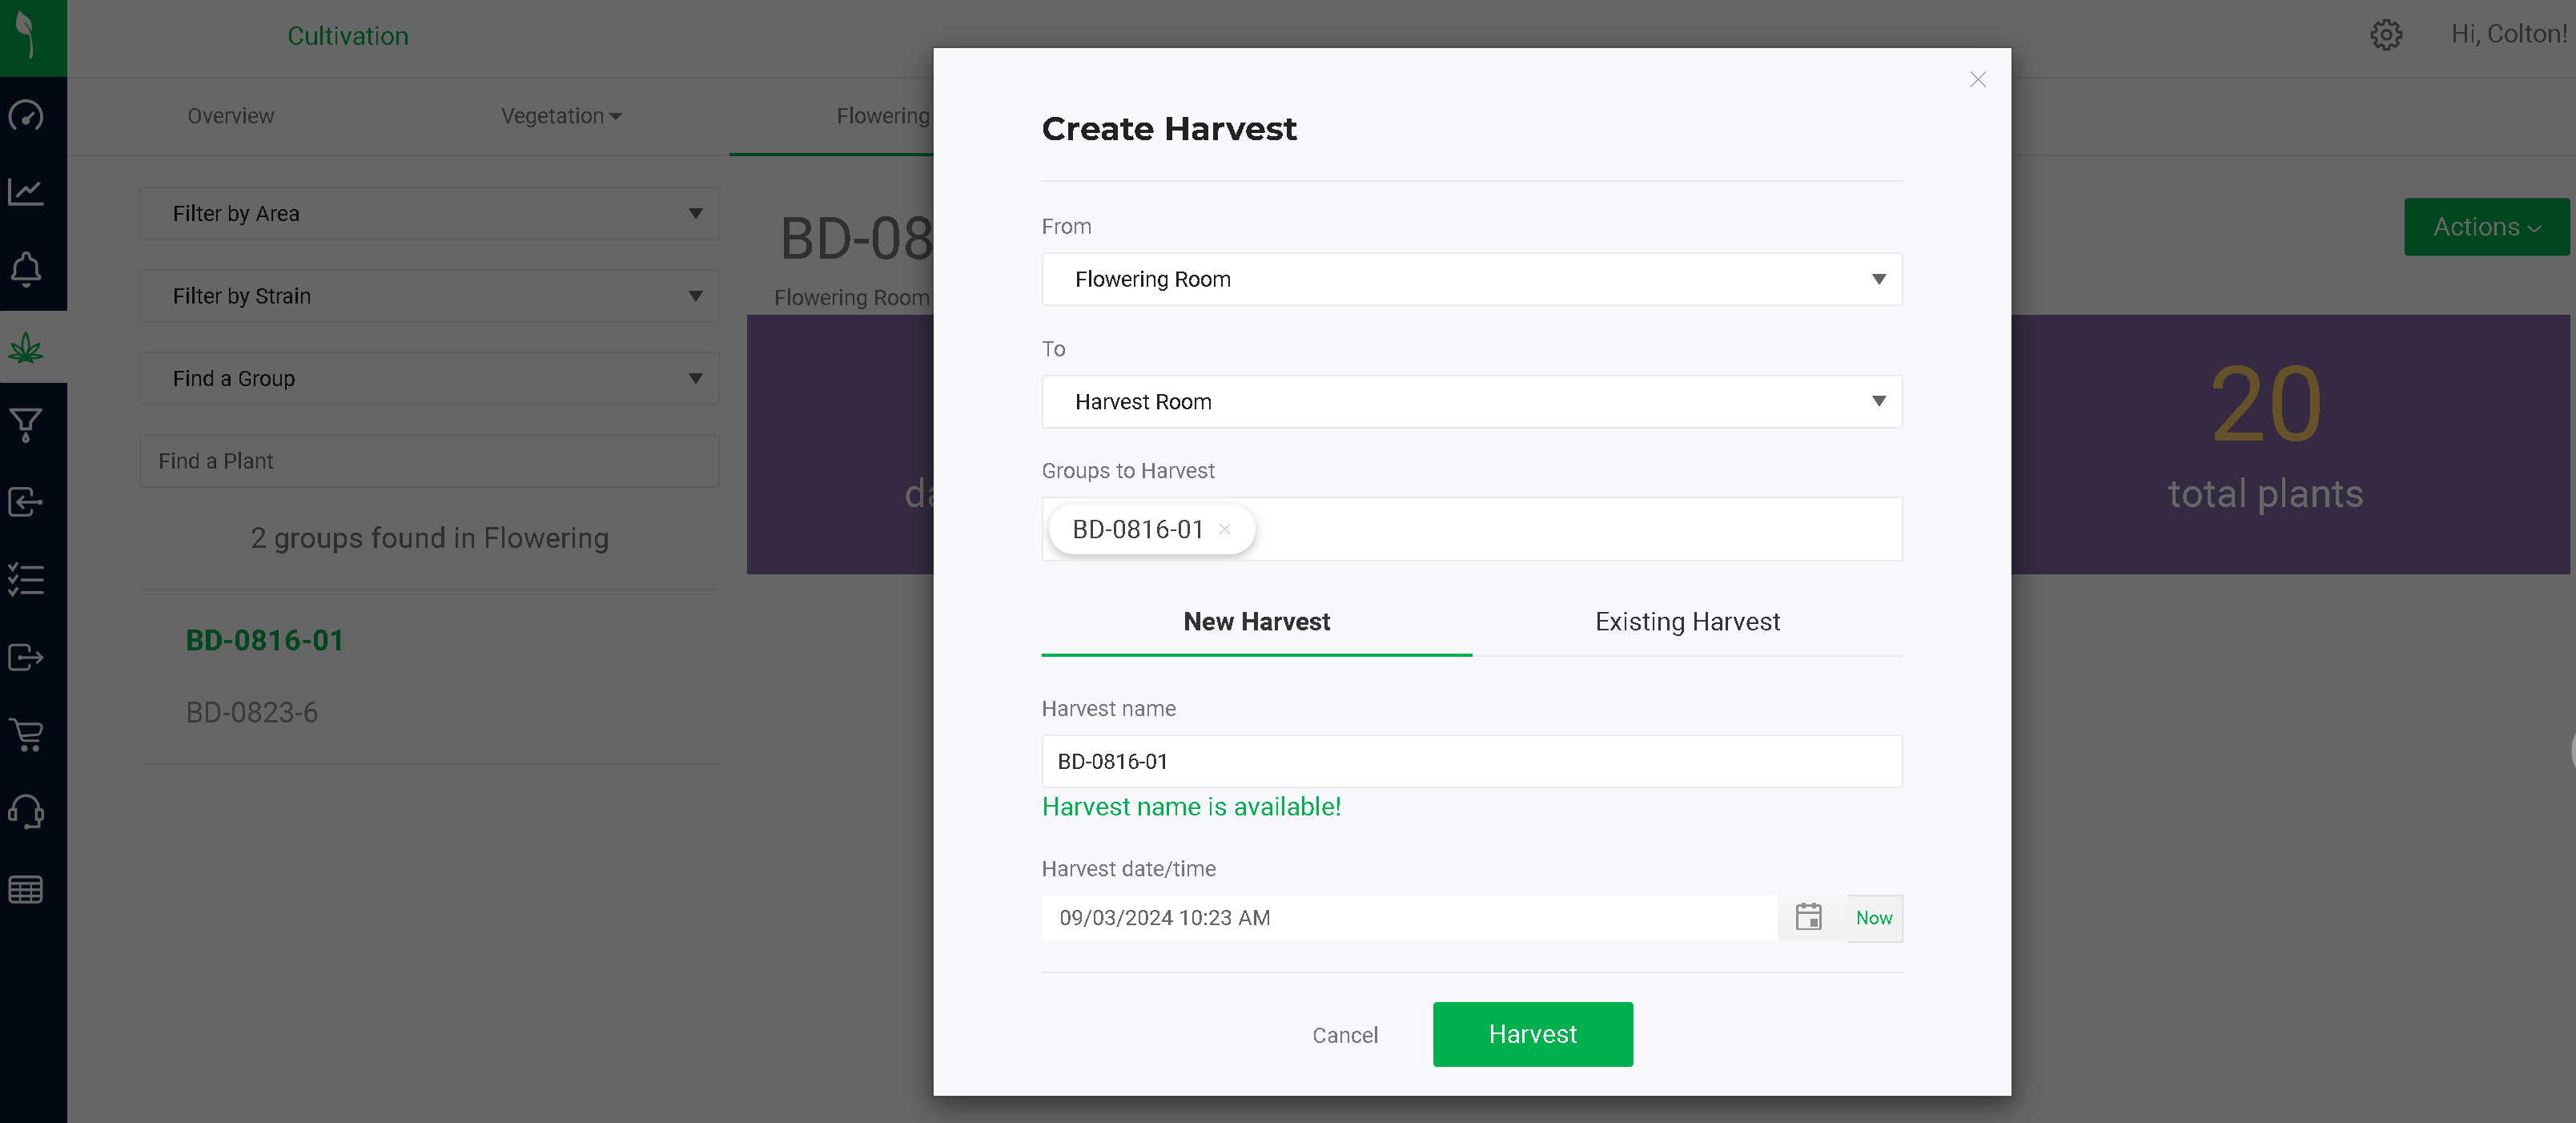
- Fill in the "Create Harvest" screen as appropriate
- Designate the Area that the plants will harvest into
- Confirm the Group that is being harvested
- Provide a Harvest Name. Flourish also supports harvesting into an existing harvest to combine groups.
- Choose the date/time for the harvest.
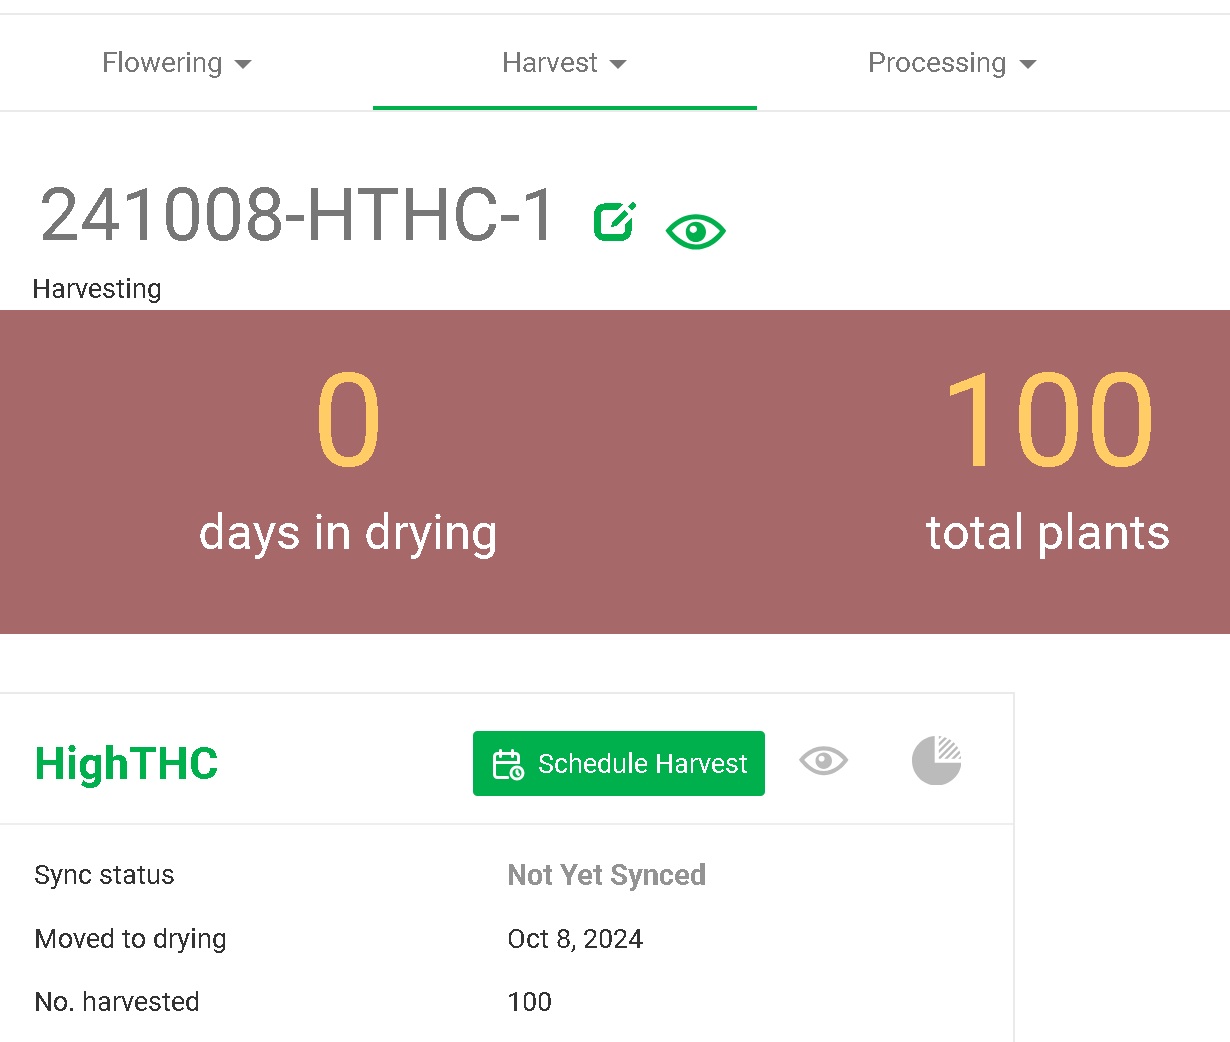
- View the Harvest in the "Harvest" Screen.
- Click the "Schedule Harvest" button to schedule the harvest with the state system. If the harvest is successful, the sync status will change from "Not Yet Synced" to "Synced."
- If you need to move the harvest back to Flowering, click "Un-schedule Harvest" to enable that action
Undo a Harvest
For an “Un-Scheduled” Harvest
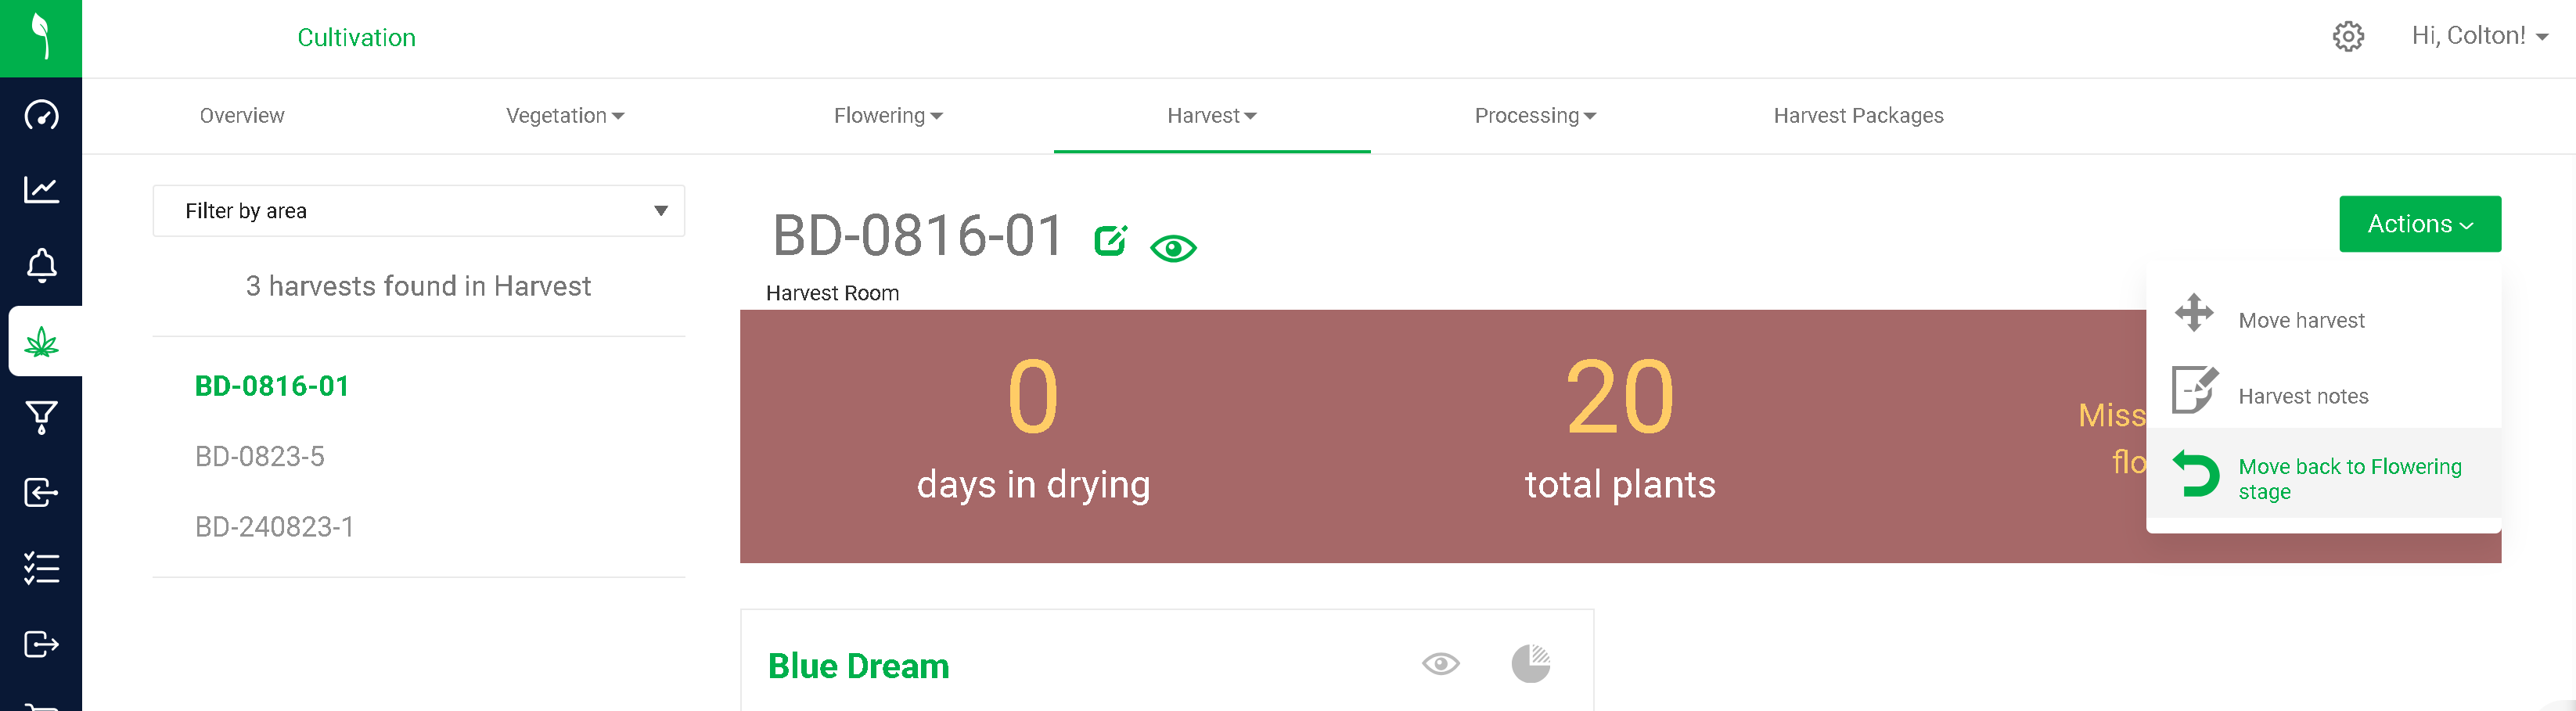
- Use the "Move back to Flowering stage" menu option to move the plants back and correct a mistake.
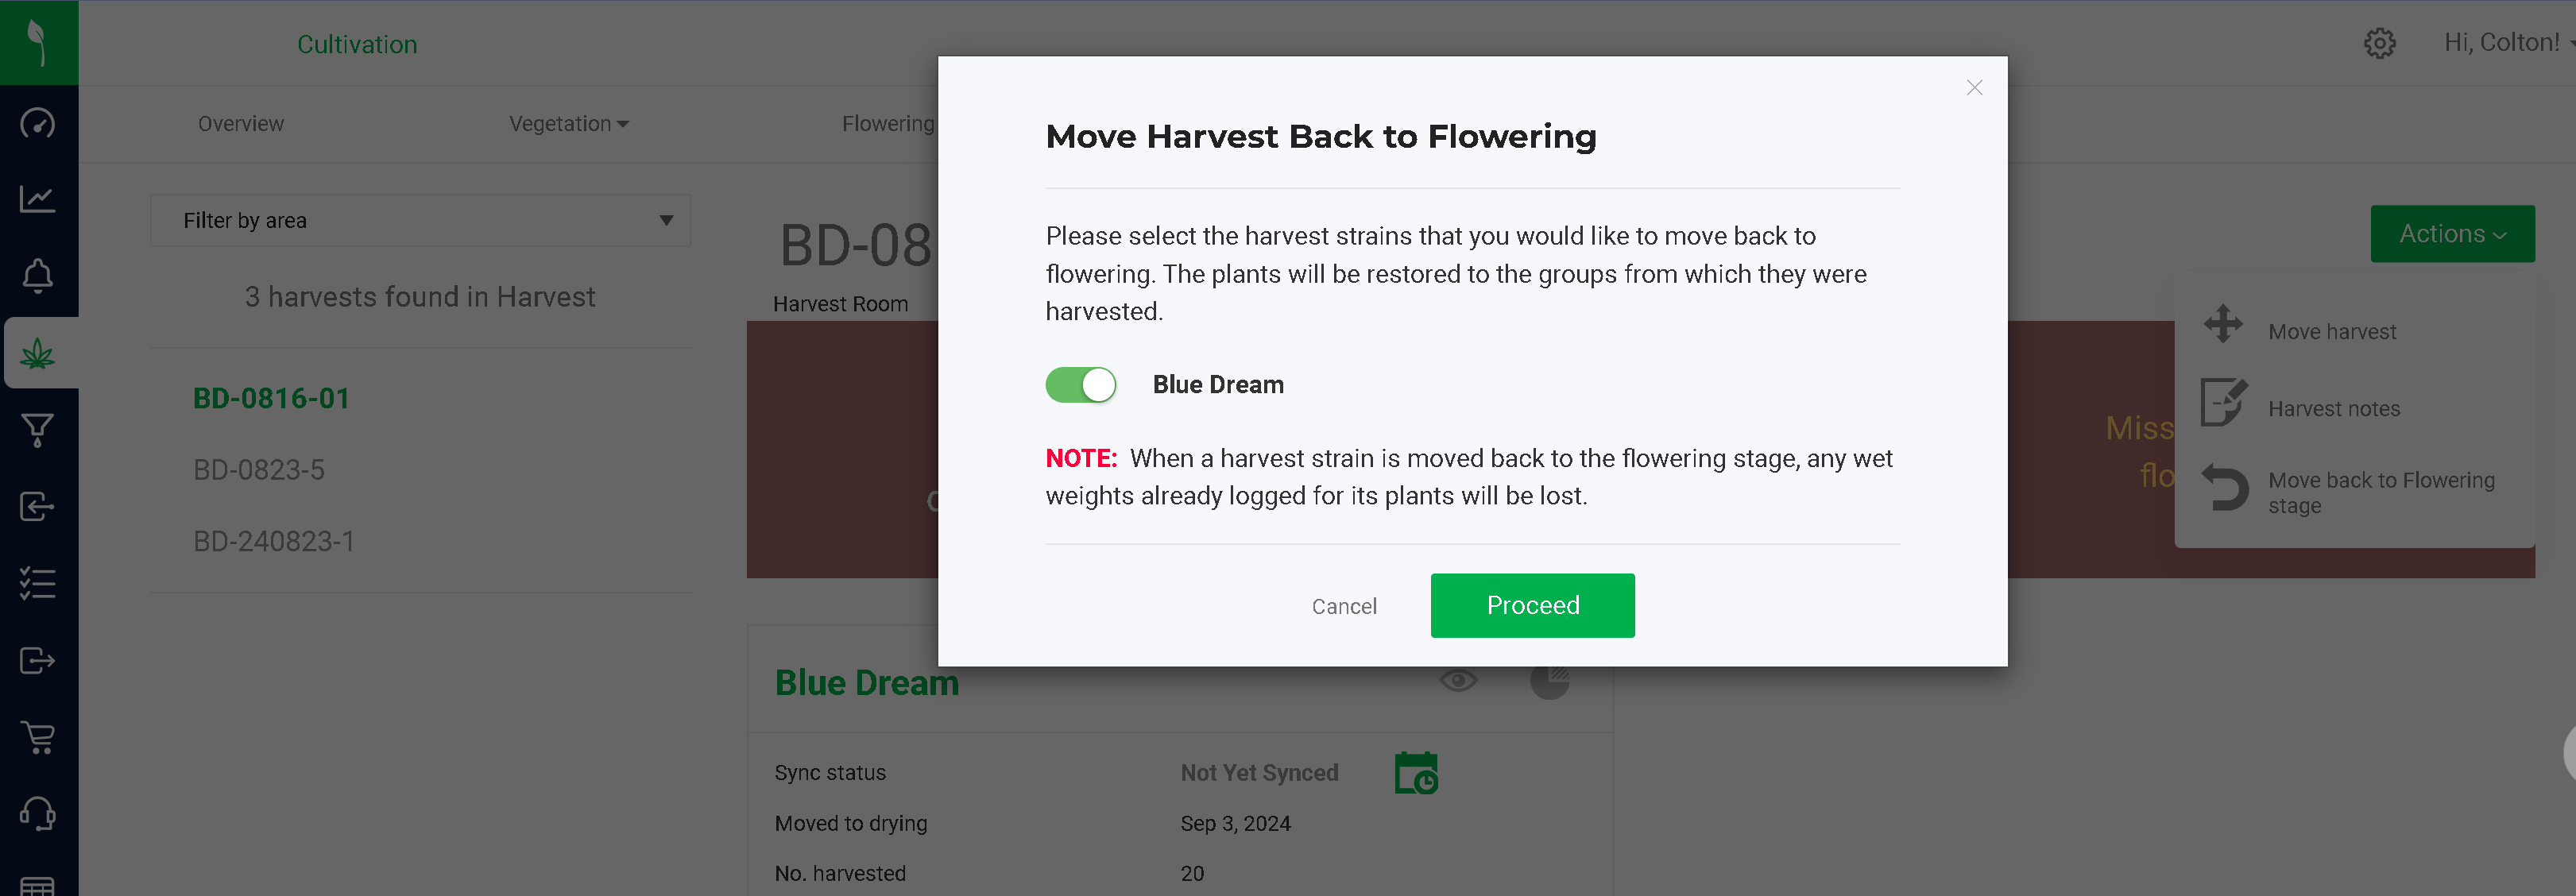
- Acknowledge that this removes the harvest record and any wet weight logged.Please save this information offline if needed.
- View the group in Flowering.
For a scheduled and synced harvest
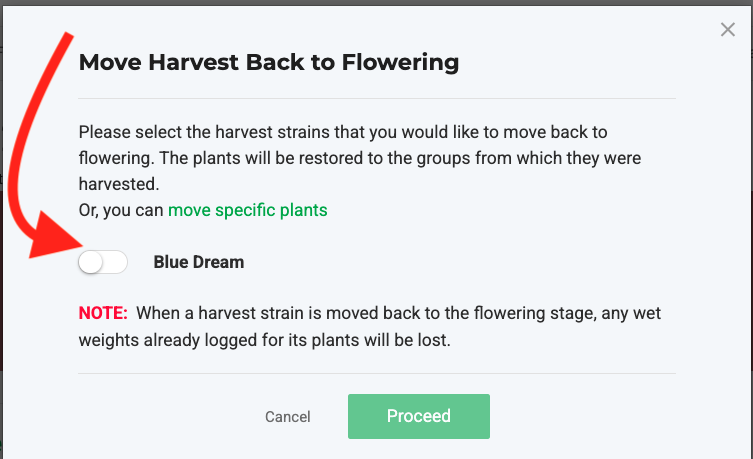
- Use the "Move back to Flowering stage" menu option to move the plants back and correct a mistake.
- Select the Strain you want to move.
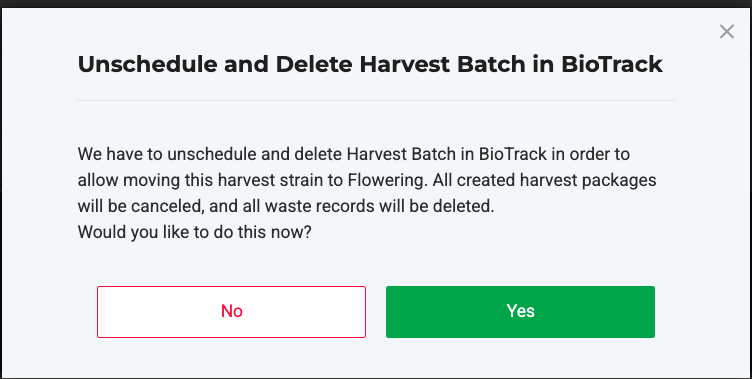
- Click 'Yes' to acknowledge unscheduling and deleting harvest Batches in BioTrack and canceling all harvest packages.
- Click 'Proceed'
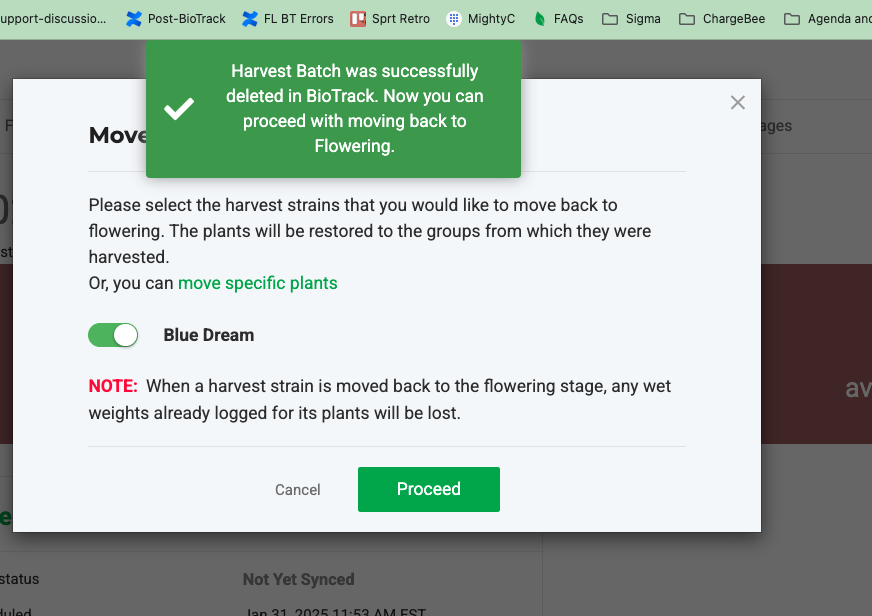
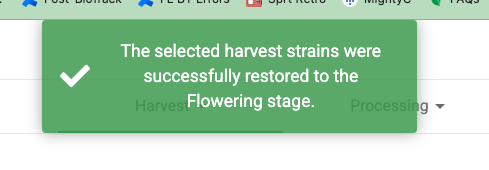
- See the success message and View the group in Flowering.
Undoing a Synced Harvest Video
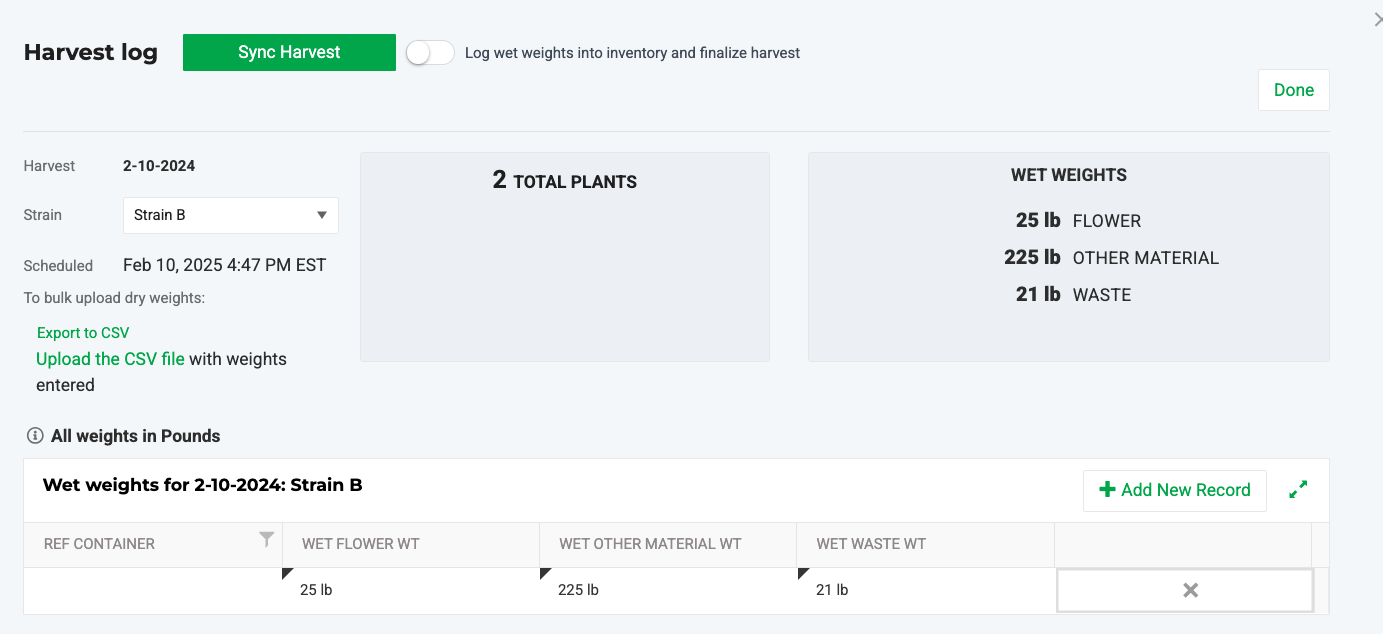
Submitting Wet Weights
- Navigate to the harvest.
- Open the harvest log by clicking "Edit Harvest Wet Weight."

- Input the totals for the Strain:
- Wet Flower Weight.
- Wet Trim Weight. This will go directly into inventory as "Other Material"
- Wet Waste Weight. This will go directly into inventory as "Waste"
- Click "Sync Harvest"
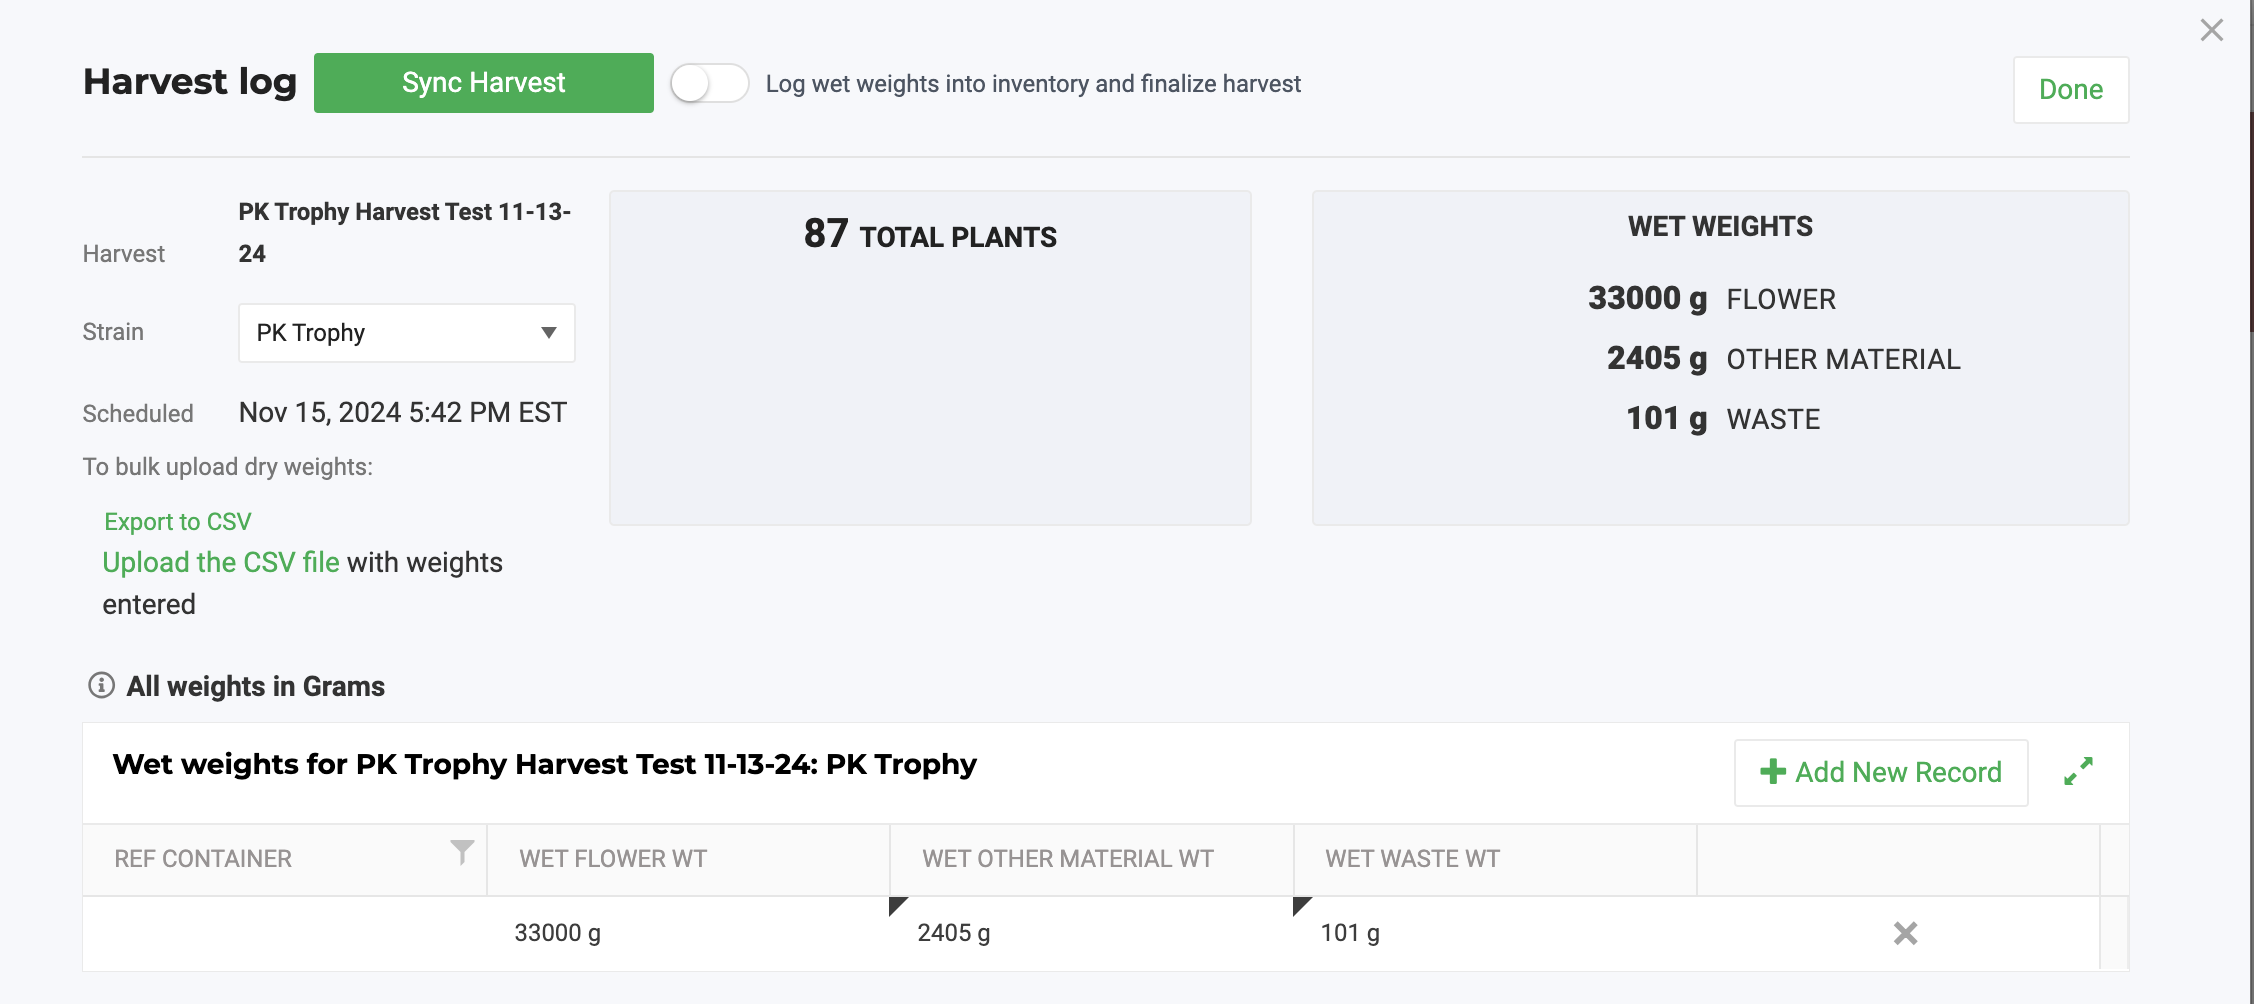
- This will push the weights to BioTrack.
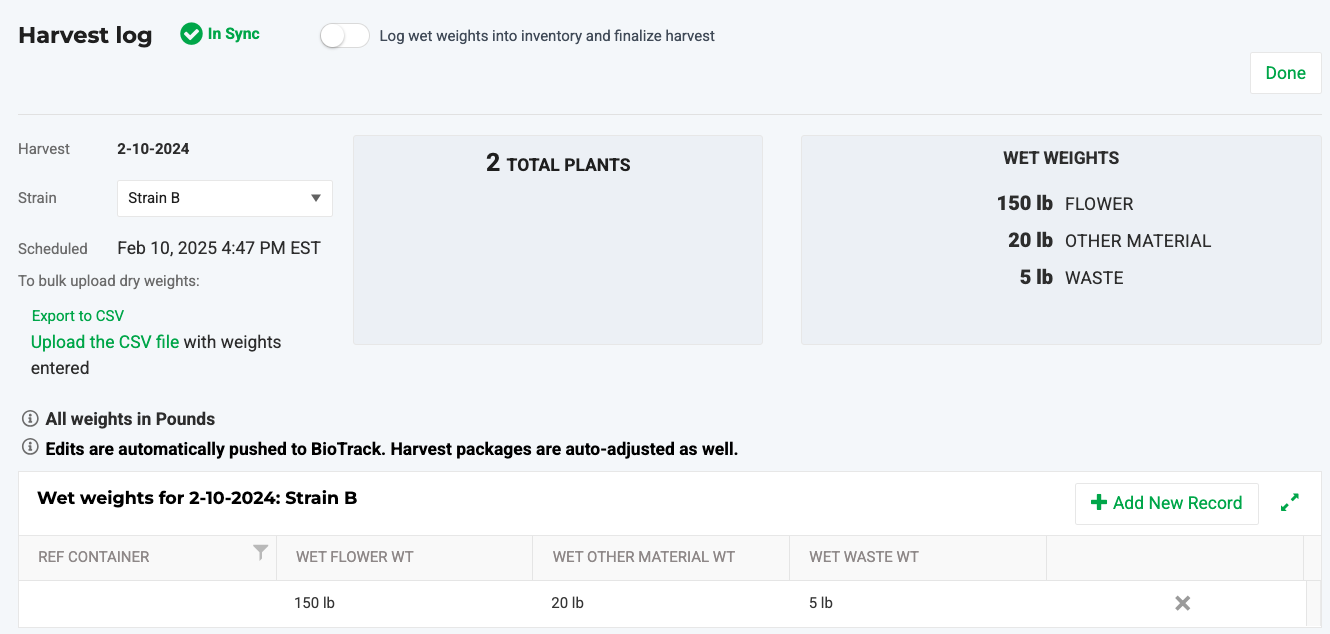
The Harvest Log Sync Indicator will show "Pending Sync" and "In Sync" after a successful attempt:

- All weights in Pounds.
- Edits are automatically pushed to BioTrack. Harvest packages are auto-adjusted as well.
- Anything in the "Trim" amount goes directly into Inventory as a package of "[Strain Name] - Other Material."
- Waste goes directly into Flourish's Waste Log in Inventory. Navigate there to schedule destruction.Do not schedule this item for destruction until all weights and related updates are finalized. Only schedule this item for destruction after all weights and updates are finalized.
If you need to edit or delete your recorded weights, please click here to see how.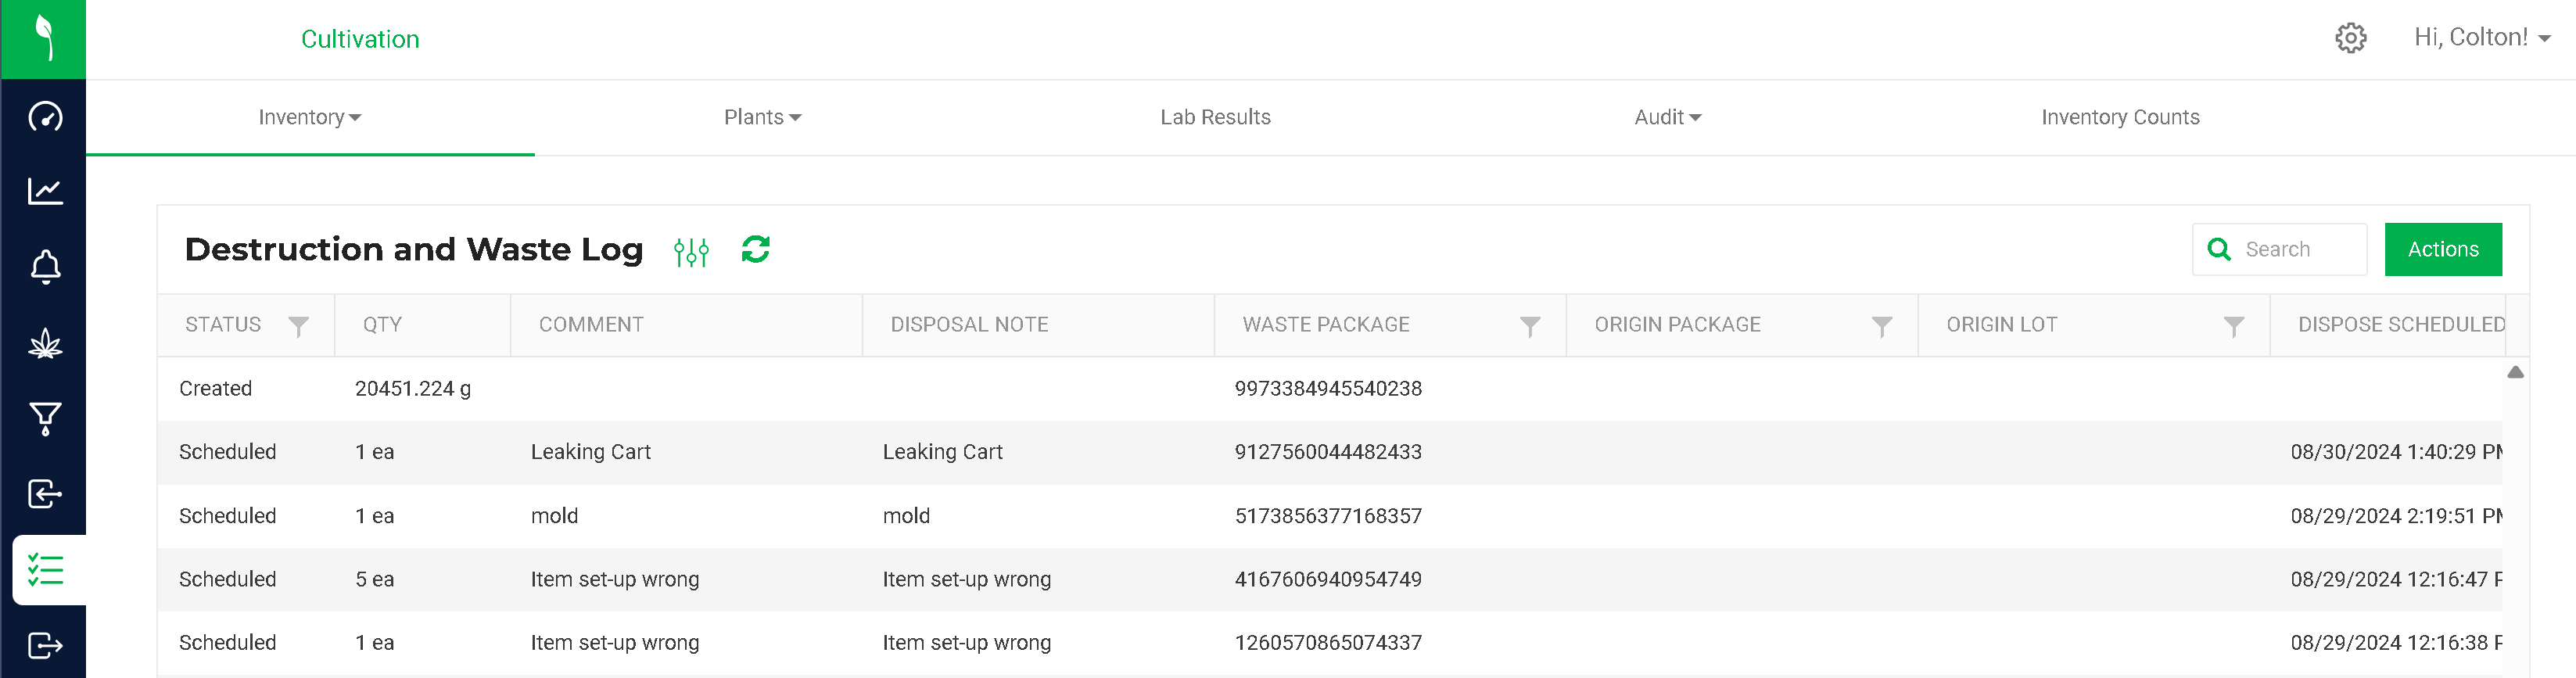
- Select the waste package ID and use the Action to schedule destruction.

- Choose "Waste" and enter a note
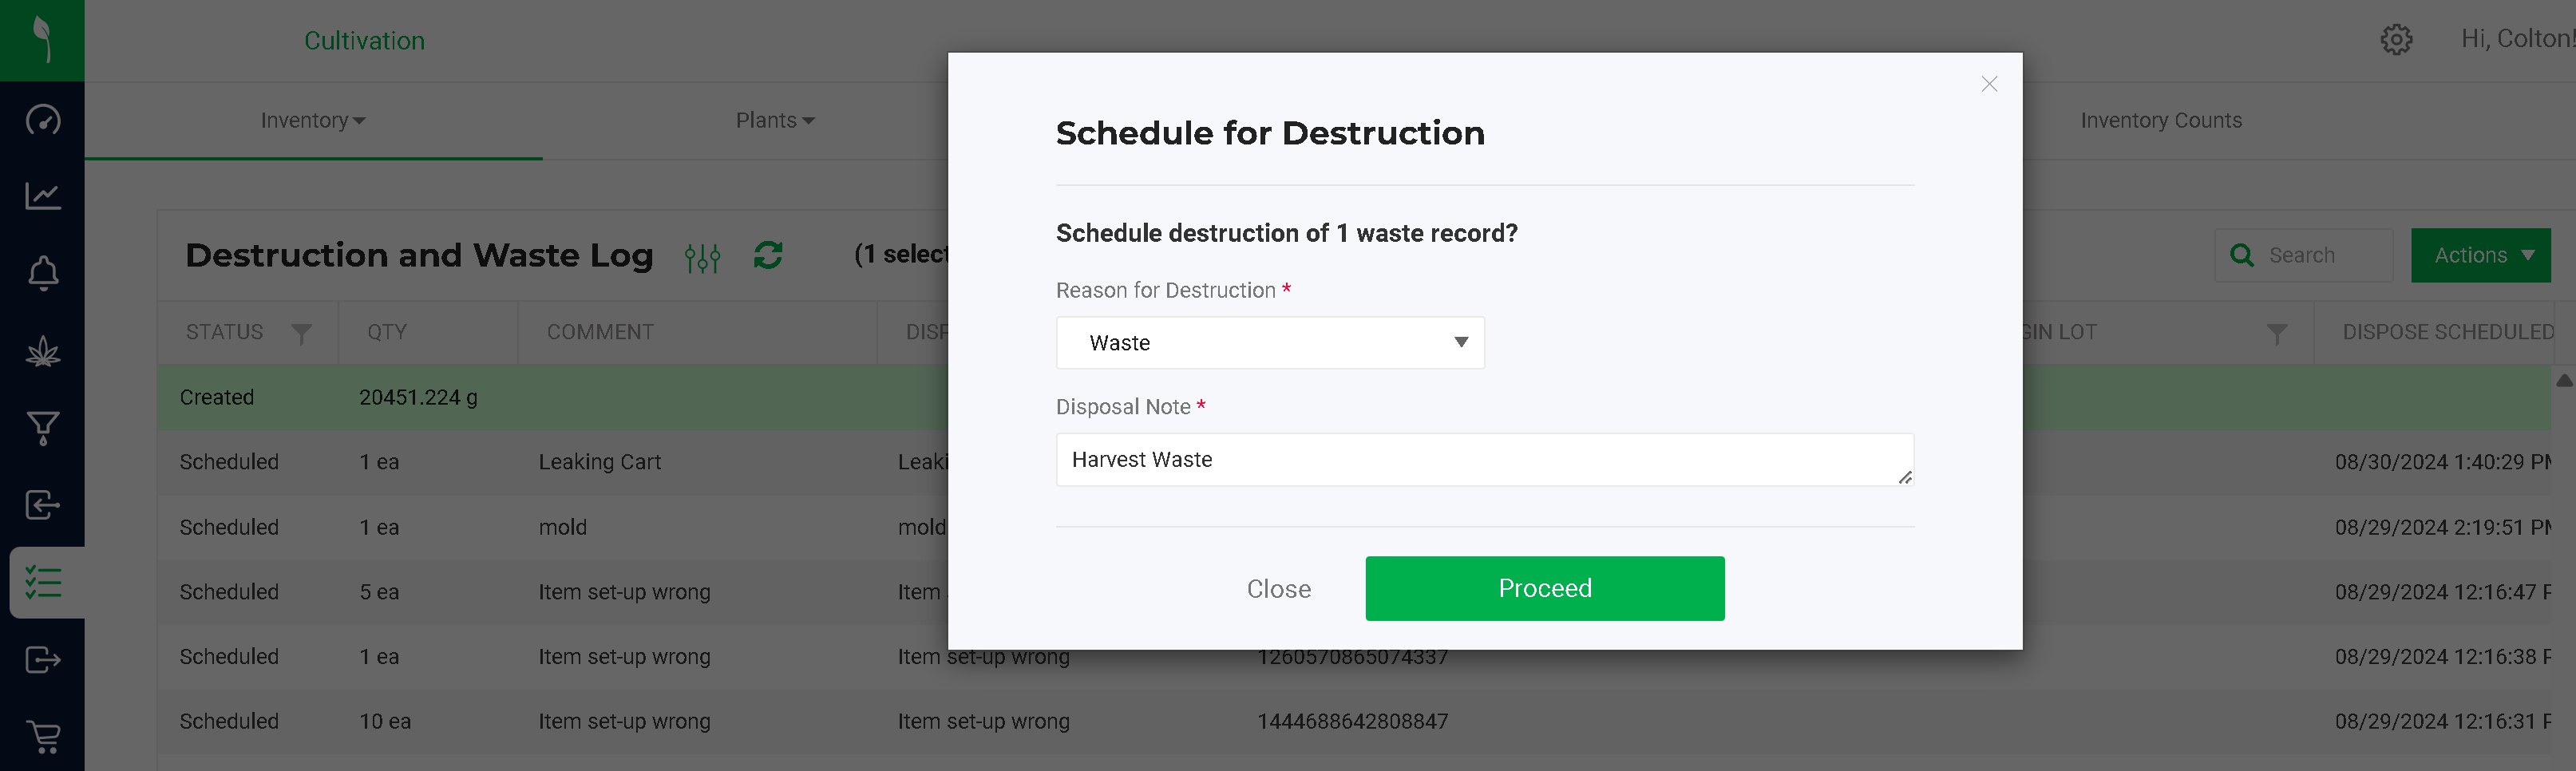
- Mark this waste as destroyed after the 72-hour waiting period.
Harvesting Wet Biomass into Inventory (Fresh Frozen, Flash Frozen, Harvest Wet)
If you want to do a partial wet harvest, please do a manicure harvest first and then fully harvest to take to drying/processing.
- Harvest the group of plants
- Schedule the harvest
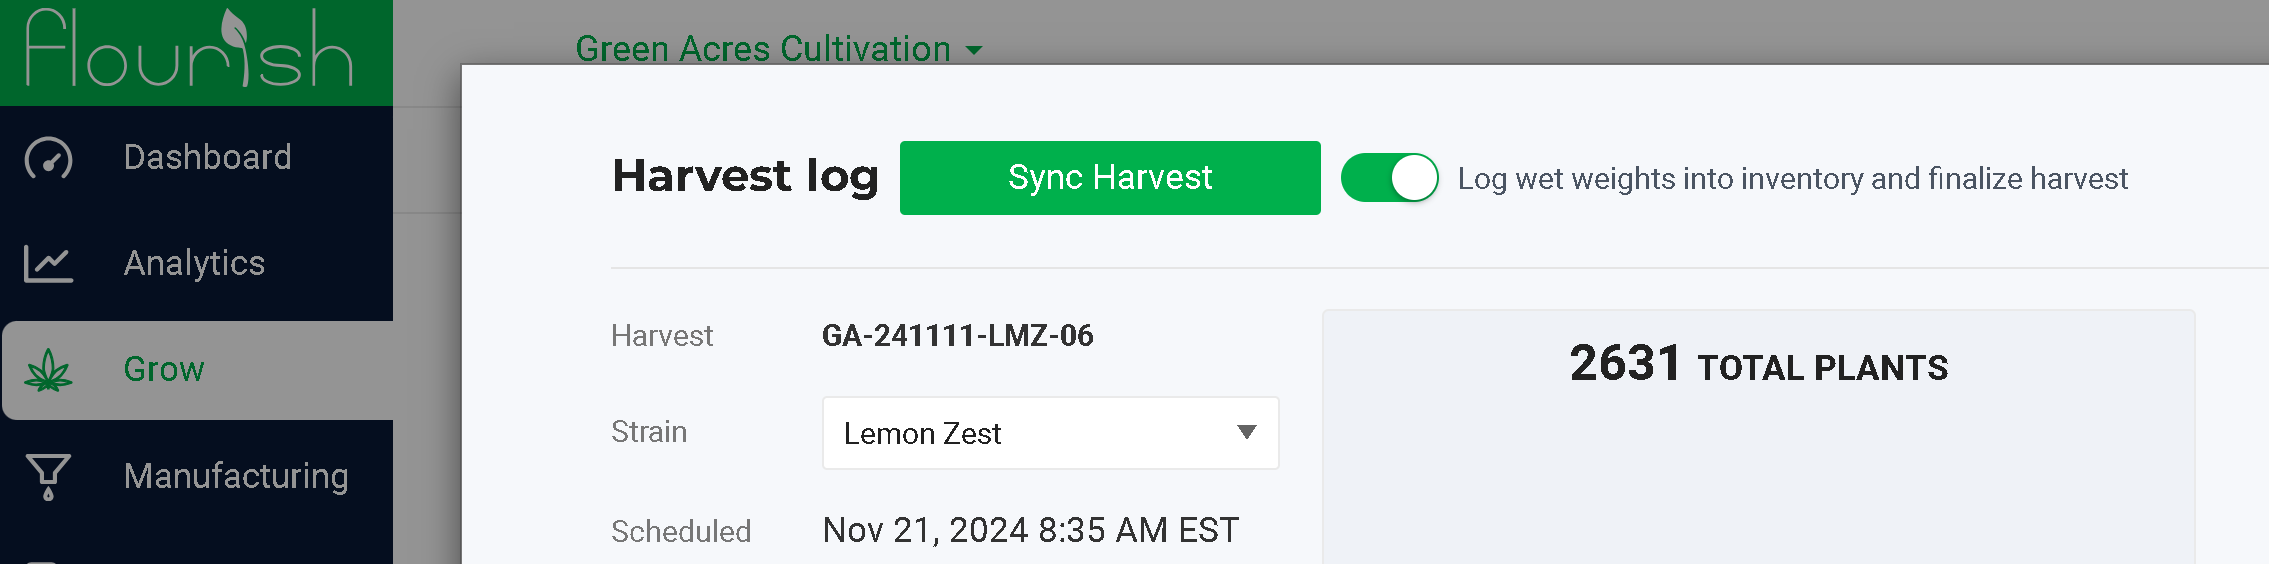
- Input the Wet Weights. Ensure this is complete and accurate before proceeding.
- Toggle on the option "Log wet weights into inventory and finalize harvest" and click "Sync Harvest" to push the weights in the harvest log into inventory.
- If you forgot to toggle on the option "Log wet weights into inventory and finalize harvest" before you synced the harvest, you can toggle it after you sync the harvest. Flourish Software will do the same.This is a final action. You cannot move the harvest to "Processing".
- After you log wet weights into inventory and finalize harvest, the harvest will display a
 sign indicating that the wet weights are in your inventory, and you will not be able to proceed to the processing phase.
Logging Dry Weights and Curing into Inventory
After logging Wet Weights and letting the plants dry, BioTrack requires submitting the total dry weight(s) and then using the "Cure" function to bring this into inventory.
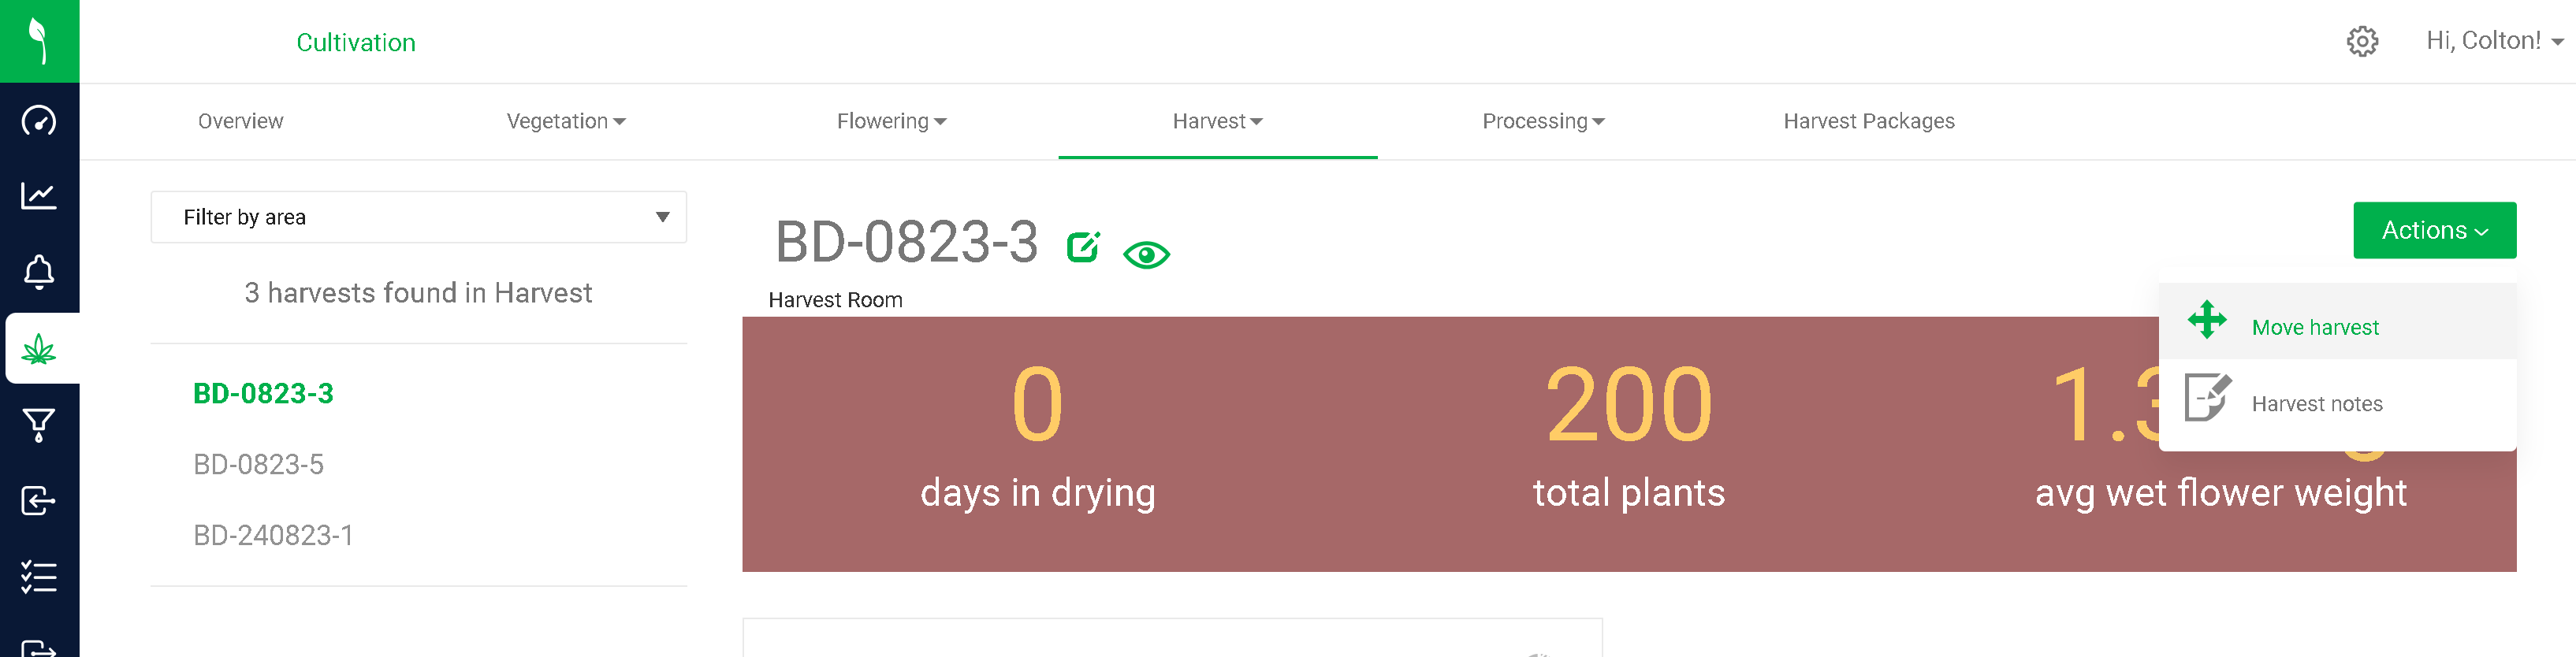
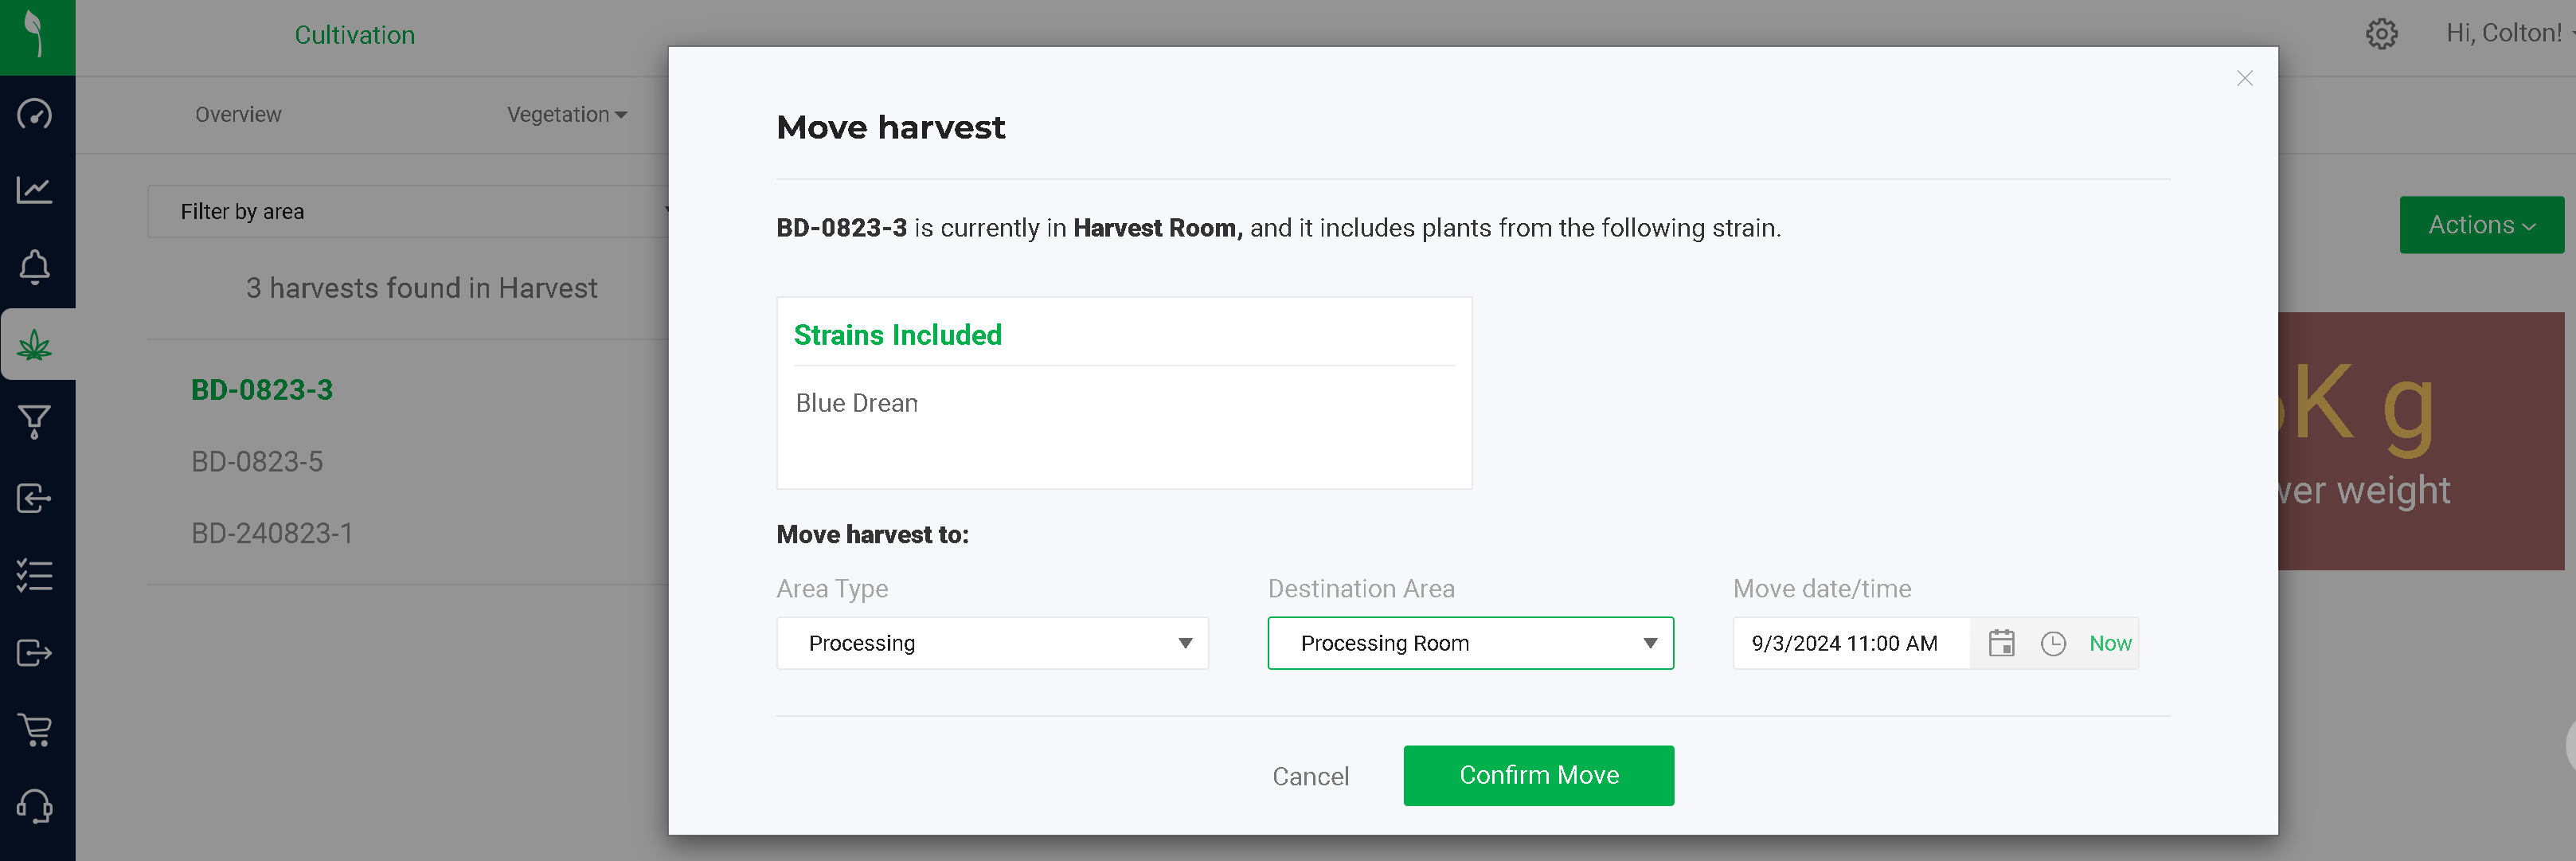
- Move the Harvest to "Processing" in Flourish
- Click "View Harvest Dry Weight" to log the dry weight(s) against the plants in this Harvest.
- Log the total weights for this harvest for each strain
- Dry Flower wight.
- Dry Trim Weight ("Other Material" in BioTrack terms).
- Total remaining harvest waste.
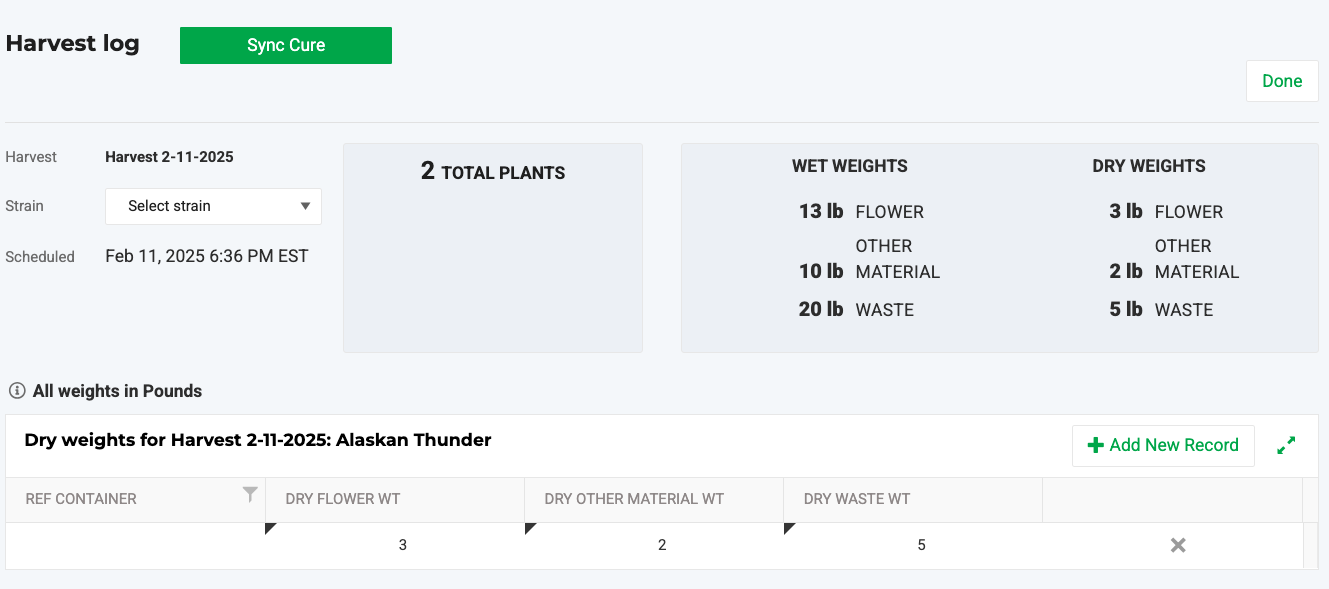
- Click "Sync Cure" to finalize the weights. Confirm this action using the pop-up.
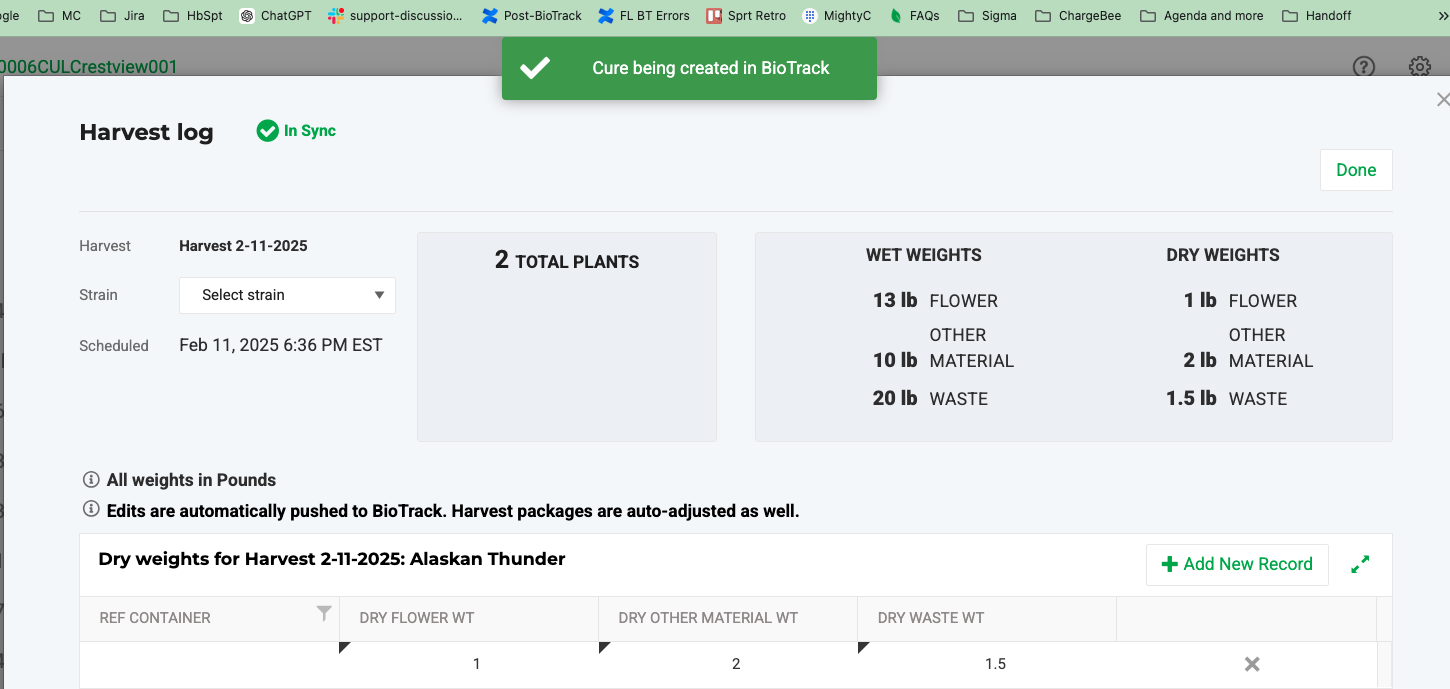
- The weights are now finalized. This can be modified if the packages created haven't been manipulated.
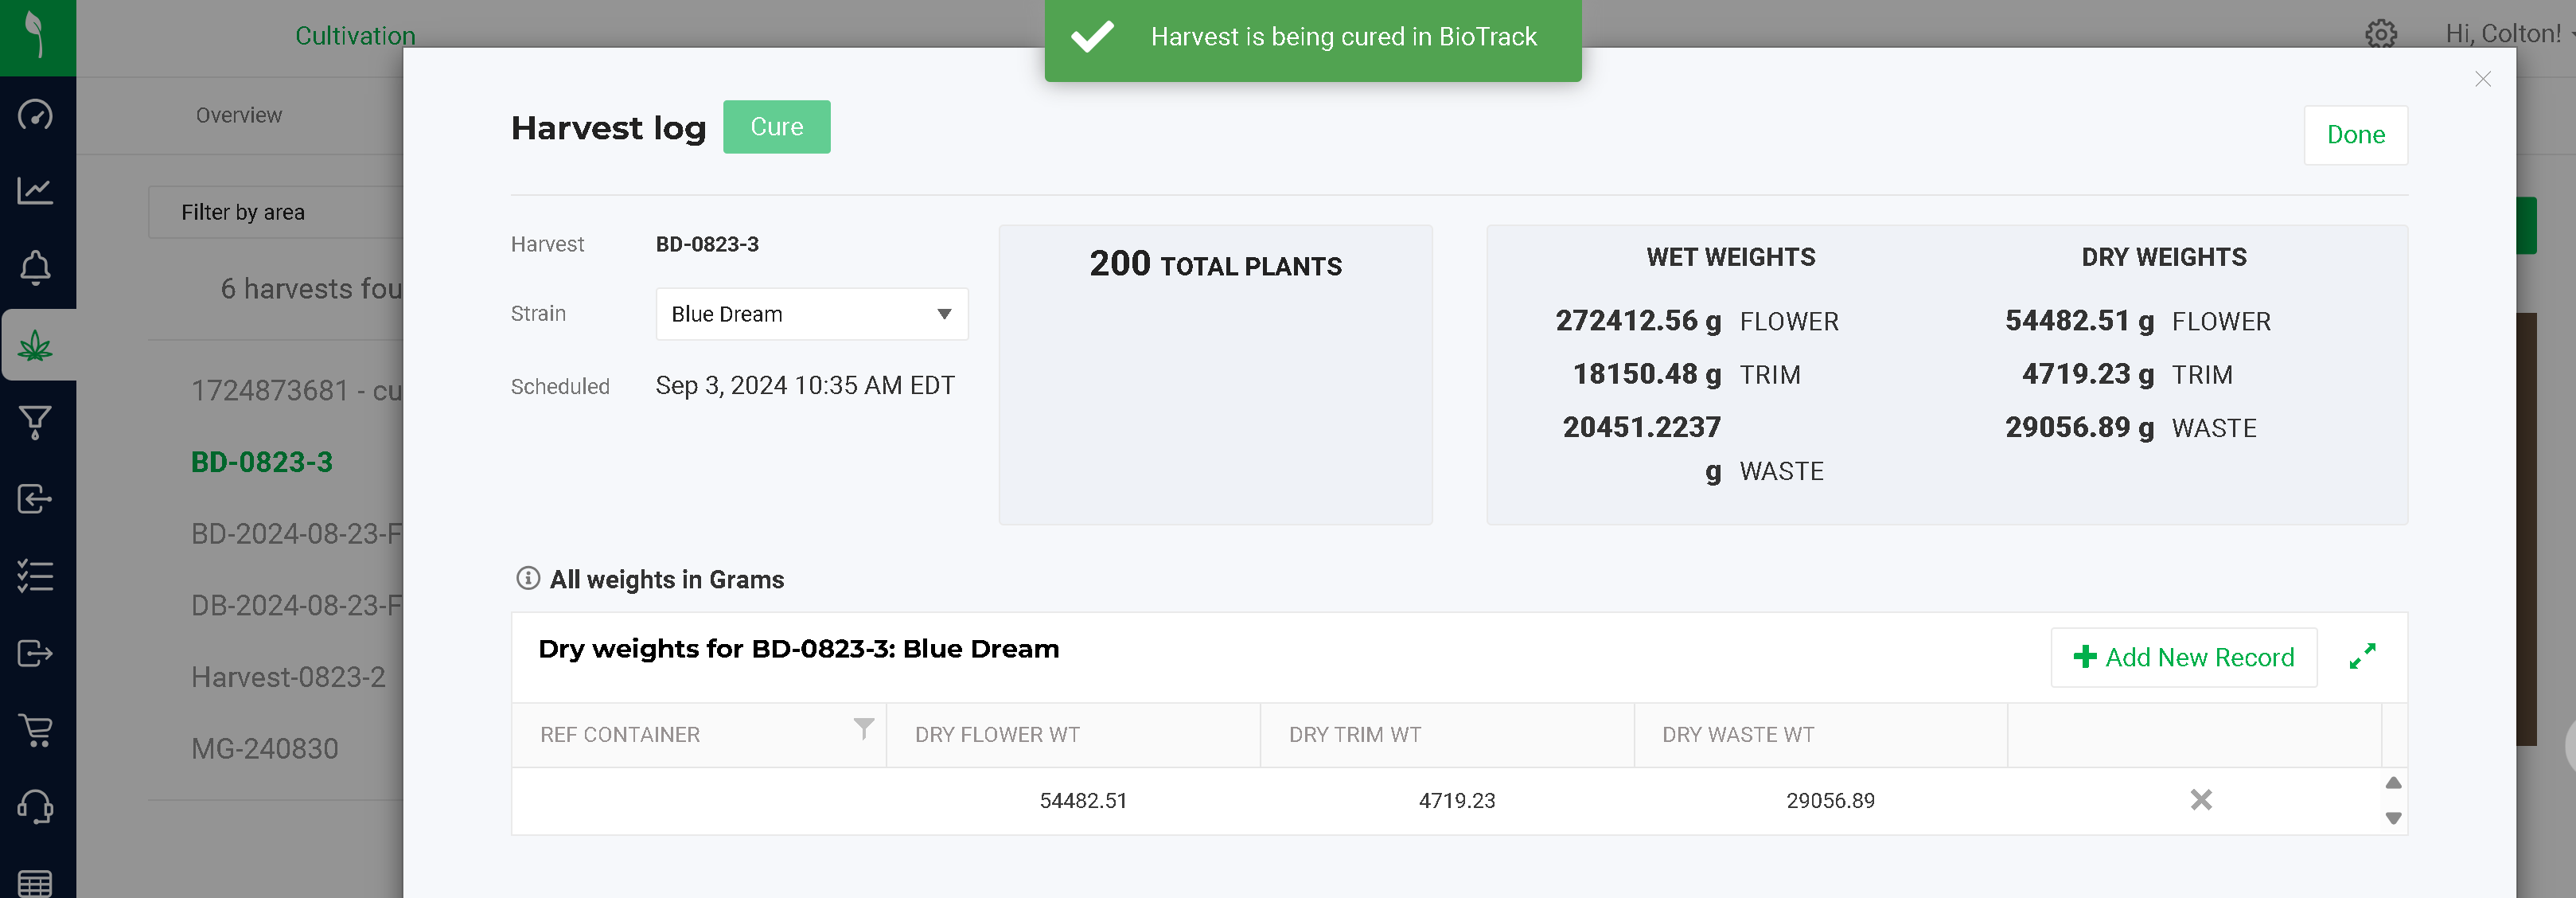
- View the totals in Inventory:
- View the Flower and Trim ("Other Material") in the Harvest Packages grid
- View the Waste in the Waste Log. Use the Destruction Workflow to schedule and destroy the waste.

- Next, change the item name or create a "Lot Product" to make the inventory available for the next steps of manufacturing or flower processing.
- Use the action menu to "Complete" the harvest to hide it from this screen. This does not do anything in BioTrack. It simply keeps the screen focused on open harvests.
Editing and Deleting Weights
Editing weights
You can update the weights in the harvest log in the 'Harvest' phase or the 'Processing' phase.
To do that:
- Click "Edit Harvest Wet Weight" or "Edit Harvest Dry Weight" to open the harvest Log.
- Click on the cells of the existing records or click "Add New Record."
- Make your updates.
Flourish syncs the changes you make immediately to BioTrack.
Editing Wet Weights Video
Editing Dry Weights Video
Deleting All Weights records
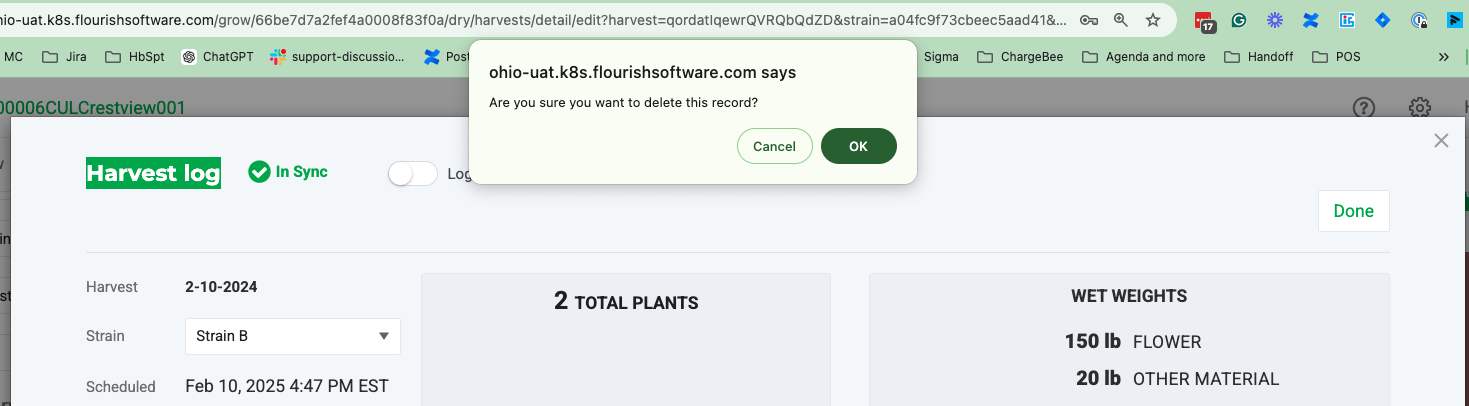
- Click the 'X' button next to the line to delete the harvest records from the harvest log.

- Flourish Software will prompt this message:
- When you update the records, Flourish will Display the "Sync Harvest" button to push the new heights to BioTrack.
Deleting wet weights video
How did we do?
Florida BioTrack Cultivation Management
Florida BioTrack Inventory Creation