Table of Contents
METRC Inbound Process
Learn how to sync METRC transfers and receive inventory into purchase orders in Flourish Software, including default auto-created POs and an alternative workflow with manual PO creation and package receiving.
General
Default Behavior
Alternative Inbound Process
The alternative inbound workflow is the following:
- Use Purchase Order to record what you wish to purchase from the vendor.
- Use Transfers to record and receive the inventory into the Purchase Orders.
- Retag/Convert packages to the Internal items on your Purchase Order
lines. - Update the Purchase Order lines' quantities to what you received on the Transfer.
With the new ability to receive packages from Transfers on Inbound Purchase Orders, you can now do the following:
- Create a purchase order and send it to the vendor before inbounding the transfer in METRC.
- Receive the inventory on the transfer 'against' the purchase order.
- Update your purchase orders according to the actual quantity on the transfers.
- Receive packages from multiple METRC transfers on one Inbound Purchase Order.
- Receive packages on a METRC transfer on various Inbound Purchase Orders.
- Retag/Convert packages to the Internal items on your Purchase Order
lines.
Prerequisites
Set the User Role
If you want one user to be able to perform all the actions below, the User Role must have the following permissions toggled 'On' for the user role:
- Access to Transfers.
- Create inbound transfers.
- Receive inventory on inbound transfers.
- Assign inventory on inbound transfers to PO.
To do that:
- Click
 Settings.
 - Select User Roles.
- Make sure to select the facility you need.
- Click the
 icon to CONFIGURE.
 - Locate the Inbound Card.
- Ensure the toggle for View and Update in ON for Transfers.
- Next to the Transfers line on the Inbound Card, click
 to configure the Actions for the Inbound Transfers modal.
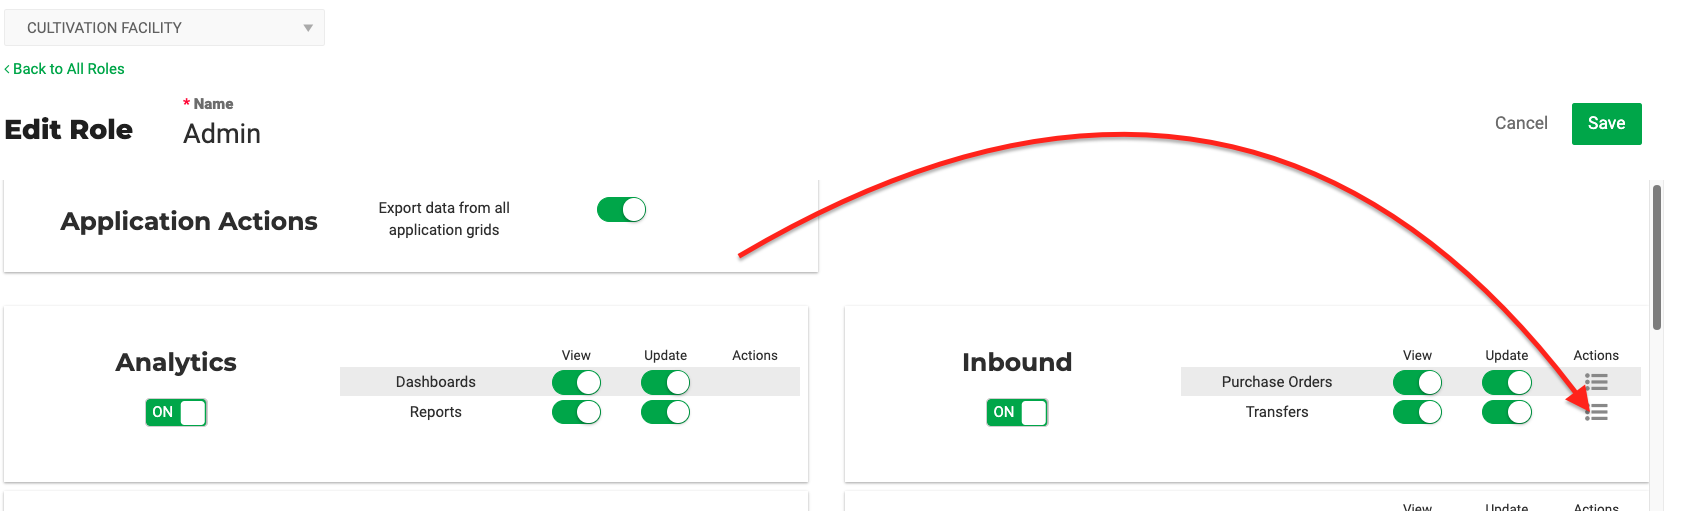
- Toggle 'On' The following:
- "Assign inventory on inbound transfers to PO"
- "Create inbound transfers" - Not relevant. You are not able to create inbound transfers in a METRC-integrated facility.
- "Receive inventory on inbound transfers"

- Close the modal.
- Click Save.
Video: Set the User Role
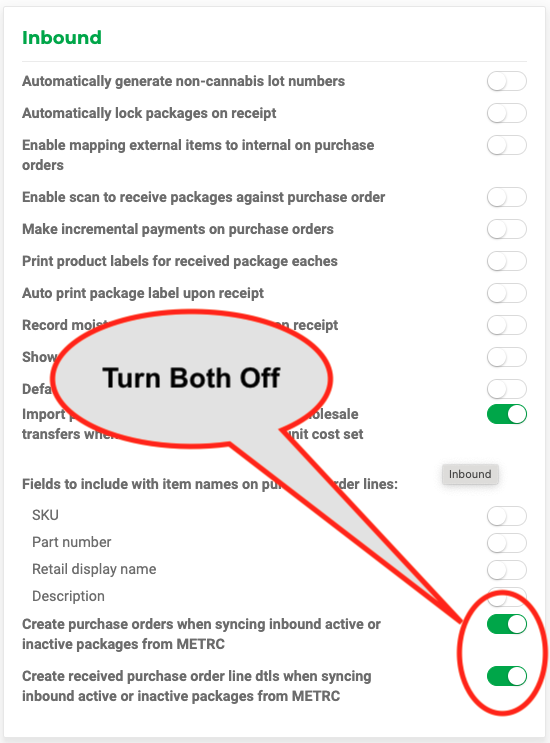
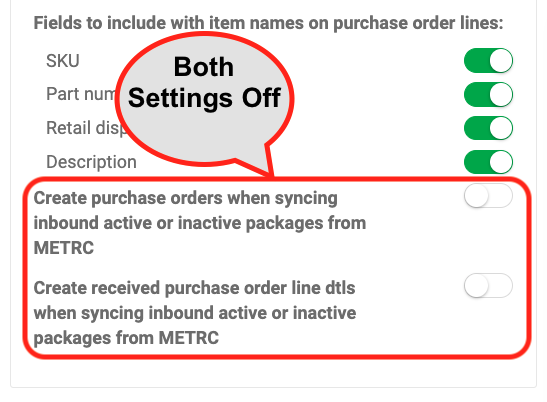
Stop Creating Inbound Purchases Automatically
Turn off the settings that Create purchase orders from sync packages from METRC.
You can sync transfers, but Flourish will not create a corresponding purchase order. The purpose is to create the purchase order with your internal items before the inbound Transfer is synced.
Follow the steps below to stop creating purchase orders:
|   |
 .
.Video: Stop Creating Inbound Purchases Automatically
Create a Purchase Order
Video
More on creating Purchase Orders in our Flourish Software Hub
Receive Inventory
Transfers
- Go to METRC and Accept the transfer.
- Use the "Sync from METRC" button to sync the Transfers you accepted in METRC. Flourish automatically syncs once every 24 hours if you forget to "Sync from METRC".
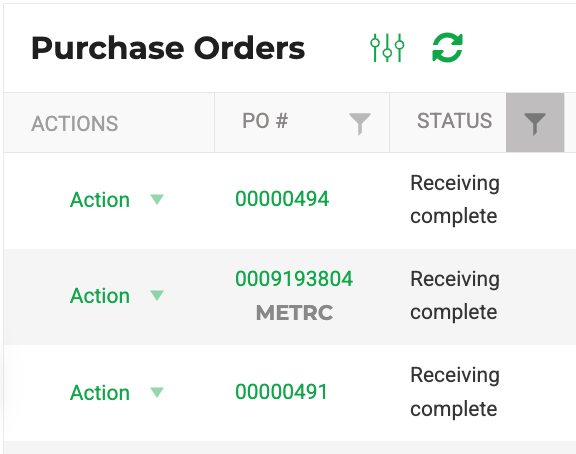
Current Transfers Screen
Go to Inbound/Transfers
You can search via package tags, manifest number, or Vendor and view the following:
- Manifest
- Shipper Name
- Shipper License
- Status
- Item Count
- Created By
- Created Date
- Modified By
- Modified Date

Sync a Transfer into Flourish
To accept and transfer a package to your license in METRC, follow the steps below:
- Go to Inbound Transfers in METRC and open the transfer manifest.
- Verify the packages and quantities on hand.
- Look at test results in METRC and make sure they match the COA received from the vendor.
- Click on ‘Receive’ to transfer packages to your license.
- In Flourish, click "Sync from METRC" to update the incoming Transfer data immediately. Otherwise, the sync will occur at night, which may cause an out-of-sync quantity.
- Go to Inventory and click Sync METRC Packages OR,
- Go to Inbound/Transfers and click Sync From METRC.
Inventory - Sync METRC Packages: |
 |
Inbound/Transfers -Sync From METRC: |
 |
Receive Inventory to PO
- Go to Inbound/Transfers
- Locate the transfer you wish to receive to a PO from.
- Check a box or more next to the transfer lines.
- Click Receive.
- Select the Purchase Order to receive.
- Select the Area.
- Select the Location.
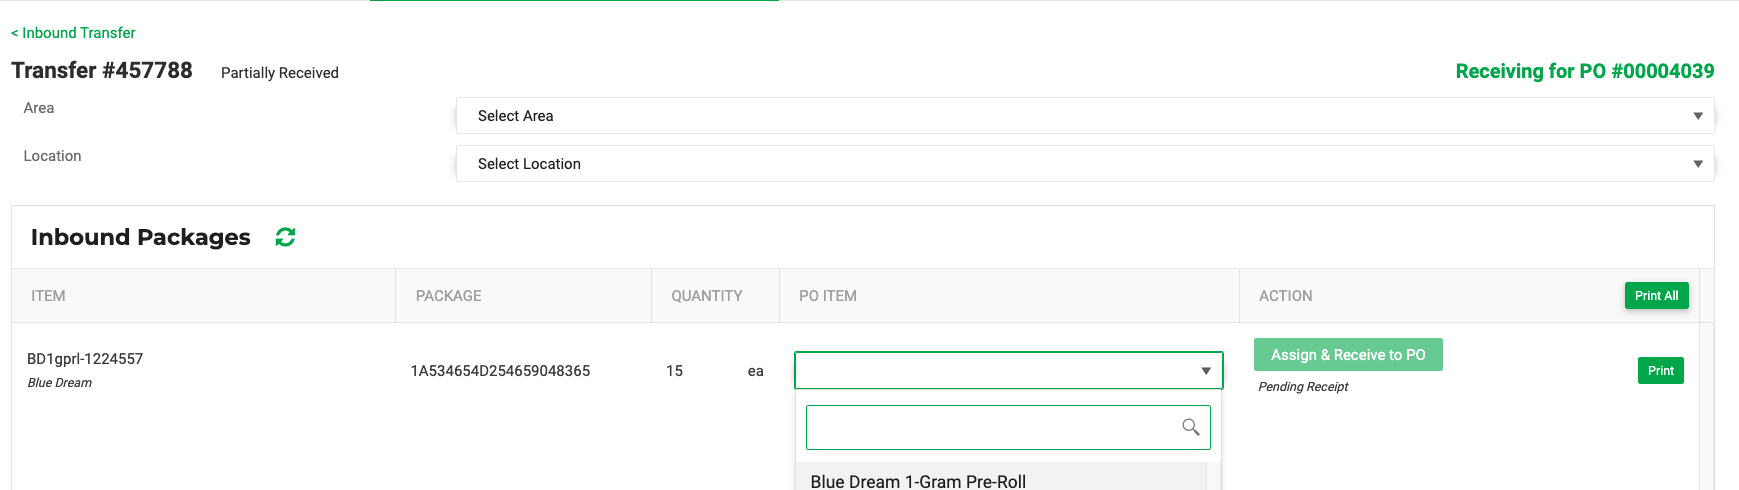
- Select the PO ITEM to receive if not already selected.
- If the PO ITEM you selected differs from the item you inbound, Flourish will prompt you to Convert the package to a new item and retag the new item.
- Click Assign & Receive.
- Click Print to print Package labels.
- YOu can click the Purchase Order ID to view and update the Purchase Order fields:
- QTY ORDERED
- UNIT LINE COST/ TOTAL LINE COST
Video: Basic functionality
Video: Multiple orders
Converting packages when you inbound
- Check the box next to the line item on the Transfer.
- Click Receiving.
- Select the Purchase Order.
- Select the corresponding order line for the PO ITEM.
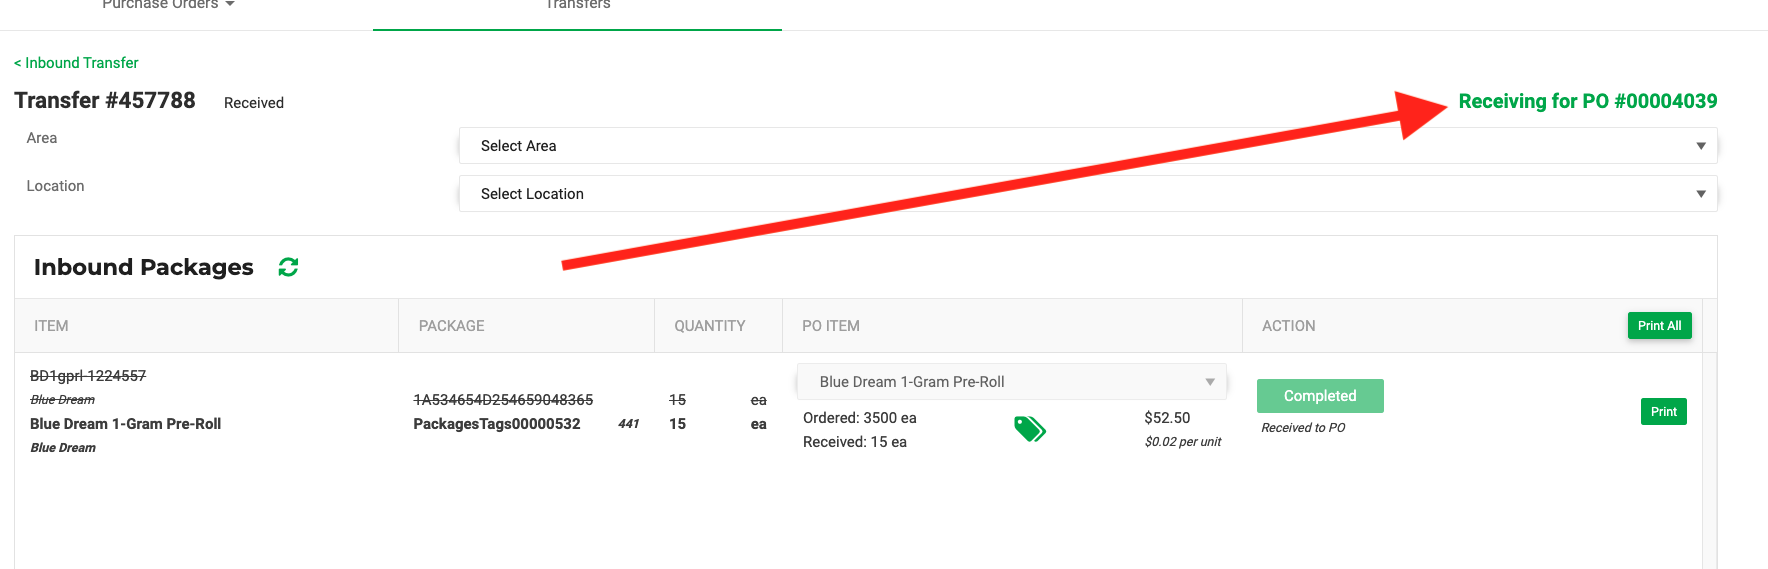
- Note the green tag icon
 - this icon displays when you select a different item than the item you inbound. It means you will convert the package from the item on the transfer to the item in your selected purchase order line.
- Click Assign & receive to PO.
- In the Convert Package screen, Select the New Tag.
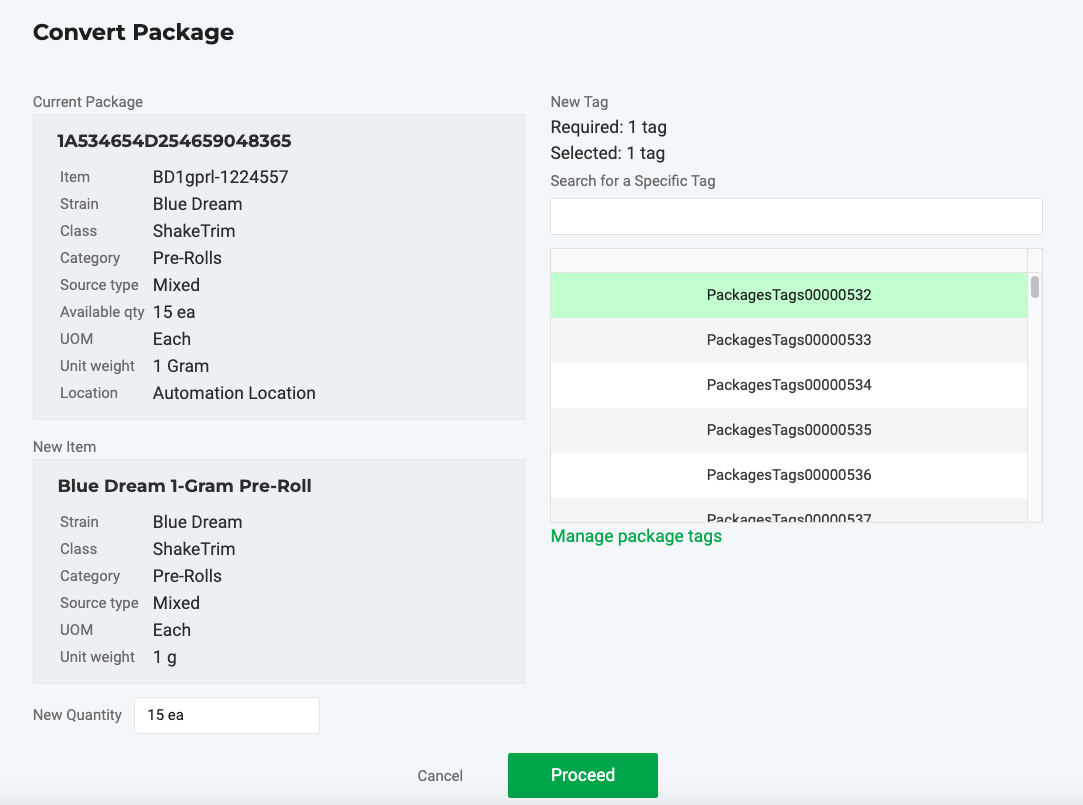
- Click Proceed.
- Type the data you need in the Confirm new package screen.
- Click Create New Package.
- Click Confirm to Confirm the Package Replacement.
- Print the label if you need to.
- Click on the PO number to go to the Purchase order, where you can edit:
- QTY ORDERED
- UNIT LINE COST or TOTAL LINE COST
Video
How did we do?
Sync Manufacturing Runs to METRC Processing Jobs