Retail
Flourish Retail is composed of two platforms that work together to help streamline your high-volume dispensary. Platforms Functions From Flourish POS, you can perform the following functions: Custome…
Flourish Retail is composed of two platforms that work together to help streamline your high-volume dispensary.
Platforms | Functions |
From Flourish POS, you can perform the following functions:
| |
 | Flourish Web allows you to perform the following functions:
|
Retail / POS Logins, Passwords, & PINs
Flourish Web and POS applications each require you to login. To login to Flourish Web, you’ll need your email and password. To login to Flourish POS, initial POS login requires your email and password. Once entered, your 6-digit PIN is required. Passwords and PINS can be changed as needed.
Login to Flourish Web
To load the Flourish Web, enter this in a Chrome browser window:
It is best to only have one active browser window or tab opened to a Flourish page at a time. It is also recommended to only keep open the most pertinent applications you need. When several instances of your browser are open, problems may occur.
Flourish recommends clearing your browser cache by pressing <CTRL+SHIFT+R> keys to refresh the application your mouse or keyboard is currently active in.
When you are not using Flourish Web, log out. Click your name in the upper right corner in Flourish Web, then click Sign Out. Then, use the X in the upper right corner to close Flourish Web.
IMPORTANT: It is important for all users to LOG OUT of Flourish Web when they have completed a task.
Resetting Your Password

You can reset your password from the Flourish Web login screen. If one of your employees has forgotten or needs to change their password, they can change it from the Login screen.
NOTE: This is the only way to reset your password. Your old password is not saved.
From a Chrome browser:
- Enter app.flourishsoftware.com.
- The Welcome back! Login screen appears.
- Enter your email address.
- Click Forgot your password?
- Enter your email when the Forgot your password? screen appears.
- Click Reset password.
- Flourish sends an email with a Key.
- Open your email for the key. You can copy and paste the key from the email to this screen. OR, you can click the link in the email.
NOTE: The Key is available to reset your password for 15 minutes. If you do not use it, Flourish DOES NOT change your password. You can use Forgot password anytime to reset your password.
- Enter the Key and click Authorize Password Reset.
- Enter your New Password. Enter it in the Confirm New Password field.
- Click Reset Password. Your password has been changed. You can log in to Flourish Web and POS with this new password.
Login to Flourish POS

Navigate to pos.flourishsoftware.com.
A Manager must login using their email and password to initially load the POS at each terminal. Once the POS is loaded, Retail Staff only need their 6-digit PIN to login. After 5 minutes of inactivity, Flourish automatically logs the current user out of the POS. This is normal. The user simply enters their PIN to log back in.
At the end of each day, you must completely log out of the POS on all devices. If a user is currently logged into the POS, click Logout in the upper right corner of the screen.
Completing Inventory Counts
Flourish allows Retail Staff to create a Blind Inventory count for review by their Manager. Once the Blind Count is started, it has a status of In Progress. The count remains in the In Progress state until completed. When the Blind Count is completed, the status must be changed to Submit for review. This lets the Manager know a count is ready for final review and approval. Once the Manager approves the count, the status must be changed to Complete. When a count has the status of Completed, Flourish Web and POS are updated with the approved inventory values. Locked, Unlocked, and Assigned (packed) inventory is included in the count. Locked items are indicated with the lock icon. Inventory Counts can be exported to PDF when they are in the following status: In Review, Completed, and Canceled.
Terms to Know
Inventory Count module uses the following terms:
Terms | Definition |
Assigned | Items that are Assigned or packed in bags for Pickup or Delivery orders. In Flourish, these items are also Unlocked. |
Available | Items that are available for sale. In Flourish they are referred to as Unlocked. The physical boxes have been opened and items are available for sale. Flourish updates the Inventory module with the Available value when the count is Completed. |
Not Available | Items that are Not Available for sale. In Flourish they are referred to as Locked. The physical boxes remain closed until items are ready for sale. |
Inventory Count Process
- Physical Count (In Progress Count) – A Retail Staff completes a physical count of all inventory: Available (Unlocked), Not Available (Locked), and Assigned (Packed). An inventory count template can be printed from Flourish to use for this physical count. Once the physical count is completed, the Retail Staff enters the values from the template into Flourish. Once entered in Flourish, the count status must be changed to In Review, indicating it is ready for a Manager review.
- Completed Count – A Manager reviews the count (that has a status of In Review). Once the Manager verifies the totals, and explains discrepancies as needed, the count status is changed to Complete. The Inventory Count is final, and Flourish updates the Inventory module.
NOTE: Once an Inventory Count is Completed, Flourish updates your Inventory with the values entered as Actual. These values are used throughout Flourish for Customer orders, reporting, Global Inventory, etc.
Understanding When Flourish Updates Inventory
Flourish tracks and automatically updates your facility’s inventory throughout the day as you perform specific functions. Specific functions Flourish uses to update your inventory are listed in the table below.
Application | Module | Function Selected | Description |
Web | Inventory/Inventory Counts | Completed | When an Inventory Count is set to Completed, Flourish updates your facility’s inventory with the numbers in the Actual fields for Available, Non-Available and Assigned. |
Web | Retail/Purchases/ Fulfillment by store | Complete Packing | When Customer Orders are set to the Status Packed, Flourish updates those Cannabis items in your inventory with the Status of Packed when the Complete Packing button is selected in Flourish Web. Flourish updates the total quantity of packed items as Assigned. |
POS | Checkout | Submit Payment | When payment is processed, Flourish updates those Cannabis items by subtracting the amount of the item paid for when Submit Payment is selected. |
Web
POS | Retail/Purchases/ Fulfillment by store Cancel order Cancel Sale (from POS) | Cancel
Cancel | When Cancel is selected from the Customer’s order, the Customer order is removed.
When Cancel is selected from the Customer’s cart or by selecting the X on the Customer’s order listed in Queue, the order is removed. |
Till Management
Terms to Know
Terms related to Till management you should know are:
Term | Definition |
Close | Function in Flourish Web that makes a Till unavailable for use. Closed Tills cannot be joined by a device. Flourish automatically updates the Vault when Tills are Closed with the Final Pay Out amount. This is the Cash Sales minus the Float. |
Expected Cash | Total cash in the drawer (including Float). |
Float | The amount in the drawer to start the day, as well as the amount in the drawer after Pay Out. |
Join | Assigning a Till to a device (workstation, tablet, etc.). Tills are “joined” by devices when the Manager logs into the POS at the device using their email and password. After login, Flourish POS requires you to select a Till. This joins the Till and device. |
Open | Function in Flourish Web that makes a Till available for use. Tills must be Open to be used. |
Pay In | Function in Flourish Web that records cash transfers (drops) into a Till. |
Pay Out | Function in Flourish Web that records cash transfers out of a Till. Pay Outs typically occur from check out Tills and the Vault. |
Vault | Virtual representation of your Safe. A Vault is a Till; however, the Vault remains Open at all times. Armor Car cash pickups are Pay Outs of the Vault. Pay Outs of a Till using the Close function are automatically paid into the Vault. |
Before You Begin
Recommended processes for Opening Tills include the following:
- Manager opens all Tills in Flourish Web on back-of-house workstation or device.
- Manager enters Beginning Float of a company-determined amount at Tills where check out and payment is processed.
- Manager leaves Intake Tills open, Beginning Float is not needed.
- Manager leaves the Vault open; the Vault is NEVER closed.
- Manager logs into the POS at each device and joins all checkout Tills to devices.
- Manager inserts the physical drawers into devices.
Opening Tills
Step by Step Instructions:
- Open Flourish Software and navigate to Retail from the left side menu
- Click Tills
- Click Manage tills
- Select the till you wish to open. Click the drop-down action menu by Closed.
- Click Open Till
- Type in your Beginning Float and click Open Till
- Congratulations! You have successfully Opened a Till. Click Dismiss to close this window.
See this video walkthrough for detailed steps.
Close Tills
Tills are managed in Flourish Web. Managers close Tills and pay into the Vault during closing procedures. All Check Out Tills should be closed at the end of the day. The Vault is the only Till that is never closed. Intake Tills may also remain open if Check Out is not performed on them.
Terms to Know
Terms related to closing Tills you should know are:
Term | Definition |
Close | Function in Flourish that makes a Till unavailable for use and automatically updates Vault once Ending Cash information is entered. |
Ending Cash | Total amount of cash in a Till drawer. This is ALL the cash in the drawer. |
Ending Float | Same amount as the Beginning Float. Typically this is $200.00 for check out Tills. |
Before You Begin
Recommended processes to close tills include:
- Manager closes Tills, one by one, in Flourish Web on back-of-house workstation or device, verifying the name on the Till matches the name in Flourish.
- Manager enters the Ending Cash (total amount in the drawer) and the Ending Float.
- Manager keeps the End of Day receipt for each Till.
Closing Tills
From a check out Till device
- PIN into Flourish POS.
- Click Shop. Click Open Drawer.
- Remove the drawer and make note of the device name. Bring the drawer to the back-of-house area.
- Count all cash in the drawer.
- Login to Flourish Web from a back-of-house workstation or device.
- Click the Retail module. Click the Tills submodule, then click Manage tills.
- Verify the name on the Till matches the name in Flourish. Click next to Opened. Click Close Till.
- Enter the amount counted in Ending Cash. If there are discrepancies, add a comment in the Note box.
- Enter the Ending Float amount. This should be the same as the Beginning Float (typically $200.00 for check out Tills).
- IMPORTANT: If there is a difference between the Ending Cash and Expected Cash that you cannot resolve, enter a note to explain the discrepancies.
- Click Close Till. Final Payout is automatic. An End of Day receipt prints automatically. Flourish automatically completes a Pay In to the Vault with Ending Cash minus the Float.
End of Day Till Report
The Till Report is a useful report for troubleshooting discrepancies and determining total sales for each Till. From the report screen, you can click on a Till to see specific sales for the Till as well as the user who completed the transaction. The report can be exported to MS Excel for use with compliance reports as needed.
From Flourish Web:
- Click the Reports module. The Inventory Reports opens by default.
- Click Point of Sale Submodule. The POS reports are listed.
- On Till Report, click View Report.
- Use Calendar icons to set a Beginning and Ending date for the report or choose your own date range.
- The Today, Past 7 Days, Past 30 Days buttons can be used to filter the report.
- The Export to Excel button can be used to download a .CSV file.
Pay Out of Vault
When cash for deposit is ready, it must be recorded in the Vault. A Pay Out of the Vault is required specifying the total amount of cash being picked up. This is done from Flourish Web on a back-of-house workstation or device.
From Flourish Web:
- Click the Retail module. Click the Tills Submodule, then click Manage tills.
- Locate the Vault.
- Click Add Pay Out as shown above.
- In Amount of Cash, enter the amount of the pay out (i.e. - picked up by an armored car service).
- Use Notes to store comments regarding the Pay Out as needed.
NOTE: When entering Notes use initial of first name with last name and a brief description. Select the printer for the receipt. - Click Add Pay-Out.
Pay Out of a Till
When a check out Till has accumulated excess cash, a Pay Out of the Till is used to record the amount of cash being removed from the Till (Cash Out) and placed in the Vault. Flourish automatically updates the Vault with the Pay In amount.
To pay out of a Till:
- Go to the Till device. PIN into the POS.
- Click Shop. Click Open Drawer. Remove excess cash and bring to the back-of-house workstation or device. Count it.
- Go to the back-of-house workstation or device and log into Flourish Web.
- Click the Retail module. Click the Tills submodule. Click Manage tills.
- Locate the Till from which the cash was removed.
- Click Add Pay Out.
- In Amount of Cash enter the amount of cash you removed from the Till.
- Use Notes to store comments regarding the Pay Out as needed.
NOTE: Your Vault is selected by default and cannot be changed. - Select the printer to print a receipt for the Pay Out.
- Click Add Pay-Out.
Discounts v1
Discounts have been set up in Flourish to be automatically applied or to be manually applied to an item or an order. Line Item and Order discounts appear in the Customer’s cart in Flourish POS. There are two discounts engines in Flourish.
Discounts
- Be enabled or disabled.
- Have a start and end date (effective during a specific time frame).
- Be applied to a specific item.
- Be applied to specific locations.
- Can be a dollar or percentage.
Types of Discounts
There are several types of discounts available in Flourish. All discounts have been set up to either automatically appear in the Customer’s cart, or can manually be applied to the Customer’s cart at Checkout. Discounts can be applied as:
- Line Item – Discount that is applied to a specific item in the Customer’s cart. When a Line Item discount is applied, Flourish deducts the amount from that specific item.
- Order – Discount that is applied to the whole cart. When an Order discount is applied, Flourish deducts an amount from each item in the cart to get the total “order” discount. A Discount can be applied as a Percentage or a Dollar amount.
Automatic Discounts
Automatic discounts are Discounts that Flourish automatically applies when the Customer or item the Customer is purchasing meets an eligible Discount requirement. These are:
- Customer Group Discount – This Discount is set up in Flourish and is applied when a Customer Group is selected on the Customer’s profile. Sample groups might be Employee, First Responder, Provider, Student, or Veteran. When a Customer belongs to one of these groups, Flourish automatically applies the Discount.
- Promo Code – This Discount is set up in Flourish and can be used a single time or multiple times.
- SKU (Item) Discount – This Discount is set up in Flourish and is applied to a specific item (SKU).
- Patient Attribute – This Discount is based on a specific Customer attribute, such as birthday or birthday month.
Manually Applied Discounts
Manually applied discounts are Discounts which require the Retail Staff to enable them during Checkout. These Discounts can:
- Be a dollar or percentage.
- Be applied to a specific Line Item or the entire Customer order.
- Require a Manager PIN for approval.
- Be applied to specific item or facility.
- Require a minimum purchase amount.
- Be enabled or disabled from Flourish POS during Check Out.
Discounts v2
The new, more robust discount engine is out. Learn more here.
Call Center Module
The Call Center module allows you to initiate pick-up and home delivery orders. For busy dispensary operations, a dedicated call center module allows your back-of-the-house team members to create, allocate, and schedule orders placed over the phone - freeing up your busy front-of-house team.

# | Description |
1 | Submodules |
2 | Search By Customer |
3 | Action Items
|
Point of Sale Reports
There are three places to run retail reports.
- Reports > Point of Sale

Name of Report | Description |
Till Report | Summary of transactions for all tills Users can select their date range and have the following pre-selected options for viewing Inventory Changes:
Users can also filter by events such as:
|
Summary of Sales | Summary of completed sales by item across a date range Users can select their date range and have the following pre-selected options for viewing Inventory Changes:
Users can also filter by events such as:
|
Purchase by Item | Summary of purchases by item across a date range Users can select their date range and have the following pre-selected options for viewing Inventory Changes:
Users can also filter by events such as:
|
Purchase by Facility | Summary of purchases by facility across a date range Users can select their date range and have the following pre-selected options for viewing Inventory Changes:
Users can also filter by events such as:
|
Transaction by Facility | Summary of transactions by facility across a date range Users can select their date range and have the following pre-selected options for viewing Inventory Changes:
Users can also filter by events such as:
|
Discount Summary | Summary of discounts applied to sales over a date range Users can select their date range and have the following pre-selected options for viewing Inventory Changes:
Users can also filter by events such as:
|
Returns Summary | Summary of returns applied to sales over a date range Users can select their date range and have the following pre-selected options for viewing Inventory Changes:
Users can also filter by events such as:
|
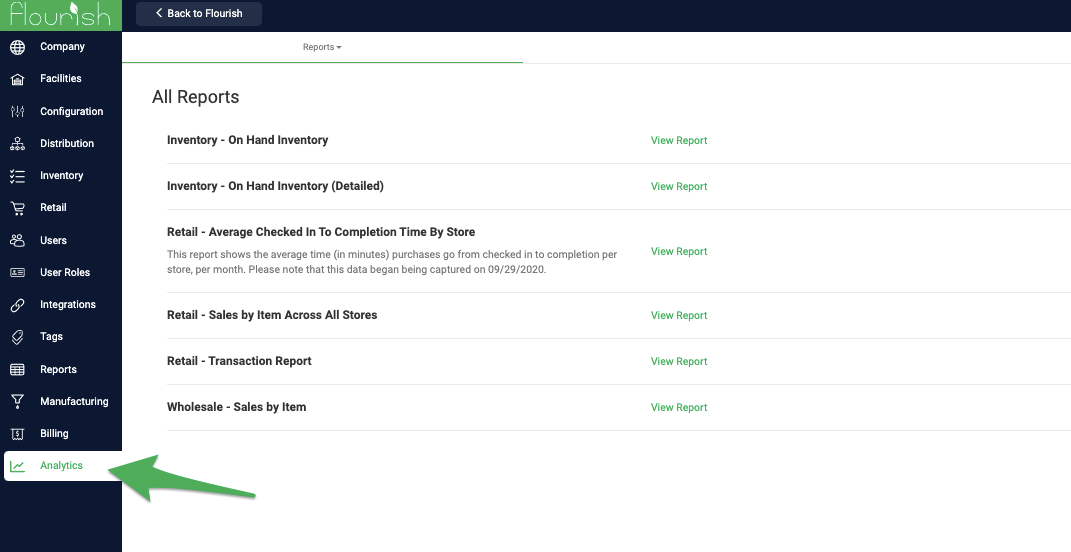
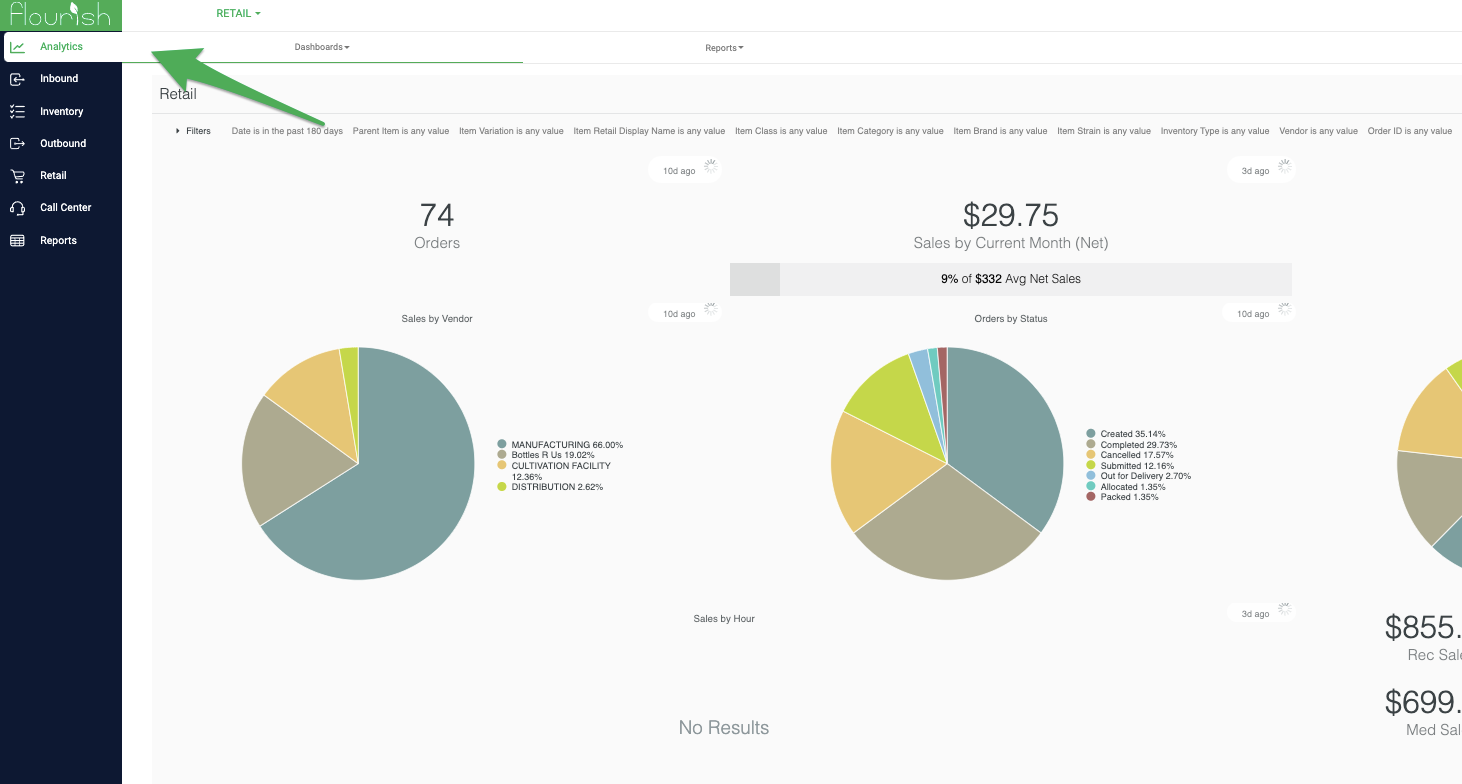
- Analytics > Retail (both dashboards and reports)
- Company wide reports in Settings > Analytics

How did we do?
Till Report