Table of Contents
Start a New Manufacturing Run
Use Manufacturing Runs to create products using cannabis and non-cannabis consumable inventory simultaneously. Adding non-cannabis consumables in a manufacturing run is optional but recommended. The…
Use Manufacturing Runs to create products using cannabis and non-cannabis consumable inventory simultaneously. Adding non-cannabis consumables in a manufacturing run is optional but recommended. The resulting outputs will carry the accumulated cost, appropriately decreasing the non-cannabis inventory levels to maintain precise quantities.
Use a Work Order to streamline the process using a Bill Of Materials. Select the Item to create and load the corresponding BOM to get the list of the input ingredients.
Manufacturing Screen
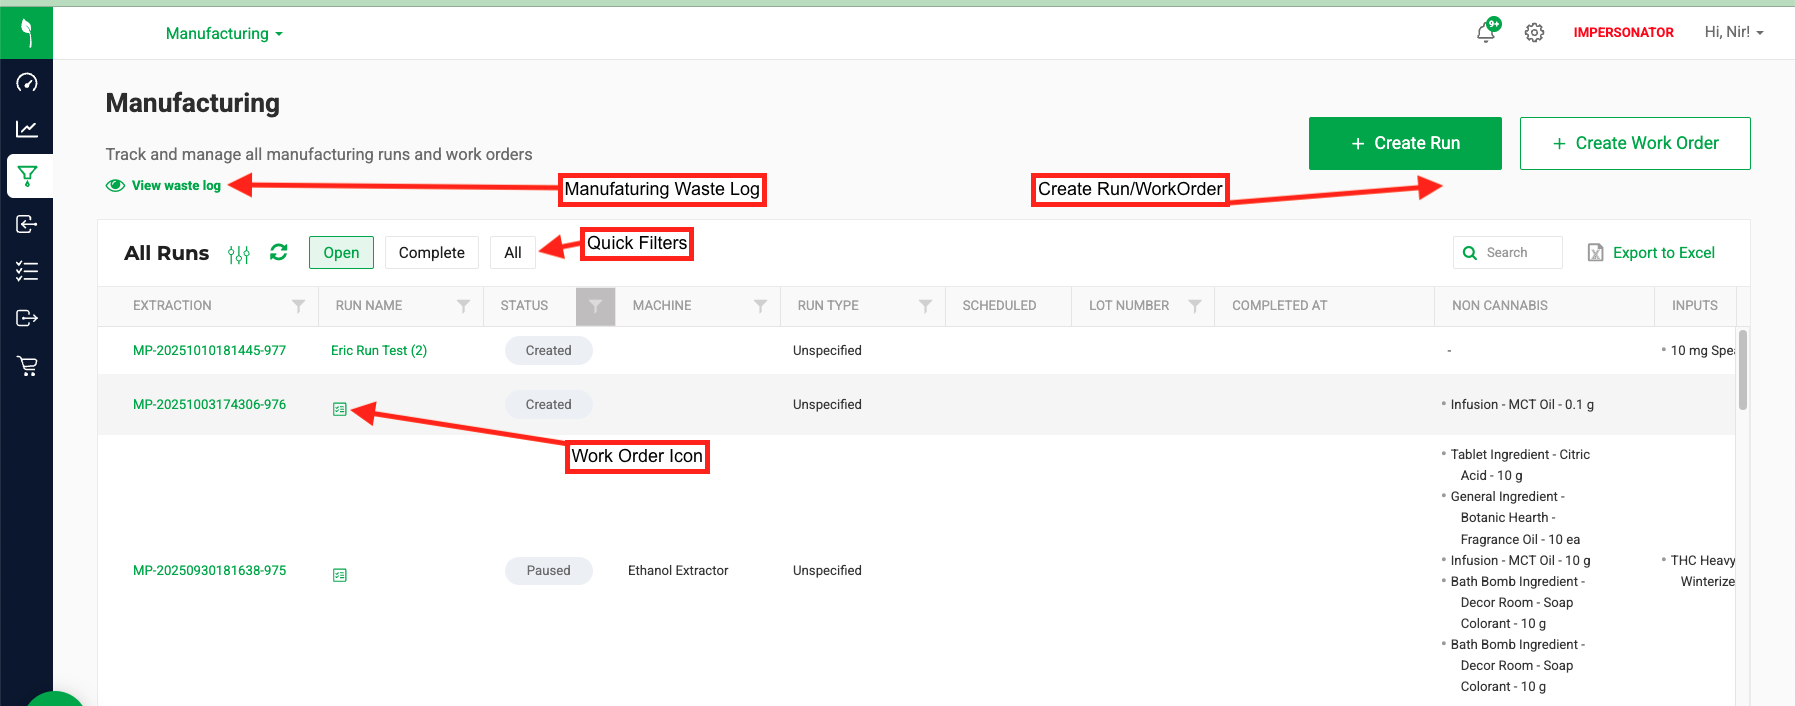
Click the SCHEDULED column header to sort the dates in this column.

Create a New Run
- Click the "Create Run" button.
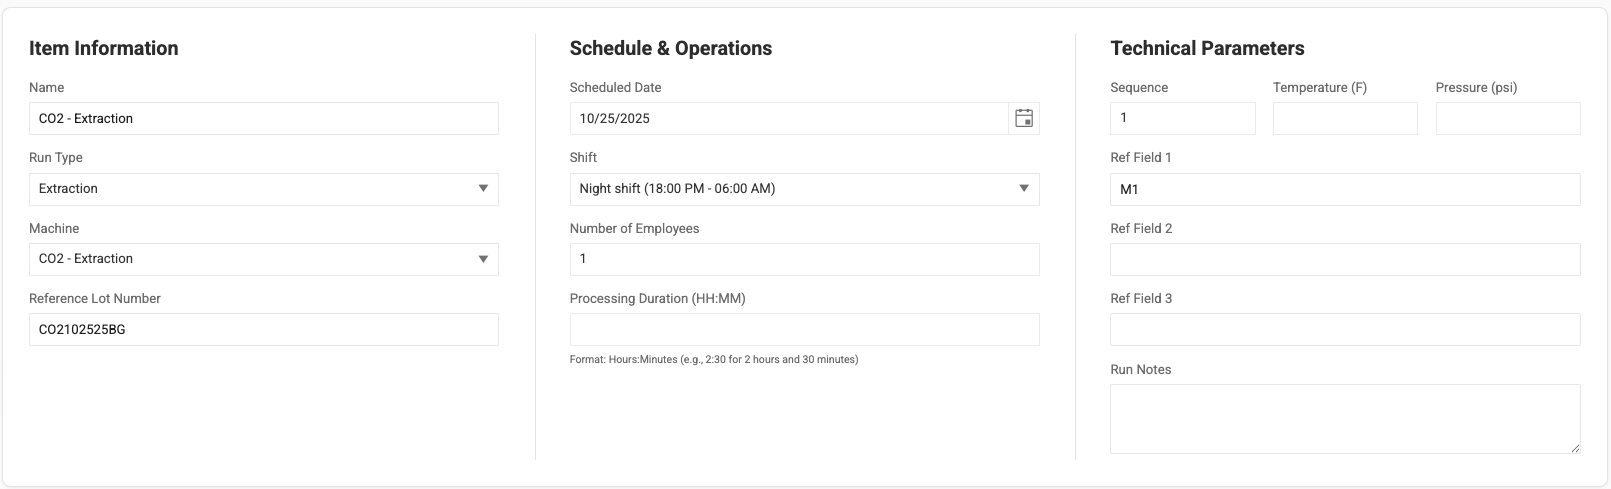
- Select or type the date the different sections:
- Item Information.
- Schedule & Operations.
Select a Shift if you use this feature. - Technical Parameters.
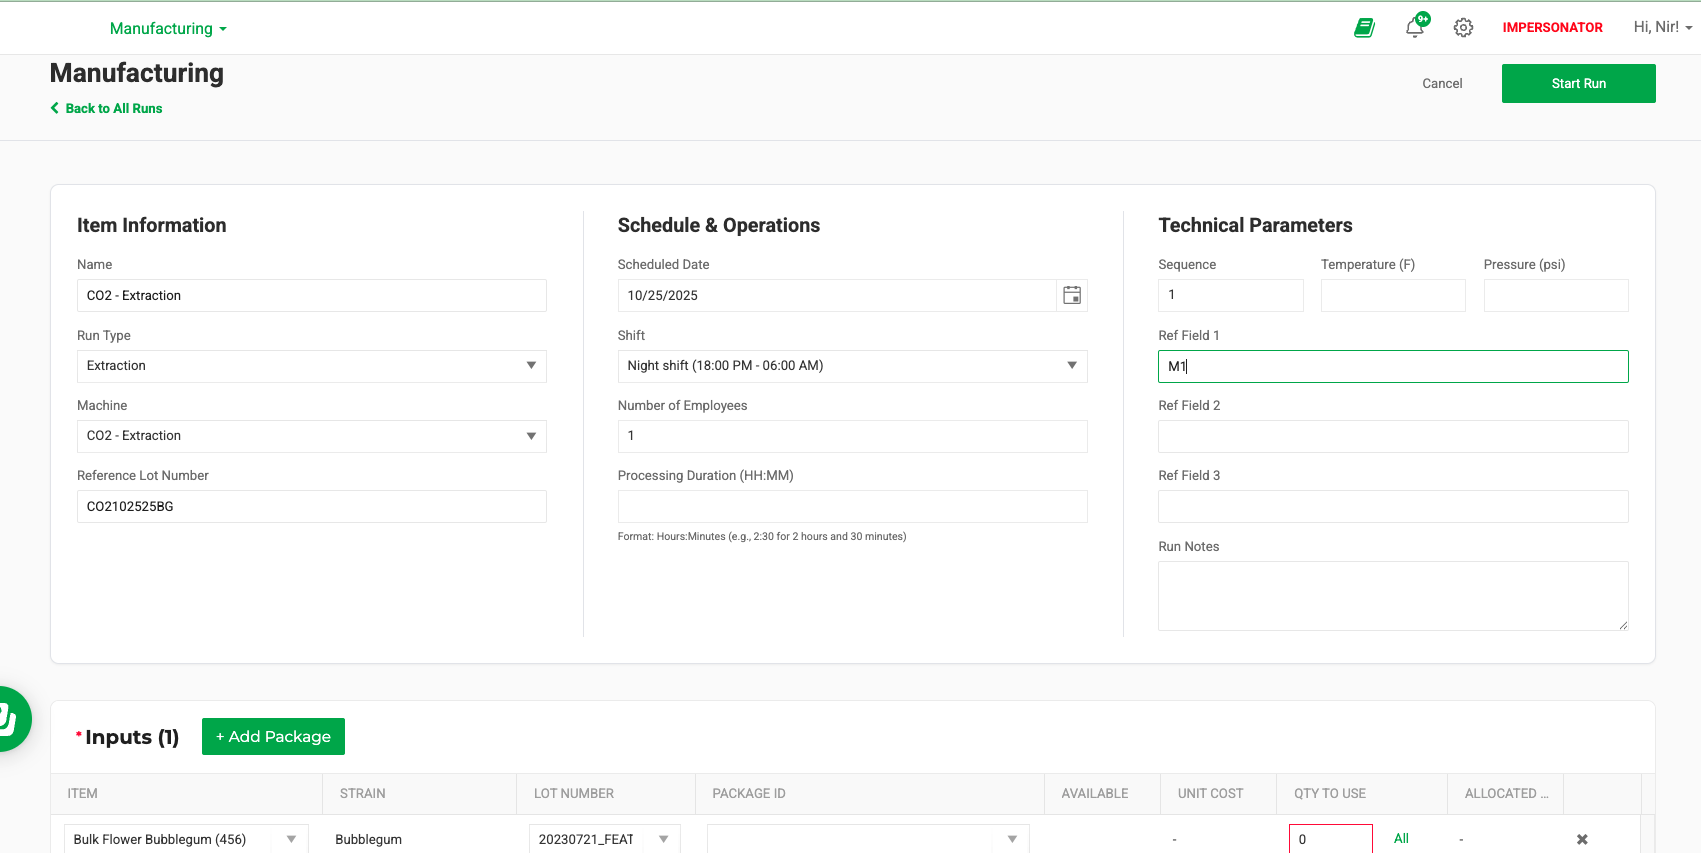
- Click "+ Add Package" next to Inputs and choose an available item from your Flourish inventory. You type in the item name or select it from the dropdown menu.Inputs will be items like "Bulk Flower", "Crude Oil", or any other raw materials you wish to manufacture into a new item in this process.
- You do NOT need to select a package during this step. The input package may be selected after the Run has started.
- You must define the "QTY TO USE" for your Inputs.
- Click "+ Add Item" next to "Non-Cannabis Consumables" to add any non-cannabis inputs used on the Run. These items will be reduced from your inventory when you complete the Run.
- You can quickly inbound non-cannabis inventory directly on the Run by clicking "Receive Non-Cannabis." Learn more here.
- Repeat steps 3 and 4 until all your known inputs are entered. You may continue adding or editing existing inputs until the Run is Completed.
- Click "Start Run." The run goes to 'Created' Status.
Transitions on a 'Created' Run
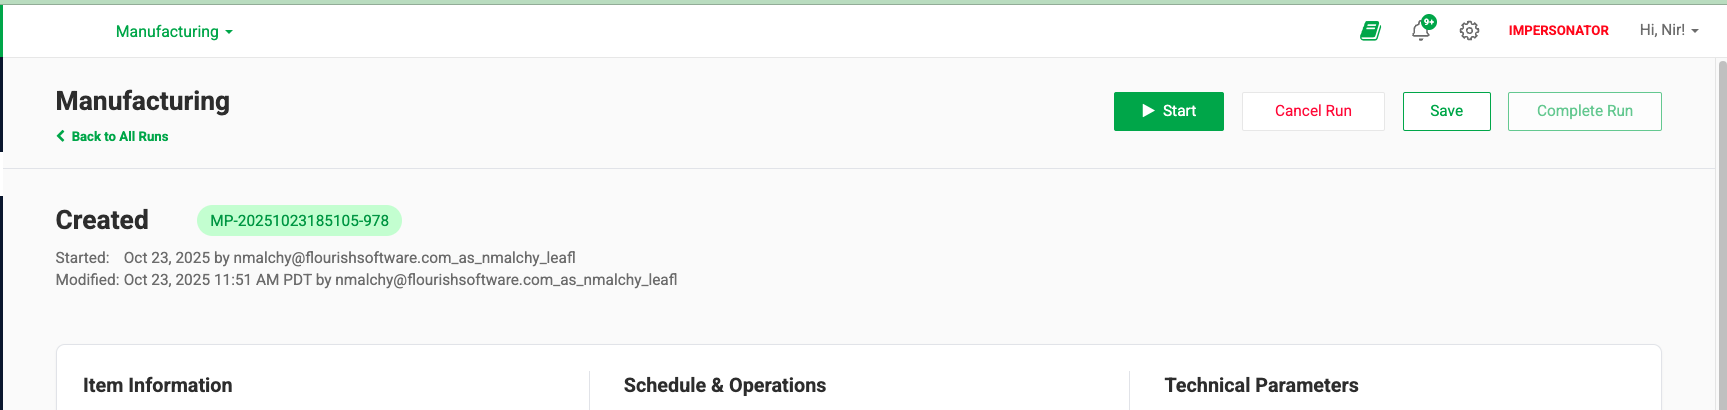
The run is now in 'Created' Status. From here, you can do the following:
- Click 'Cancel Run' and Confirm - The action will cancel the run and remove the allocation. will
- Click 'Save' - The run remains in 'Created' Status.
- Click 'Start' to initiate the run - this action starts the run, and sets the status to "In Progress".
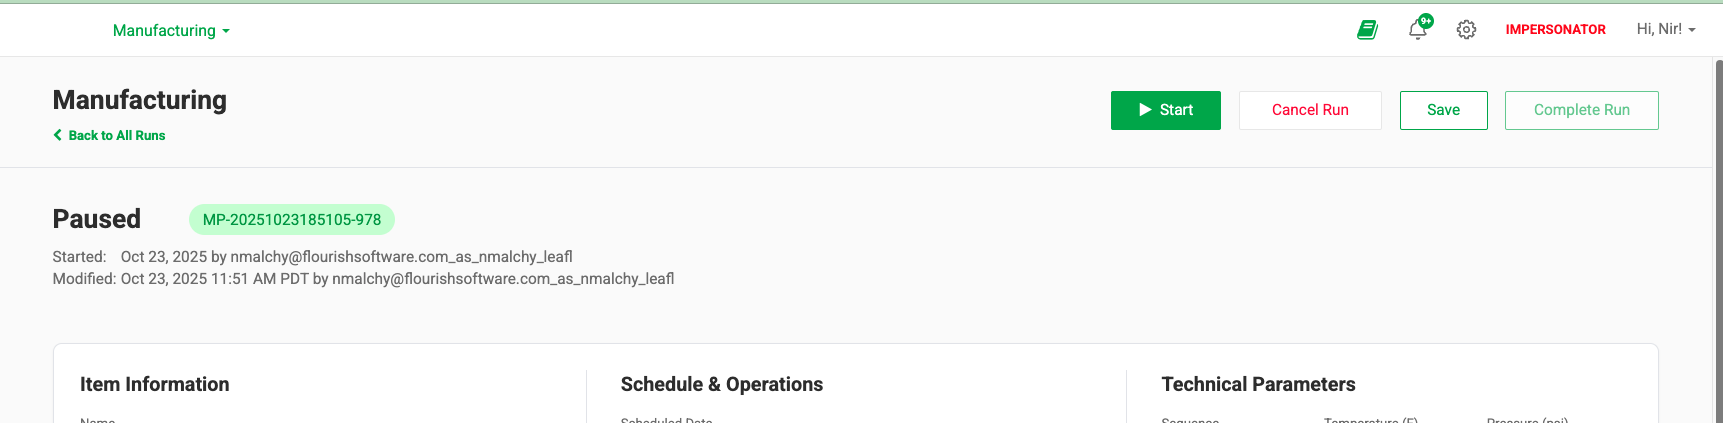
Transitions on a 'Paused' Run
- Click 'Cancel Run' and Confirm - The action will cancel the run and remove the allocation. will
- Click 'Save' - The run remains in 'Paused' Status.
- Click 'Start' to initiate the run - this action starts the run, and sets the status to "In Progress".
Edit an "In Progress" Run
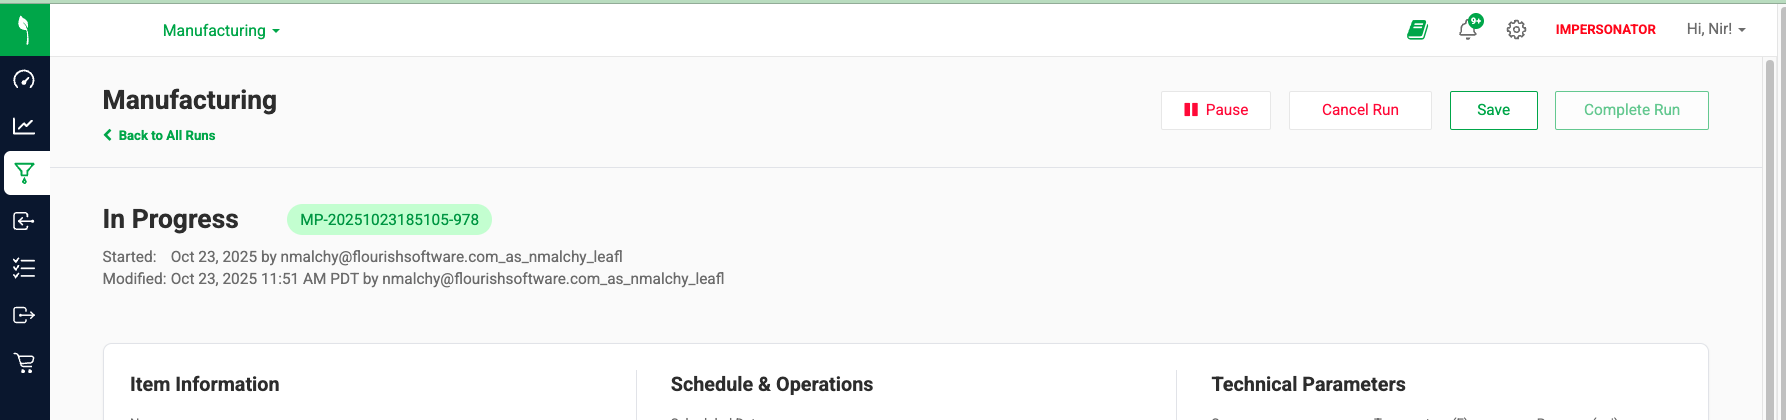
"In Progress" Run Essentials
Important things to keep in mind while editing your "In Progress" Run:
- Runs can be saved, paused or canceled at any point throughout the process. Runs can only be completed after all the required information has been entered.
- Click "Save" to save your work at any point while the current Run is in progress. Then, you may safely leave the page to return to data entry later. You will lose your work if you do not click "Save" before leaving the page.
- You can adjust your input or output information at any point before clicking "Complete Run."
Follow these steps to add Outputs to your "In Progress" Run:
- Click the "+ Add Output" button next to Outputs to record the new material created from this Run. This action will bring up this window:
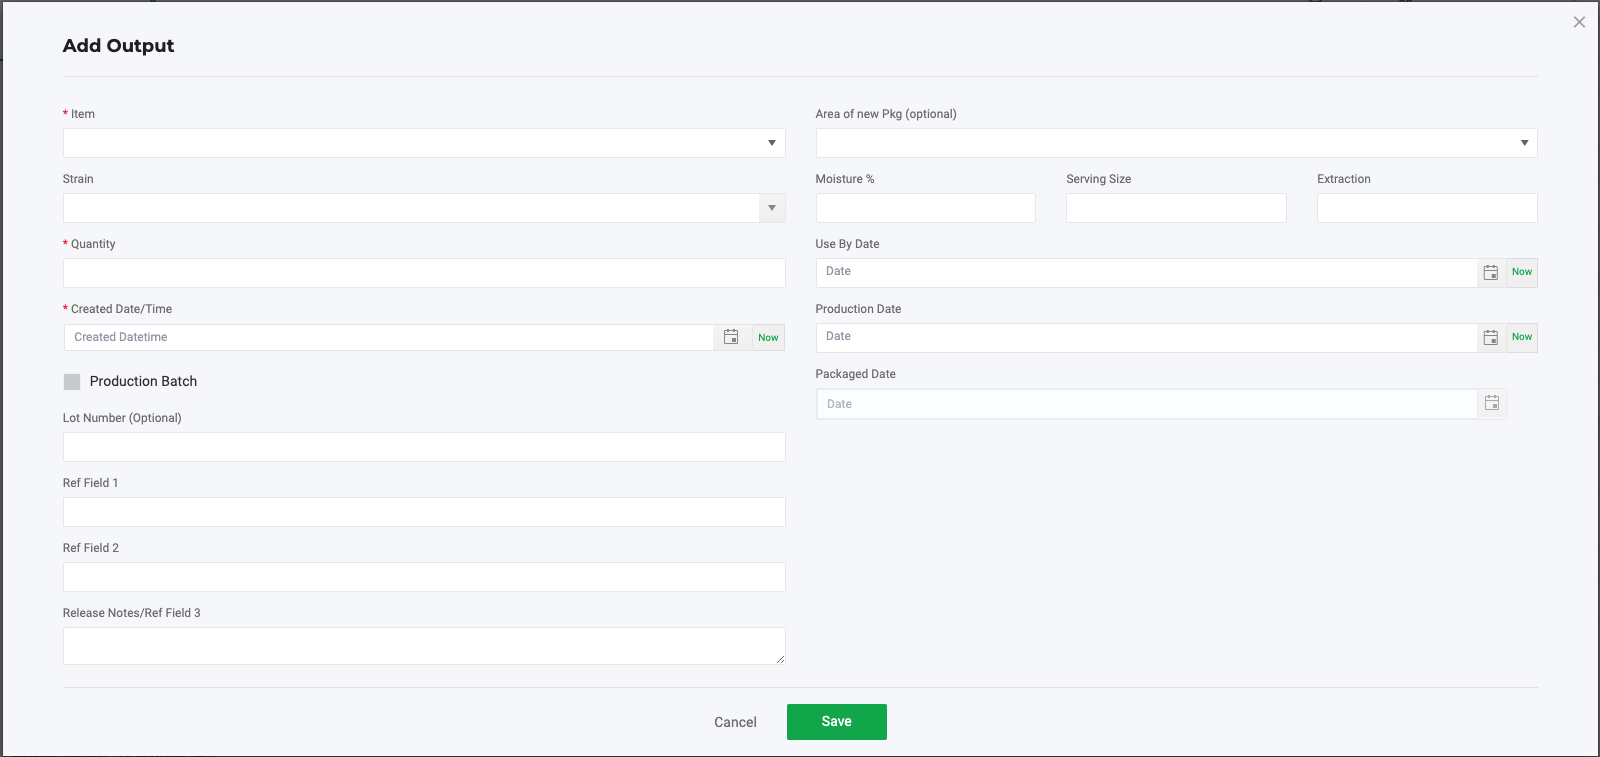
- Enter the required fields for the new output package:
- Choose the new Item that has been created from this Run.
- Enter the Quantity of new material that will be created by this Run.
- Confirm the Created Date/Time.
- Enter any other optional attributes for the new output package.
- Depending on the Rules defined in your Item Master for the Output's item, the "Lot," "Strain," or "Use By Date" may be required. Learn more about Item Rules here.
- Confirm the details of the new output package and click "Save."For METRC users ONLY:
Your list of available tags will show on the right side of this screen. Choose the new package tag ID from the list before clicking Save. This package ID will not be consumed from your list of available tags in METRC until the Run has been fully completed. - Repeat steps 1 - 5 until all your known Outputs have been entered.
- Click "Save" to save your work. You can return to this Run later to adjust quantities, approve others' work, etc.
Record Waste
- Under "Total Run Waste" at the bottom of the Run, toggle ON "Log Waste?"
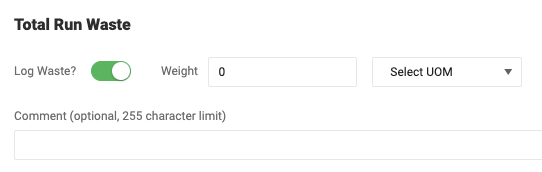
- Select your UOM (e.g., kilograms) and enter the total Weight of the waste produced by the Run.
- Include an optional comment regarding the waste created from the Run.
- Click "Save" at the top of the page.
Completing the Run
- When all the data on the Run has been confirmed and is accurate, then you can click Complete Run.
- If you click Complete Run, then the data entered becomes final and is logged accordingly into your inventory. Once done, you can no longer modify the Run.Note for METRC users: Input packages and Output packages are not decremented or created in METRC until you click Complete Run. Once clicked, this action cannot be undone.
- If you click Complete Run, then the data entered becomes final and is logged accordingly into your inventory. Once done, you can no longer modify the Run.
- The allocated input material has now been decremented from your inventory, and the new output package(s) should now be visible on your All Packages inventory grid.
To see how to Adjust Quantity for your Inventory, see: Inventory Adjustments
Input Quantities
- Flourish distributes the input packages' quantity In a manufacturing run according to the output packages' quantity.
- Since the inputs have a fixed unit cost, by distributing the input quantities proportionally, we are also proportionally distributing costs according to the size of the outputs.
Example
We use a manufacturing run to sort flower.
On the manufacturing run, we record one input package, "Unsorted Flower," which has 1000 grams.
After sorting, upon completing the manufacturing run, we record three output packages:
- "Bulk Grade A Flower" - 120 grams.
- "Bulk Popcorn" - 263 grams.
- "Bulk Trim" - 617 grams.
Instead of showing that 333.3 grams of "Unsorted Flower" were used to create each output package, the history and ancestry will show the following:
- 120 grams of "Unsorted Flower" used to make 120 grams of "Bulk Grade A Flower".
- 263 grams of "Unsorted Flower" used to make 263 grams of "Bulk Popcorn".
- 617 grams of "Unsorted Flower" used to make 617 grams of "Bulk Trim".
Example 2
We use a manufacturing run to sort flower.
On the manufacturing run, we record one input package, "Unsorted Flower," which has 100 grams.
After sorting, upon completing the manufacturing run, we record two output packages:
- 10 gram "Bulk Grade A Flower".
- 40 grams "Bulk Popcorn".
With output values like that, it would not be reasonable to say we used 50 grams to create each output package. Instead, if we used the math like above, 100 input quantity / 50 output quantity, the system would say that each output consumed 2 input gram for every one output gram.
- 20 grams "Unsorted Flower" used to make 10 gram "Bulk Grade A Flower".
- 80 grams "Unsorted Flower" used to make 40 grams "Bulk Popcorn".
Example 3
For example, there was a run with one input of 100 grams.
This manufacturing run creates two packages for a total of 90 grams:
- Output A with 80 grams
- Output B with 10 grams,
With output values like that, it would not be reasonable to say we used 50 grams to create each output package.
Instead, if we used the math like above, 100 input qty / 90 output qty, the system would say that each output consumed ~1.111111 input gram for every one output gram.
- Output A would have consumed ~88.888888 grams to create its 80 grams.
- Output B would have consumed ~11.111111 grams to create its 10 grams.
How did we do?
Manufacturing Machine & Run Configuration
Manufacturing Waste Log