Outbound Module Navigation: Orders, Shipments & Transfers
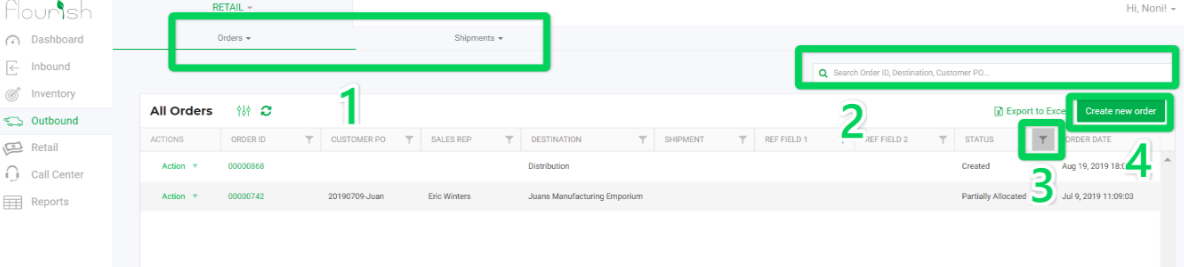
The Outbound module helps your business organize its wholesale orders, bundles shipments, and tracks sales overall. Outbound Module Navigation. # Description 1 Submodules 2 Quick Search 3 Filter view…
The Outbound module helps your business organize its wholesale orders, bundles shipments, and tracks sales overall.
Outbound Module Navigation
|  |
Users need to create and complete Sales Orders and Shipments in order to properly finalize transactions that are core to Flourish Software.
Completing the Outbound process will properly record transactions for Customers and Sales Reps and decrementing the proper packages and their quantities from inventory.
The outbound section consists of three main areas: Sales Orders, Shipments and Transfers.
Sales Order
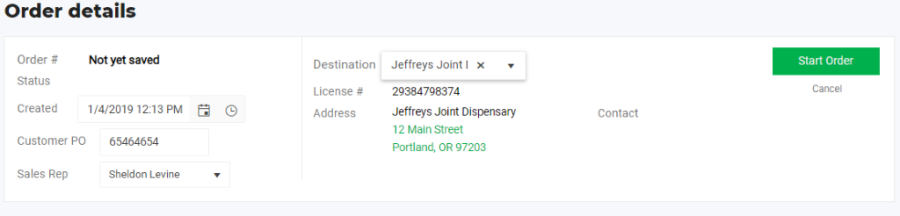
To create a new Sales Order, click on "Create New Order" in the upper right-hand corner. This will open a new screen where you will input the following:
- Customer PO (for reference – optional)
- Created Time/Date Stamp
- Sales Rep (select from drop down)
- Destination – Customer who is receiving the order
Click Start Order
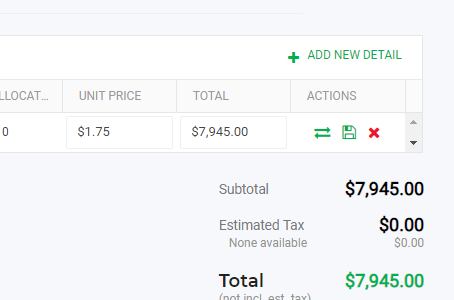
Once you have selected the Start Order button, you will now have a screen where you will enter all of the Items and/or products and their quantities that are included in this order. Click on Add New Detail to insert an Item.
- Select an item from the drop down (Only items marked as "Sellable" on the Item Master will appear here)
- Select the Strain (if required)
- Quantity Ordered – Input the amount for this order
- Quantity Allocated – After you complete and save the sales order, you'll need to allocate specific packages in inventory for this item
- Price – Price showing is the amount entered in the Item Master – Open pricing allows users to update or override the default price
- Total – this totals up the entire plus any taxes and minus any discounts

After you have completed all the details for the order you can click on the save icon in each line item, this will show a check mark after you have saved.
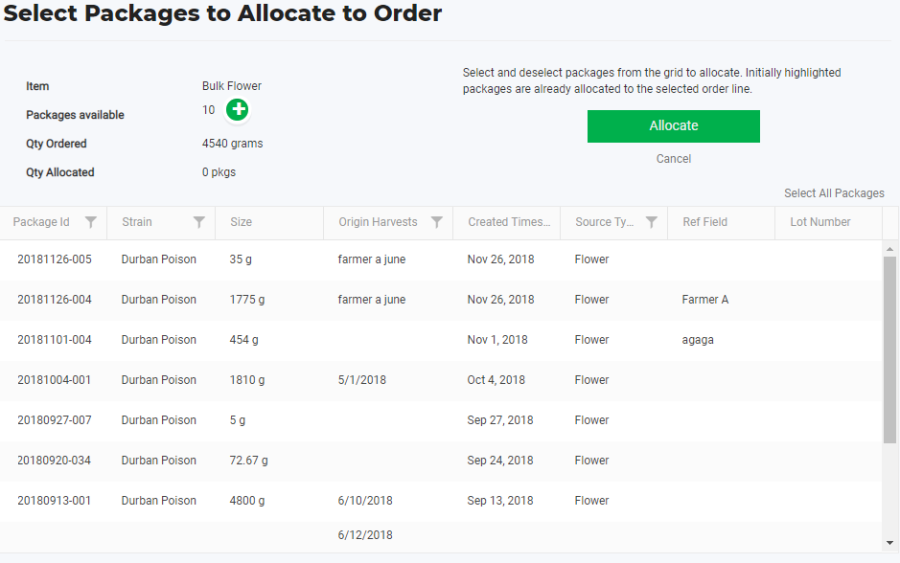
When you are ready to pick, pack and ship, the user will click on the reverse double arrows to open the Select Packages window. This will display all of the eligible packages based on the Item and Strain. Ideally, you will have packages that total up to entire quantity needed to fill the order. If there are larger packages that are too big for the order, you can click on the green plus sign ![]() next to Packages Available. This process will run the user through the From Packages process and will create the necessary packages and quantities need to fill the order.
next to Packages Available. This process will run the user through the From Packages process and will create the necessary packages and quantities need to fill the order.
After you have allocated the exact packages to be included with this sales order the Quantity Allocated field should now match the Quantity Ordered field.When you are done and ready to include this order in a shipment, click on Done in the upper right corner.When you return to the All Orders screen, the Action button allows you to view, edit clone and cancel an order. You will also notice on this screen that you can see the status of the order under the Status column.
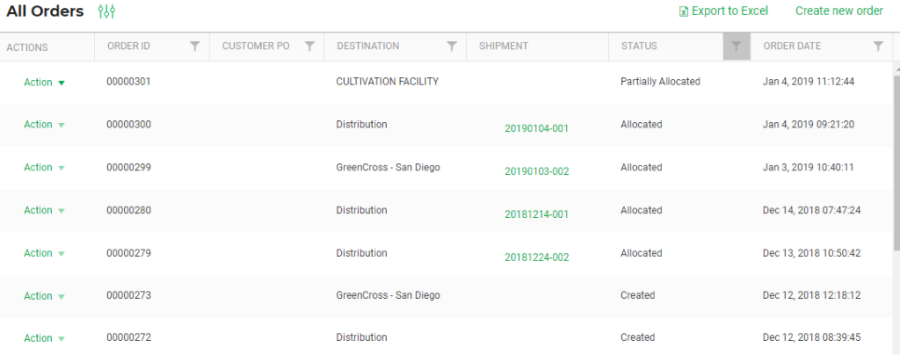
These are the orders that match the sales in METRC from the Order process to Shipment.
Creating a Shipment
This functionality can be found within the shipment dropdown in the outbound module within the web application. In order to create a shipment, you will need to select a driver and a vehicle. Users can then add/delete the Order # and an estimated arrival time. Once you have verified the correct order information, and select the save shipment button, you will see your new shipment on the all shipments grid.
Outbound Transfers (METRC Only)
For METRC clients, Transfers are enabled, and shipments will be disabled. The synced transfers from METRC will be visible for customer on the grid view. If you are a NON-METRC client, transfer will be disabled, and you will have access to your shipments through the shipments Submodule. The grid view can be found through the Outbound module and Transfers Submodule. A user can search via package tag number and view the following:
- Manifest Transfer number
- Destination
- Status
- Date created
- Date modified
- Other packages included in the Manifest
Returning a Product
Often product is rejected by the receiver and needs to be returned to inventory.
Pre-Requisite: Navigate to Settings > User Roles > Choose a User Role > Outbound > Orders > Actions > Toggle on "Return Package" permission > Save

Steps to Return:
- Navigate to the Shipped Order
- Find the Order Line with the package to return to inventory
- Click on the icon in the actions section of the order line. The tool tip says "Return Inventory"
- Select the following:
- Check the package(s) to return to inventory
- Enter the quantity to return
- Select a Return Reason
- Enter a comment (optional)
- Observe the returned package is now in inventory available to use
Icon:

How did we do?
Flourish Outbound Overview
Filter and View Outbound Orders by Status