Table of Contents
Update Items in bulk
Create or edit item attributes using a spreadsheet to export the data and import updates.
Use "Bulk Update Items" to update existing Items.
Prerequisite
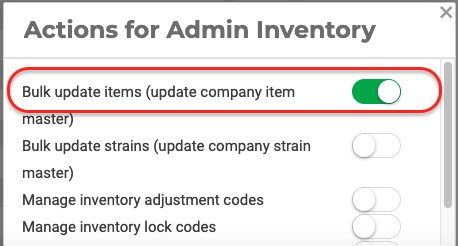
Your User Role must have the "Bulk update items (update company item master)".
" toggled 'On.'
To do that:
- Click
 Settings.
 - Select User Roles.
- Make sure to select the facility you need.
- Click the
 icon to CONFIGURE.
 - Locate the Admin Card.
- Next to the Inventory line on the Admin Card, click
 to configure the Actions for the Admin Inventory modal.
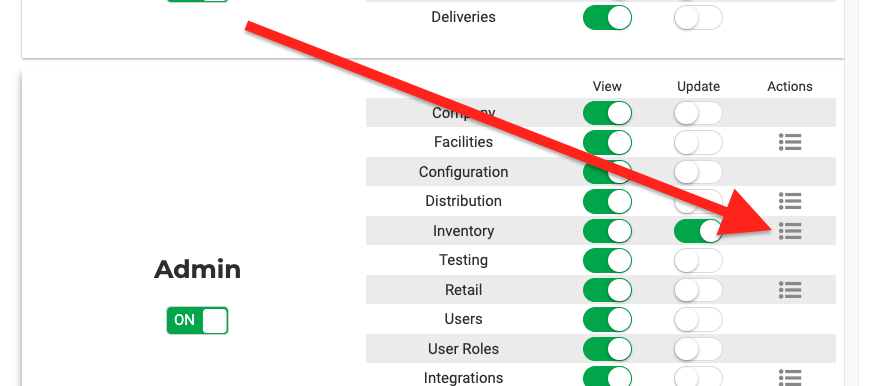
- Toggle 'On' ’ Bulk update items (update company item master).”
- Close the modal.
- Click Save.
Log in and log out to see the setting updates take effect.
Bulk update Items
- Click
 Settings.
 - Select Inventory.
- Select Items / All Items.
- Click Bulk Update Items

- Follow the instructions on the page, and read the IMPORTANT carefully:
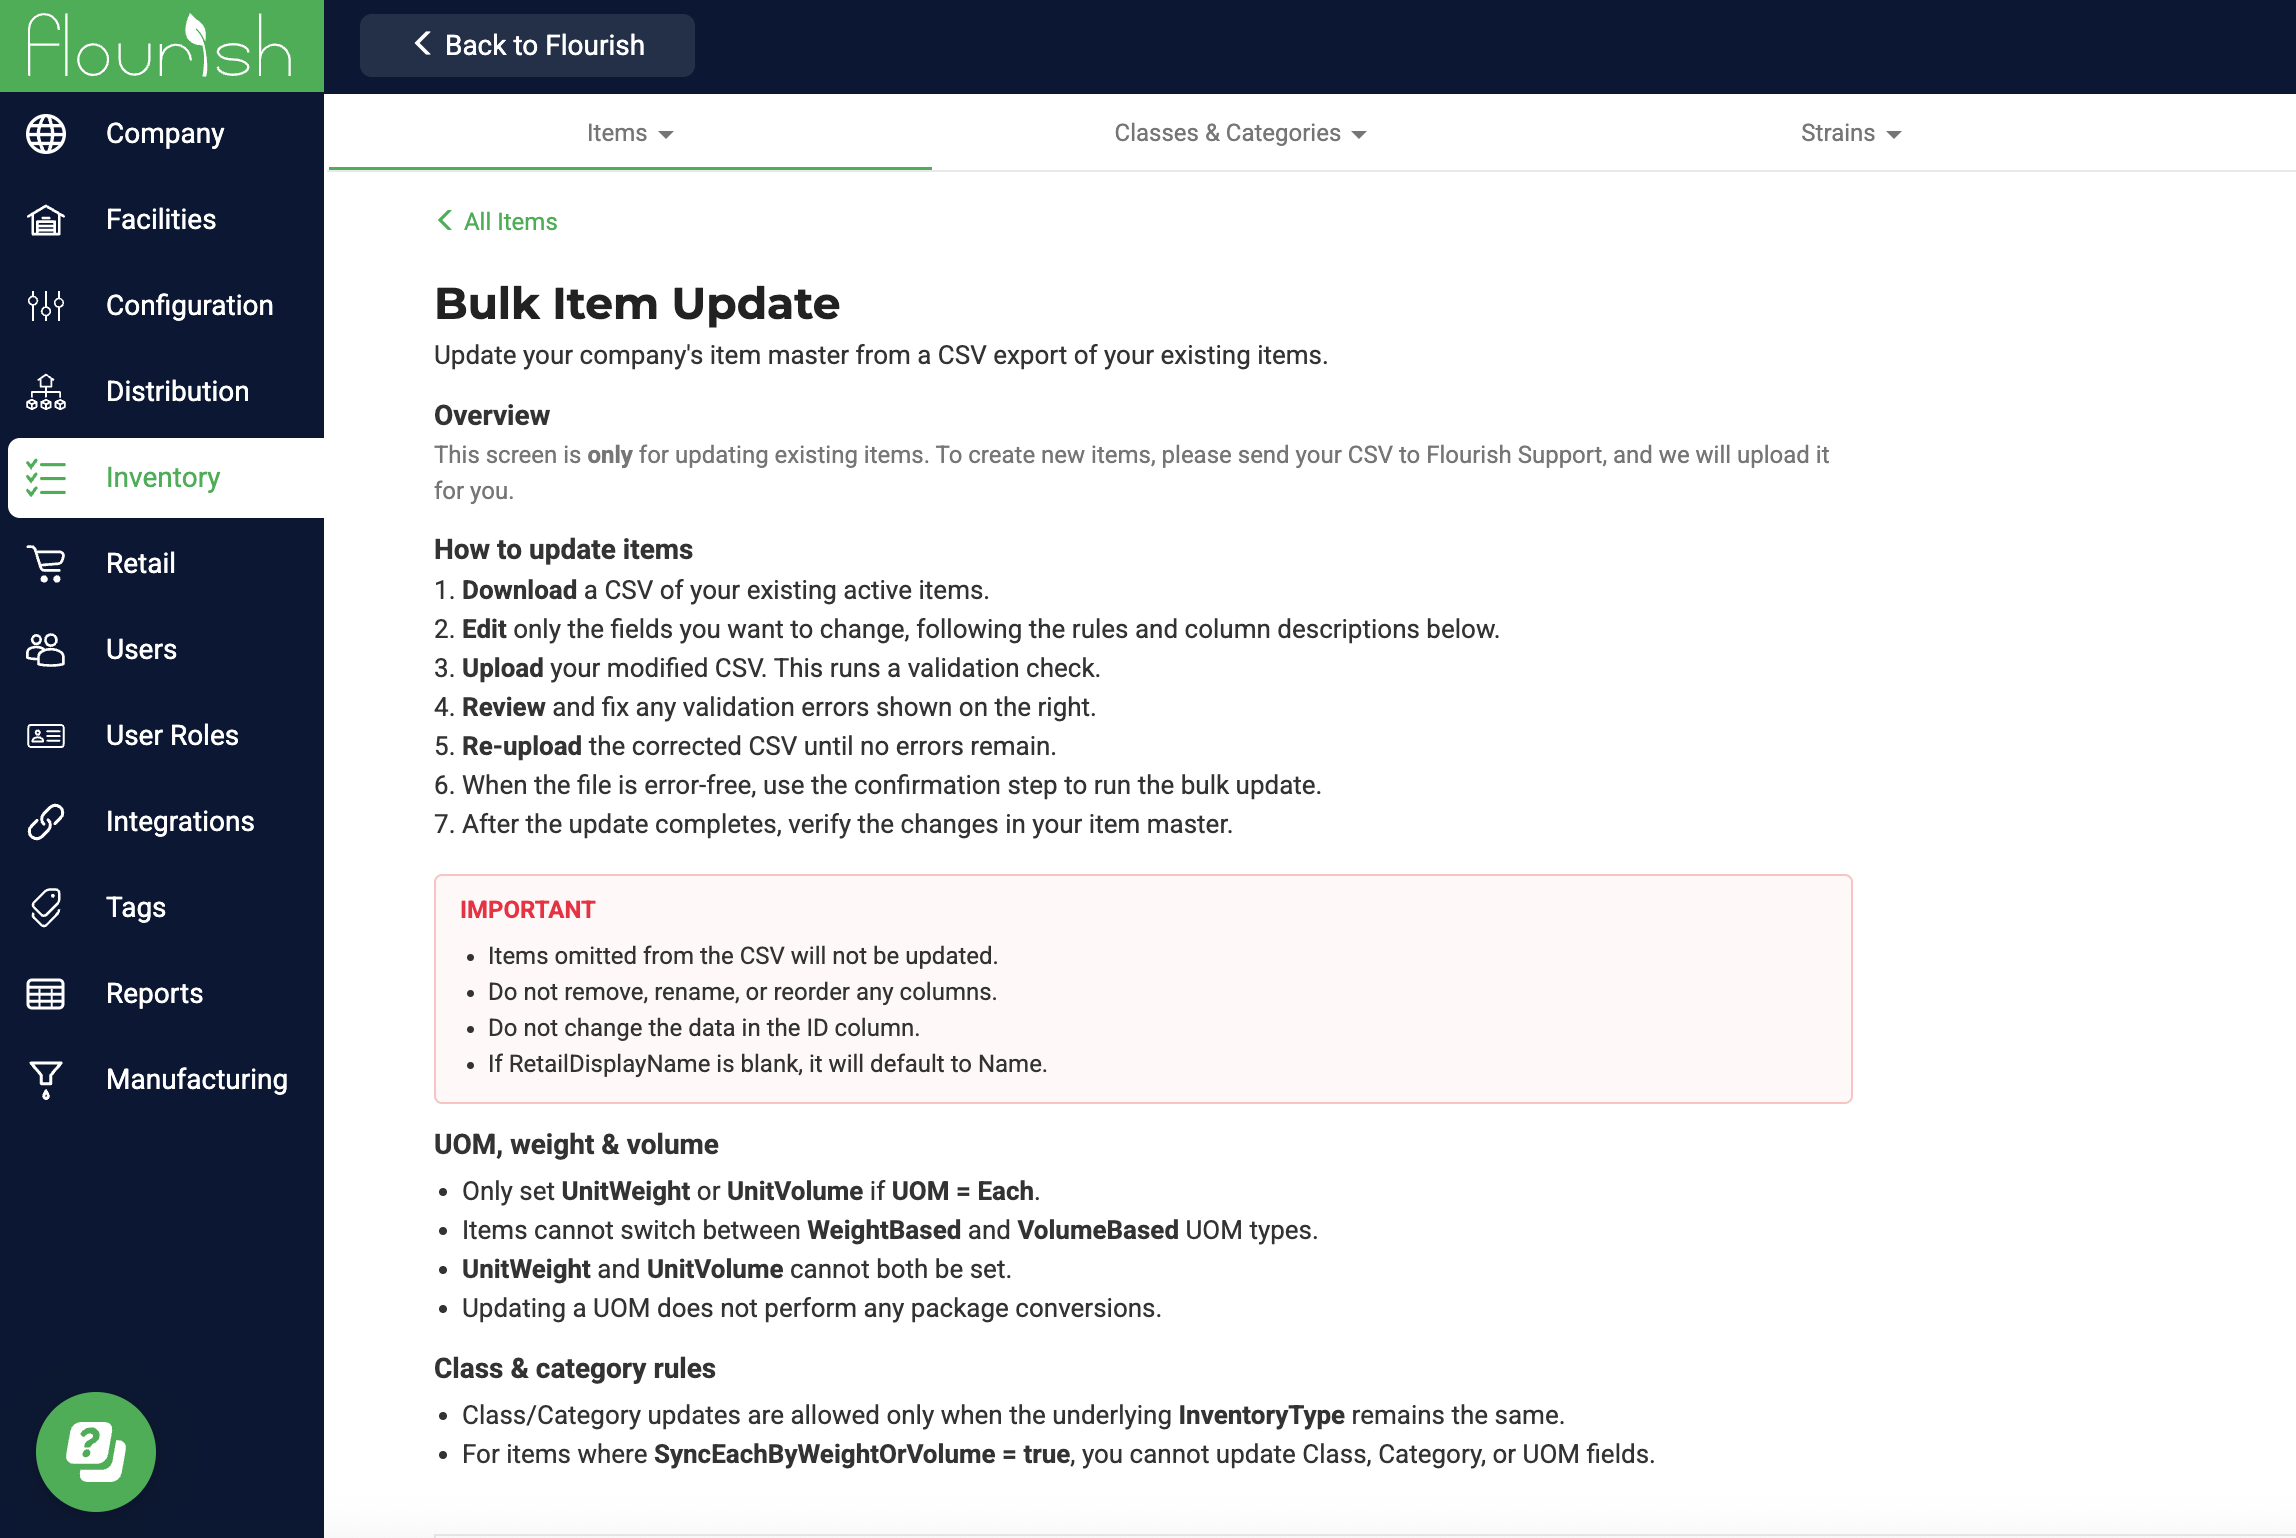
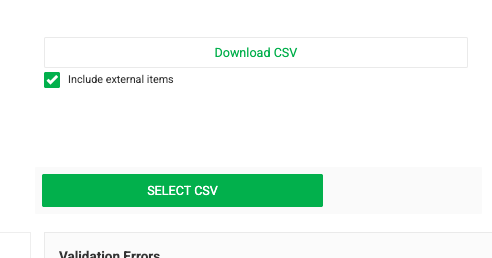
- To update External items, please check the box on the download screen:
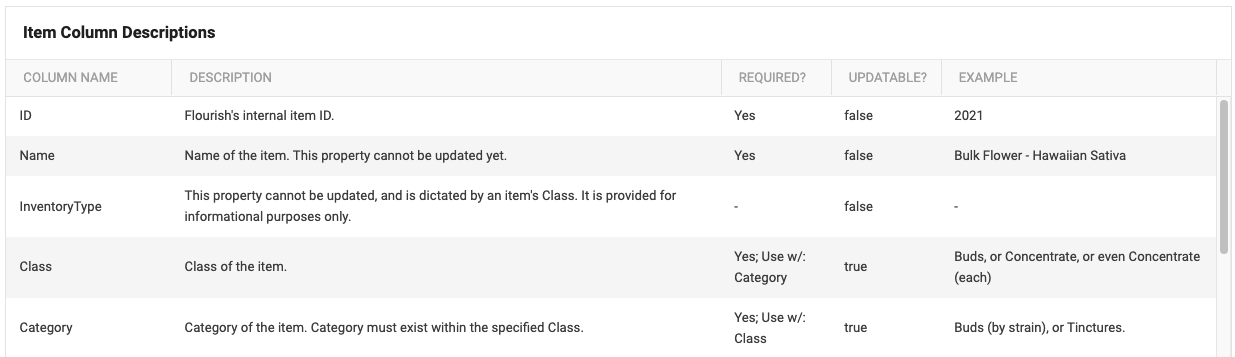
- The Item Column Descriptions part of the page describes the information on the CSV file and how to handle it.
We added the ability to upload additional attributes on items, including page dimensions and reference fields. You will be able to use the attributes for future custom reporting.
Good to know!
Do not update the column names in the CSV file.
- Users with permission above can now use the CSV Import to disable items in Flourish.Disabling items or strains via Bulk Import/Update will not trigger the deactivation of those items/strains in any external system.
- The currently supported fields are listed on the Bulk Item Update page in the Item Column Descriptions grid. Any fields listed there will also appear in an export.
- Please do not delete any columns from the exported data, as all columns are updated. This might change in the future.
- We support updating existing items only. Importing new items will be included in a future release.
- This feature does not delete or disable items in METRC or Flourish.
- You can now update the Name of an item, but not for items integrated to Leaflink, Quickbooks, or METRC.
- You can update the strain of an item, but only if packages have never been created.
- Do not edit the data in the ID column, as this is how the API knows which item to update.
- Do not edit the data in the InventoryType column, as this is intended to help with any filtering or sorting clients might need to perform on the exported data before triggering an update.
- Do not edit the data in the SyncEachByWeightOrVolumeUom column, as this is intended to help with any filtering or sorting clients might need to perform on the exported data before triggering an update.
- The documentation provided on the Bulk Item Update page itself also contains some of the above helpful information, and more! So, please check it out :)
Did you get an error?
Fatal Error: failed to read CSV file data in *items.Updater.Update: error reading CSV bytes: found unmatched struct field with tags [Description Class]
- If you see an error like the one above, it means that the CSV you uploaded is missing the column names specified in the error.
- For example, in the scenario above, the Description and Class columns were either missing from the uploaded document, or the column header names were changed before it was uploaded.
- Another thing that can happen is that we released an update, but the document you are trying to upload is from a version without the listed fields.
- You can get by with adding the columns to the document, but CAUTION should be exercised when doing this, as the action can potentially remove existing data.
- It is highly advised to download another CSV and reapply the changes to a more up-to-date CSV.
- Sometimes just adding the blank columns is advisable, however, if the fields are meaningless to the operation of the client.
- This only affects data in CSV fields which are uploaded with blank content when the database currently contains non-empty values for said fields.
How did we do?
Create and Update Strains in Bulk
Create and Manage Item Price Sets for Retail and Wholesale