Table of Contents
Creating Inventory Using Bill of Materials
There are now three main ways to create inventory when manufacturing or processing: (1) Through a Manufacturing Run , which is commonly used for extraction or machine-driven production (2) Through th…
Table of Contents
There are now three main ways to create inventory when manufacturing or processing:
(1) Through a Manufacturing Run, which is commonly used for extraction or machine-driven production
(2) Through the Create Work Order function in the Manufacturing Runs Module.
(3) Through a Bill of Materials which lets you create more repeatable processes for a finished good (e.g. a gummy, filled vape cart, or packaged item). To learn how to create a Bill of Materials, see Creating Bill of Materials or Creating Bill of Materials for Handling Case Quantities.
Create Inventory using BOM
- To create Inventory from Bill of Materials, go to Inventory Module.
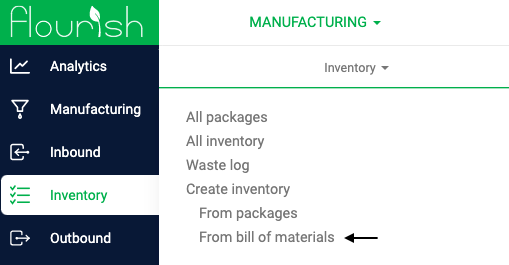
- Click on Inventory dropdown menu at the top of the page. Then select Create Inventory From Bill of Materials.
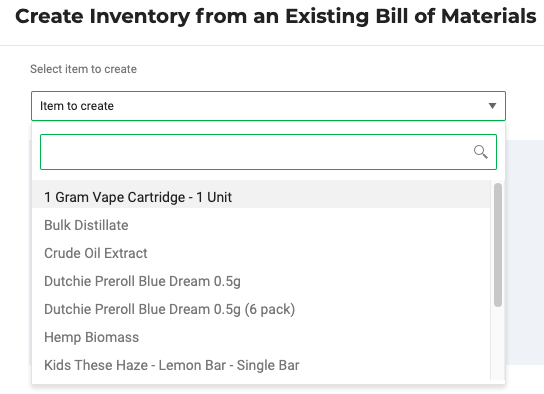
- Select the Item to Create using the dropdown menu. You can also type in the item name.
* Run Type
* Machine
* Bill of Materials
- Select the name of the Bill of Materials used to create the item.
- Enter the Qty per package (the number of units you want to create).
You can create multiple packages with different quantities in one session. When you create the packages;
- Click the
 sign to add another line, where you can specify the "Number of packages" and the "Qty per package (ea)"
 - Click the
 sign to remove the line. Learn more here.
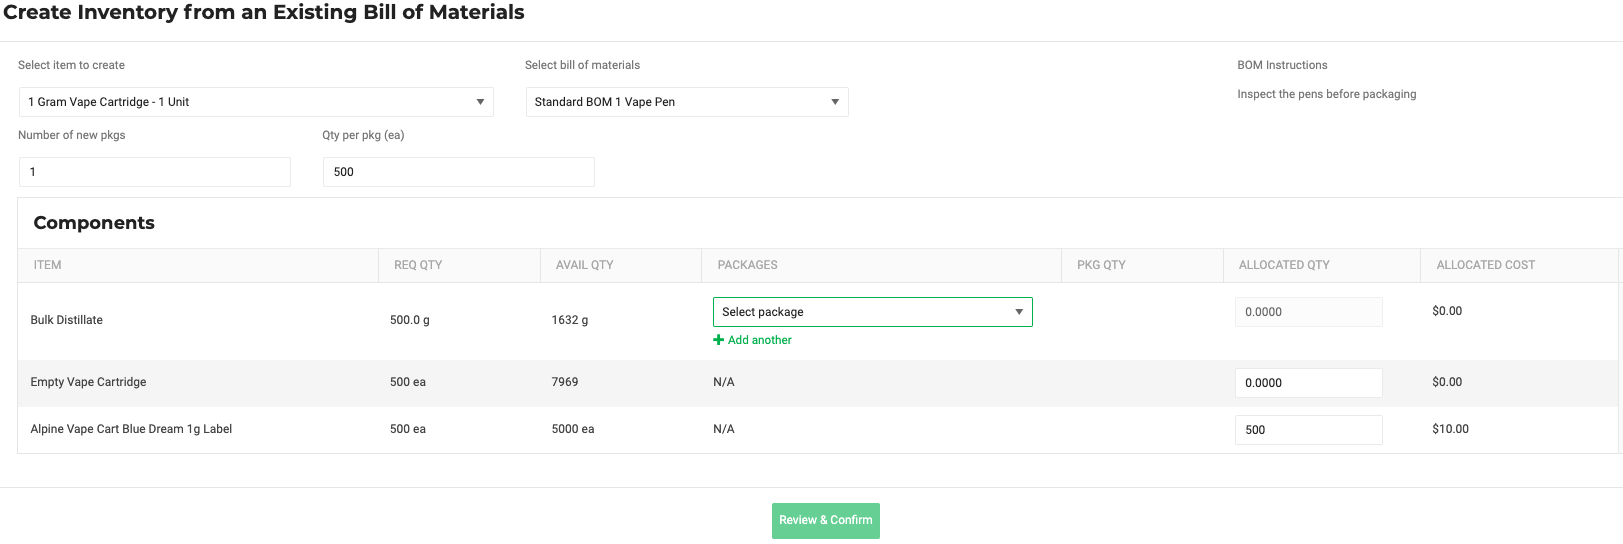
- Select your cannabis input package from the dropdown menu. In this example, we are using distillate to create a packaged vape cart of 500 units.
- When you select a package, the Allocated Quantity populates according to the required Quantity.
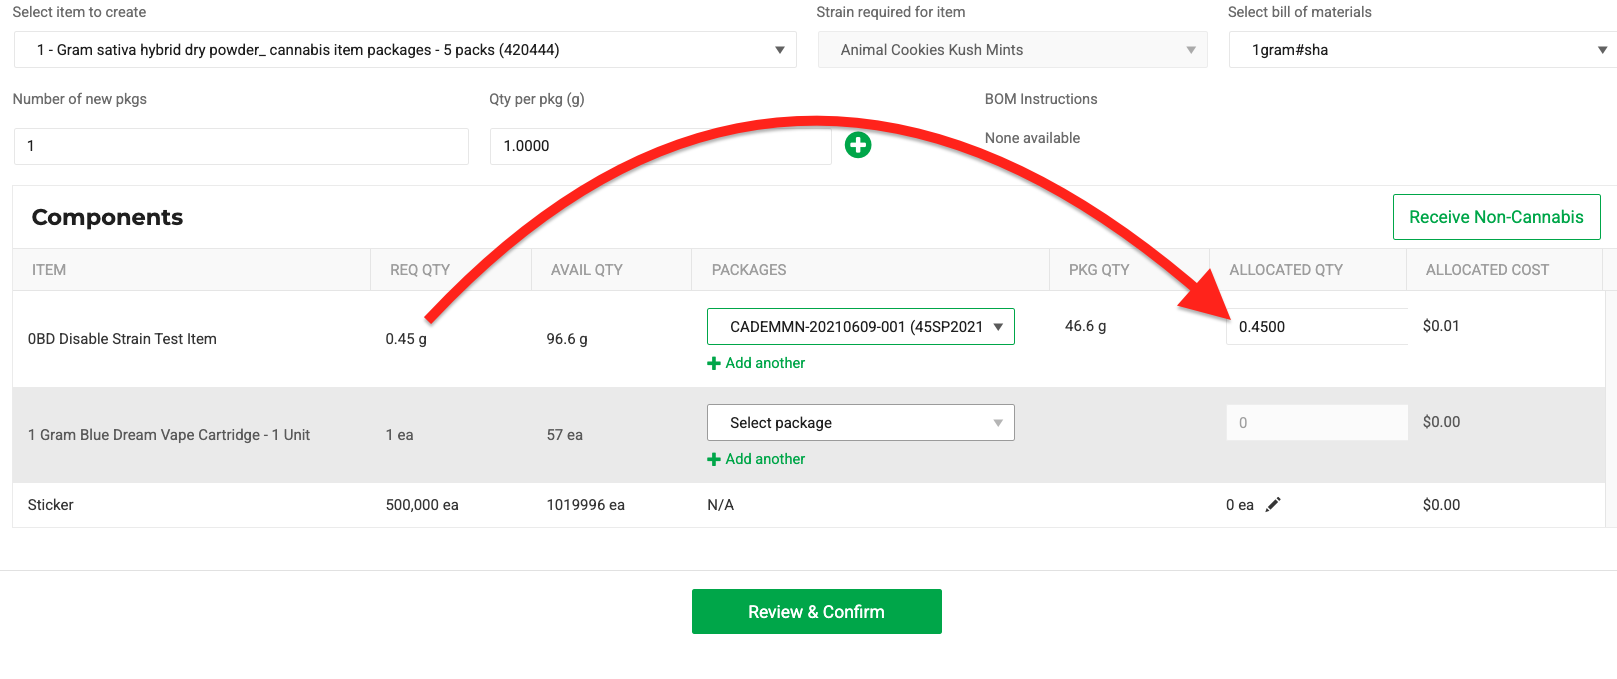
- Enter the Allocated Quantity of your cannabis package(s) and non-cannabis components. Verify the information is correct and click Review & Confirm.
- Flourish Software will alert you if the Allocated Quantity does not match the required Quantity on any of the Components.
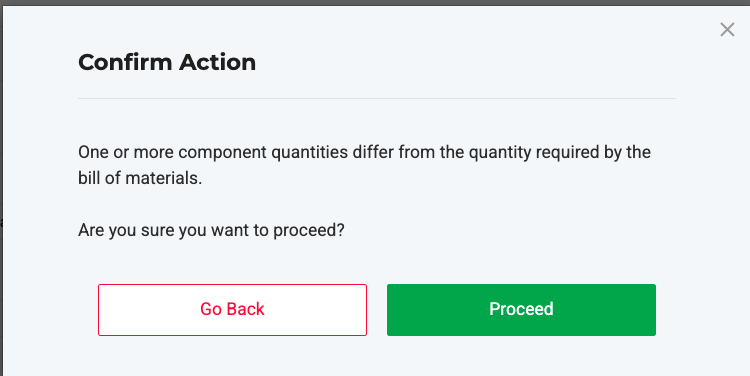
- Enter in the date created and any other optional attributes. Select the Area and Location of your package, if required.
- Click Save and you have successfully created a new package using a Bill of Materials.
Create Case Size Quantities
Please see here how to set up a BOM to handle case quantities.
If a BOM is already set up to handle cases, follow steps 1-3 above. From there, you will:
- Select the name of the Bill of Materials for the case qty.
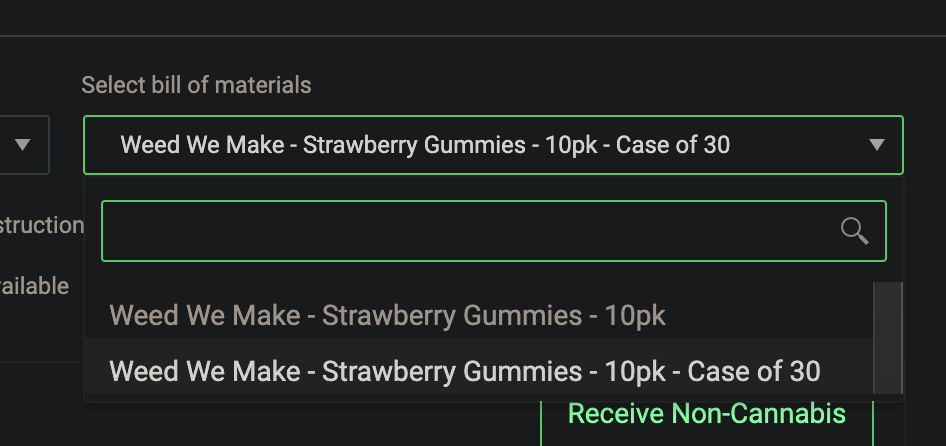
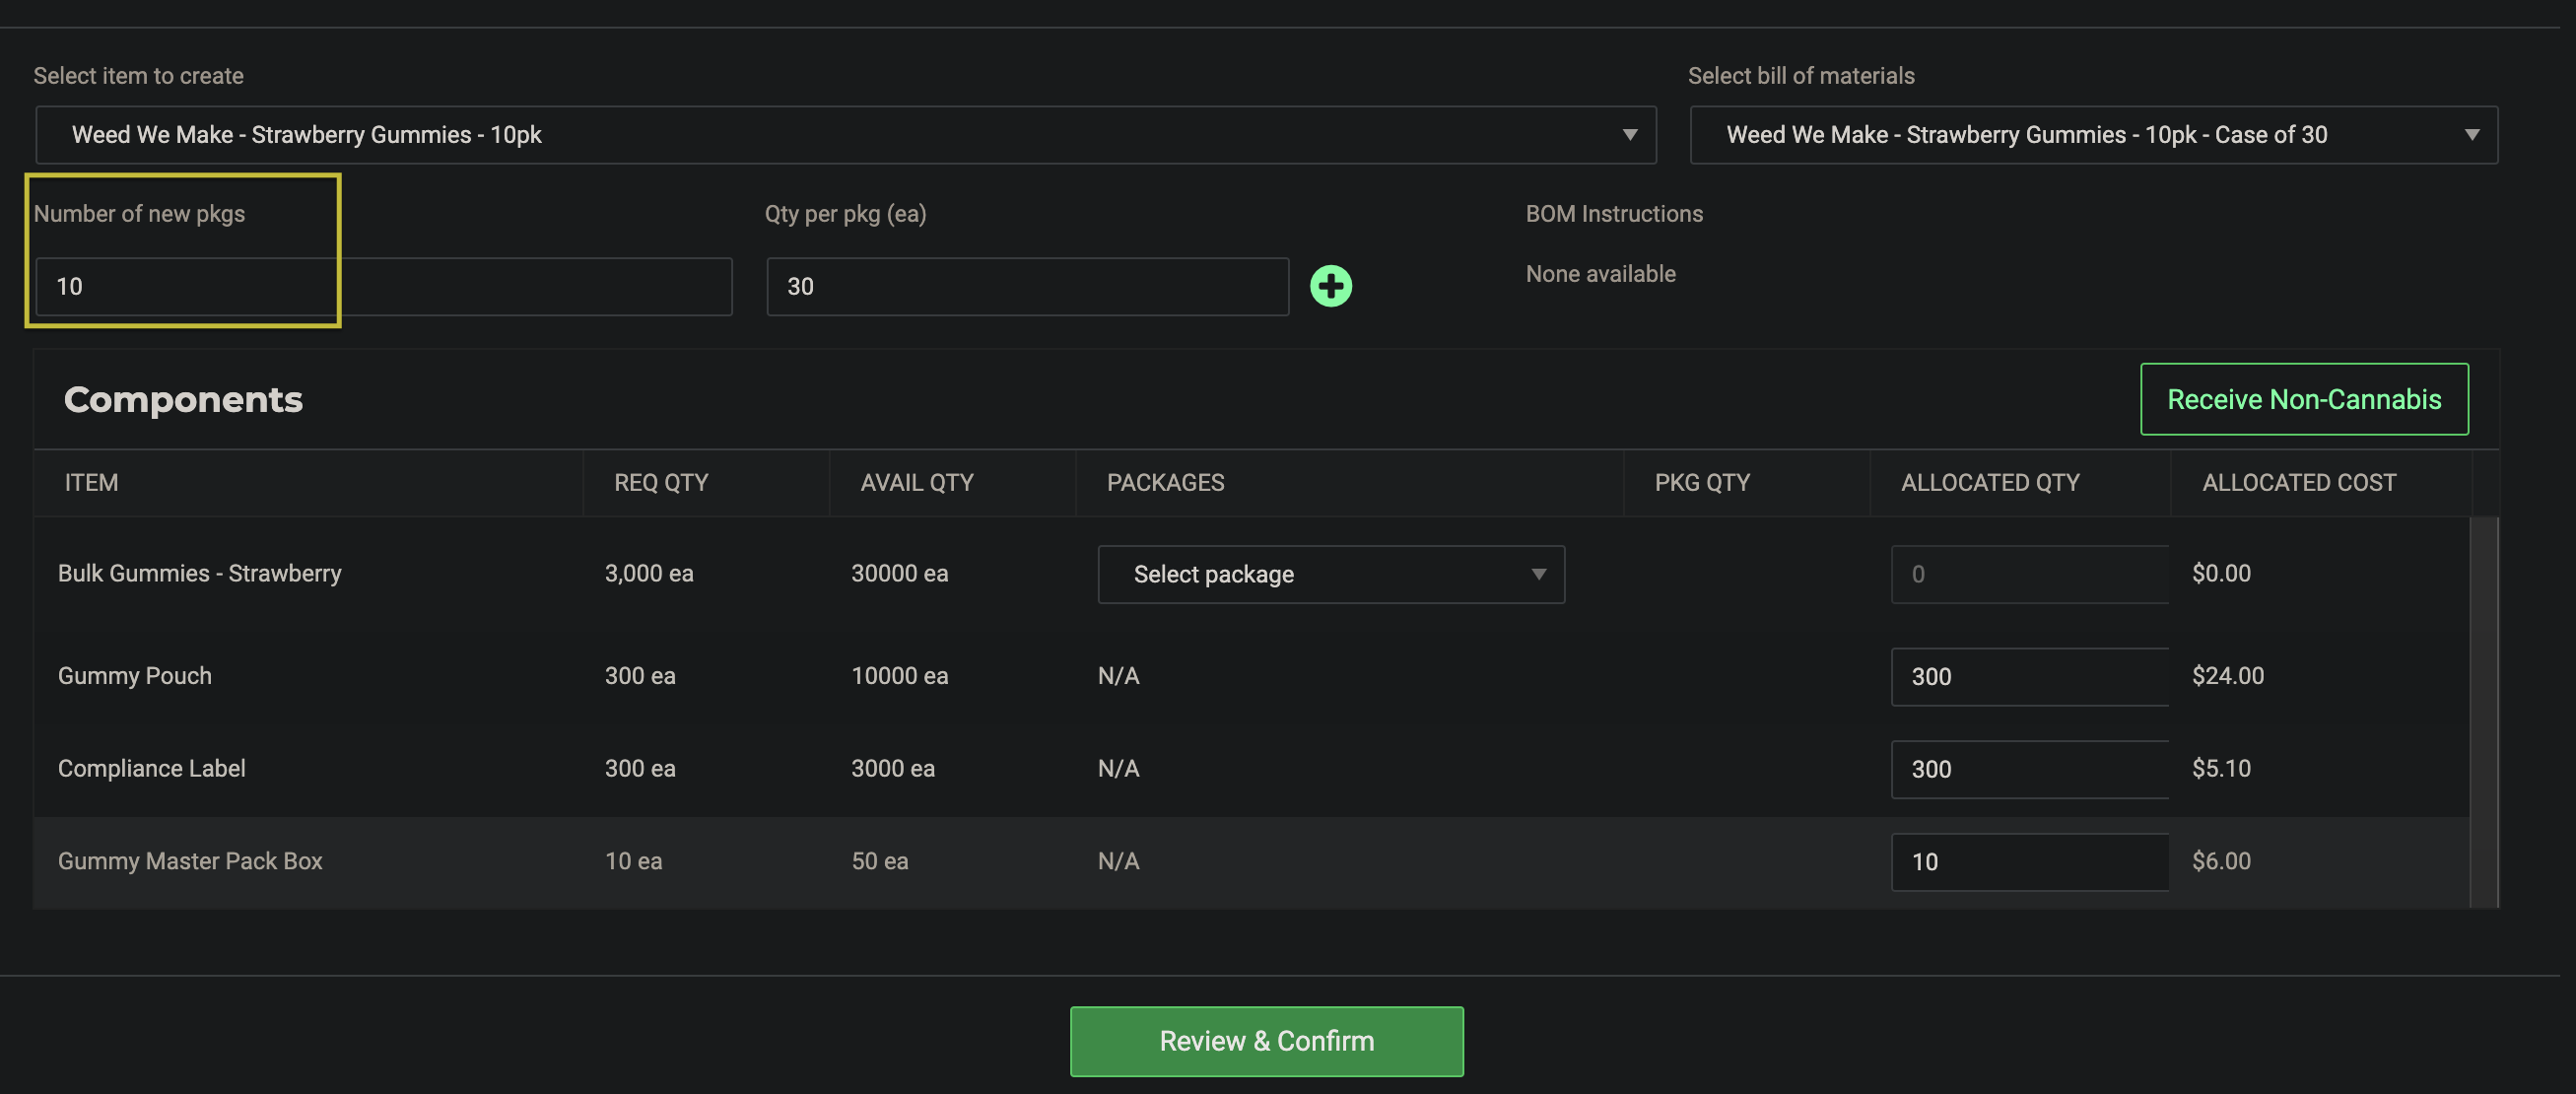
- Enter the number of cases to create in the "Number of New Pkgs" field, as the 'Qty per pkg (ea)' will auto-populate for you based on how the BOM was set up. In this example, we will make 10 cases.
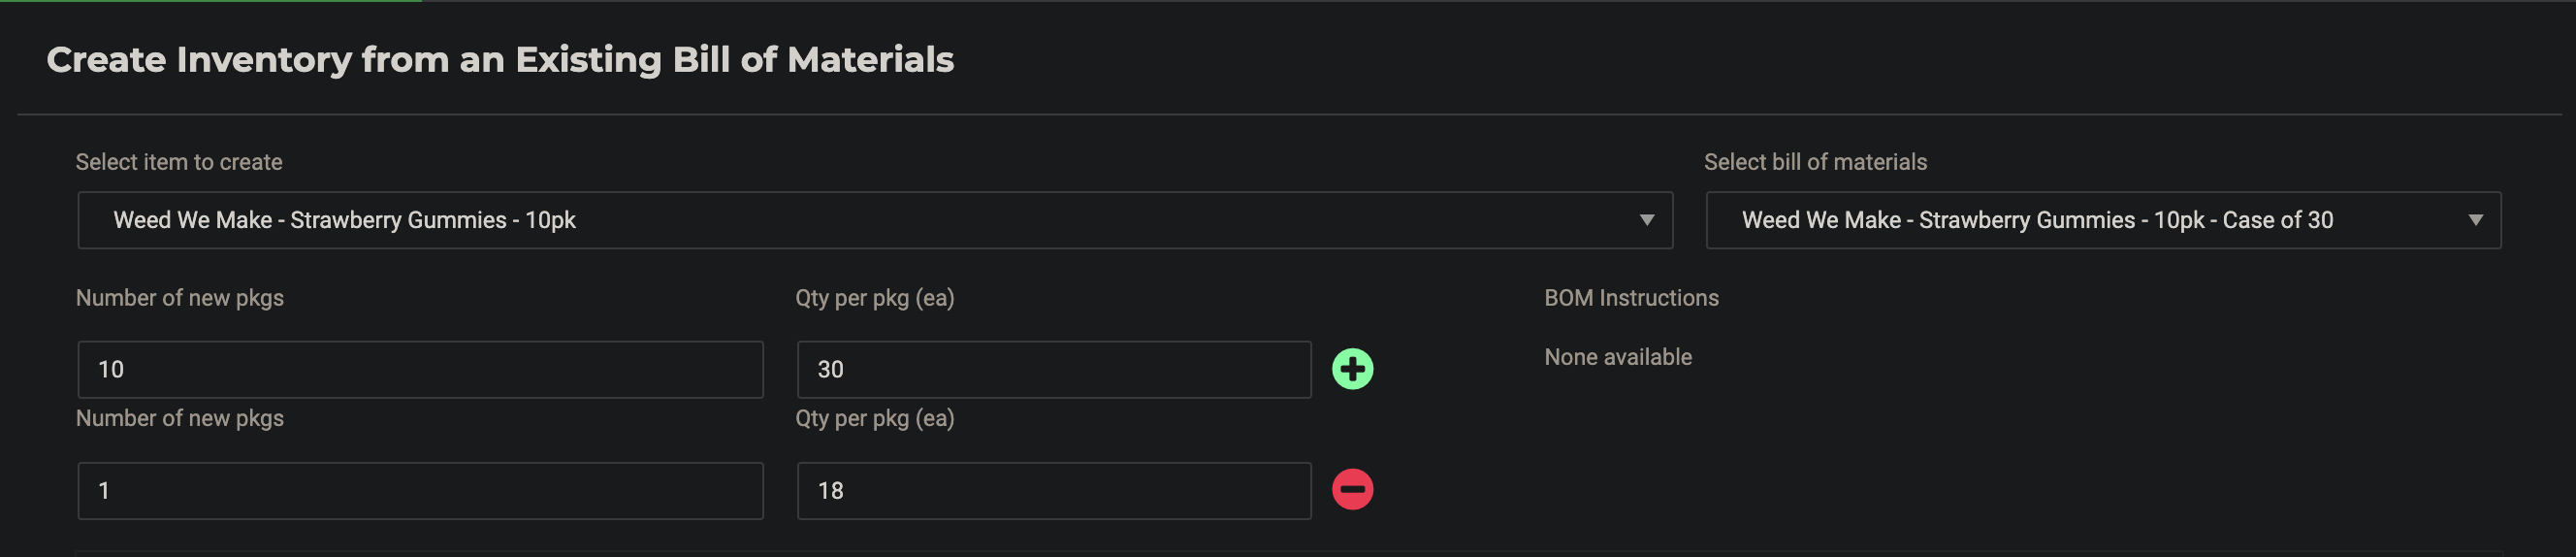
- If you need to create a package of a partial case, click the
 sign to add another package. We will add a partial case of 18 units to this example.
- Select your cannabis input package from the dropdown menu.
- Enter the Allocated Quantity of your cannabis package(s) and non-cannabis components.
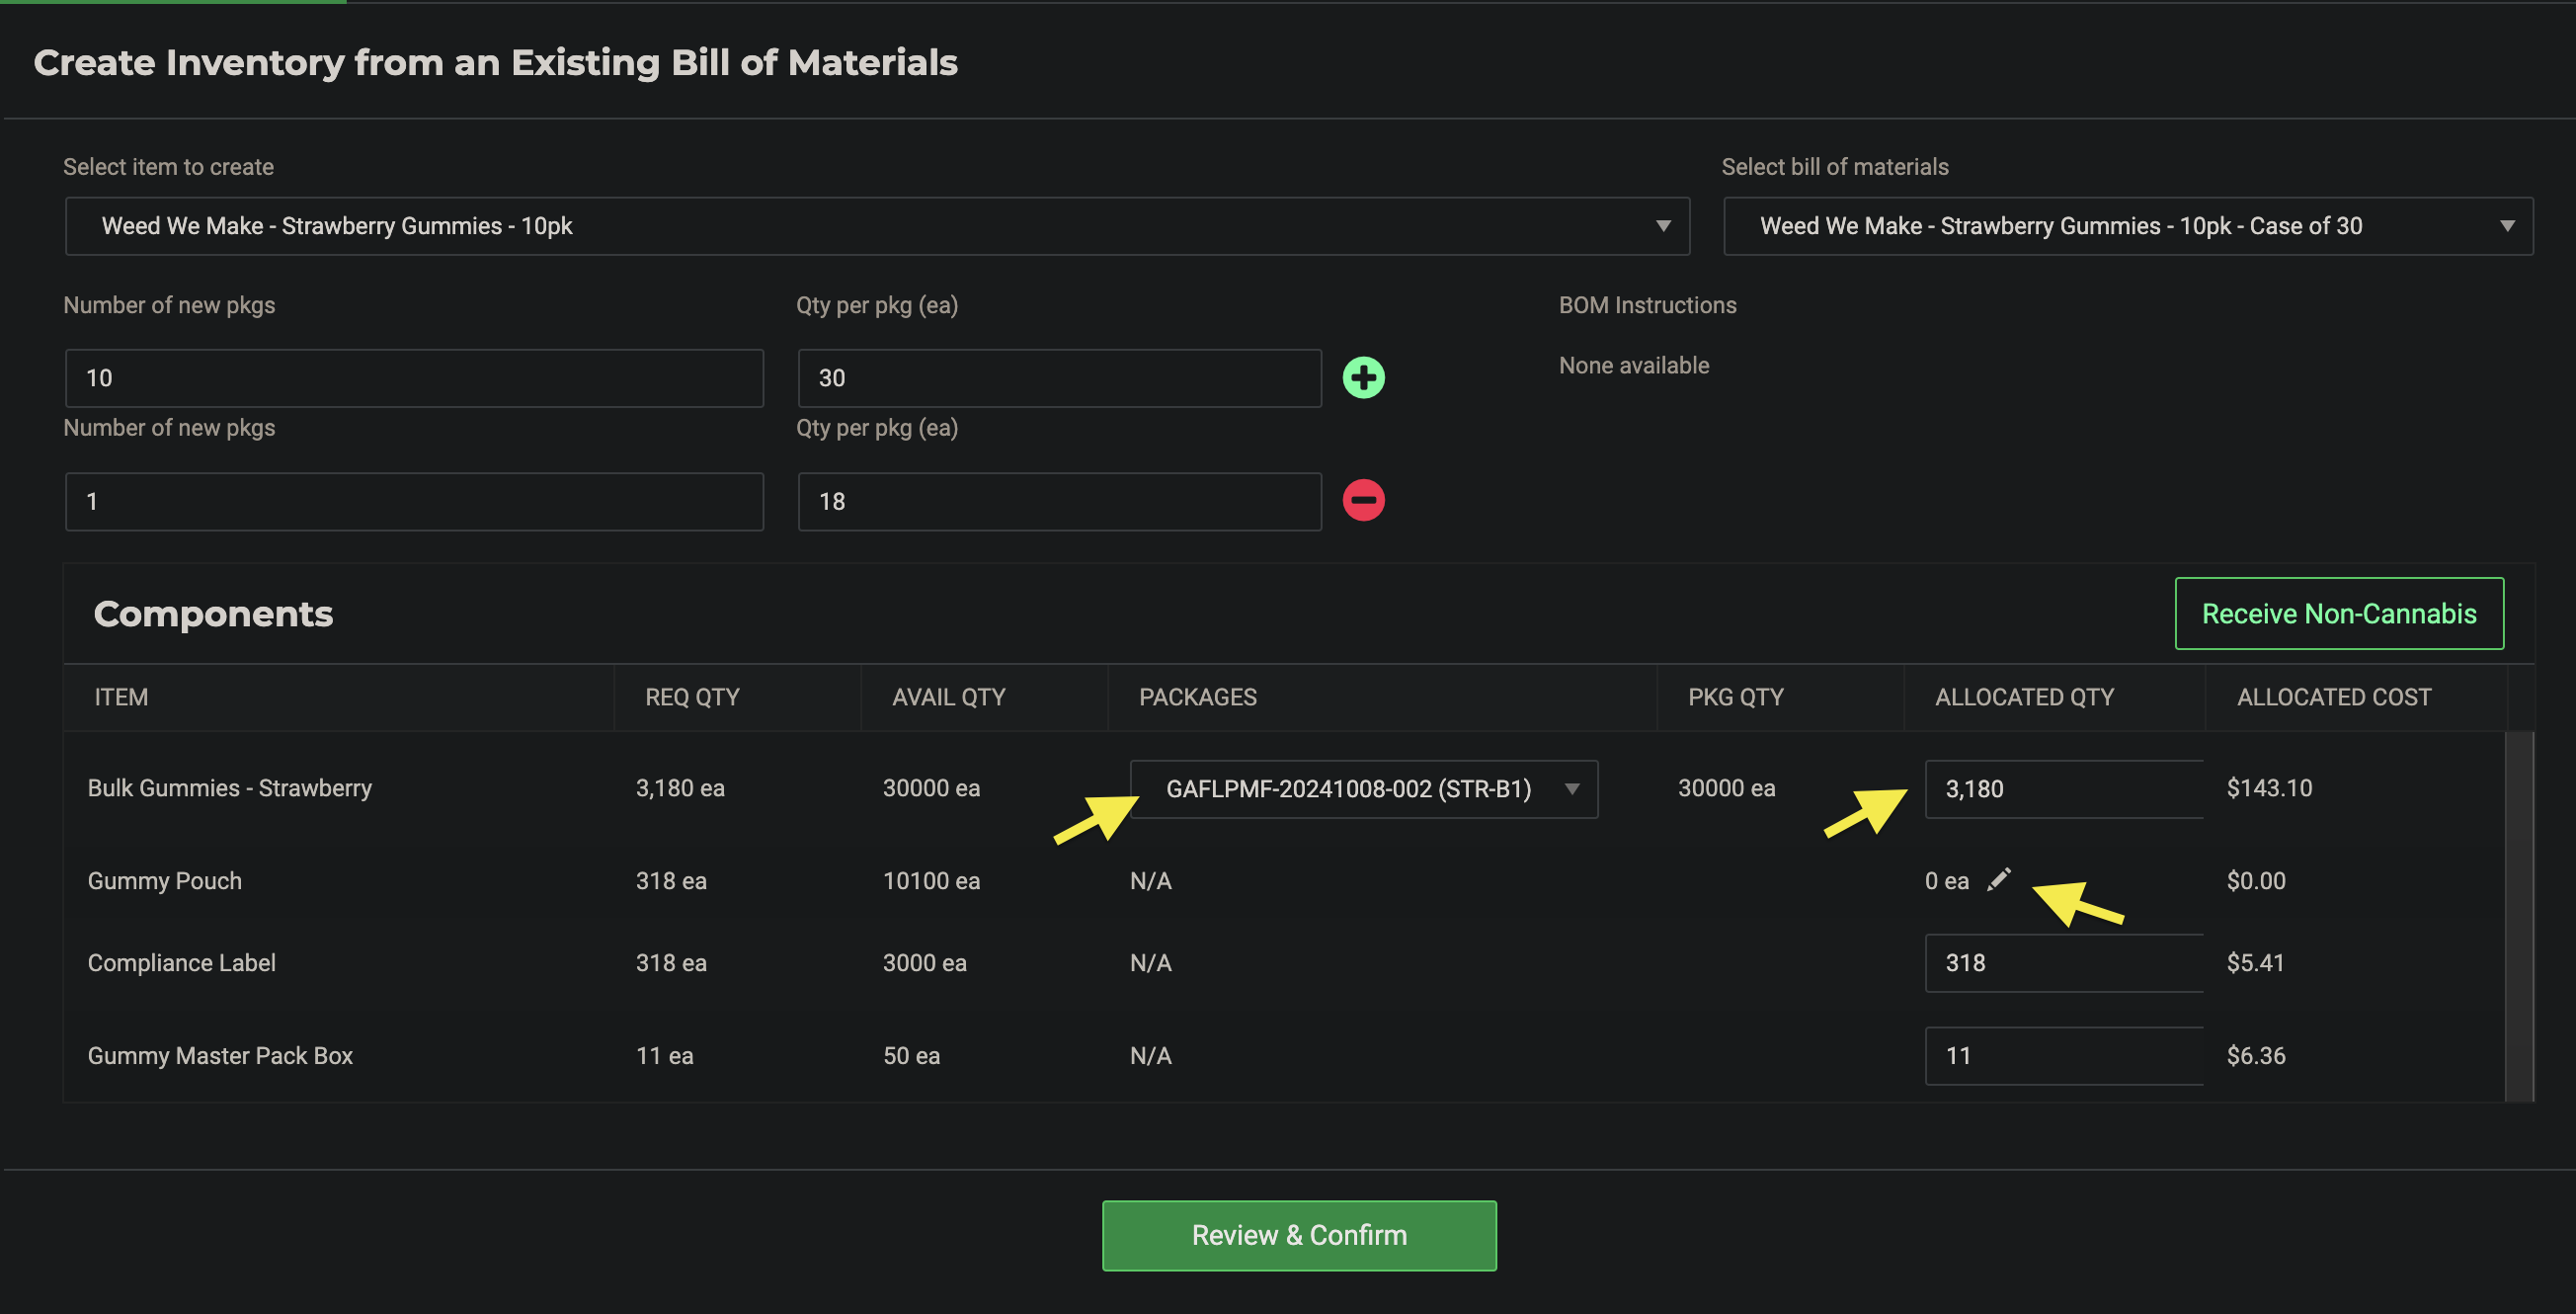 Note: Non-cannabis components will auto-allocate if only one LOT exists. When more than one LOT exists, click the pencil icon to choose which LOT to allocate.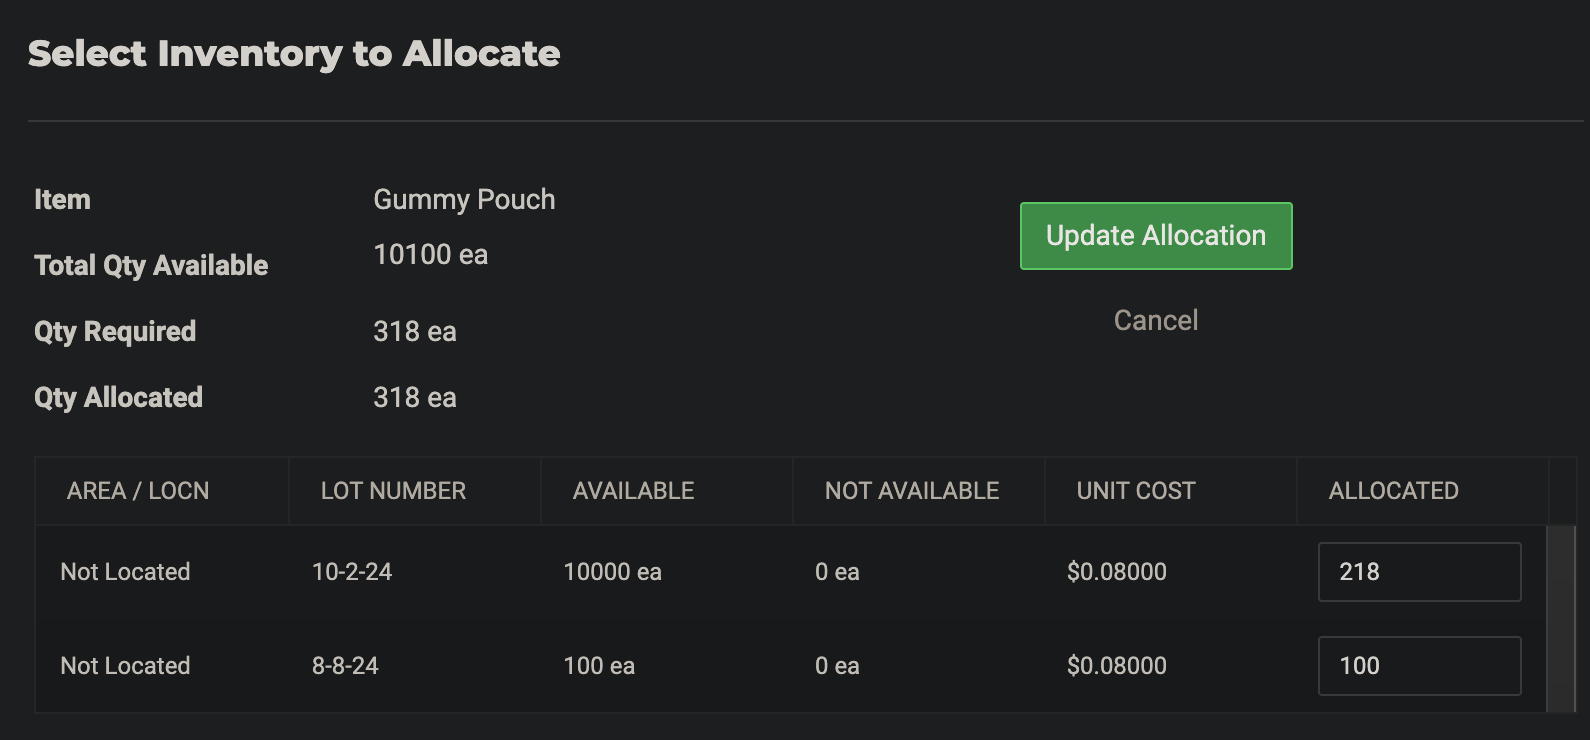
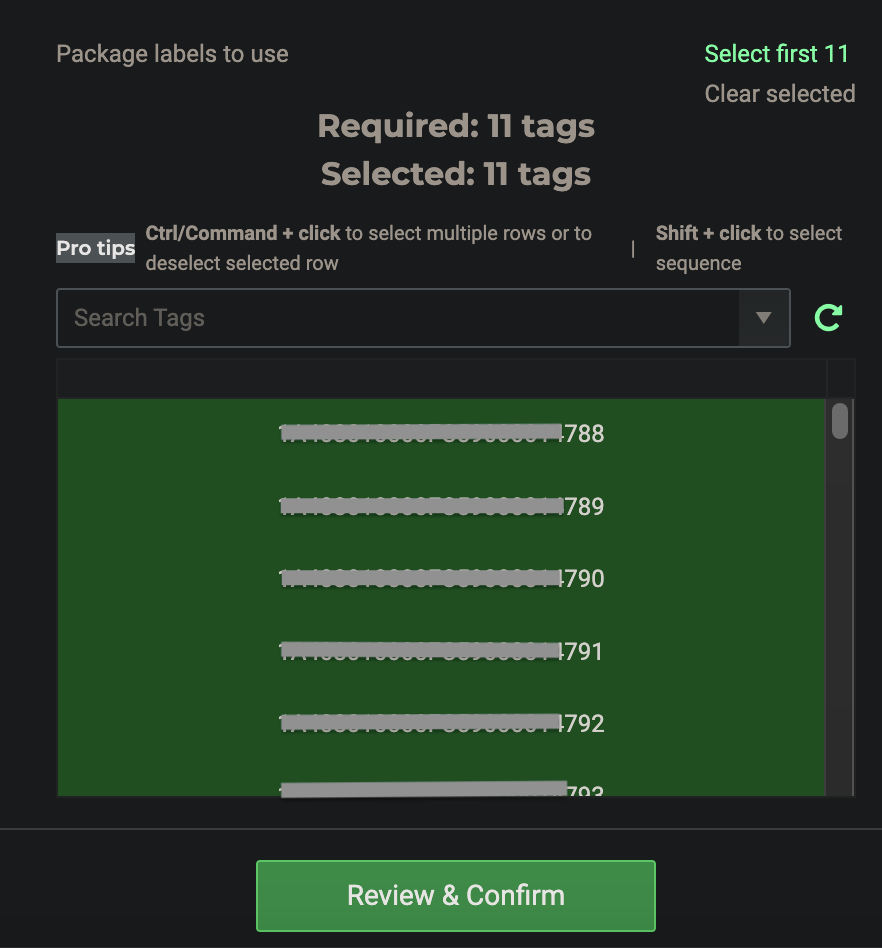
- Verify the information is correct and click Review & Confirm.
- Enter the Created Date and any other optional attributes. Select the Area and Location of your package, if required.
- Click Save and you have successfully created a new package using a Bill of Materials. The screen will resolve back to the All-Packages grid so you can view the inventory created.
How did we do?
Creating Bill of Materials for Handling Case Quantities
Manufacturing Work Orders with BOMs
