2020.12.29 Software Release 4.26.1
VERSION. 4.26.1 SUMMARY OF RELEASED ITEMS. Integrations. Ability to have Multiple Leaflink Accounts Sync to one Flourish Account. Retail/POS. Ability to Change the Customer on a Retail Purchase. Inve…
VERSION
4.26.1
SUMMARY OF RELEASED ITEMS
Integrations
Ability to have Multiple Leaflink Accounts Sync to one Flourish Account
Retail/POS
Ability to Change the Customer on a Retail Purchase
Inventory/Mobile
Added a Package Count to Inventory Counts
Mobile
Added the ability to Scan a Barcode with a user PIN
Inbound
Added the ability to have Inventory Automatically Located upon Receipt
DETAILS
Integrations
Ability to have Multiple Leaflink Accounts Sync to one Flourish Account
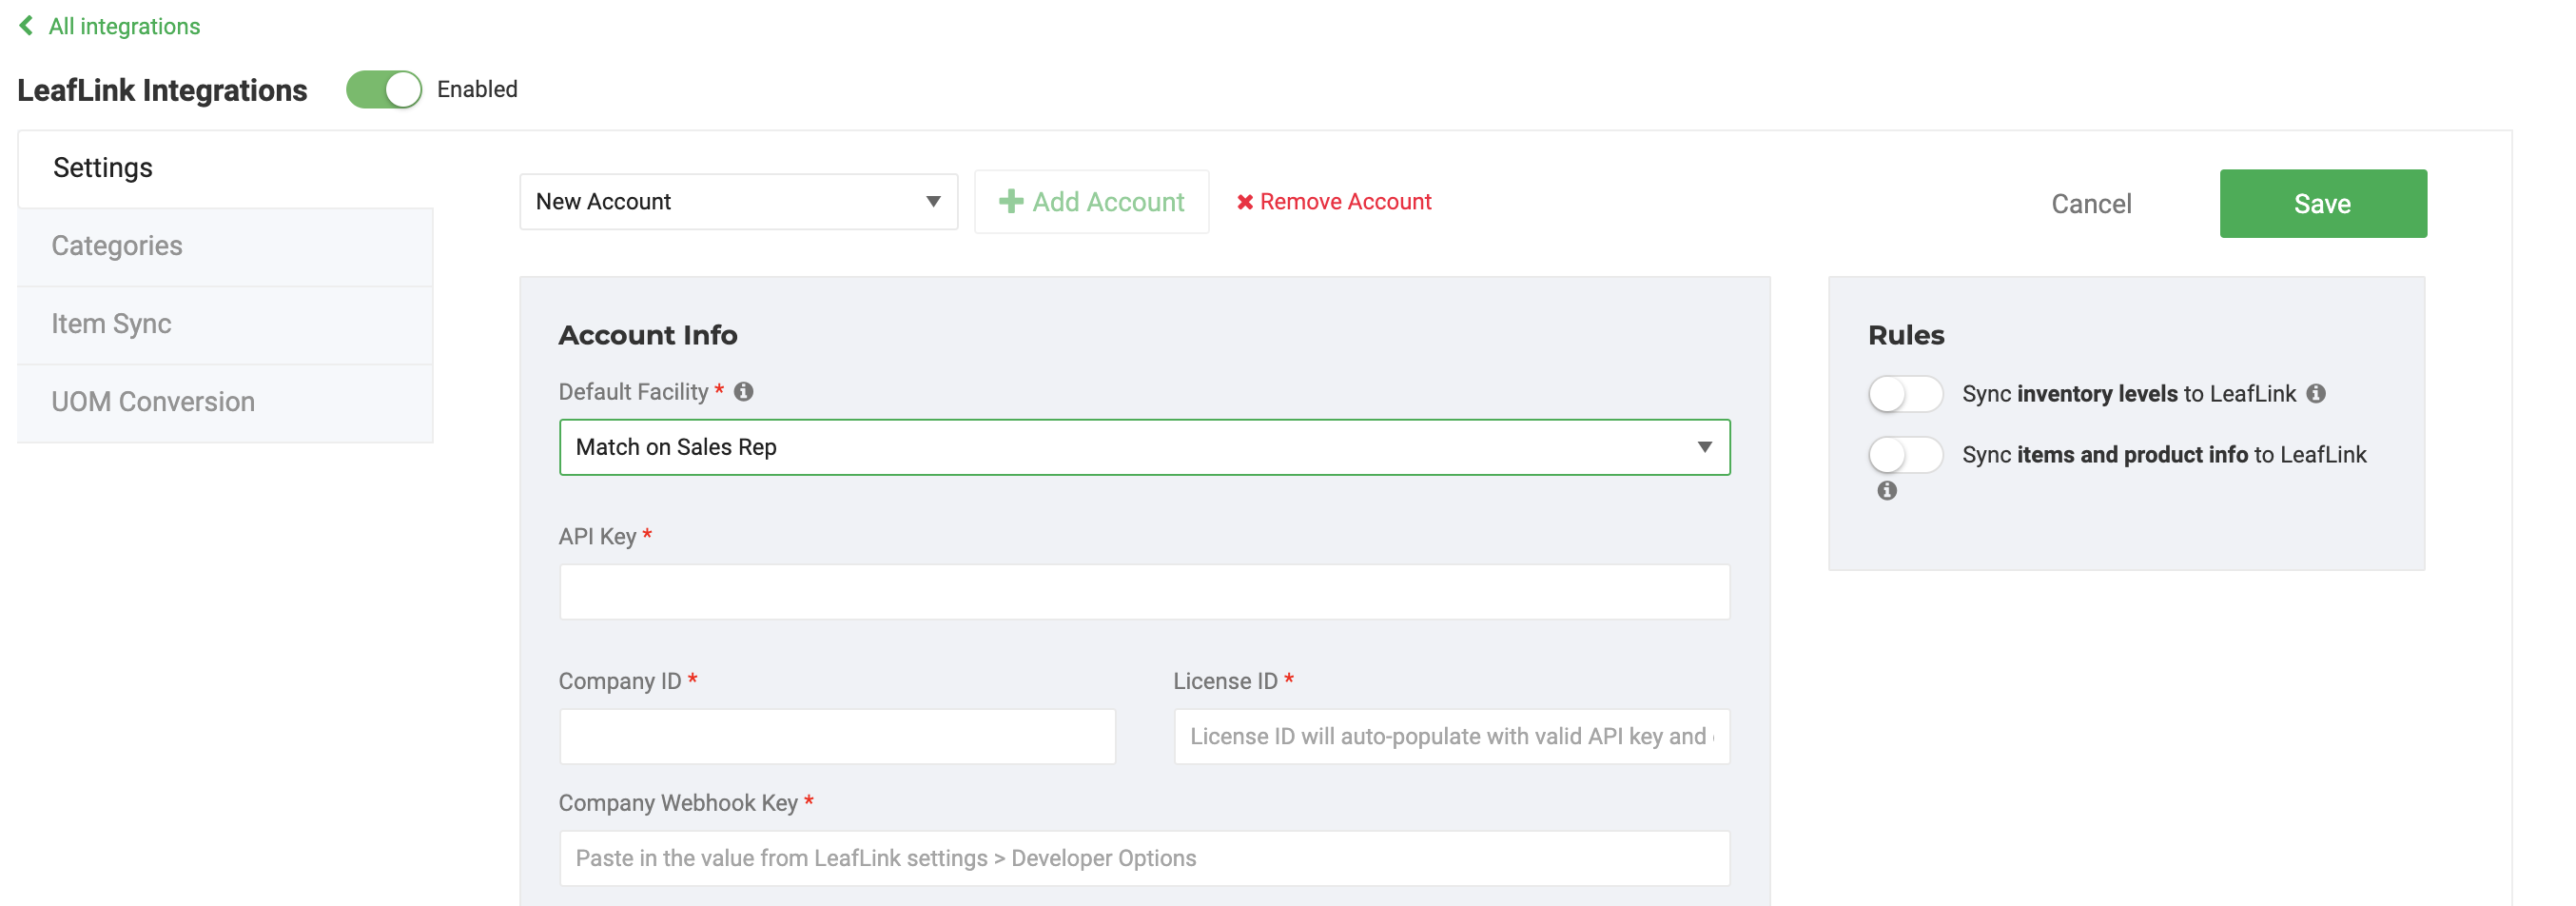
We have built a solution to allow you to use your multiple Leaflink Accounts and your one Flourish account in a seamless fashion. You can configure two or more separate Leaflink accounts to send orders and get inventory from a single Flourish account. To setup your multiple Leaflink account, simply go to the Leaflink integration card in the Admin section of Flourish. Click +Add New Account, and enter the information requested.
You can choose to have orders sent to a single facility OR match based on the Sales Rep on the order.
Retail/POS
Ability to Change the Customer on a Retail Purchase
When ordering online some customers may forget that they have an account already. They then create a new account with a different email address and submit a purchase. To allow you to quickly move this purchase to the customer's existing account we are allowing for the customer on a purchase to be changed! If your user role has the correct permission you can edit the customer on the purchase by clicking Replace Customer! This opens a modal where you can search for the existing customer to move the purchase.
Your user must have the Change Customer permission on for either the Retail Module or POS
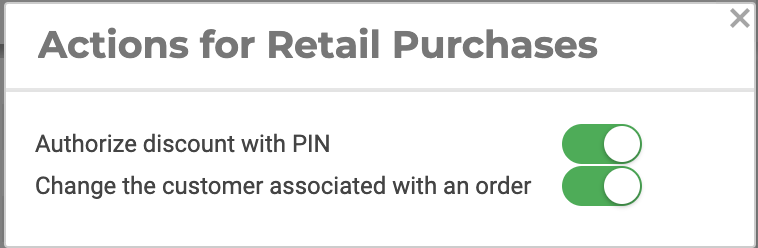
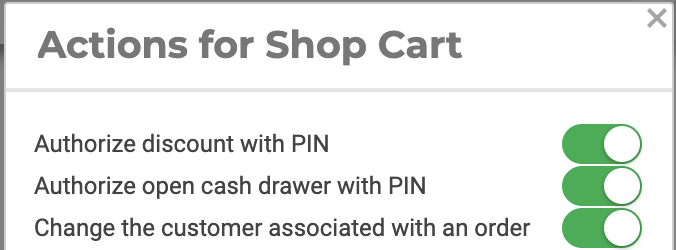
- Retail Module
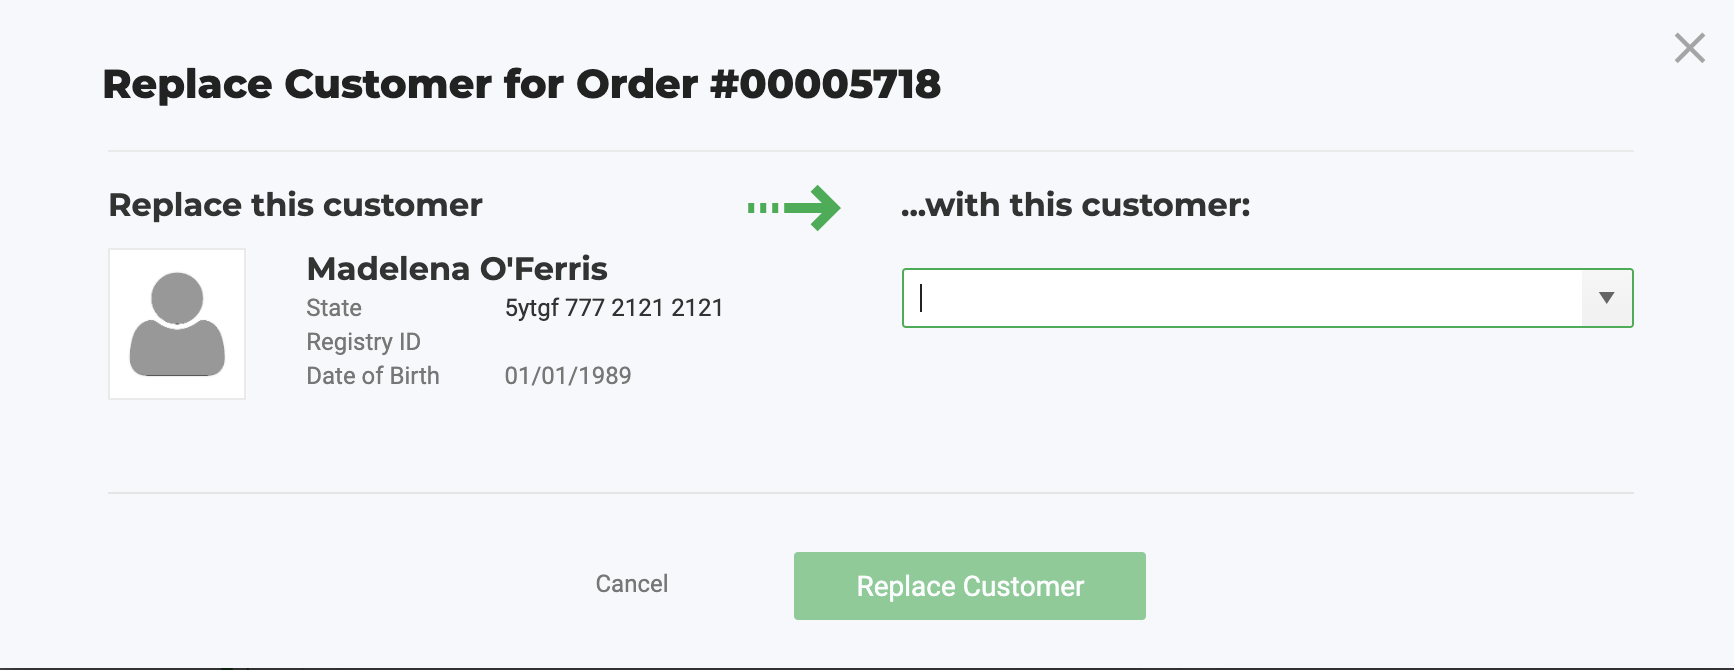
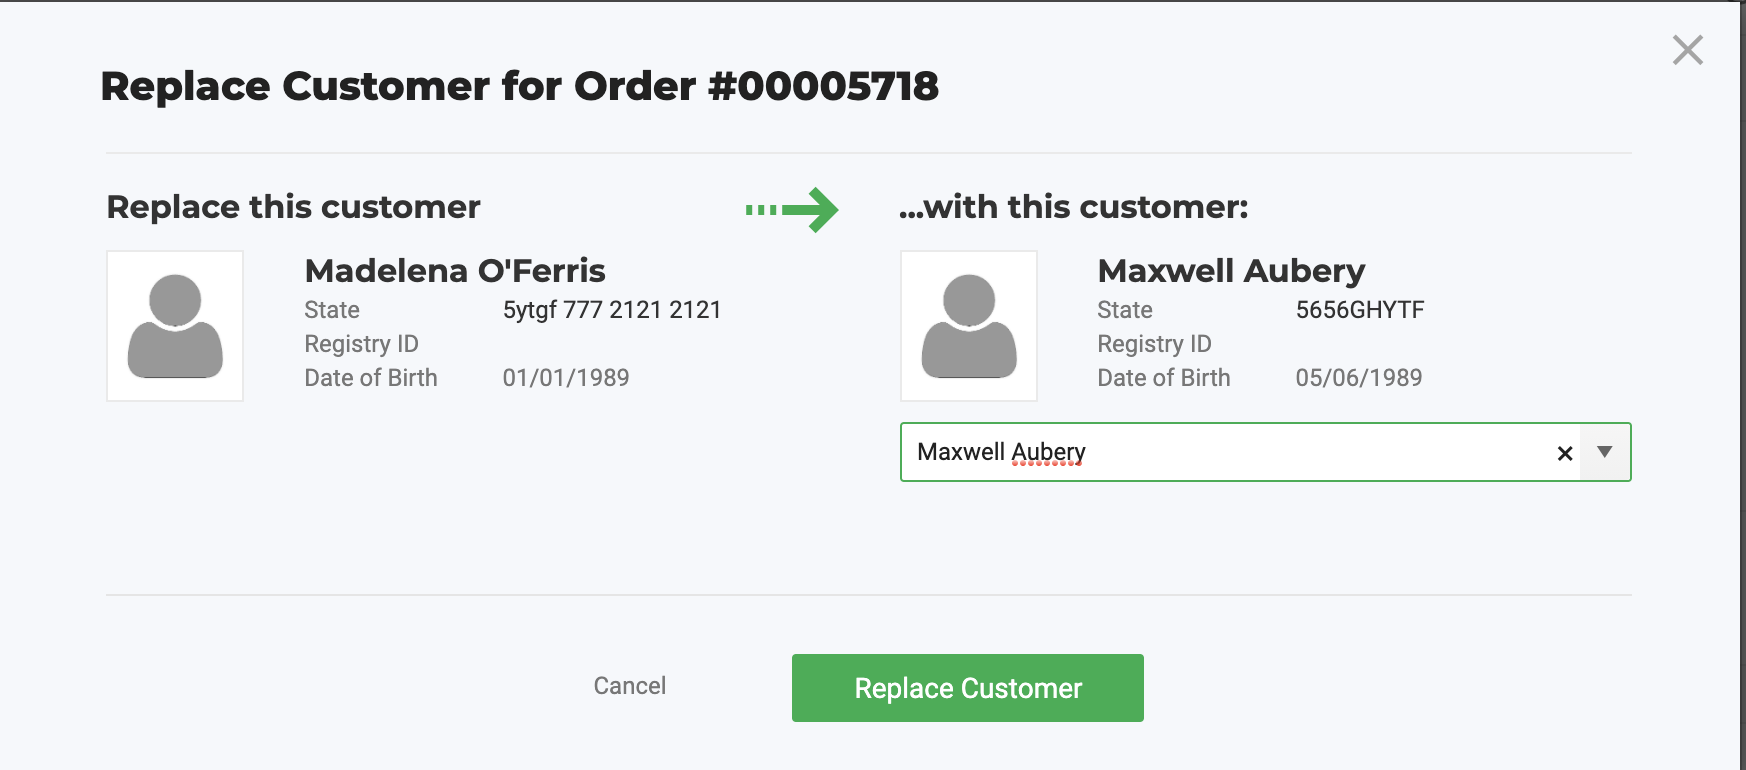
- POS App
The Replace Customer action is hidden under the More drop down. Just click the arrow!

Inventory/Mobile
Added a Package Counting to Inventory Counts for Web and Mobile App
This one is for the distribution and warehouse users out there! Our existing inventory counts are for counting the quantity of the package. This style of counting involves just scanning or entering the number of packages you have for an item. The mobile app can also be used to count the packages. However, the review and submittal of a count are done on the web.
Click this link for Step by Step directions for Scanning Packages to count on the Mobile App.
Click this link for Step by Step directions for Entering the Number of Packages Per item.
Mobile
Added the ability to Scan a Barcode with a user PIN
We have added the ability to scan a barcode with your PIN embedded to make signing into the Flourish Mobile app a much faster experience!
Just create a barcode using this barcode creator, print, and add the cutout to your badge.
Inbound
Added the ability to have Inventory Automatically Located upon Receipt
Receiving inventory can sometimes be a time consuming endeavor. To help you receive in inventory faster we have added the option for inventory to be automatically located to a designated Area and/or Location.
The facility configuration 'Default Area upon receiving' needs to be toggled on. Then set the Area, which is required, and Location, which is optional.
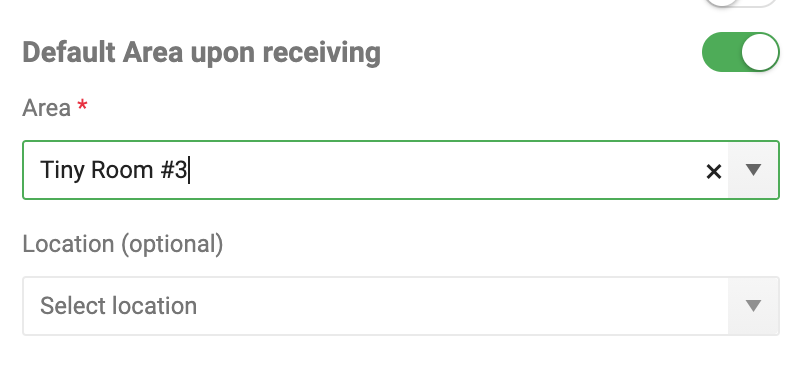
The Area/Location can be set while receiving still. However, if the toggle is on and inventory is received the inventory will go to the designated Area/Location.
How did we do?
2020.12.14 Software Release 4.26.0
2021.01.11 Software Release 4.28.0
