Mobile Application – Checking in and Managing Retail Customers
Flourish Software's mobile application enables streamlined check-in and management of retail customer profiles from your device. Checking in a Customer. Open the Flourish mobile application and log i…
Flourish Software's mobile application enables streamlined check-in and management of retail customer profiles from your device.
Checking in a Customer
- Open the Flourish mobile application and log in using your credentials.
- Select Retail from the main menu to access the "CHECK IN" Screen
- From the CHECK IN screen, you can
- Scan an ID to pull up the Customer Profile
- Manually create a new customer profile
- Search for existing customers by name or other details.
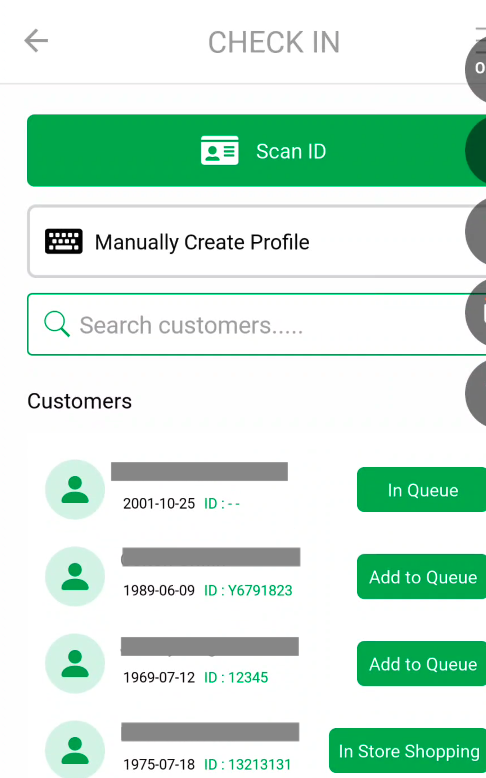
- Tap Scan ID and use your device to scan the customer's government-issued ID.
- Flourish will auto-populate the customer profile and trigger age verification if the ID is detected and valid. Once verified, tap Check Customer In to proceed to shopping.
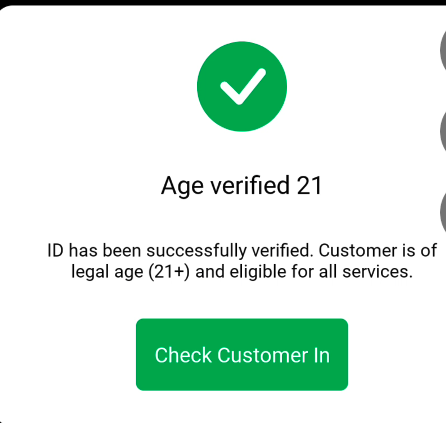
- Flourish will auto-populate the customer profile and trigger age verification if the ID is detected and valid. Once verified, tap Check Customer In to proceed to shopping.
- Flourish prompts you to manually create a customer account if the ID is not detected or readable.
Manually Creating or Editing Customer Profiles
Tap the option to create a profile from the CHECK IN screen manually, enter the customer's information, and save the profile to check them in. You can also edit existing customer profiles anytime through the mobile app.
Manage Customer Documents
Keep required documents — state IDs, medical cards, and similar — on file right from the customer's profile, without leaving the register.
Where: open the customer's profile (tap a customer from Check-In, or View Profile after scanning their ID) and scroll to the Documents section. Documents added here sync with the customer's profile in the Flourish web app, and vice versa.
Add a document:
- Tap Add Document.
- Select the Document Type — the list matches your company's document types, e.g. Driver's License, Medical Card.
- Set the Expiration Date if the document has one (tap the calendar icon — for example, a medical card's expiry), and select the State.
- Tap Take Photo and photograph the document, or tap Choose from Gallery to pick an existing image.
- Check the preview — tap Retake Photo if it isn't legible.
- Tap Upload. You'll see "Document uploaded successfully" and the document appears in the list.
Each document holds one photo — for a multi-page document, add an entry per page.
View a document: tap it in the list. Photos open right in the app; PDFs uploaded from the web open in your device's PDF viewer.
Delete a document: tap the X on its row and confirm. This removes the document from the customer's profile (files are retained per record-keeping requirements). To correct a document's type, date, or photo, delete it and add it again.
Troubleshooting:
- "You do not have permission to upload customer documents" — your role needs the Retail Check-In permission; ask your admin.
- "Camera permission is required to photograph documents" — allow camera access when prompted, or enable it in your device's app settings.
- Can't pick a past expiration date — expiration dates must be today or later; a document that's already expired shouldn't be added as valid.
How did we do?
Mobile App - Retail Order Fulfillment
Manage Retail Deliveries & Orders with Flourish Mobile App
