Table of Contents

Canada - Destroy plants

Our friends in Canada can submit the information required when destroying plants. Check out the process and the steps below. Select the plants to destroy. From the Groups view. Use the Groups view to…

Table of Contents

Our friends in Canada can submit the information required when destroying plants. Check out the process and the steps below.

Select the plants to destroy

From the Groups view

Use the Groups view to select plants of the same group in the Cloning, Vegetation, or Flowering phases. In this example, we will use the Vegetation phase.

  1. Click Grow.
  2. Click Vegetation / Veg Groups.
  3. Locate the group.
  4. Click the 'eye' icon to display the active plants for this group in the Plants in Vegetation screen.
  5. Click and highlight one or more plants (Use the Pro tips on the page)
    The image shows the "Plants in Vegetation" screen header in the Grow module, featuring a green title bar and filter/refresh icons, along with a "Pro tips" toolbar that explains…

From the Plants view

Use the Plants view to select plants in the Flowering or Vegetation phases. In this example, we will use the Vegetation phase.

  1. Click Grow.
  2. Click Vegetation / Veg plants.
  3. Use the filters to locate the plants.
  4. Click and highlight one or more plants (Use the Pro tips on the page).

Destroy the plants

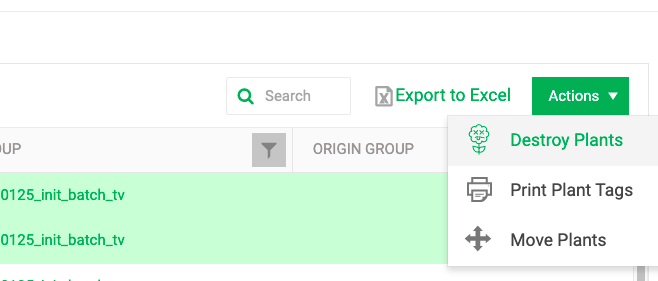
  1. Click the green "Actions" button in the top right and select "Destroy Plants" from the dropdown.
    The screenshot shows the plant management interface with the green "Actions" dropdown menu expanded, displaying three options: "Destroy Plants," "Print Plant Tags," and "Move…
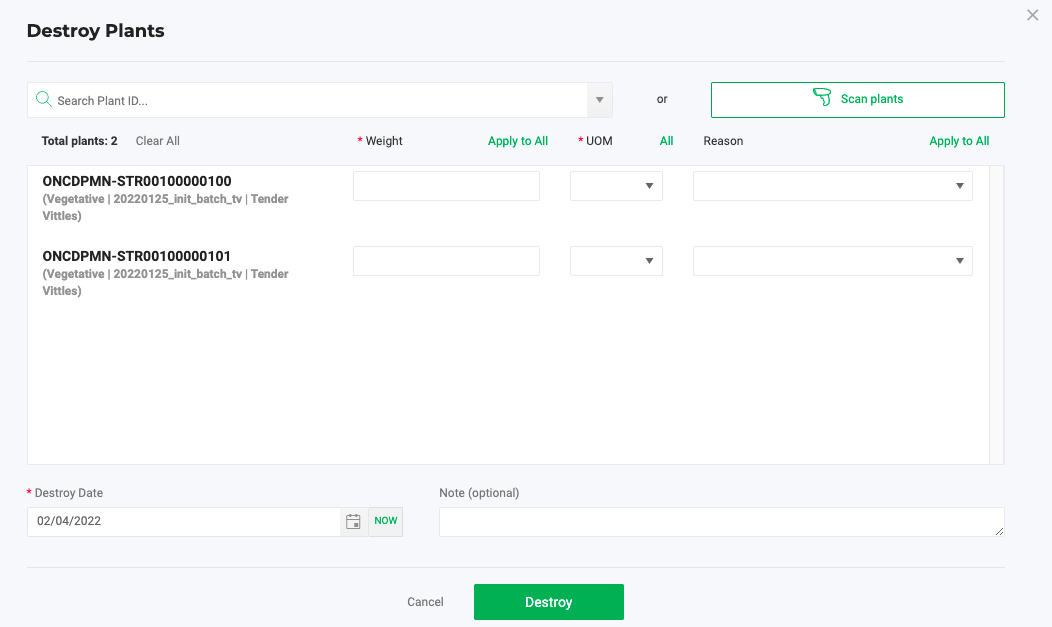
  2. Submit the information on the "Destroy Plants" modal:
    The "Destroy Plants" modal dialog showing two selected vegetative plants (identified by their ONCDPMN-STR IDs and batch details), with required fields for Weight and UOM, an…
    1. Type the "Weight" of the plant.
    2. Type the "UOM" for that weight.
      After defining the "Weight," "UOM," or "Reason" for the first plant, you can click "Apply to All" and All, which will copy and paste the same information to all the plants under it.
    3. All the other fields are optional. (Learn more about 'Reason'.)
    4. The "Destroy Date" defaults to today's date.
  3. Click The image shows a green "Destroy" button, which is the confirmation button users click to finalize the plant destruction process in the Grow module.

After destroying the plants, they are logged as "DEAD" under Inventory>Plants>All Plants>Plants: Dead.

Add a "Reason" for killing the plants

You can specify a "Reason" for killing the plants.

If you need to create a new plant adjustment "Reason" for the destroy plants action, then follow these steps:

  1. Navigate to Settings.
  2. Select Inventory.
  3. Select Items>Inventory adjustment codes.
    The image shows the Flourish software navigation menu with the Settings > Inventory > Items submenu expanded, highlighting the "Inventory adjustment codes" option as the currently…
  4. Click on "Create New Adjustment Code"
  5. For the "Type," select "Plant Adjustment."
  6. Provide an applicable "Adjustment Code Reason Name" (e.g., "Excessive Heat")
  7. Fill out the optional fields if desired
  8. Click "Save."

The new Plant Adjustment Reason will be available in the dropdown menu while destroying plants in the Grow module.

How did we do?

Kill Individual Plant IDs from Plant Groups

Record Cultivation Waste (Pre-Harvest)

Contact