Table of Contents
Creating New Outbound Orders
Creating New Outbound Orders. New outbound orders can be used to record the movement of wholesale inventory out of a facility to another location. These orders may be referred to as a Sales Order, Di…
Creating New Outbound Orders
New outbound orders can be used to record the movement of wholesale inventory out of a facility to another location. These orders may be referred to as a Sales Order, Distribution Order, Transfer Order, etc.
Video
Create a New Outbound Order
Follow these steps to create a New Outbound Order
- Click Outbound from the left side menu
- Click the green Create New Order button
- Enter in the following details
- Created Date: Today’s date. The date you are creating the Outbound order
- Customer PO: Customer specific purchase order number. This can be unique to your facility.
- Sales Rep: The Sales representative initiating the outbound purchase order. Sales reps will need be set up in advance. Navigate to Manage Settings, Distribution, Sales to add new Sales Reps
- Distributor: Select the distribution company you are using. Leave blank if this is not applicable. Distribution companies will need to be set up in advance. Navigate to Manage Settings, Distribution to add a new distribution company.
- Destination: Select the destination of the outbound purchase order. Destinations will need to be set up in advance. Navigate to Manage Settings, Distribution, Destinations to add a new destination.METRC Facilities
When you select a Destination, Flourish remembers the Transfer Type you selected last time and automatically populates it. - Optional: "Bill to different facility"
Check this box if you ship the inventory to one destination, and bill a different destination you select from the dropdown.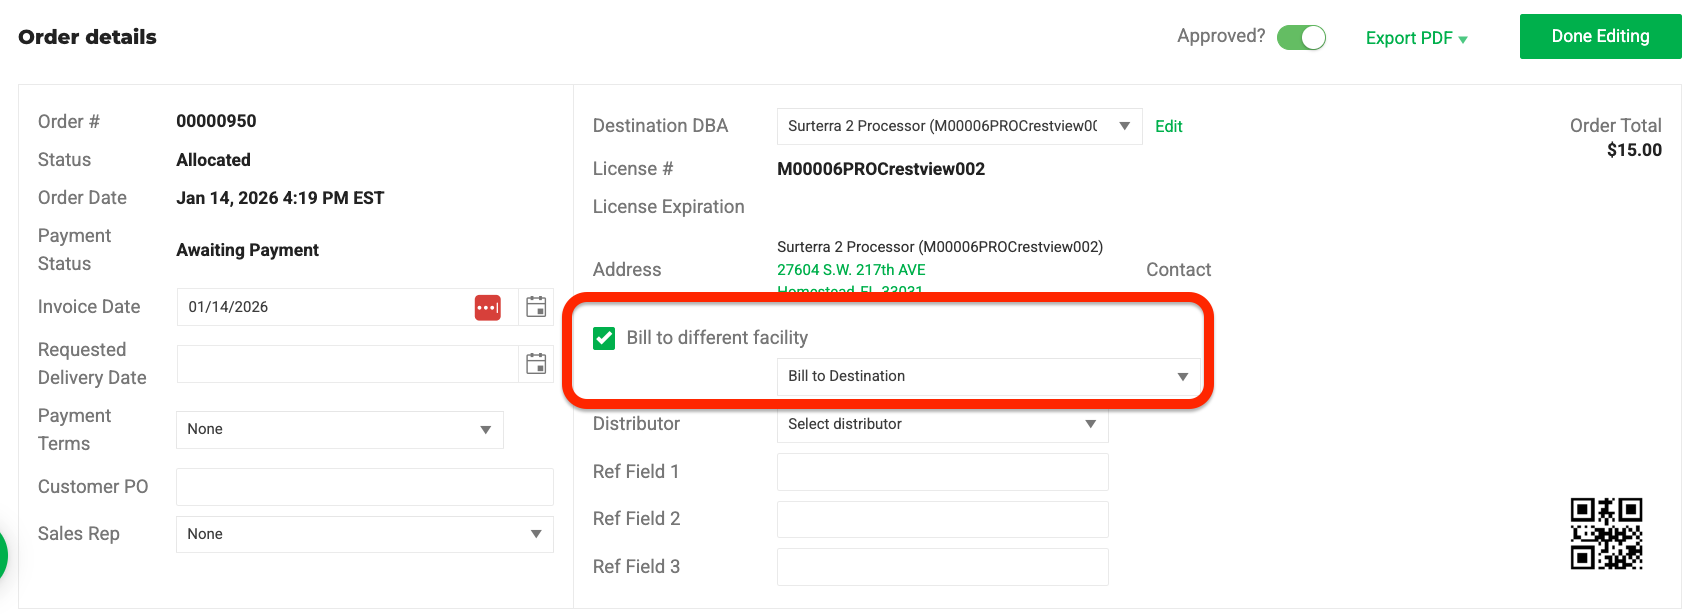
- Requested Delivery Date: When the delivery should be made to the destination. Initiating new outbound purchase orders ahead of delivery dates ensure that the necessary products are allocated and saved for customers and ensures an uninterrupted supply chain.
- Optional: Ref Field 1, Ref Field 2 : Use these reference fields to record any necessary data. These fields are optional and can be left blank.
- On Shipment: See how to create a shipment from the order screen.
- Terms: Select the appropriate payment term for this customer.
- Click Start Order
- Under Order Detail, click +Add New Detail
- Under Item Name, select the item you wish to add to the purchase order from the drop-down menu. Note, each item has the available quantity on hand in parenthesis next to the item name.
- Select the Strain from the drop-down menu
- Enter in the Qty. Ordered
- Adjust the Unit Price
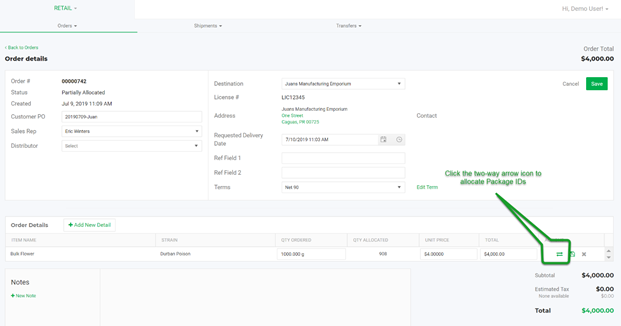
- Under Actions, click the two-way arrow icon to allocate packages to this sales order
- Select the appropriate packages to allocate
- Click Update Allocation
- Click Save
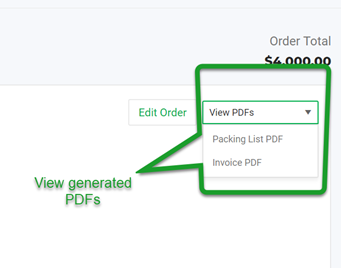
- Two PDFs have automatically been generated. To view your Packing List PDF and Invoice PDF, select the options using the drop-down menu located under the Order Total
Adding an Order to a Shipment from the Order Detail Screen
Purpose
The Add to Shipment control on the order detail screen lets you assign an order to a shipment or create a new one without leaving the order. This reduces the steps needed to manifest an order for delivery.
Add an order to an existing shipment
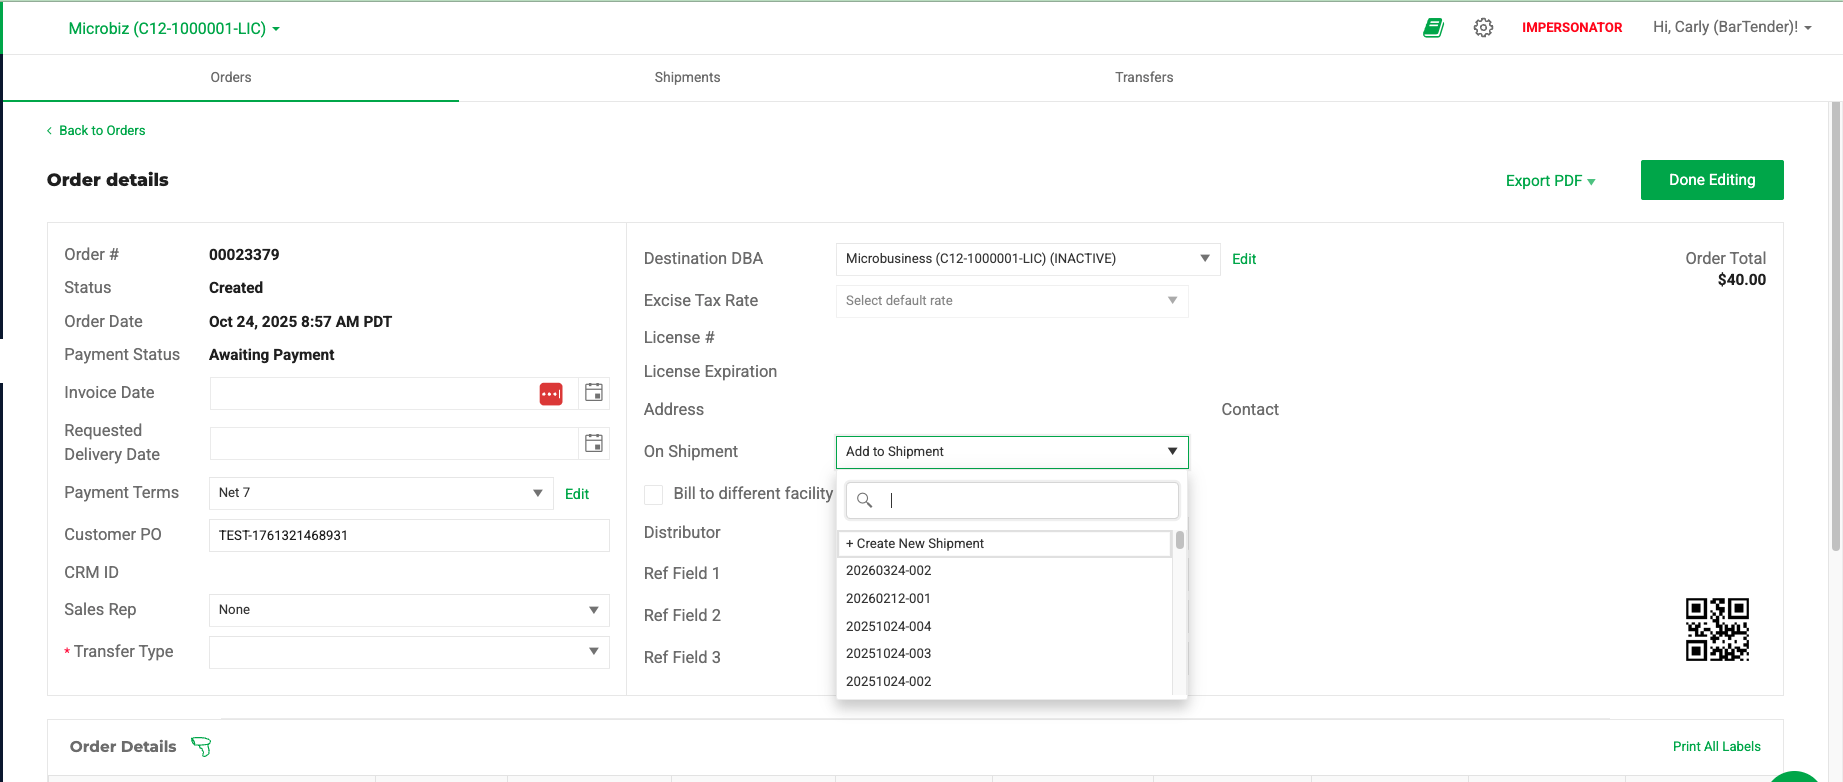
When an order is not yet assigned to a shipment, the On Shipment field displays an Add to Shipment dropdown.
- Open the order in Outbound.
- Locate the On Shipment field in the order header.
- Click Add to Shipment.
- Select a shipment from the dropdown. The dropdown shows open shipments for the same facility, sorted by creation date. It includes shipments in the following statuses: Created, Orders Assigned, and Manifest Printed. The list displays up to five shipments. Scroll down to see more. Select the shipment to assign the order to. Flourish saves the association and the On Shipment field updates to display the linked shipment number.
Create a new shipment from an order
- Open the order in Outbound.
- Locate the On Shipment field in the order header.
- Click Add to Shipment.
- Select + Create New Shipment.
Flourish opens the shipment creation flow in a new tab. The order's destination is pre-populated as a stop, and the order is already attached. For steps to complete the new shipment, see Creating a Shipment.
How did we do?
Create Outbound Sales Orders in Flourish
Allocate Packages to Outbound Order