Florida BioTrack Facility Areas Creation
This document is specific to the Florida BioTrack STS Integration for Flourish Software. Click here for General instructions on Creating Locations and Areas. When you create an Area in Flourish, you…
This document is specific to the Florida BioTrack STS Integration for Flourish Software.
Click here for General instructions on Creating Locations and Areas.
When you create an Area in Flourish, you must designate an "Area type" to sync it to BioTrack.
Flourish Software has several Area Types, which all map to BioTrack as 'Plant' or 'Inventory'.
Please follow the steps below to create and set your Areas:
- Go to Setting.
- Select Facilities.
- In the Facilities List, click the eye icon
 next to the facility you need to enter the Areas page.
 - Click "Add New" to enter the "Add Area" screen:
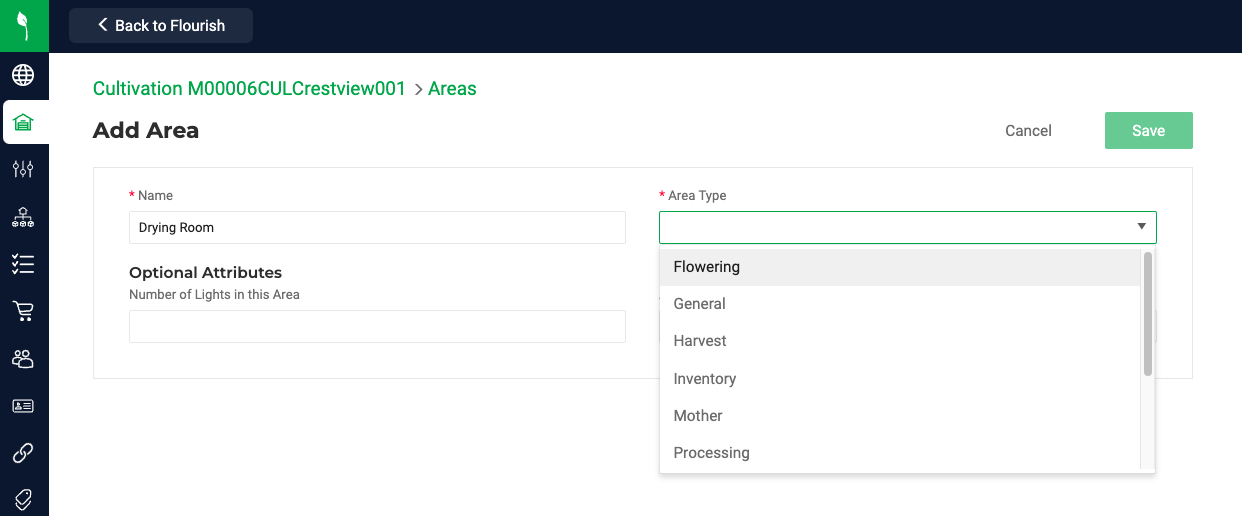
- Type the Name.
- Select the "Area Type":
- To set an area for plants, it must be of the type (Vegetative, Mother, Flowering, Drying, Processing, Harvest)
- To set an Are for Inventory, it should be the type (Inventory, Quarantine, General, Unspecified, Waste)
- Add the Optional Attributes.
- Click 'Save'.
- Please make sure the Area you created is in sync. If it is not, don't hesitate to contact us.

How did we do?
Florida BioTrack Delivery Devices
Florida BioTrack Lab Samples and COA Management
