Florida BioTrack Cultivation Management guide to actions within Flourish's Cultivation Module such as viewing plants, moving plants, destroying plants, logging plant waste, etc.
This document is specific to the Florida BioTrack STS Integration for Flourish Software
Manage all plants within Flourish's Cultivation Module.
Refer to the Florida BioTrack Propagation help document for instruction on how to create clones, plant tissue, and seeds as well as how to plant plants.
Refer to the Florida BioTrack Harvesting help document for instructions on how to harvest plants and manage the drying and curing process.
Plant Barcodes and Syncing
The BioTrack STS system generates plant barcodes. When a user creates the plants, Flourish sends the relevant information to BioTrack. BioTrack returns the barcodes as the Plant IDs.
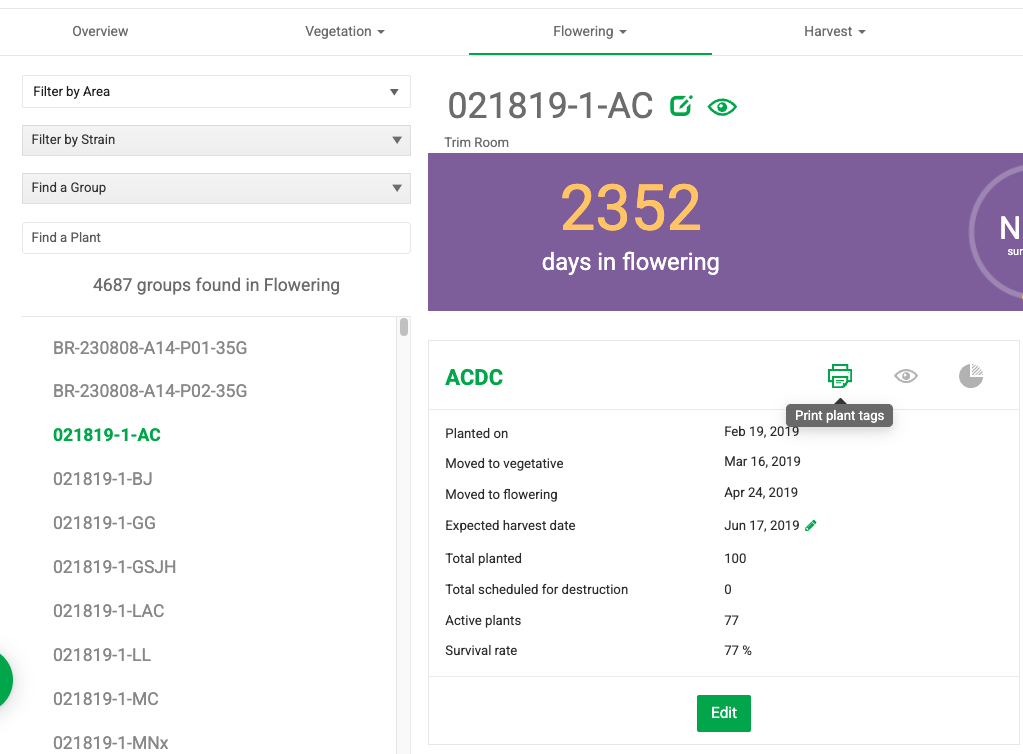
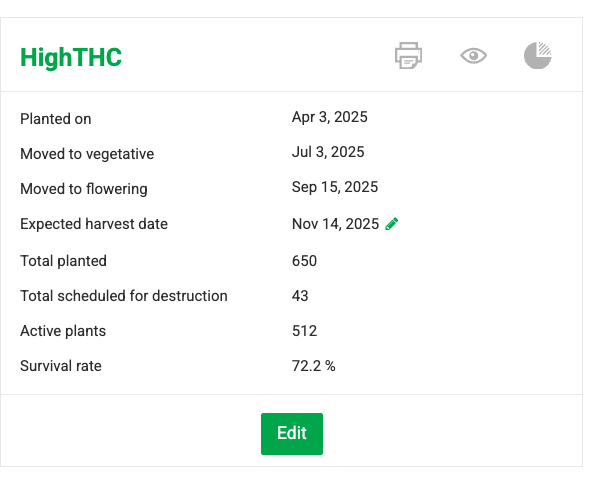
Print Plant Tags using the print icon within the Group screen
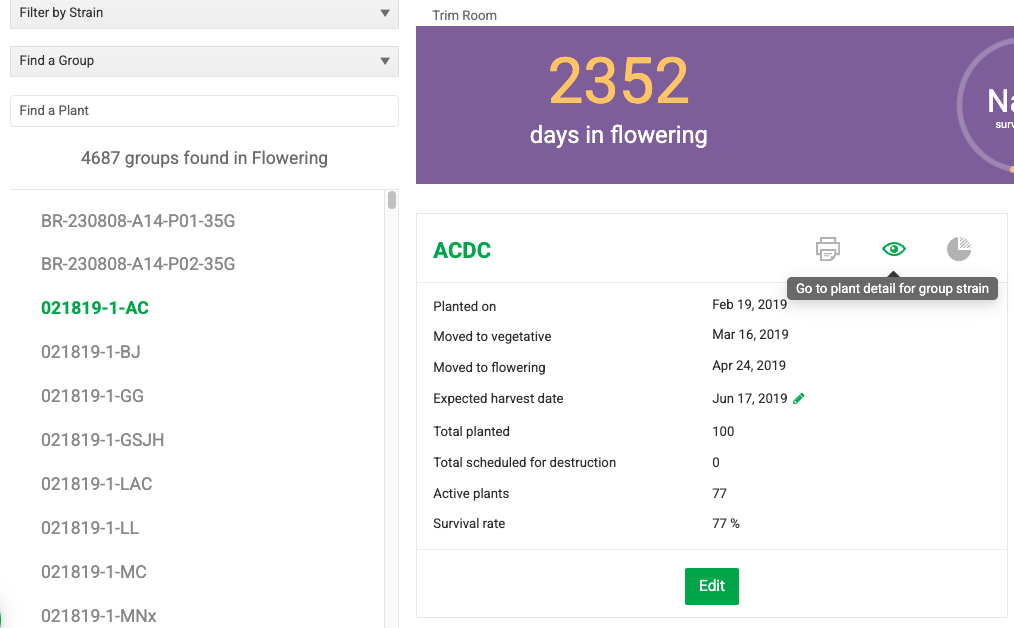
Use the eye icon to quickly view all plants. This navigates to the "Plants In..." screen and filters it by the group name.
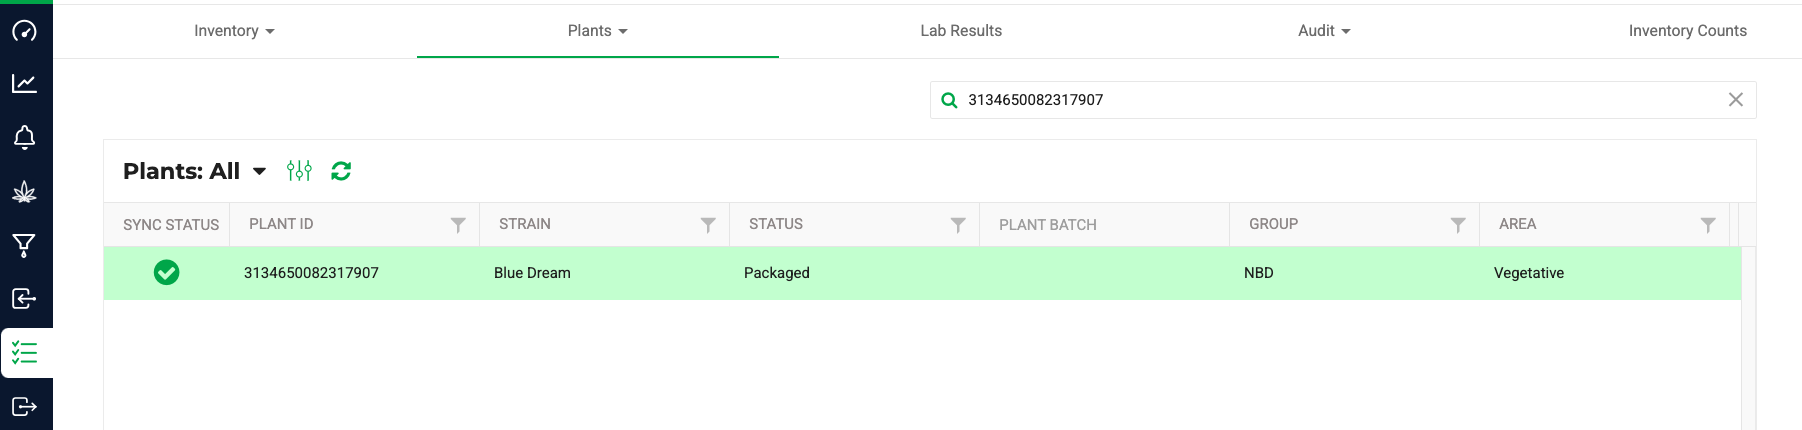
See the "Sync Status" in the Plants screen (available in Vegetation, Mother, and Flower). The green checkmark indicates that the plant record is "in sync" with the state traceability system.
Group Summary Screen Counts
Total Scheduled for Destruction alongside your other plant counts.
Active plants clarified:Active = all plants not marked “Dead” or “Scheduled for Destruction.”
Survival rate accuracy: Plants scheduled for Destruction are treated the same as Dead for survival rate—i.e., they’re not counted as “survived.”
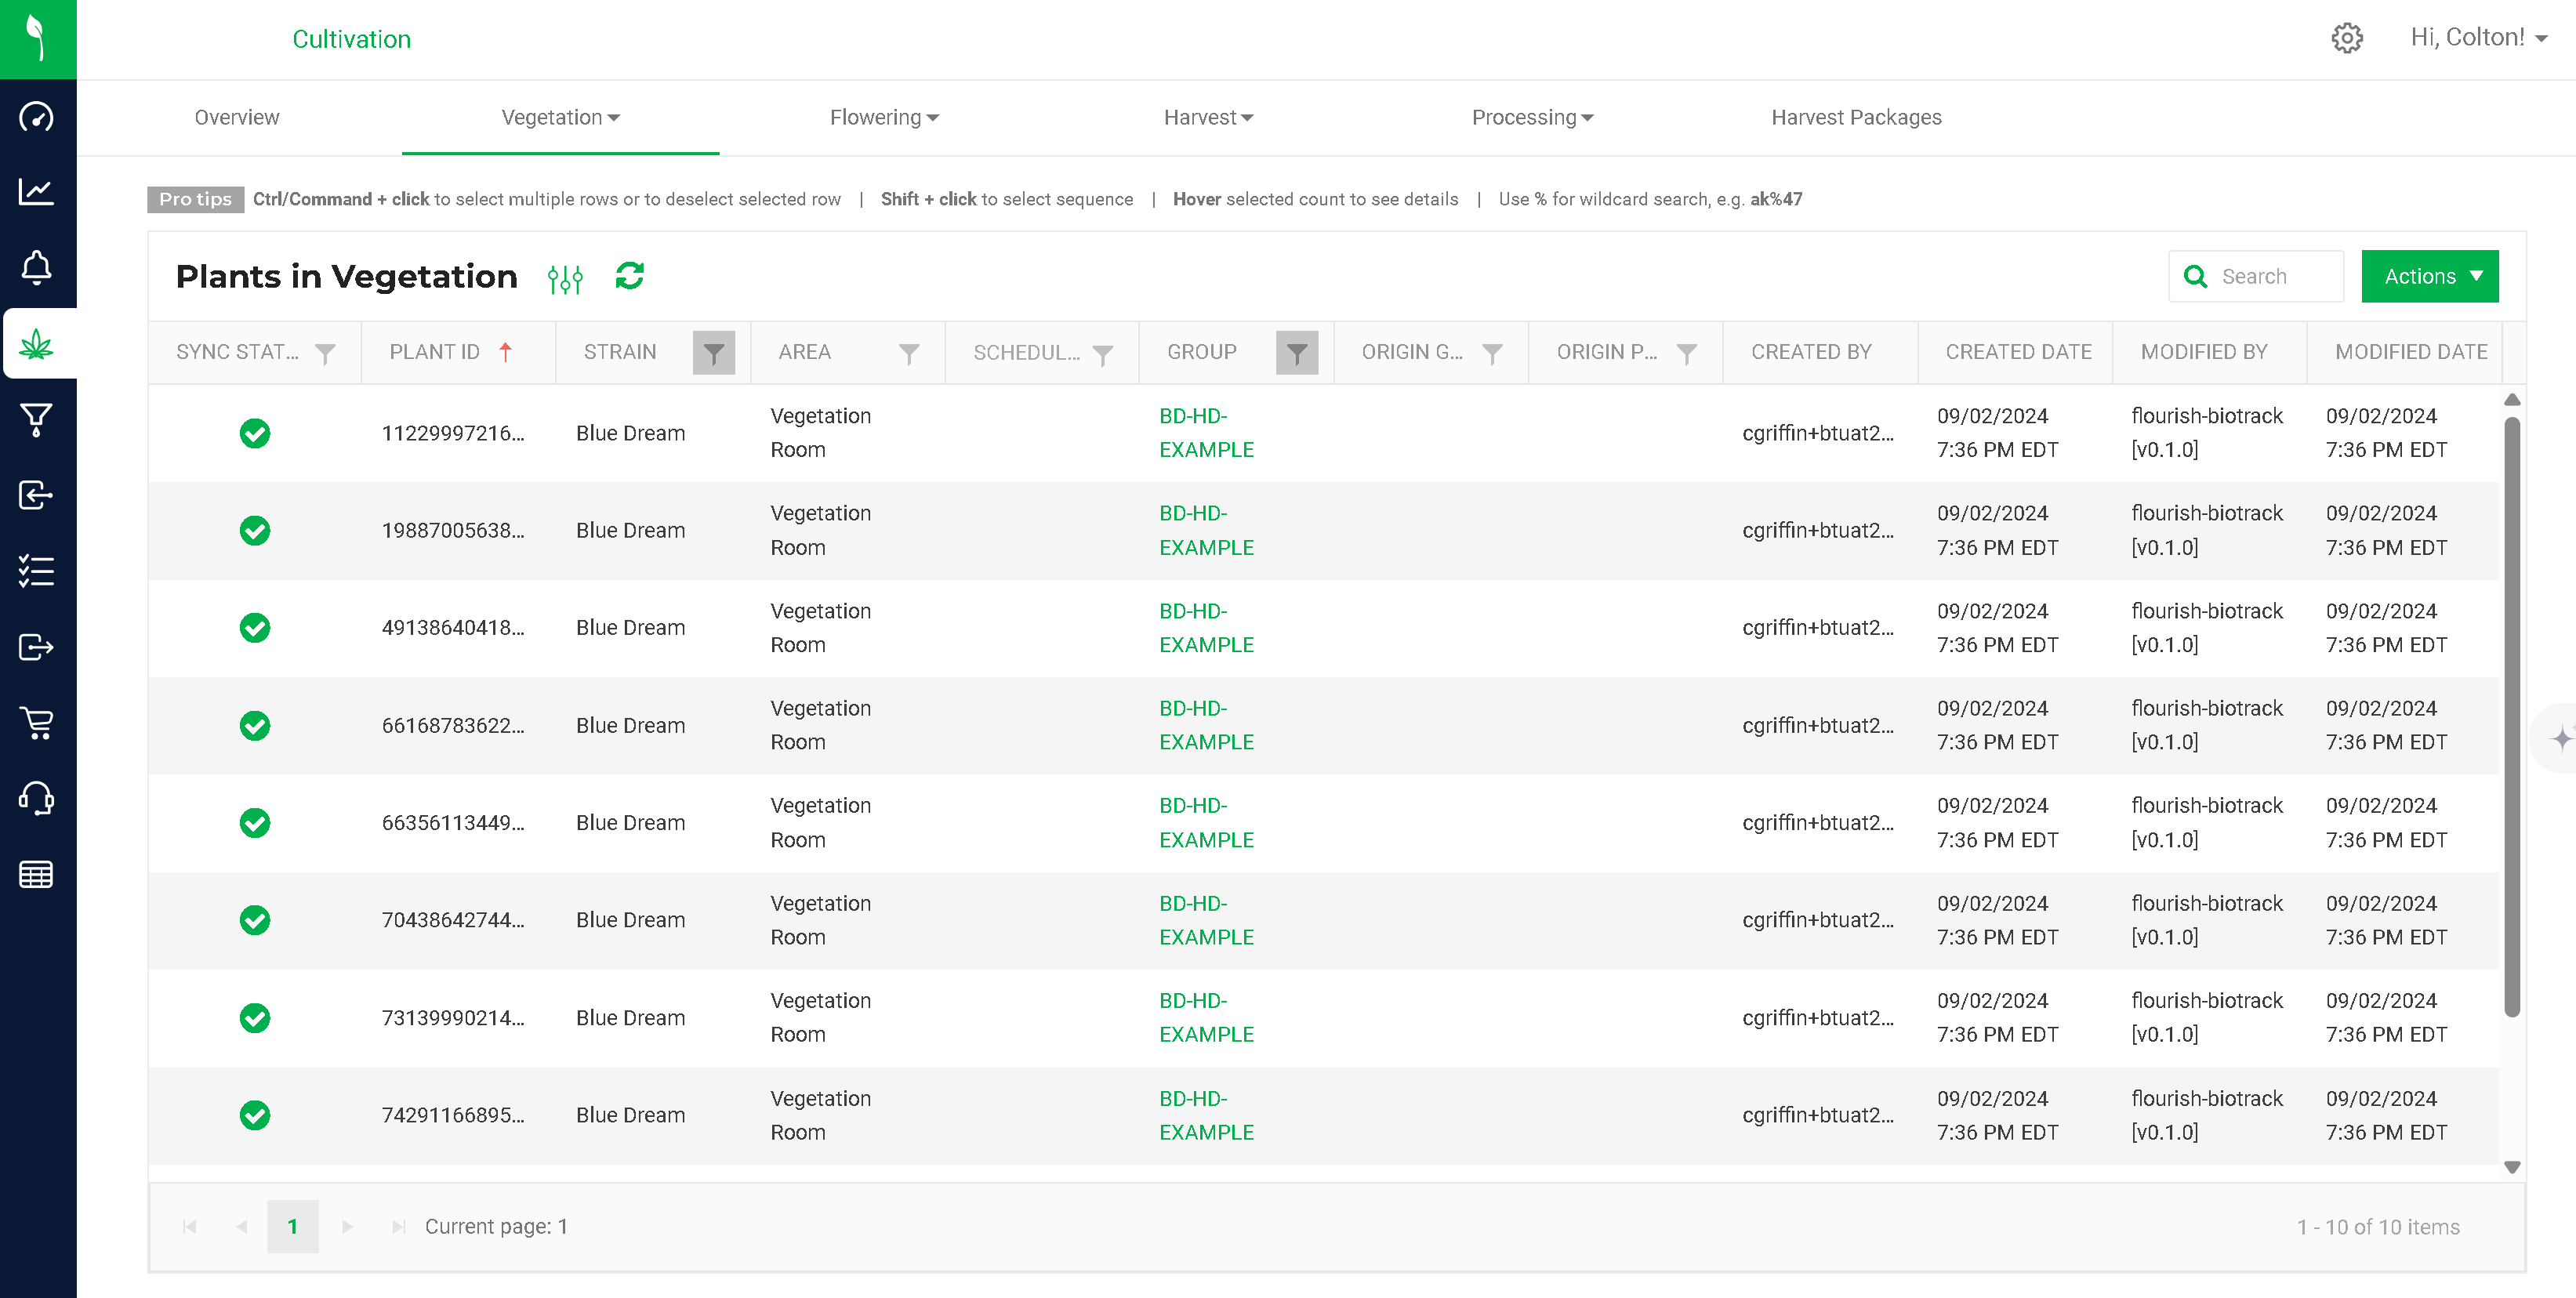
Plants Screen
Data
This screen is available in Vegetation, Mother, and Flowering phases. Here are some tips on how to best use it.
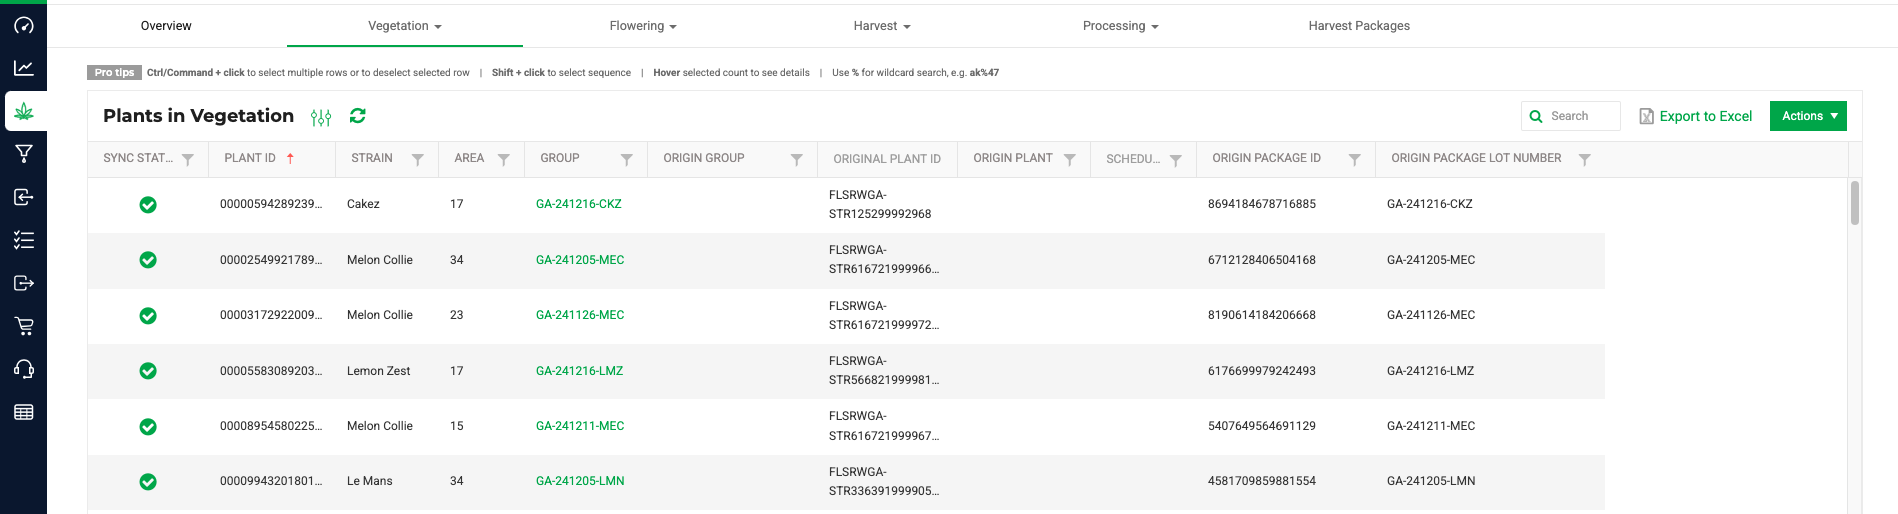
This screen includes the Origin data for the plants to make it easier to locate the Origin of the plants by using, for example:
Origin Plant ID
Origin Group
Origin Package ID
Origin Lot NumberActions
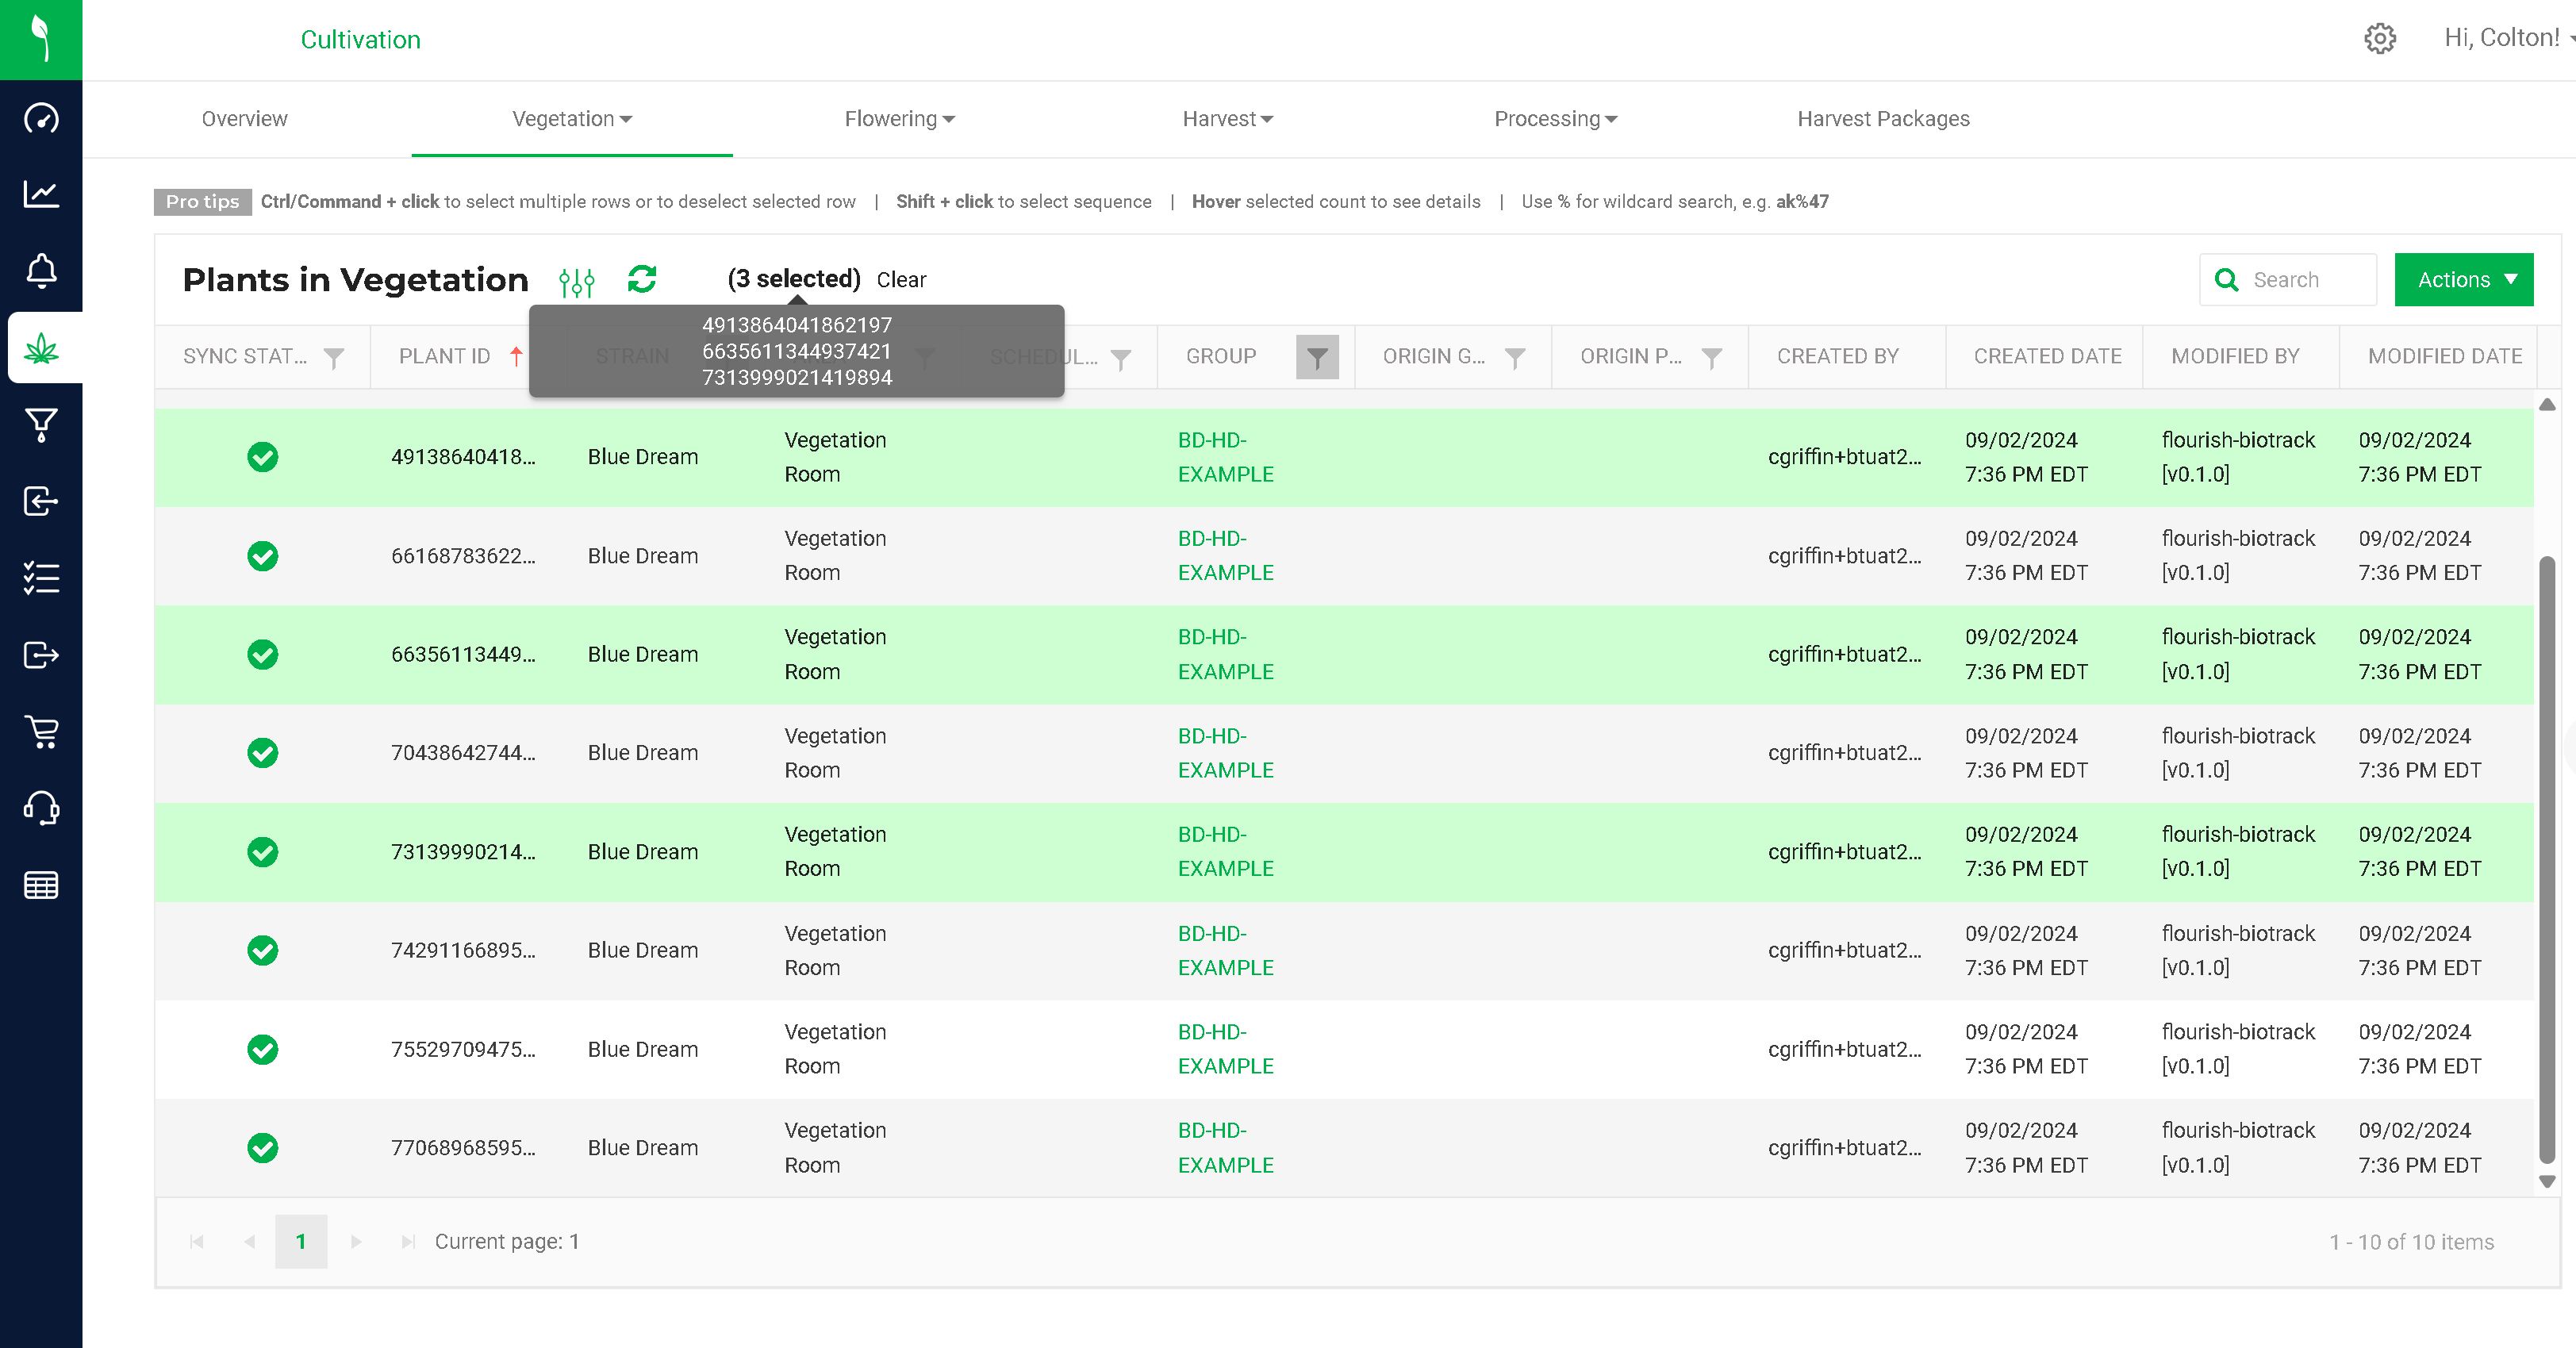
Use Ctrl/Command + click to select multiple rows or to deselect selected row.
Use Shift + click to select a sequence or rows.
Hover the selected count to see details.
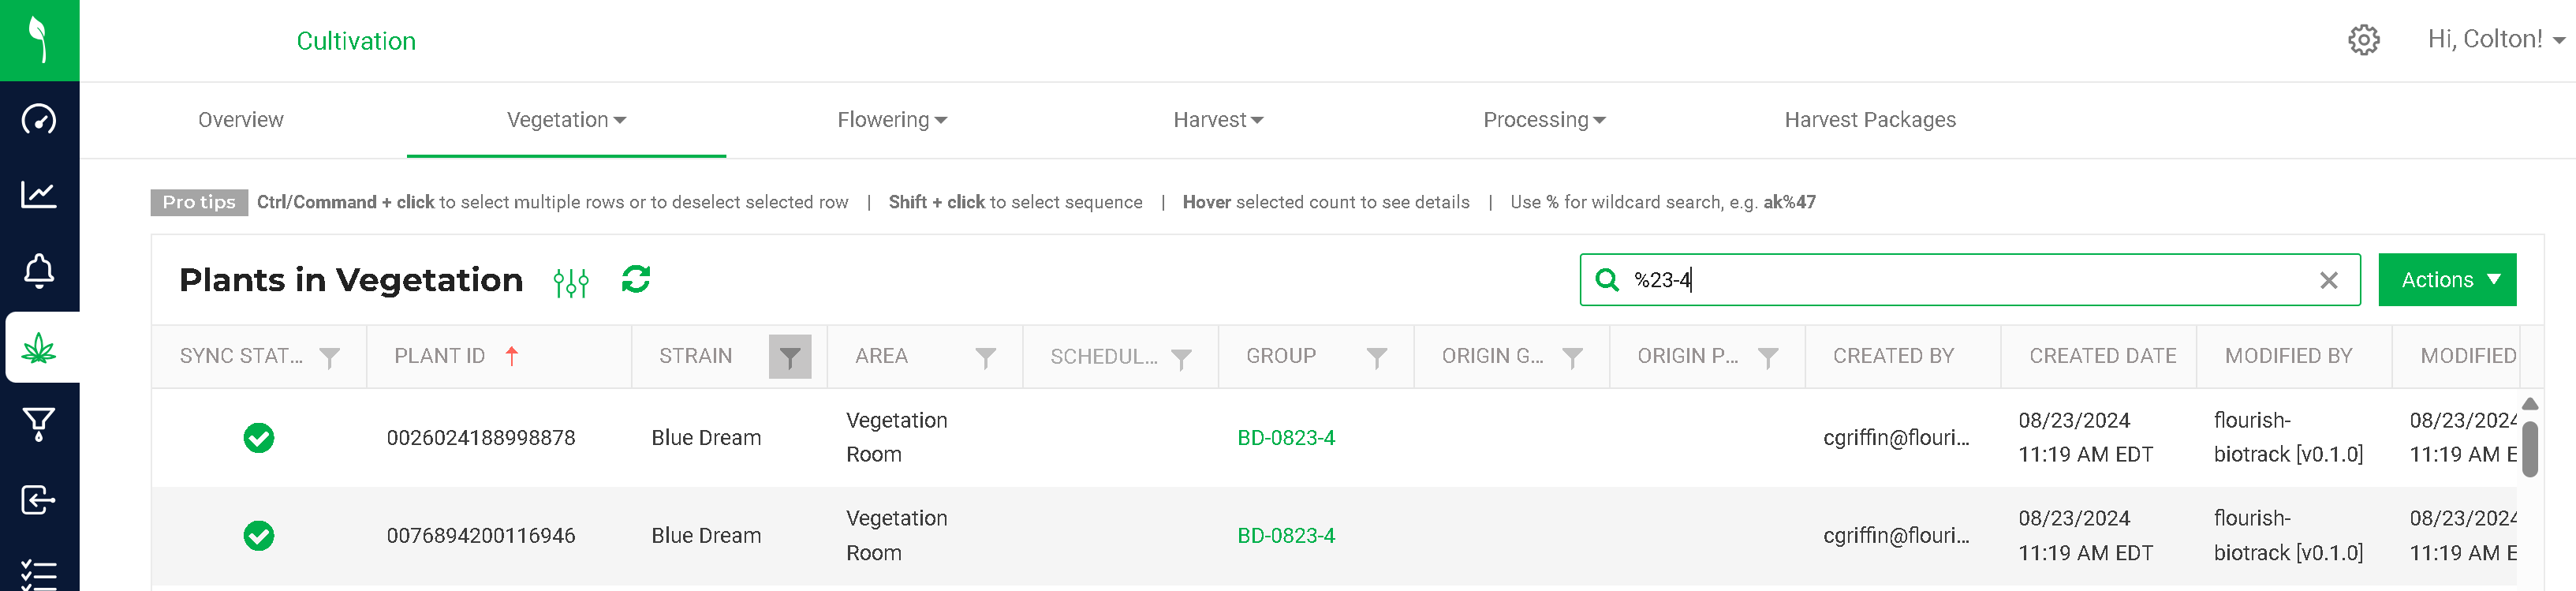
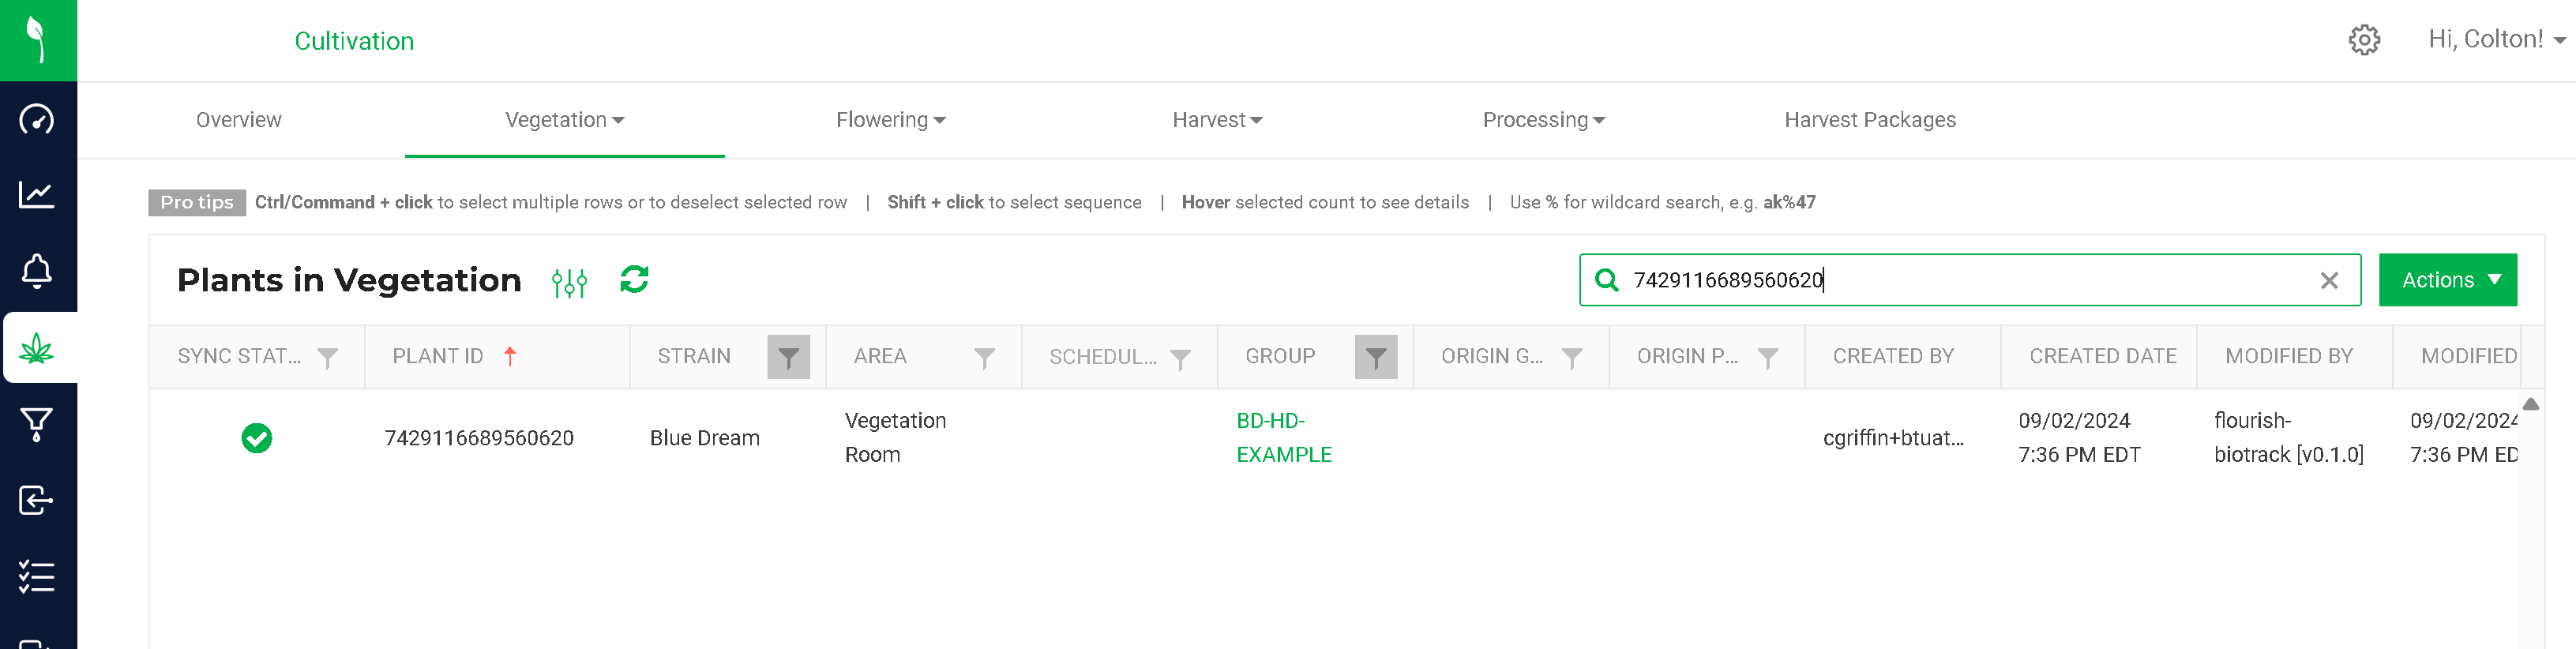
Use % for wildcard search, e.g. ak%47 to search by a pattern. The search works by Plant ID, Group Name, Strain, and Area.
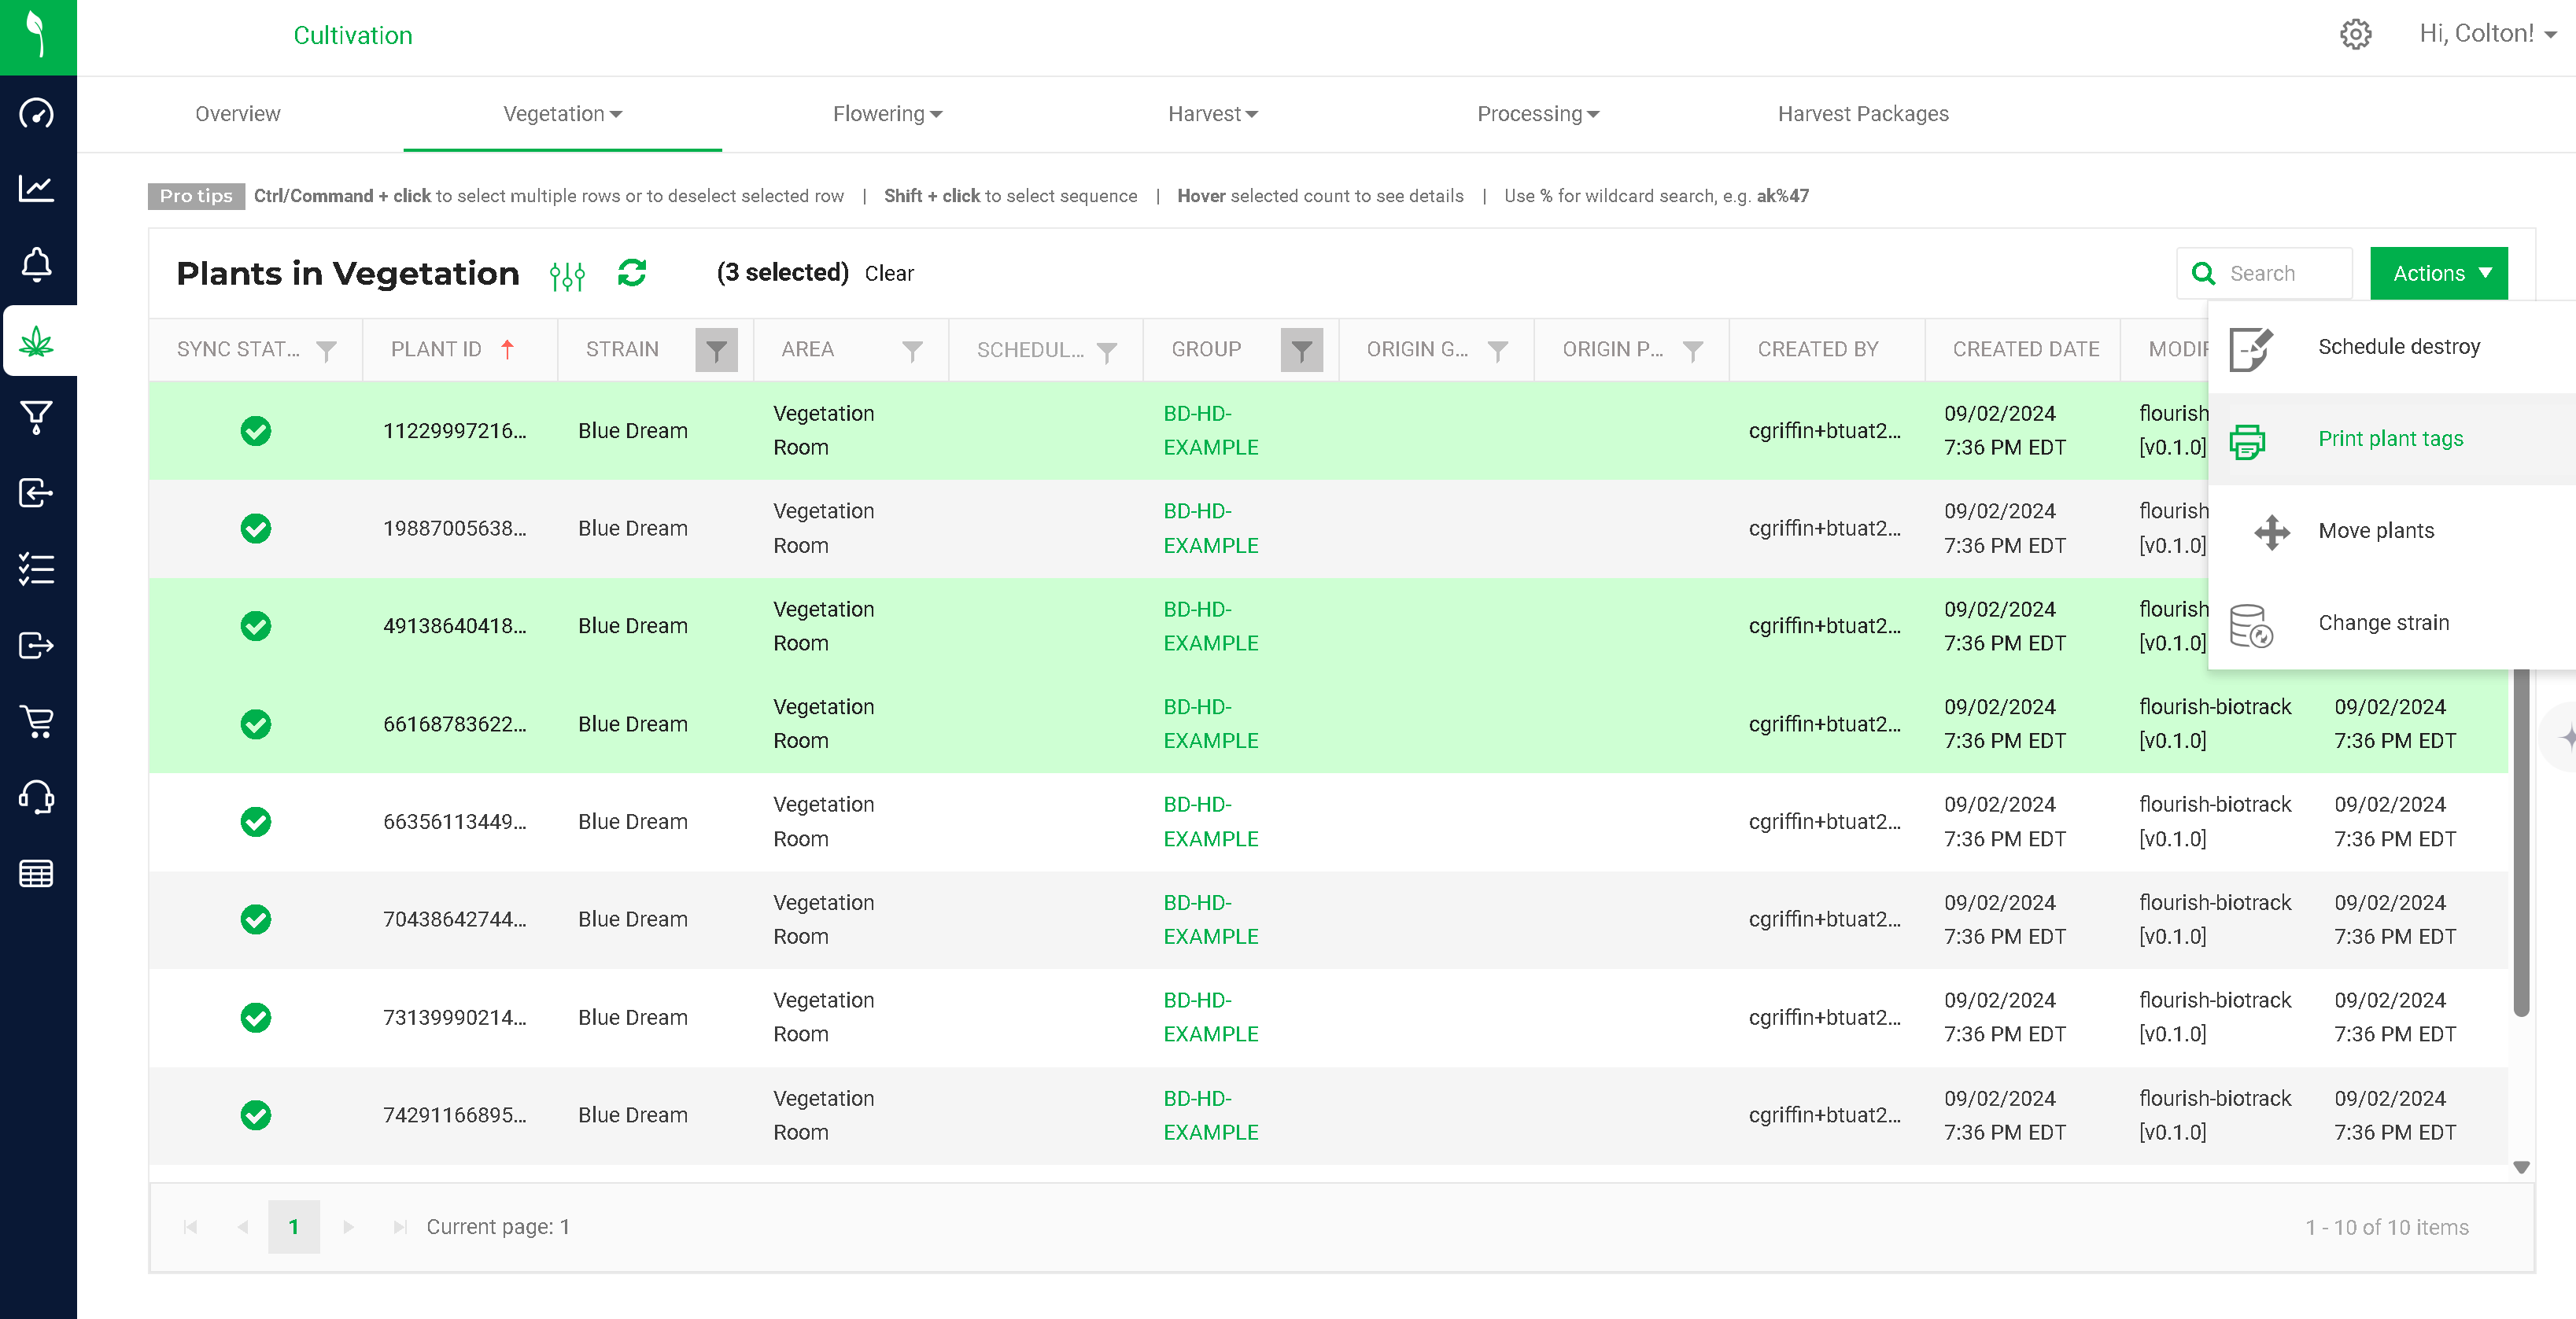
Use the Action menu to print or re-print plant tags as needed.
Plant Phases
Flourish groups plants into three phases within the cultivation module. BioTrack considers immature plants (clones) as inventory, and they are tagged with a package tag and managed within the inventory module.
Vegetation Phase.
Mother Plants.
Flowering Phase.
Plant Movement
Use the "Move Group" or "Move Plant" functions to move plants between Vegetation, Mother, and Flower. BioTrack doesn't restrict plant movement. Flourish expects all plants to be in a "Group," so the application will prompt to "Split Group" if moving individual plants in the application.
Package from Plant
Use the "Package from Plant" menu option to take clones, plant tissue, and seeds into inventory. More details are in the Florida BioTrack Propagation help document.
Clone from Plant
Use the "Clone from plant" menu option within a Mother group or Mother plant (or any plant marked as a "mother") to create Plant IDs directly from a plant in Cultivation. More details are in the Florida BioTrack Propagation help document.
Undo Plant Creation
This feature allows you to "undo" the creation and restore the quantity back into the inventory package that it came from.
Select a recently created plant in Veg/Mom/Flower
Click the sync icon (green checkmark)
Click "Undo Plant Creation"
Confirm and observe the original package is incremented up and the plant is removed from the Grow module
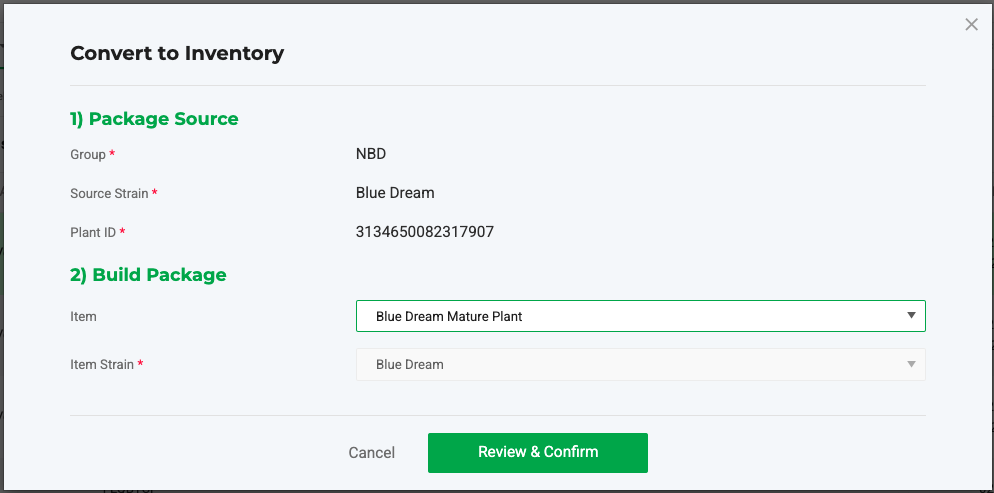
Package Plant(s) into Inventory
This feature allows you to select one or more plants and move them into Inventory. The supported item must be in the "Mature Plant" category.
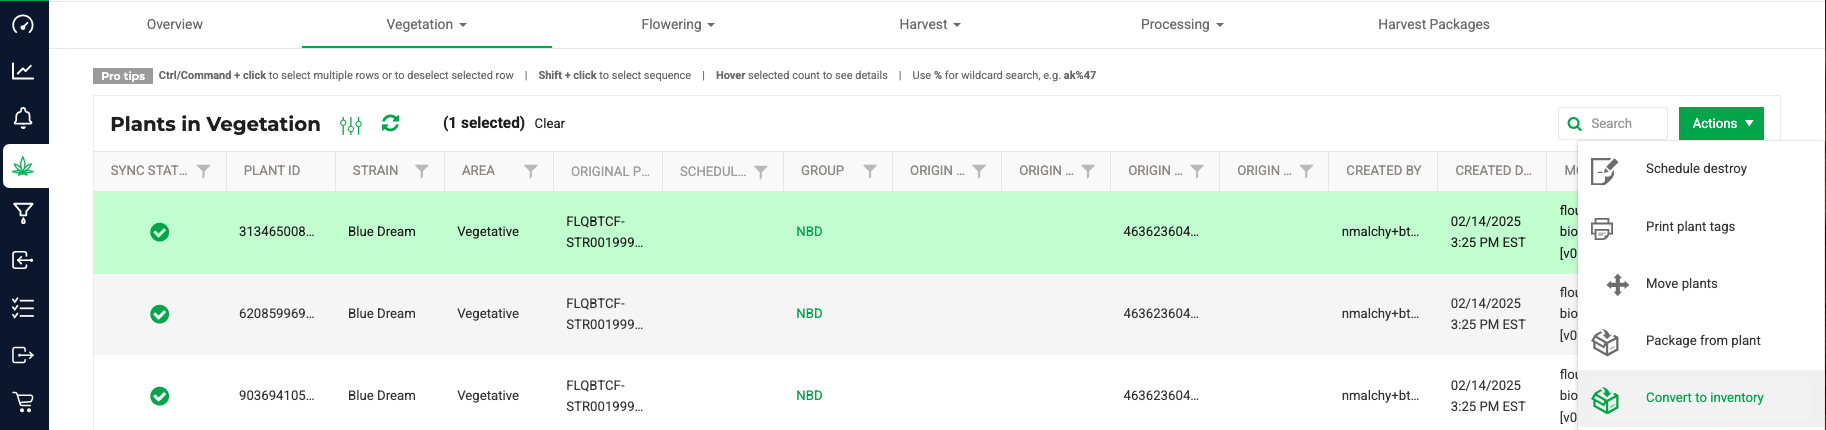
Select a plant from Veg/Mom/Flower
Select Action / Convert to Inventory
On the "Convert to Inventory" screen, select:
Item
Item Strain
Click Review and Confirm
On the "Confirm new package" screen
Select Created Date/Time
Type in the details
Click Create New Package
Observe the plant's barcode is now a package ID in the All Packages screen
The status of the plant is now "Packaged".
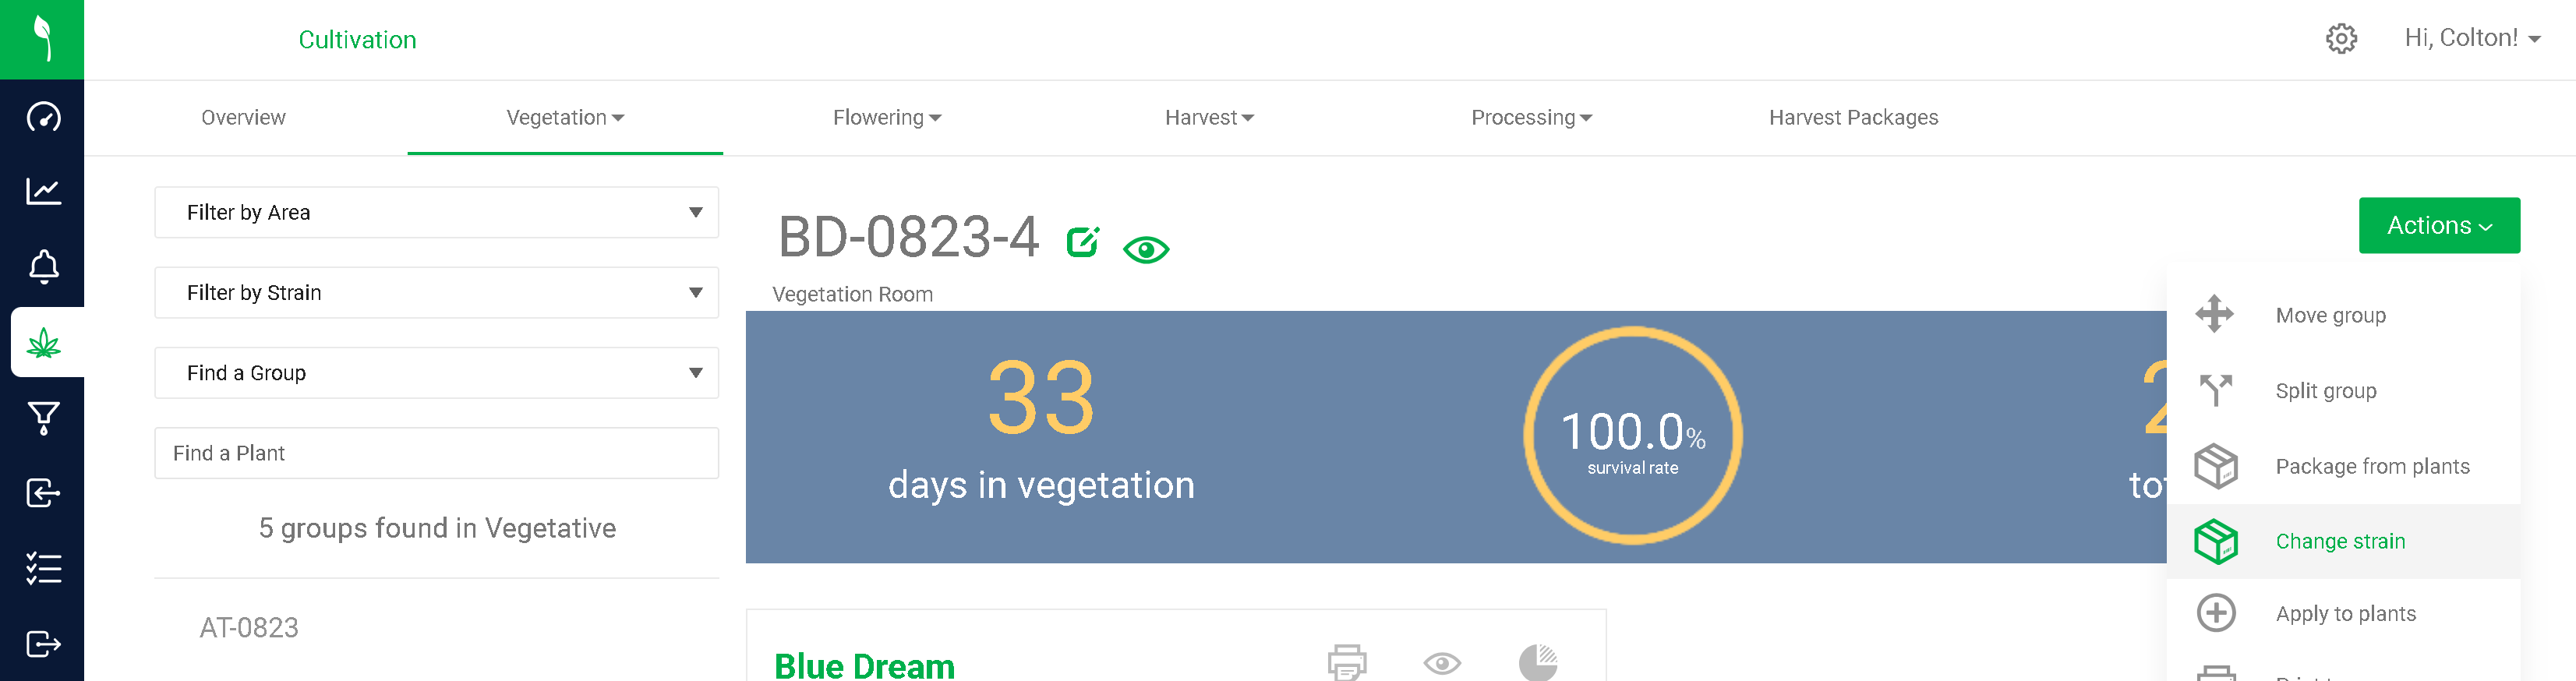
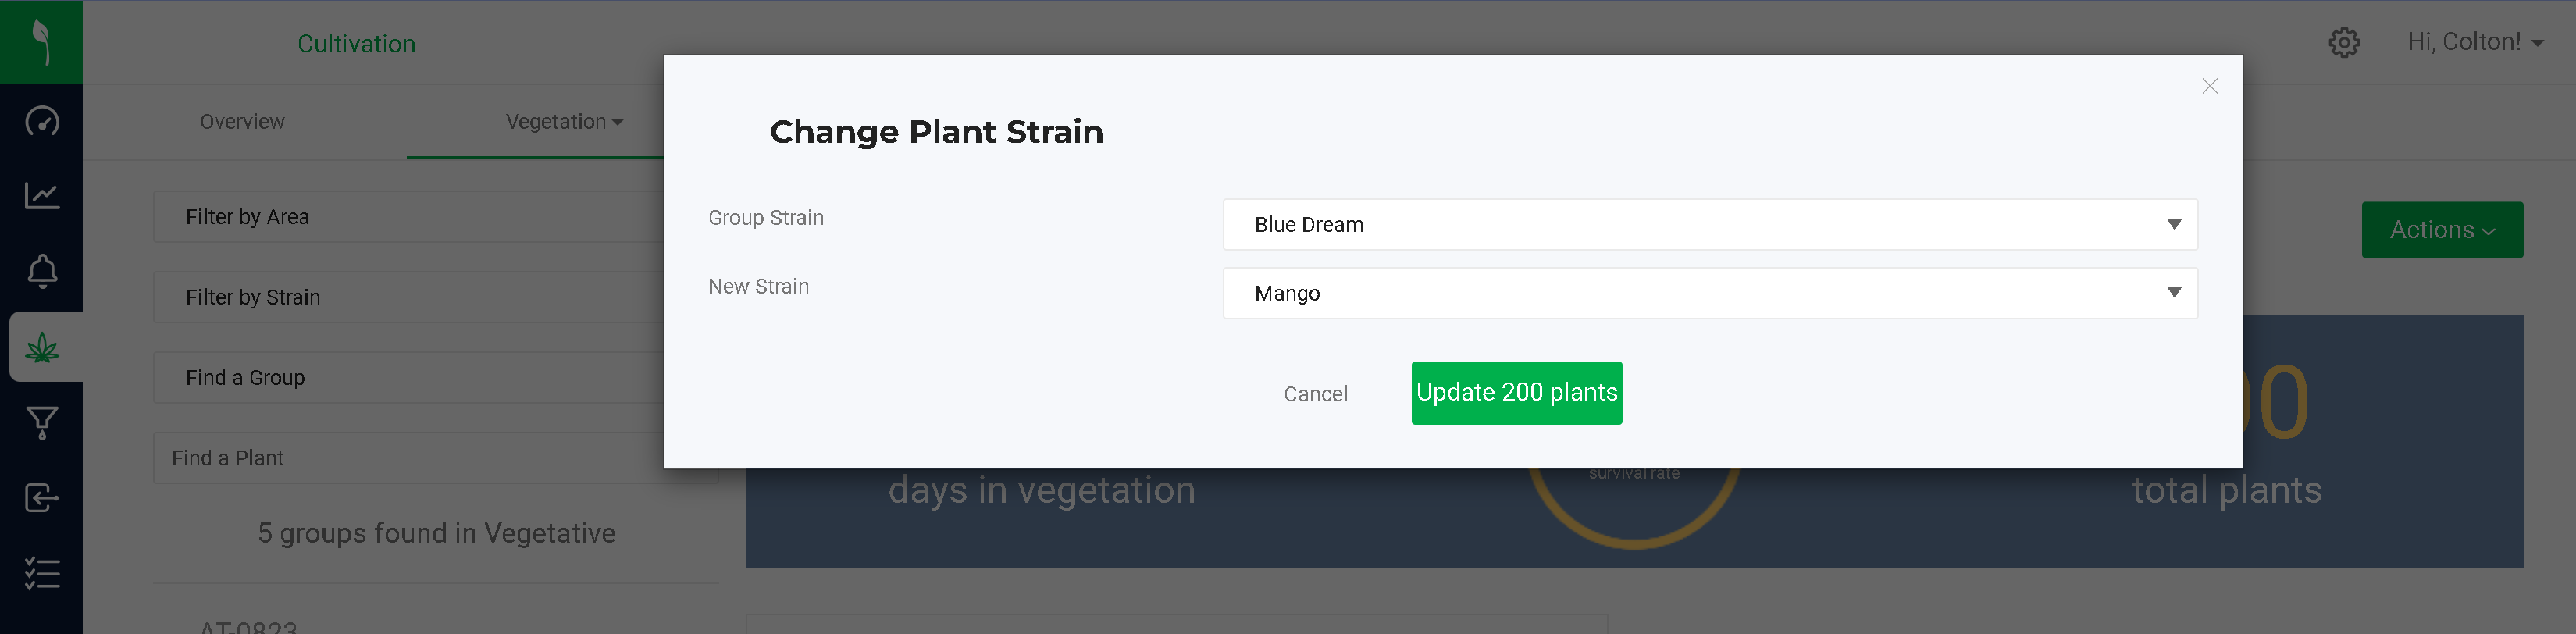
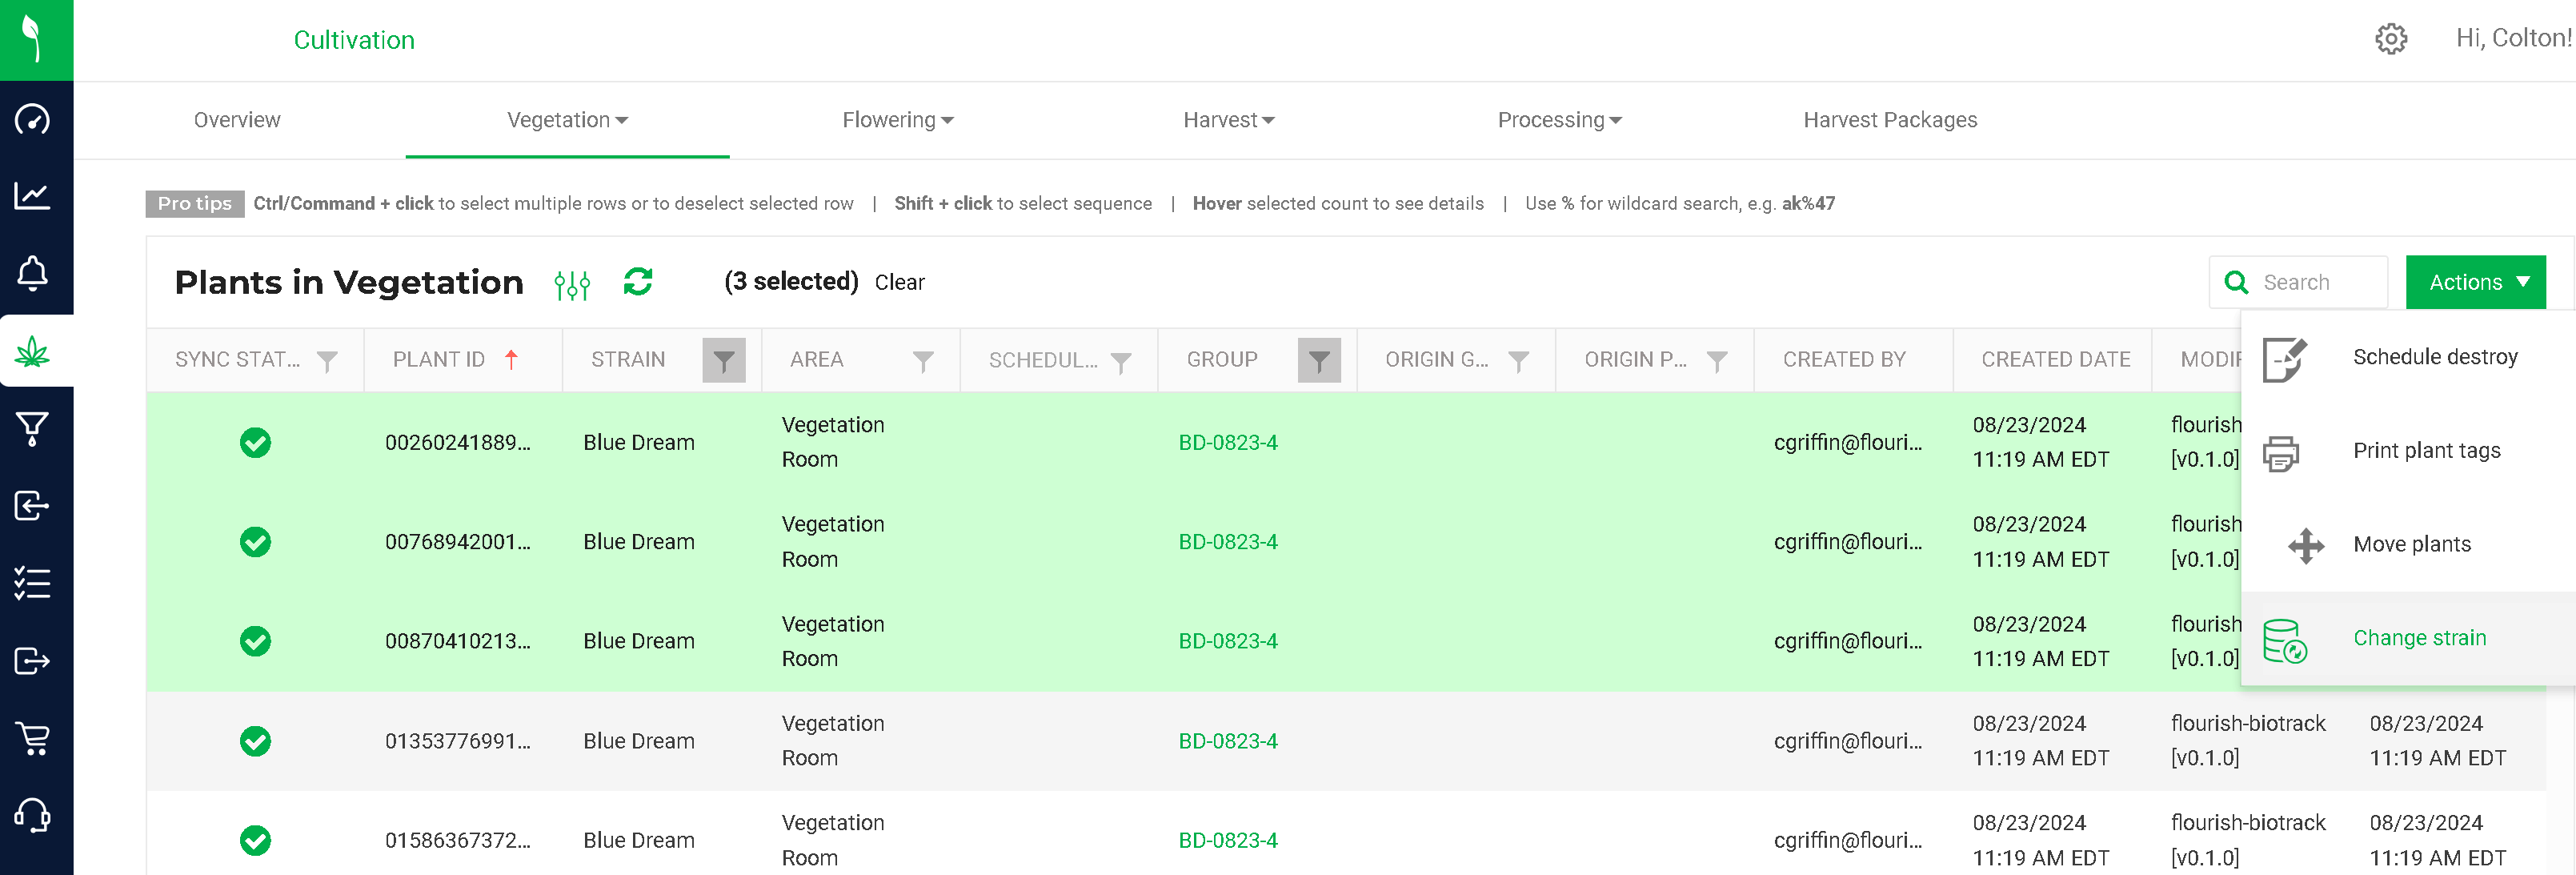
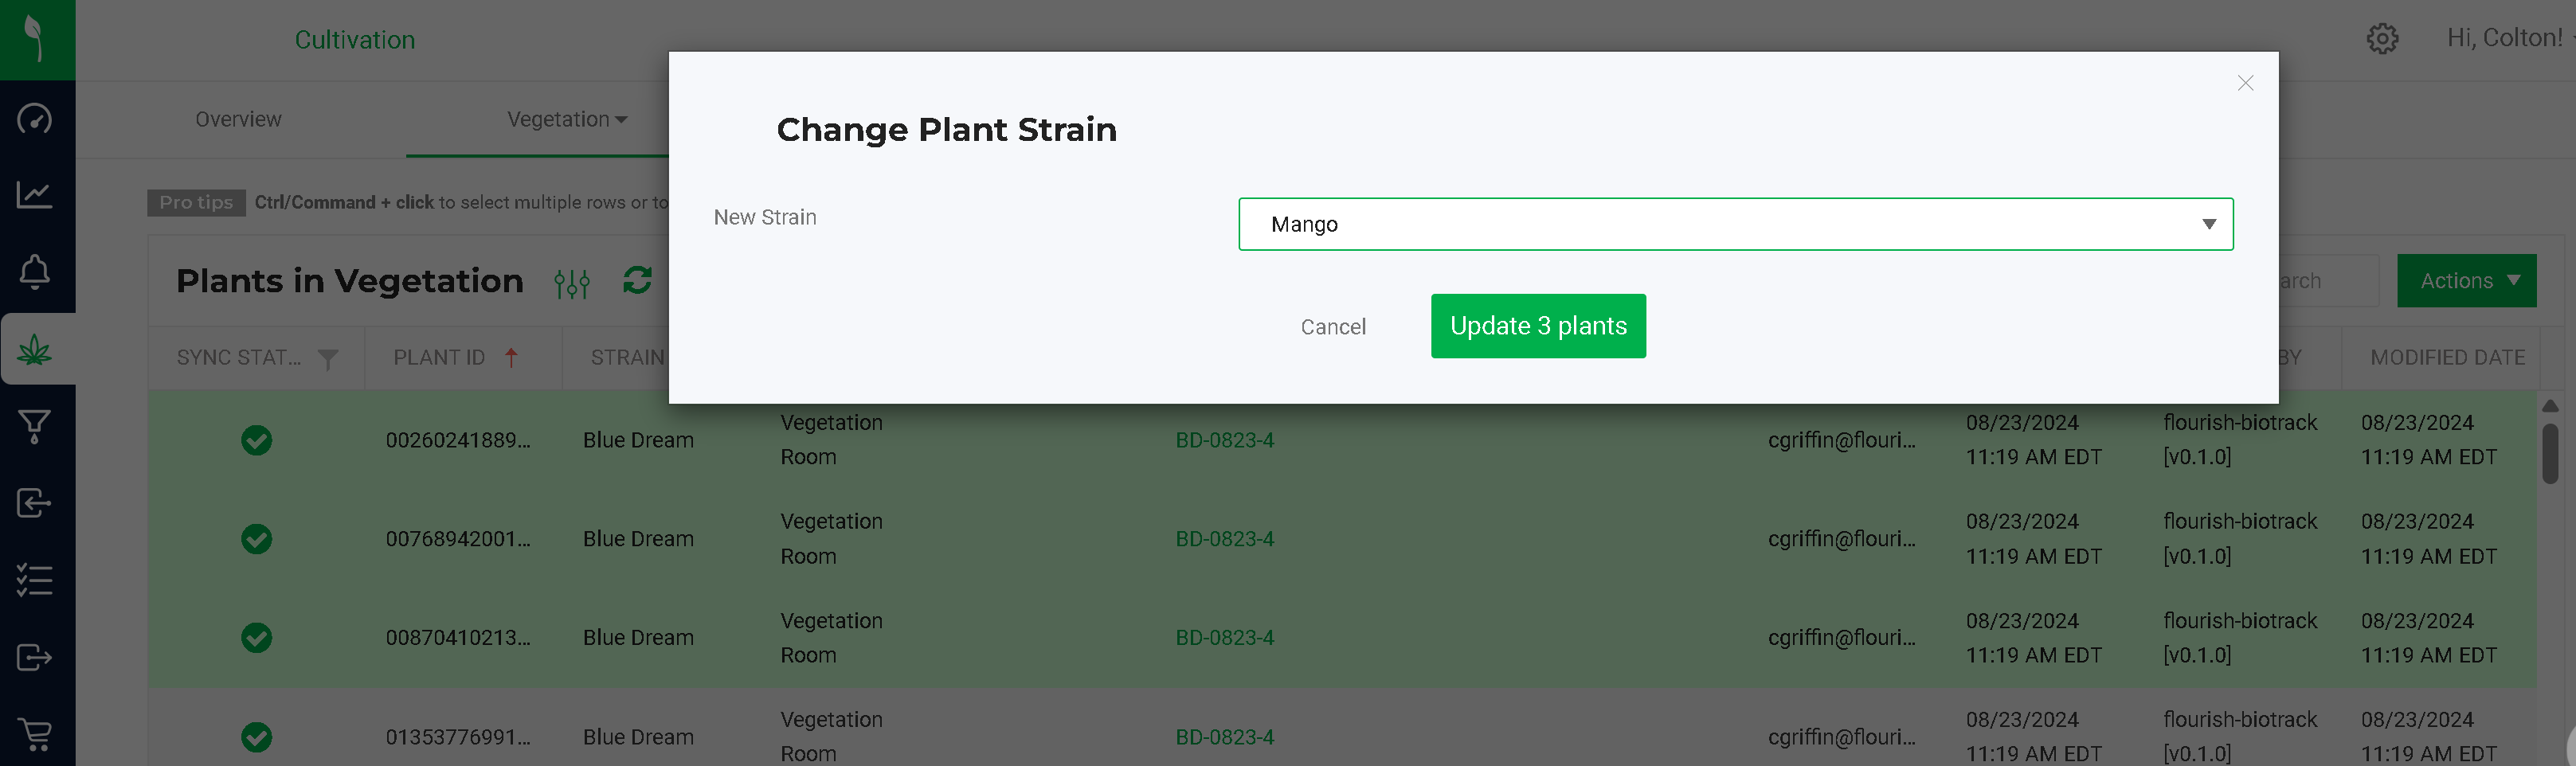
Change Strain
Use the "Change Strain" feature within the Group or the Plant screen to change the strain for a plant in cultivation.
Select the new strain. This is useful for changing all plants of a strain within a group to a new strain.
The action exists on the Plant screen as well.
This is useful for changing only a select number of plants to a new strain.
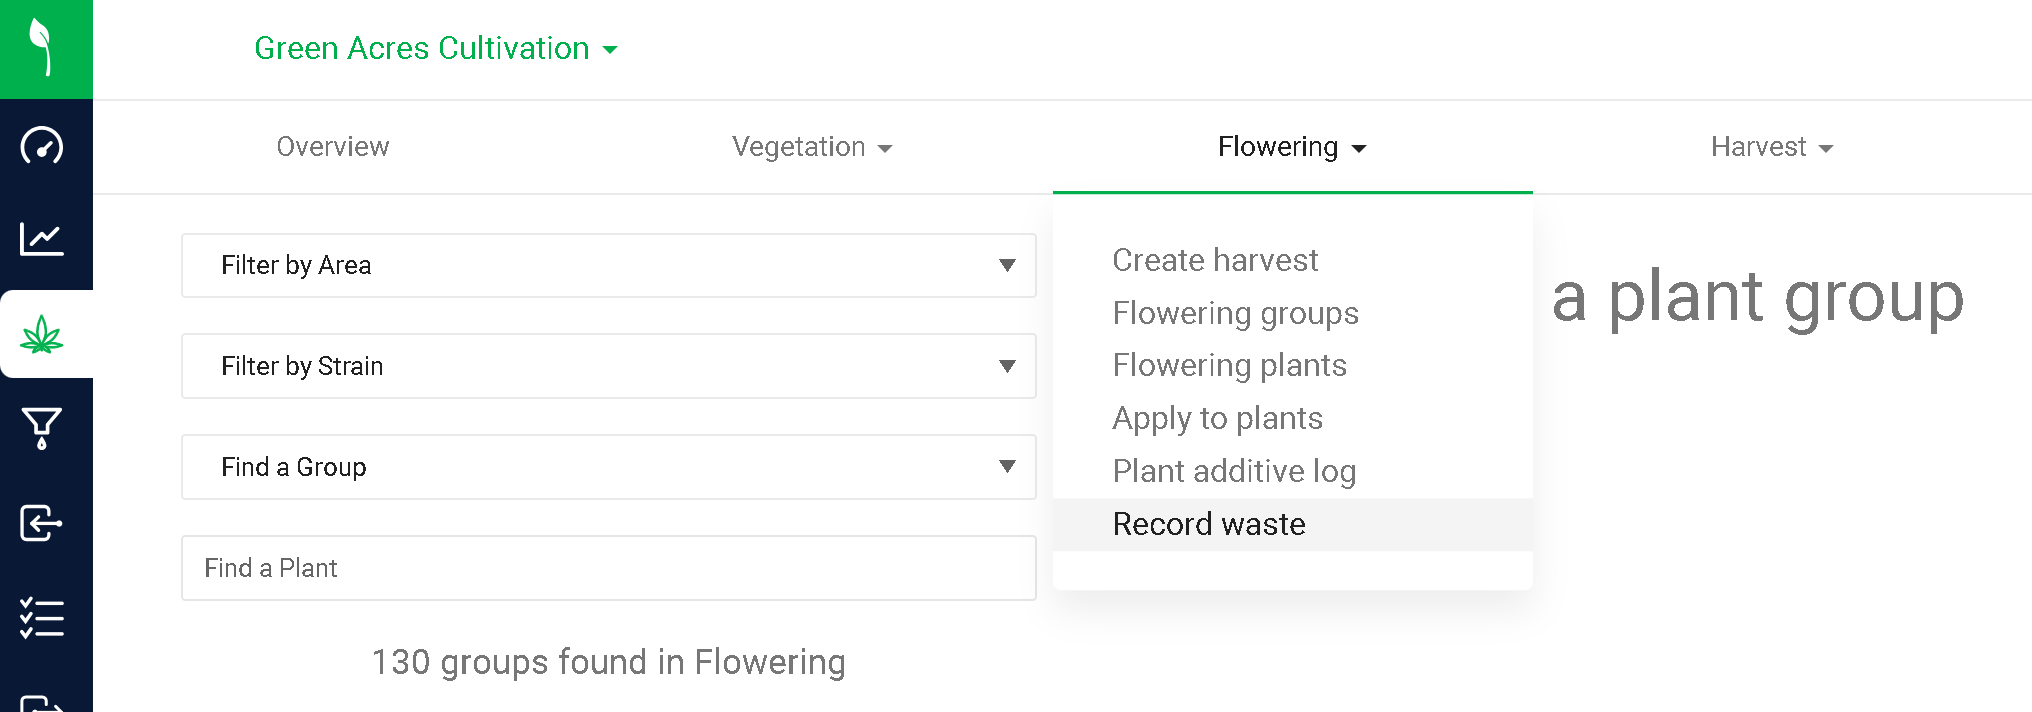
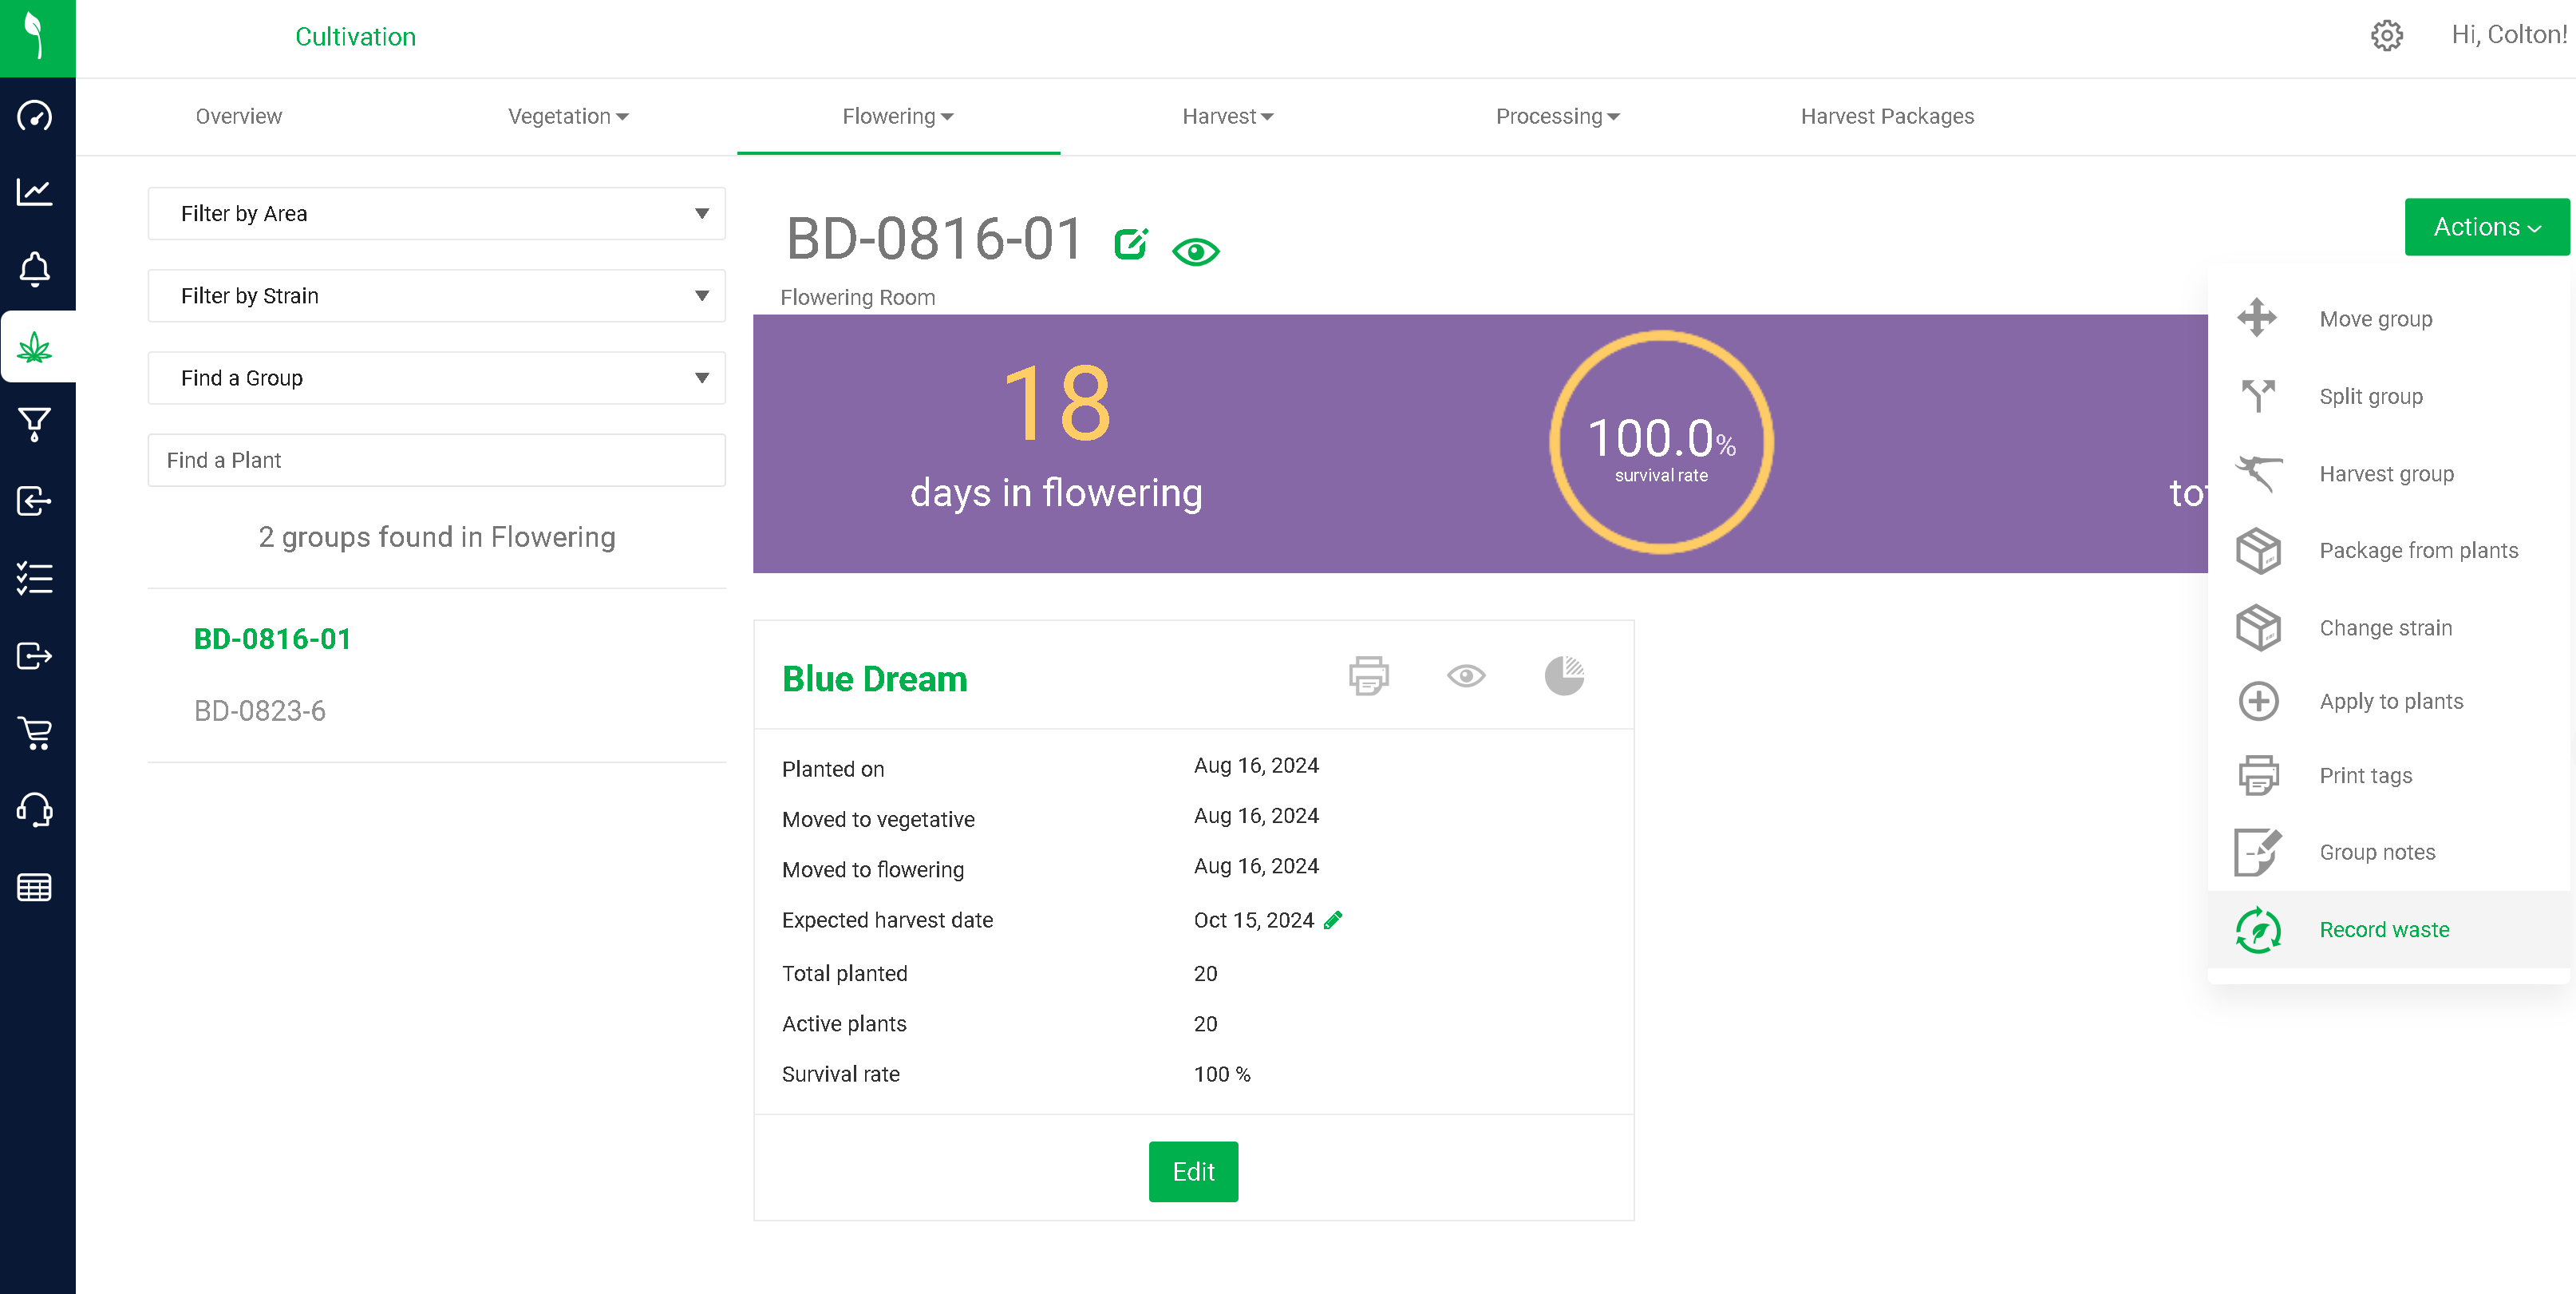
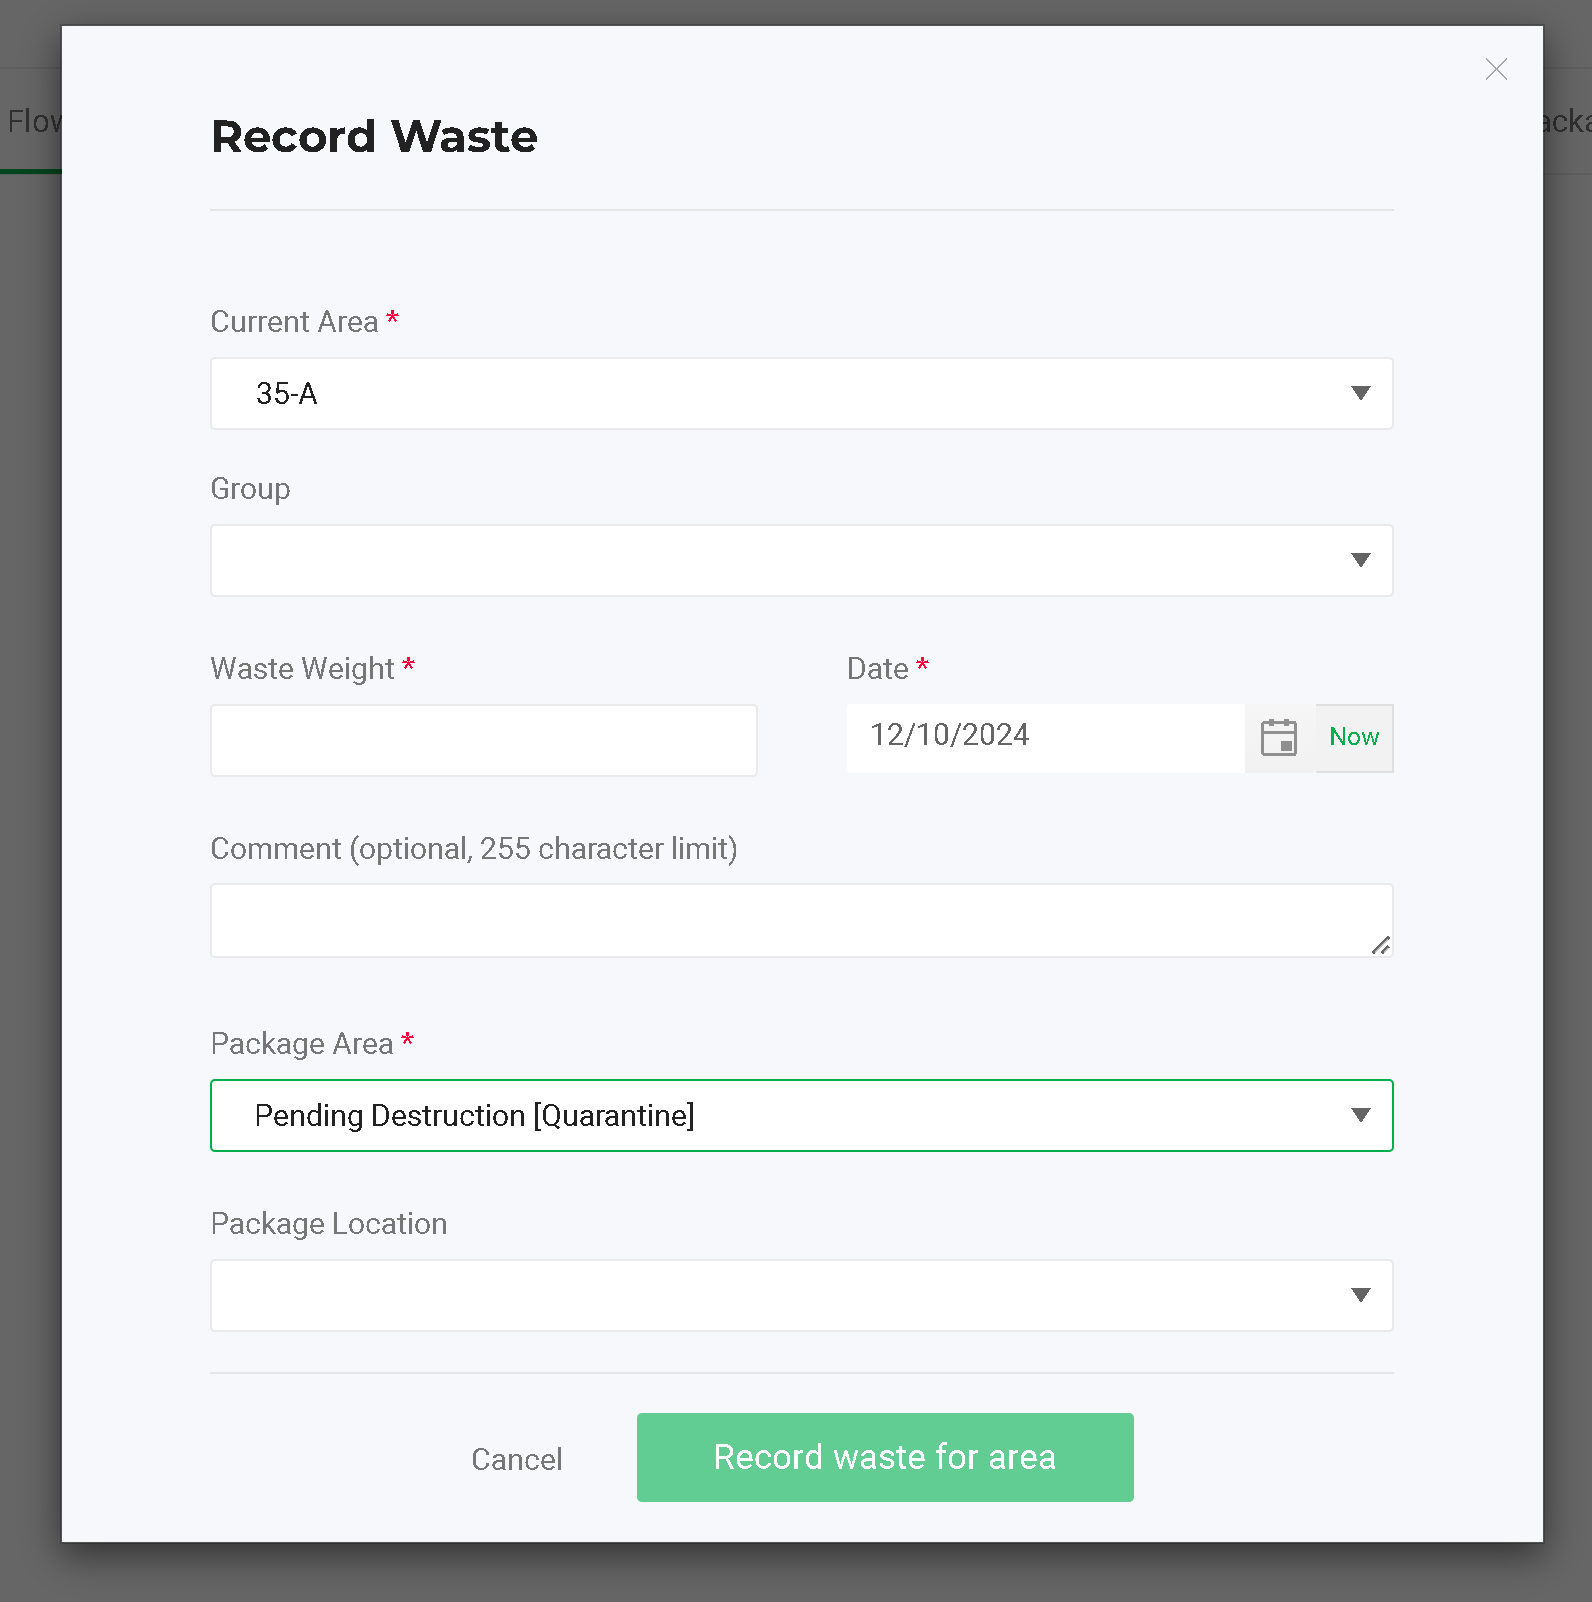
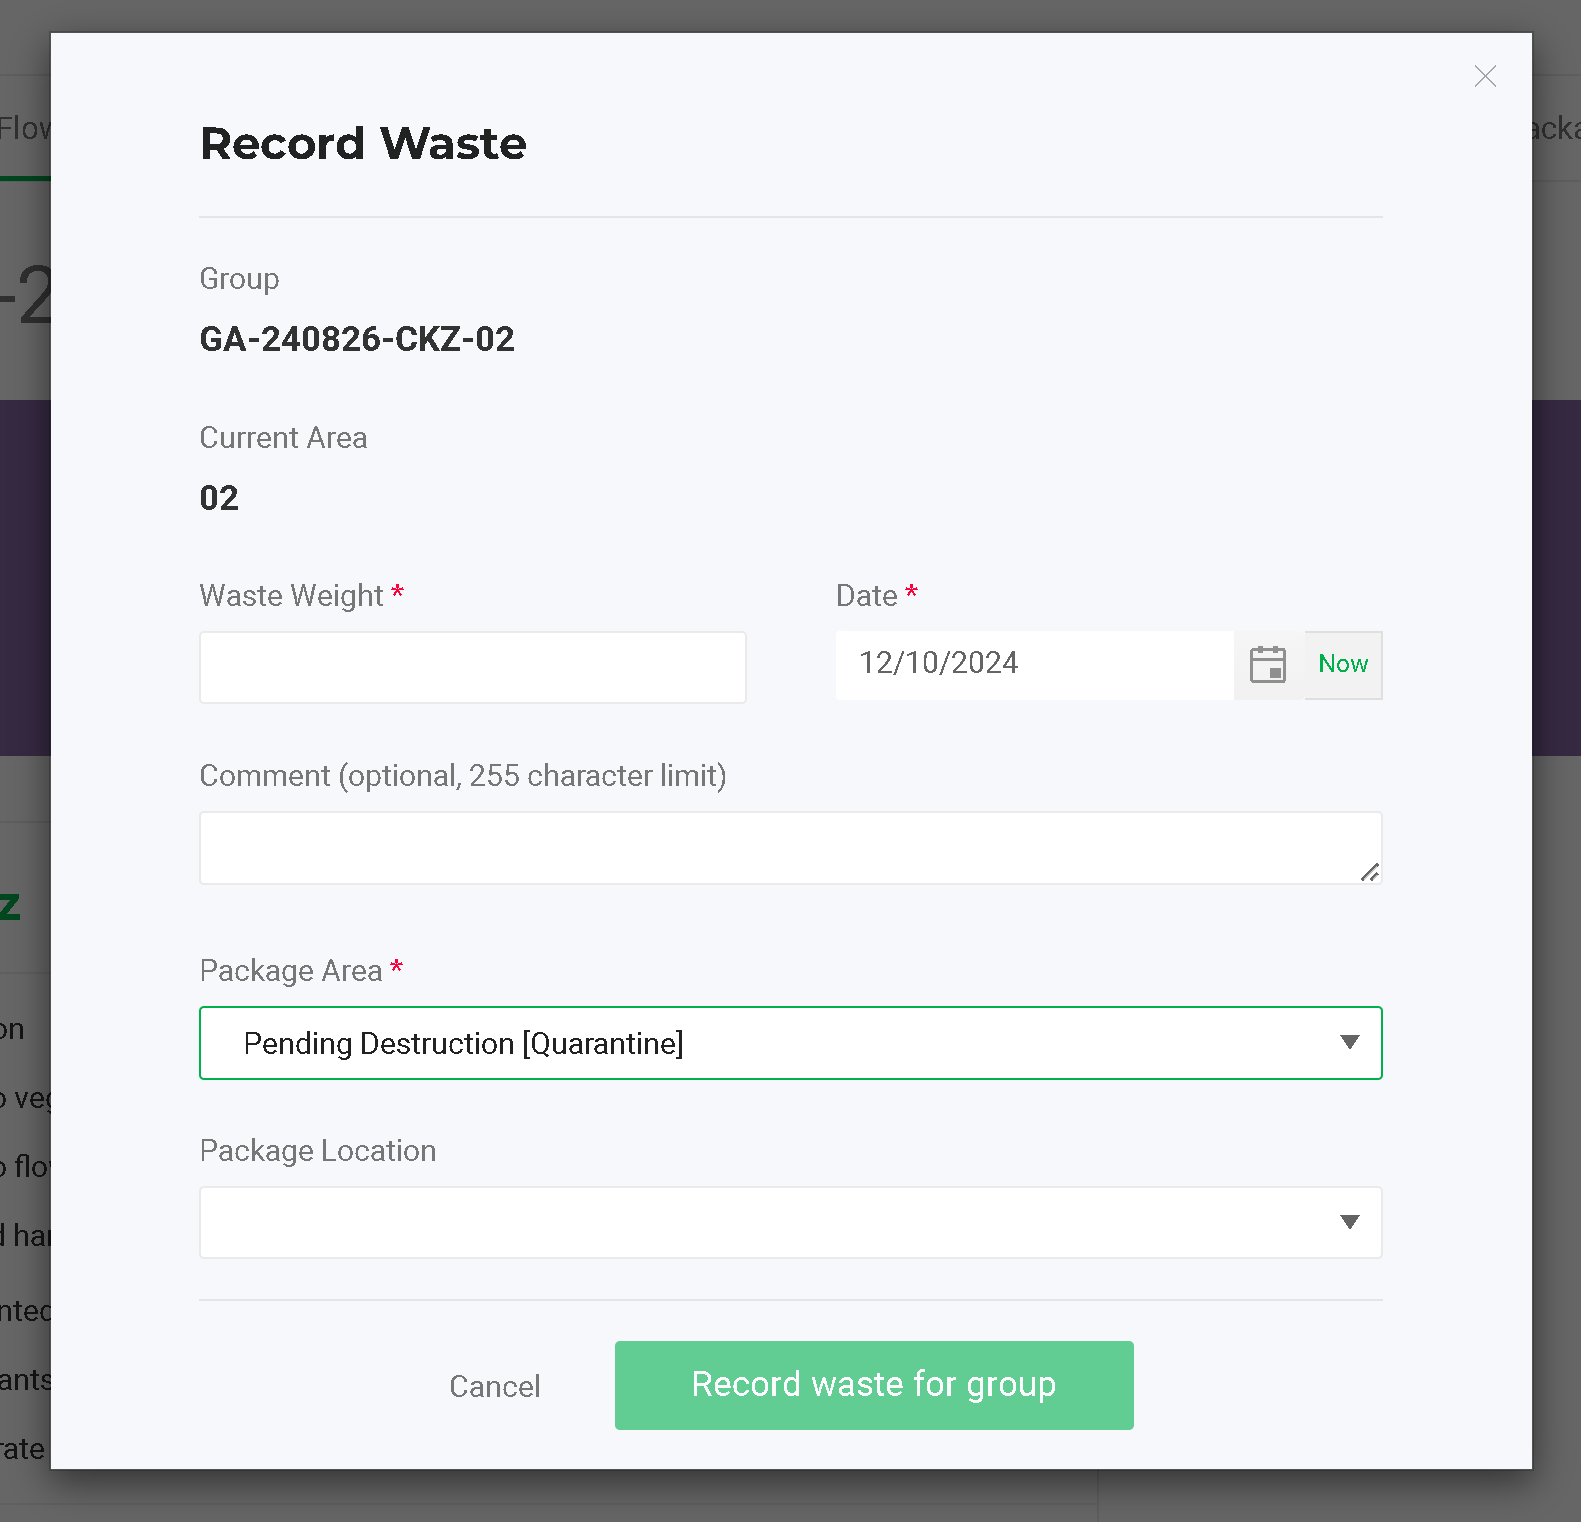
Record Waste
Use the "Record Waste" menu option to document plant waste from a group in Cultivation. This will create a waste Package ID in Inventory.
Use the menu action within the phase, group or plant screen
Use "Record Waste" from the Vegetation or Flowering tab to record against a room
Use "Record Waste" from the group or plant screen to record against a group
Fill in the relevant details
Area to record against
Group within the areas, if needed
The weight of the waste package to make.
A comment is useful.
Select the date.
Choose where the waste will be created. This must be an "Inventory" area type.
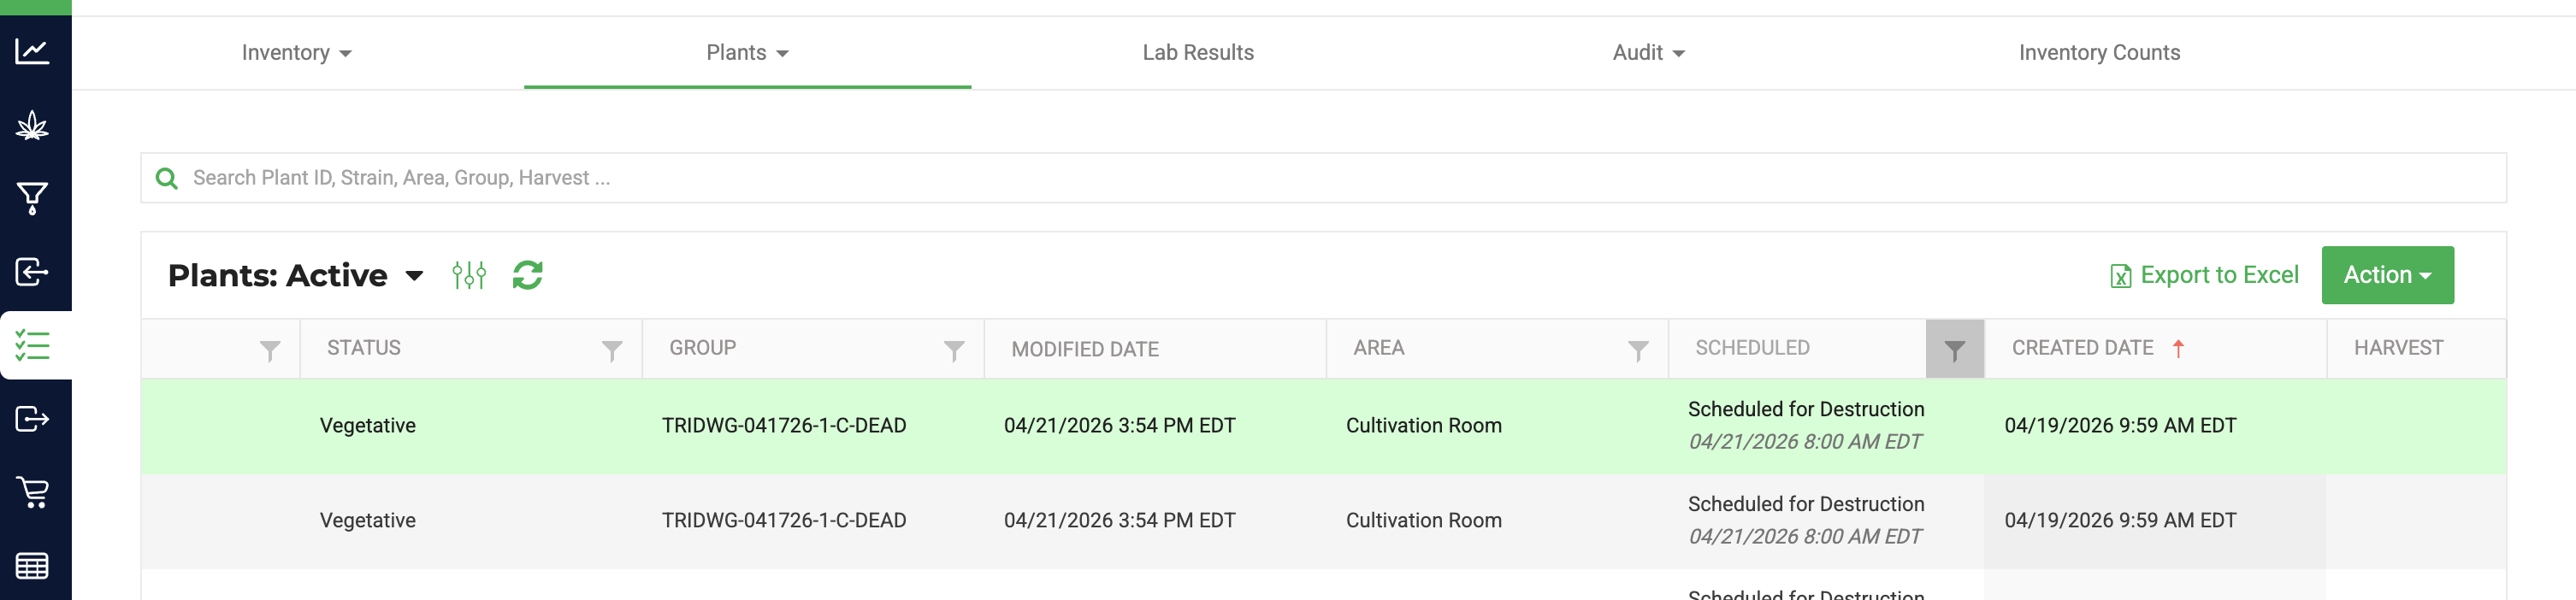
In BioTrack plant destruction is a two-step process. When you schedule a plant for destruction, Flourish will hide these plants form the active plant group screen and list. These plants are techincally still "active" in BioTrack. Flourish will mark them as destroyed after the required waiting period. In the interim, the plant can be "unscheduled" and restored to an active status.
Plants remain in "scheduled for destruction" 72 hours and then are "destroyed" in the system.
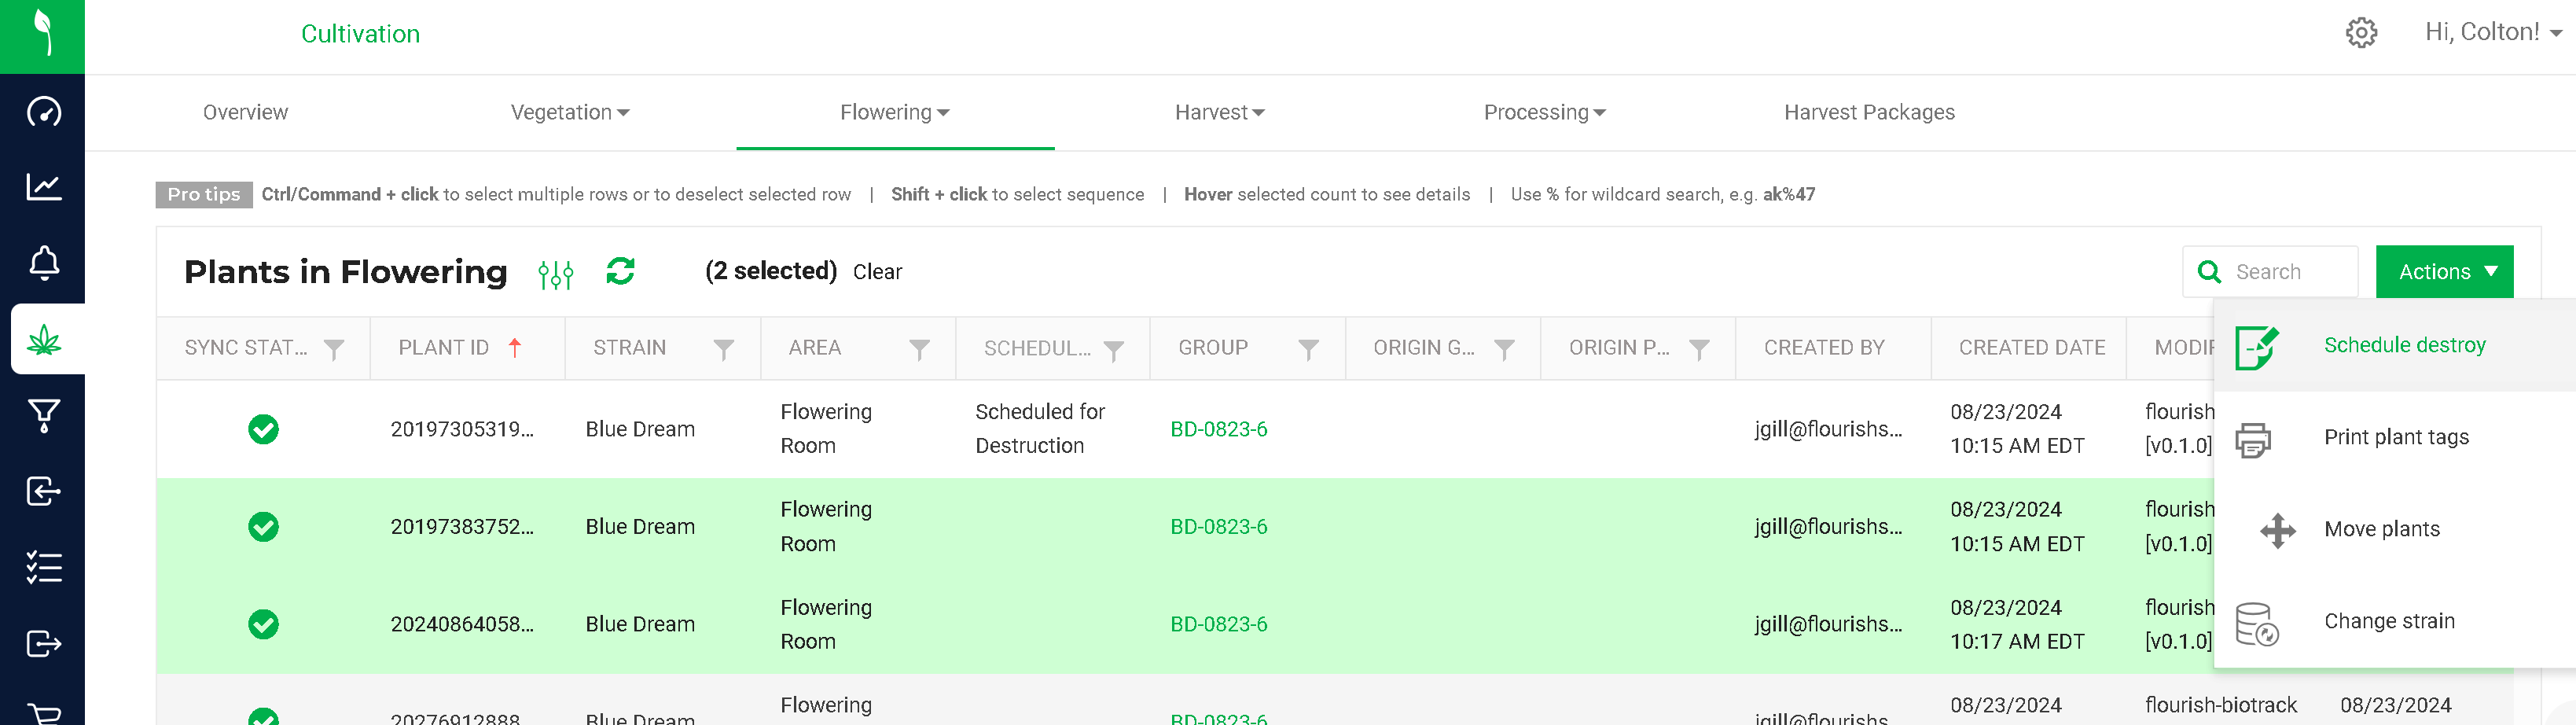
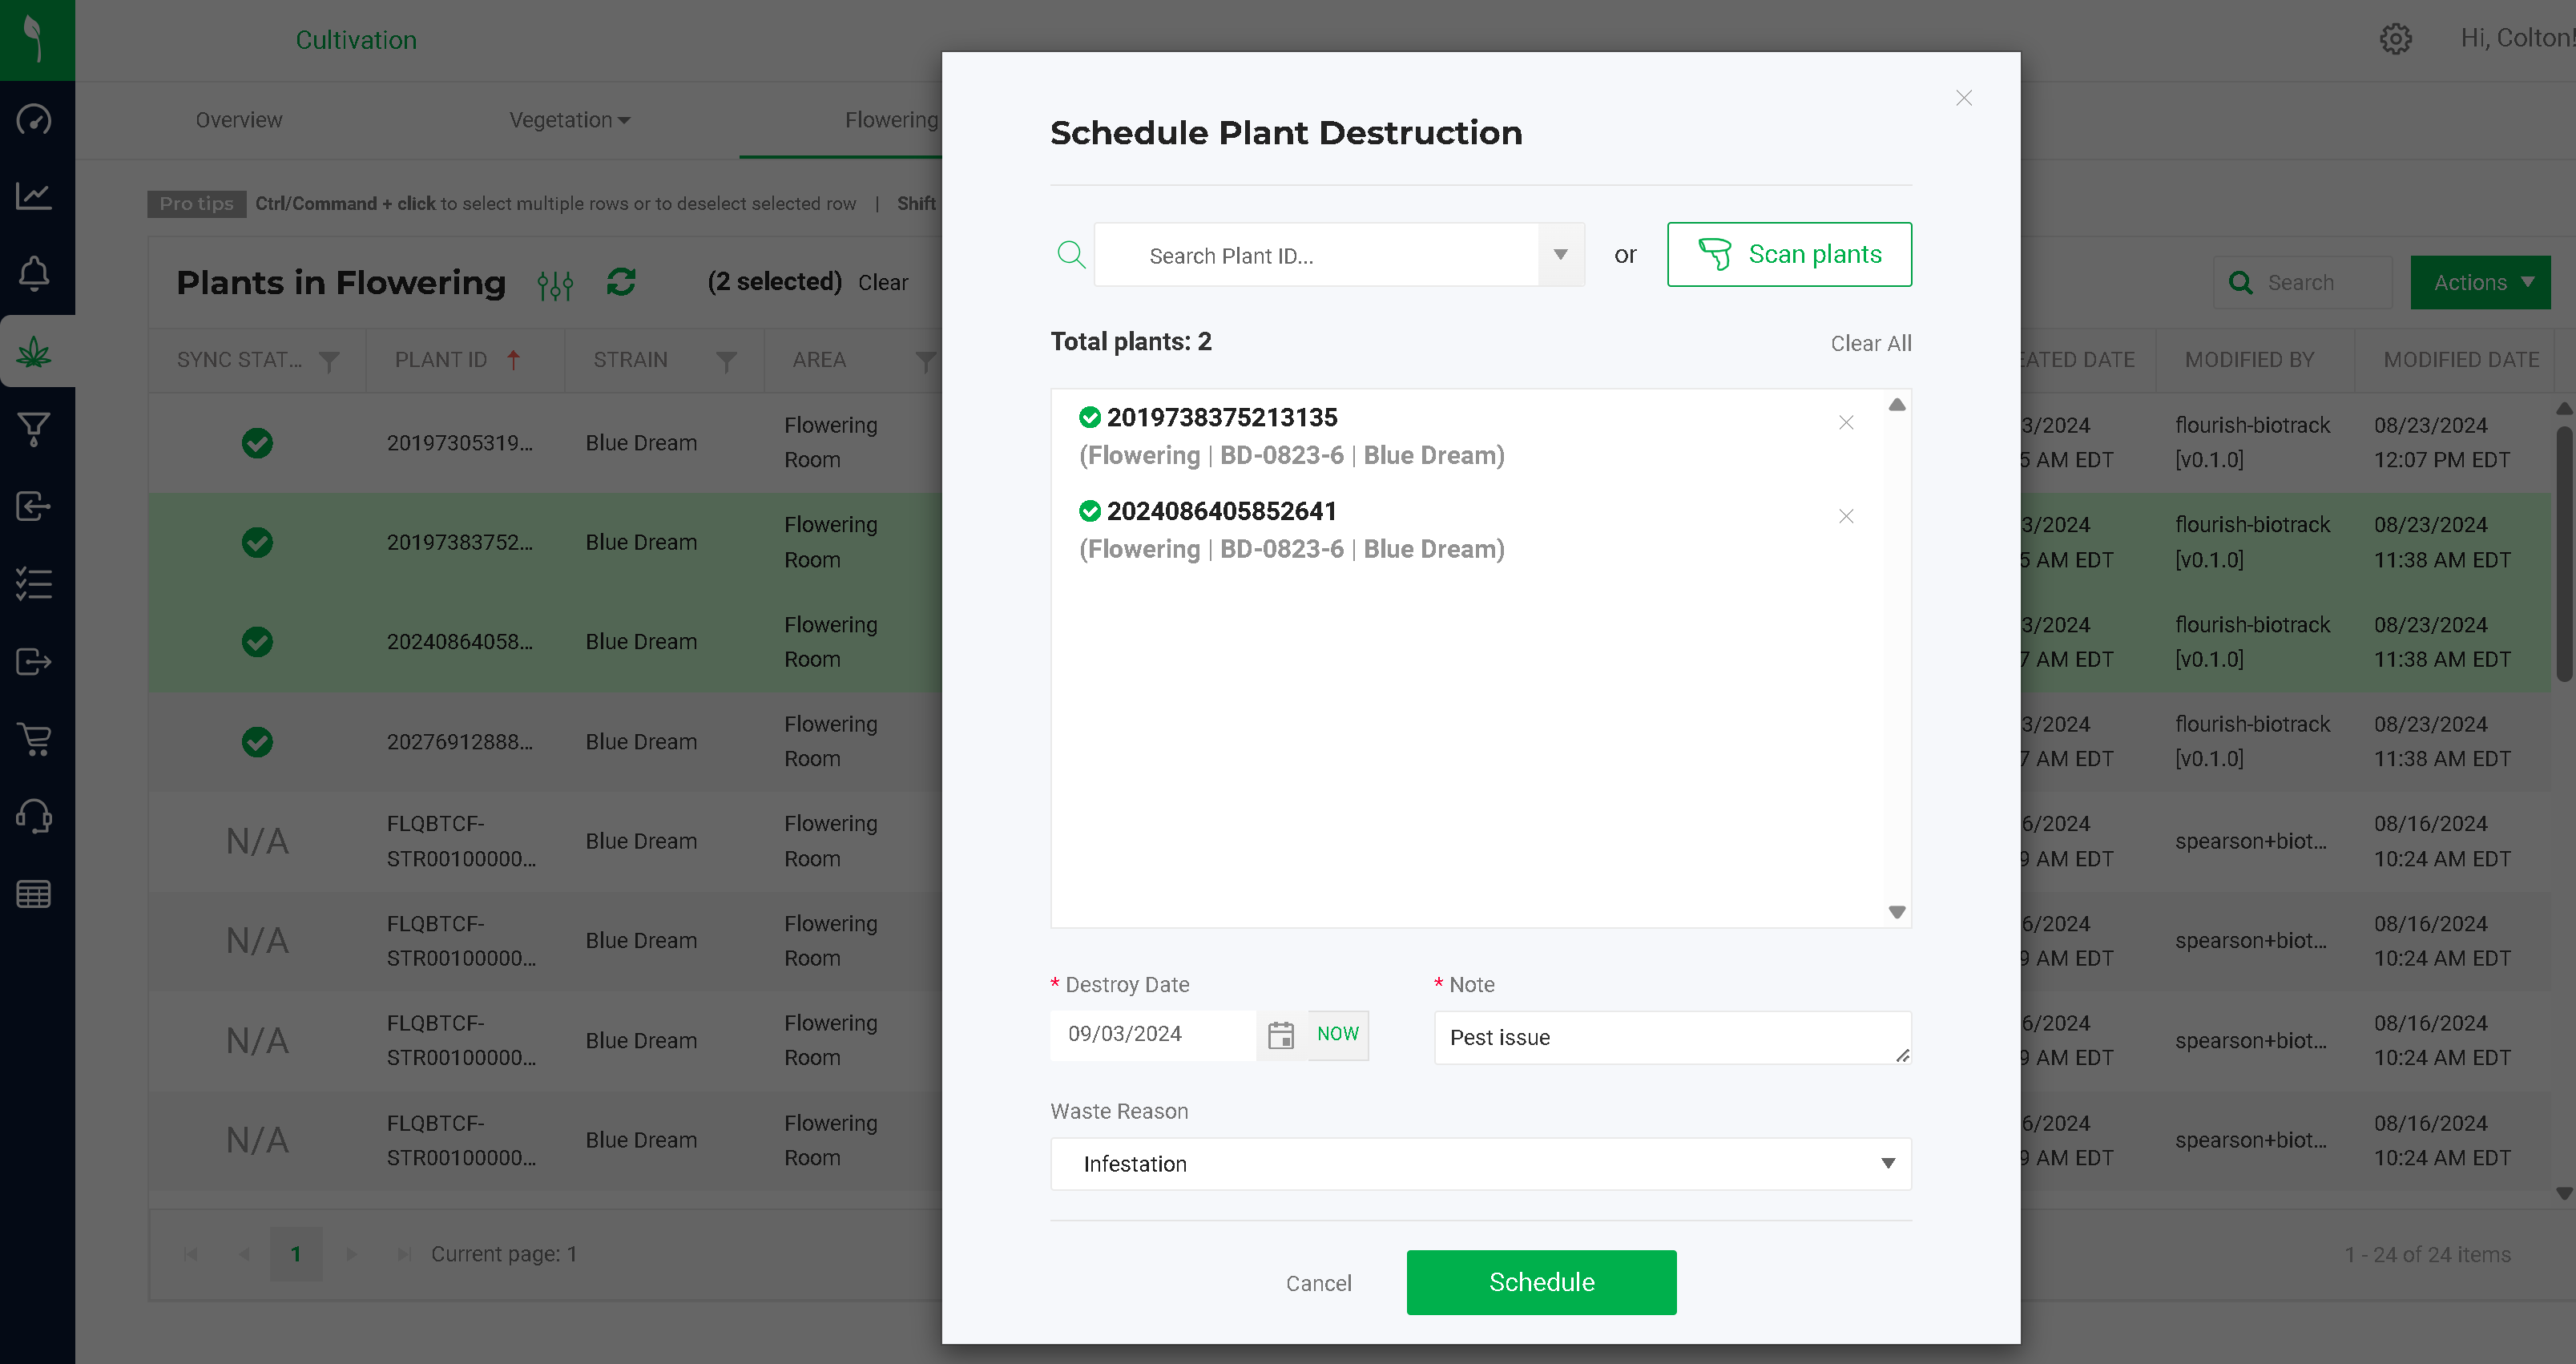
Schedule Destruction
Select the plants to destroy
Confirm the Date, enter a Note, and select a Waste Reason.
Click Schedule to start the waiting period.
Use the 'Scheduled' filter to see what plants are Scheduled for Destruction witin the Inventory > All Plants screen.
Un-schedule Destruction
Select the plants that are currently schedule for destruction
Use the "Unschedule destroy" menu option
Complete Destruction
This is a final action and can't be undone. Flourish will automatically complete this process after the 72-hour waiting period.
Select the plants that are currently scheduled for destruction
Use the Destroy Plants menu action to complete this process
View the Destroyed Plants in the Inventory > All Plants screen by using the filter for "Dead" plants
Destroying a plant doesn't record waste. Use the Action > Record Waste to generate a waste package in Inventory to take through a destruction workflow, if required.
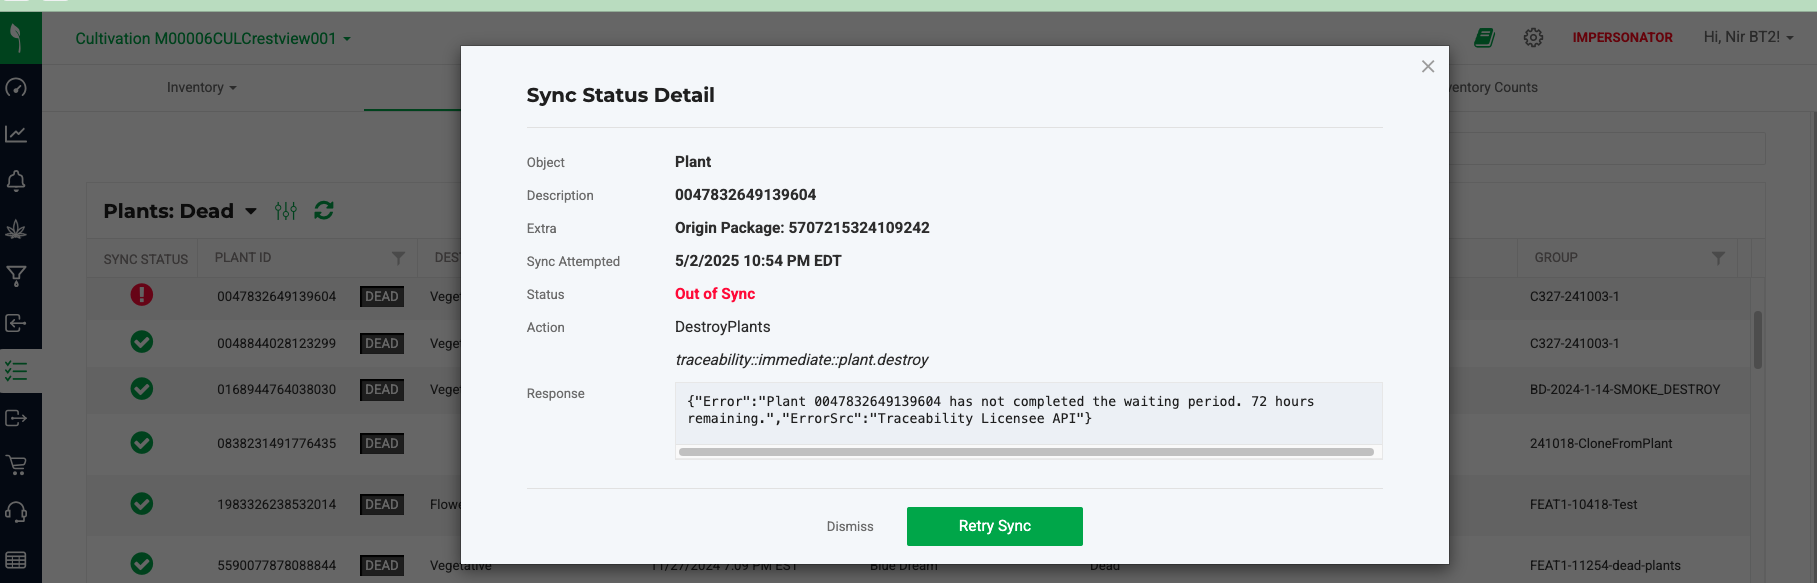
🔍 Find and Resolve out of Sync Plants
If a plant is destroyed in Flourish Software but shows as out of sync, it means the destruction did not complete successfully in BioTrack. The plant is considered destroyed in Flourish, but it still exists in BioTrack until the sync is successful.
A successful sync will update BioTrack and mark the plant as destroyed there as well.
Go to the Inventory module.
Click Plants/All plants.
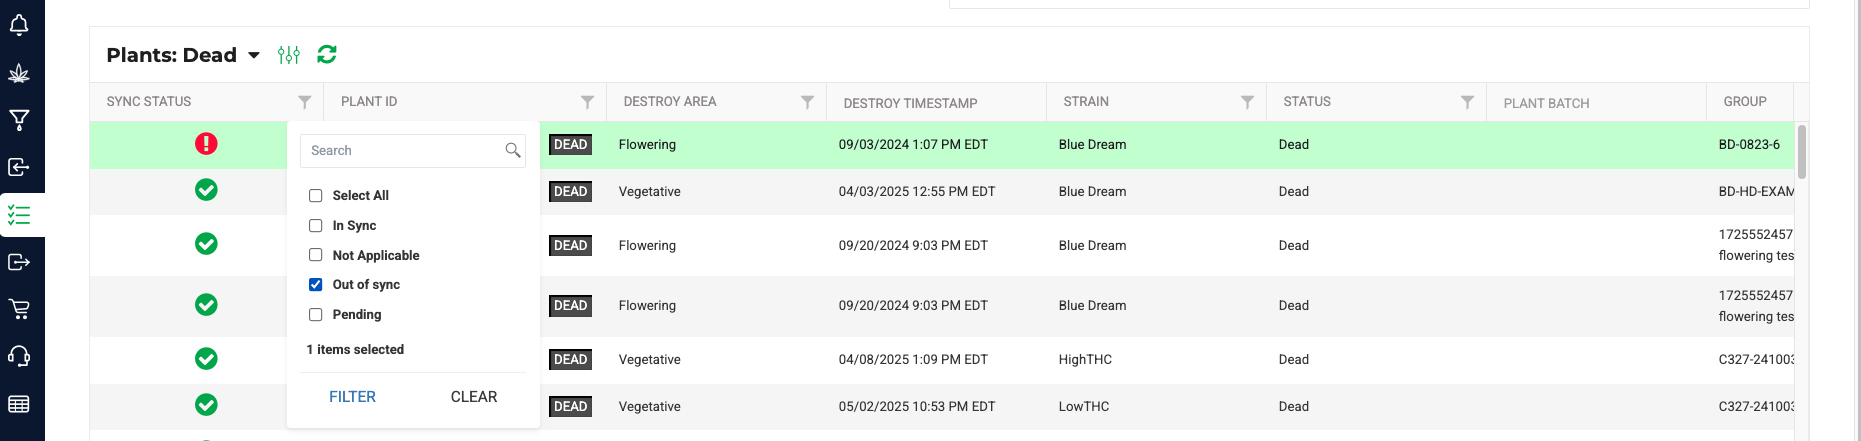
Select Plants:Dead from the dropdown to locate any that might have sync issues.
Use the Sync Status filter to locate "Out of Sync" plants.
Click the red sync status icon to open the Sync Status Detail modal, where you can review the error.
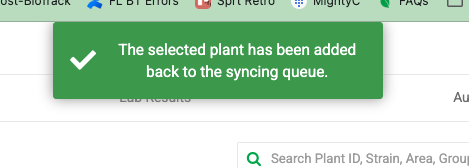
Click “Retry” directly in that modal to attempt resyncing.


 to open the Sync Status Detail modal, where you can review the error.