2021.11.02 Software Release 4.47.0
VERSION 4.47.0 SUMMARY OF RELEASED ITEMS Admin. Vendor profile Enhancements - added new fields. Added more columns to All Destinations View. Inventory. Added a Primary Vendor field to All Inventory G…
VERSION 4.47.0
SUMMARY OF RELEASED ITEMS
Admin
- Vendor profile Enhancements - added new fields.
- Added more columns to All Destinations View.
Inventory
- Added a Primary Vendor field to All Inventory Grid.
Inbound
- Added the lot number to the Scan Package modal when receiving.
Outbound
- You can search by lot number in the outbound package allocation screen.
- The Amount Paid and Balance Due information is now a part of an outbound invoice.
Integrations
- Leaflink - Added External Items filter and removed Disabled items.
QuickBooks Online:
- Outbound Order Notes now sync to QuickBooks Online.
- Outbound Order Payment sync updates.
- Disconnect (Un-map) Items, Destinations, and Vendors between the platforms.
Details
Admin
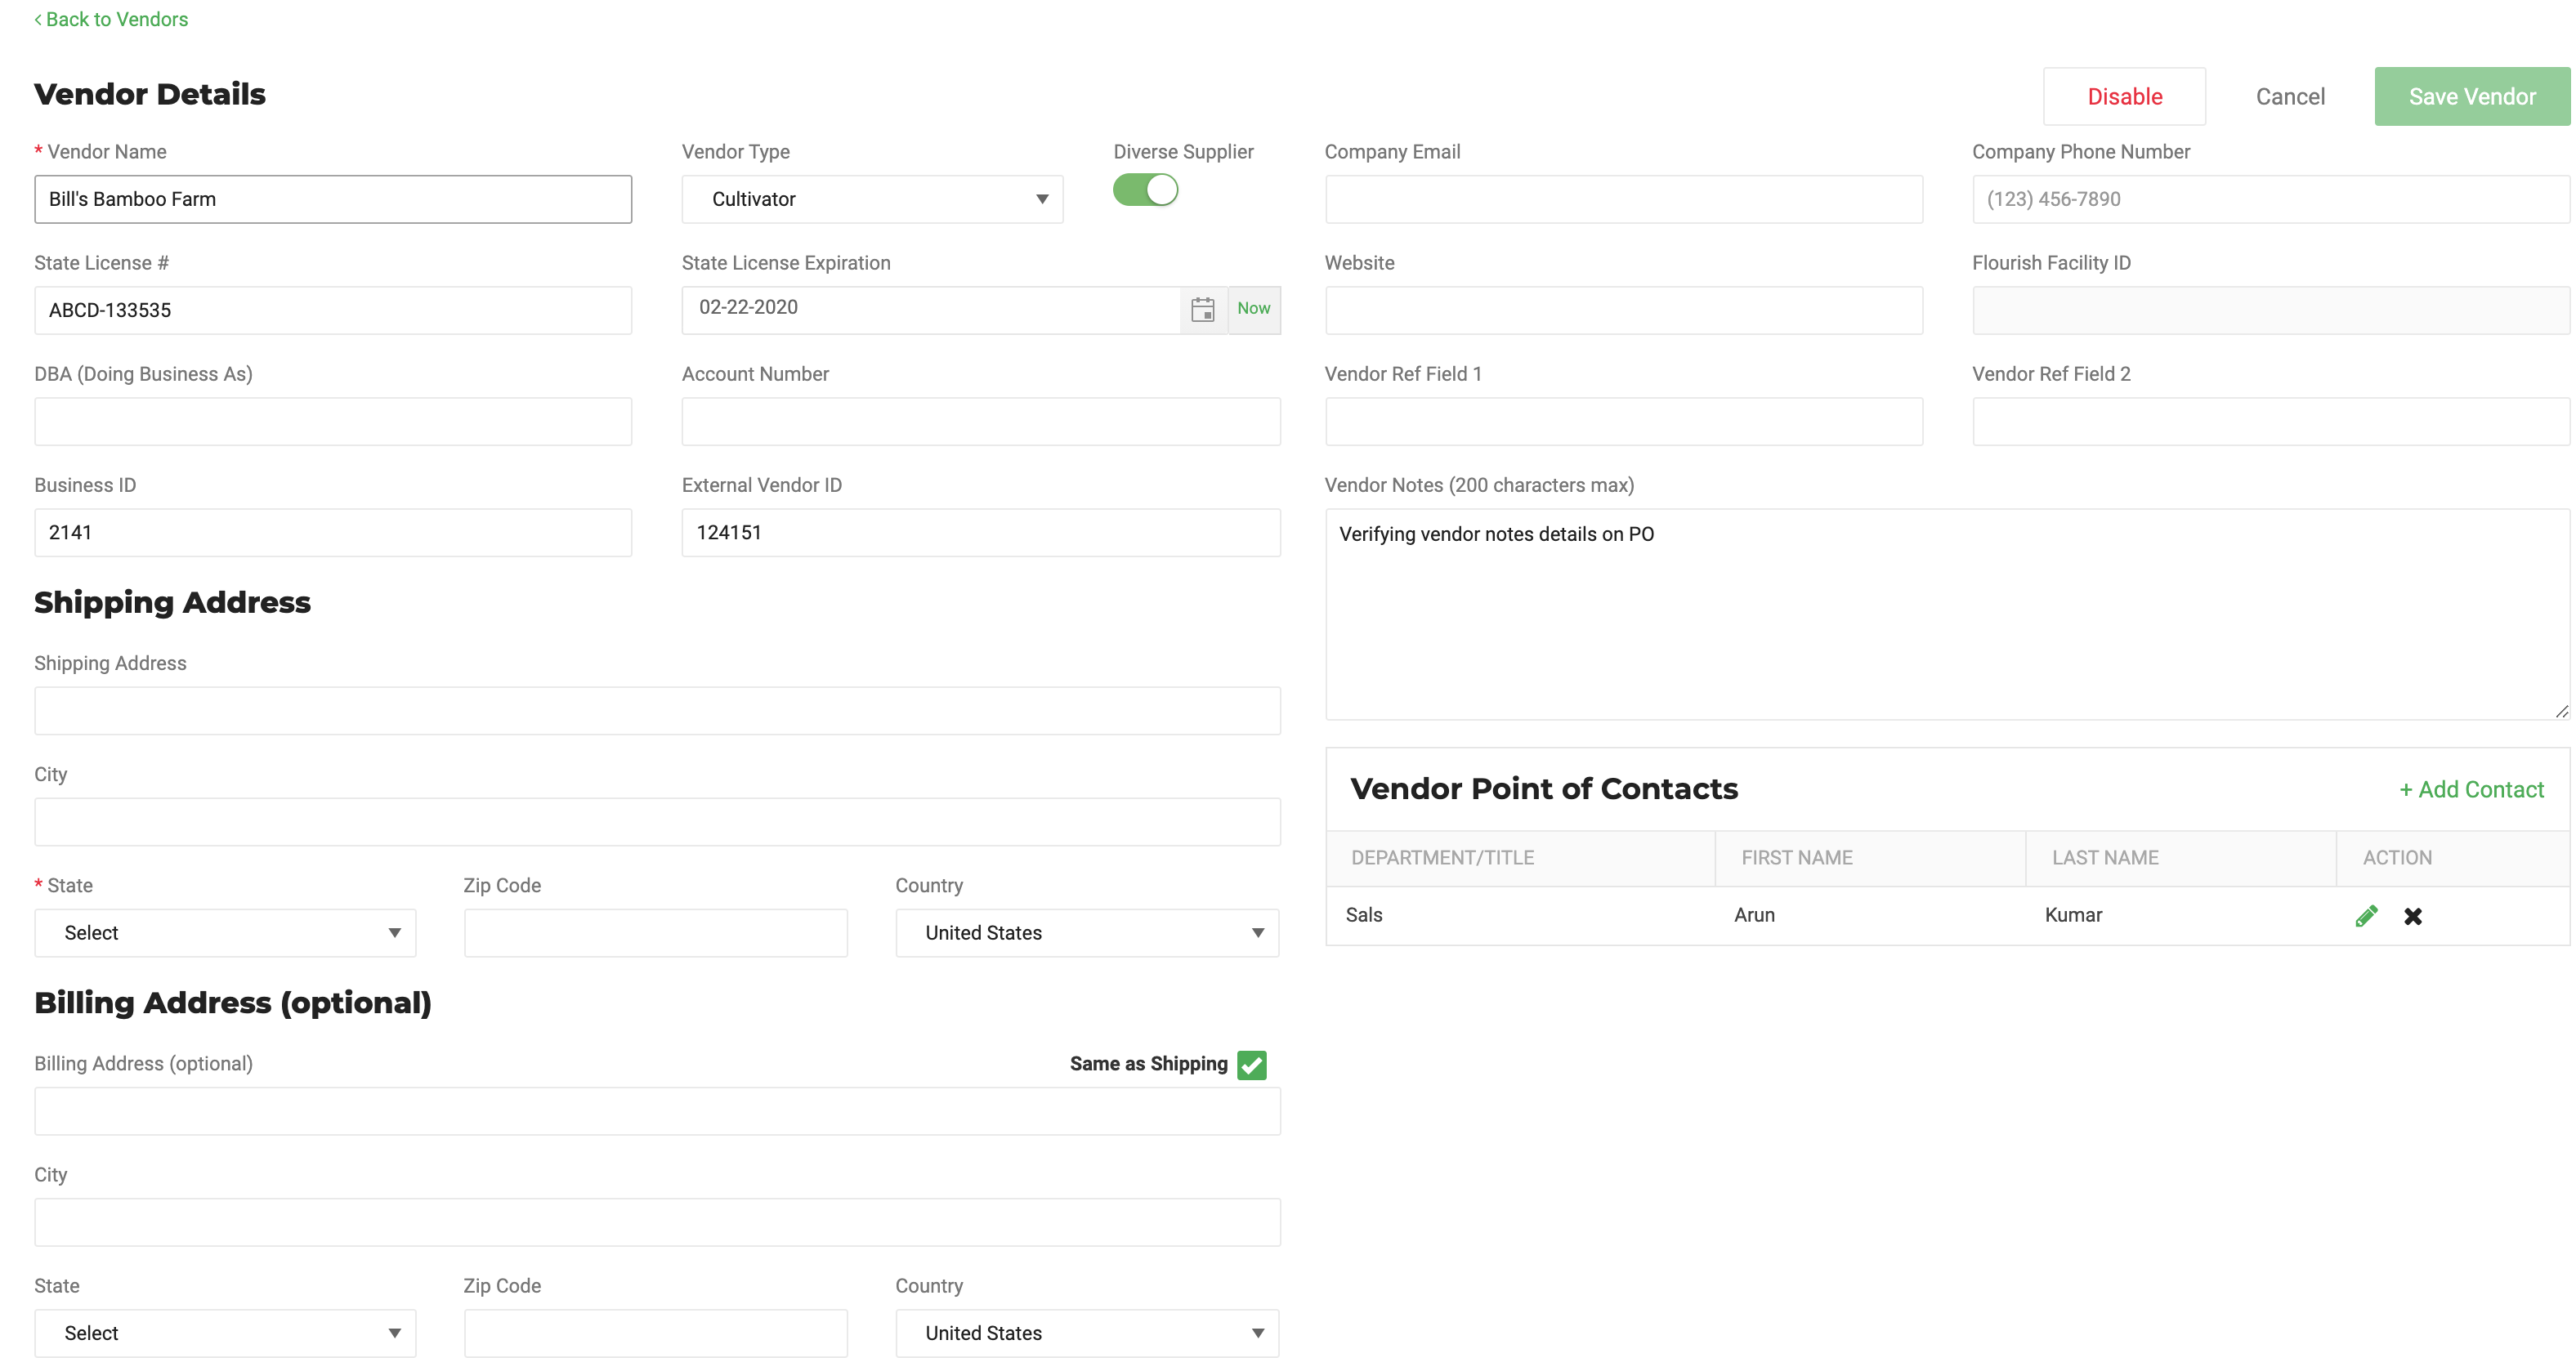
- We added new fields of data to the Vendor profile:
- Go to Settings > Distribution > Vendors
- Click on the name of any Vendor to access the Vendor Details screen
You will see new fields of information, and later you will be able to include the data in reporting:
- Vendor Type.
- Toggle for Diverse Suppliers - now you can set.
- Account Number (QBO specific).
- Business ID.
- External Vendor ID (used QBO Vendor ID).
- Company Phone Number.
- Vendor Points of Contacts.
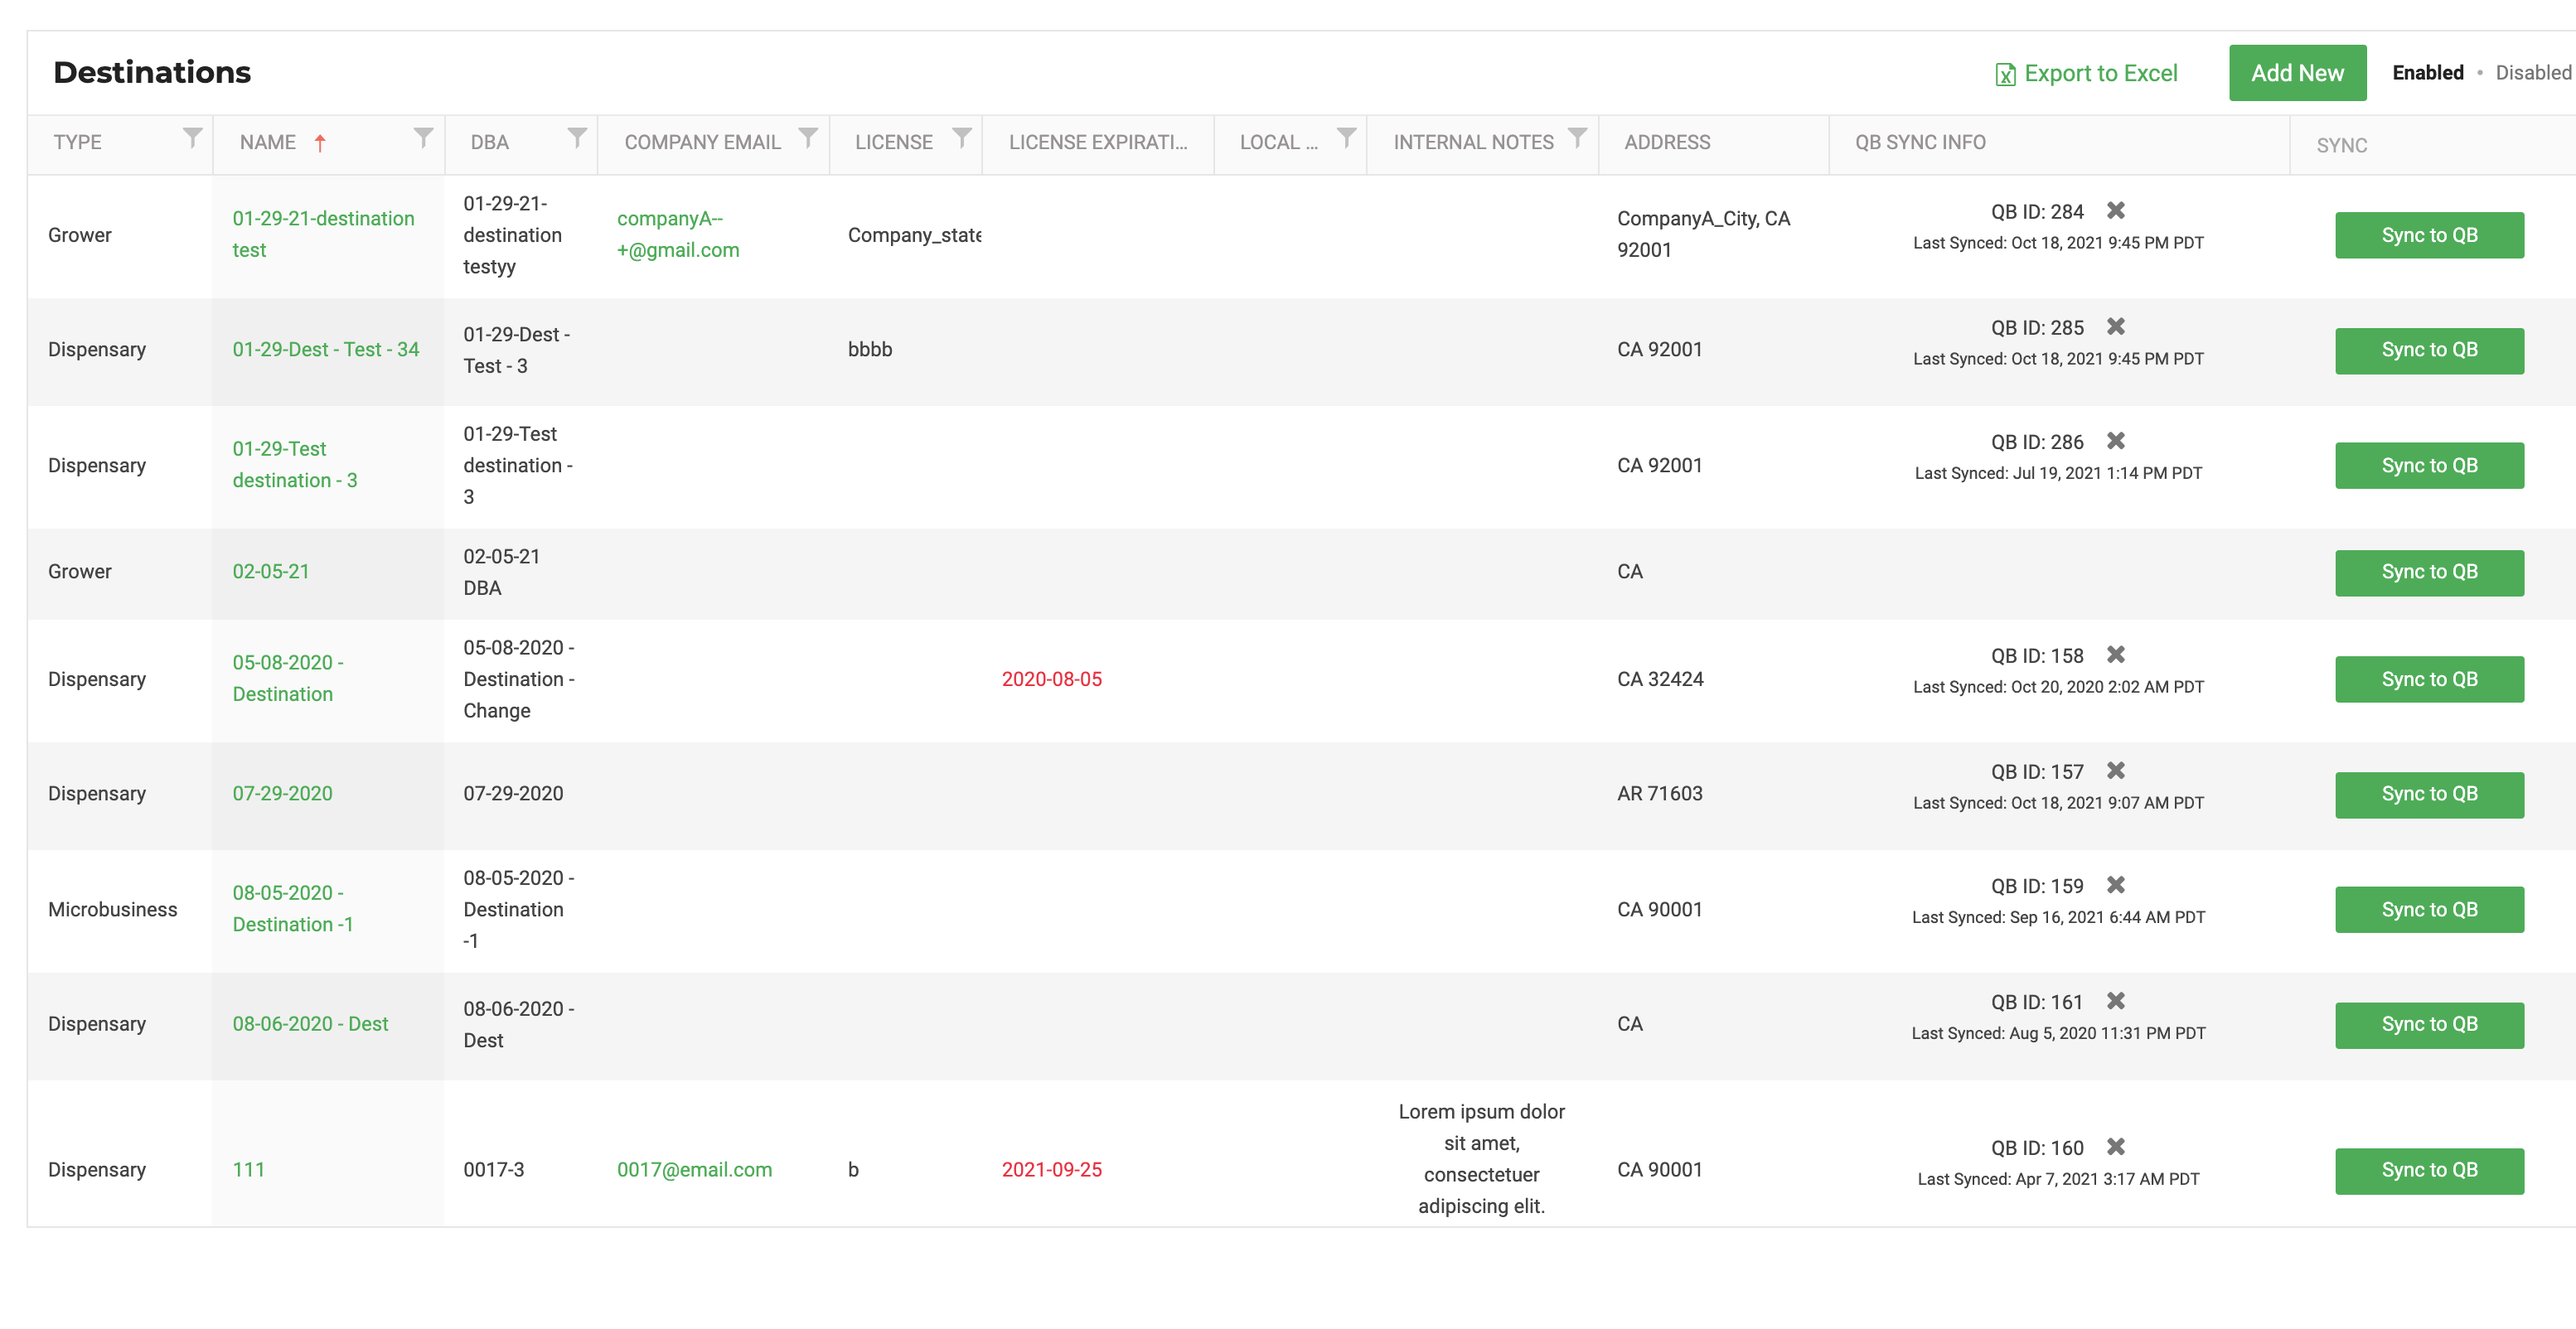
- Added more columns to All Destinations View:
Now you can see the Company Email and the Local License Number as columns in the All Destinations view.
Inventory
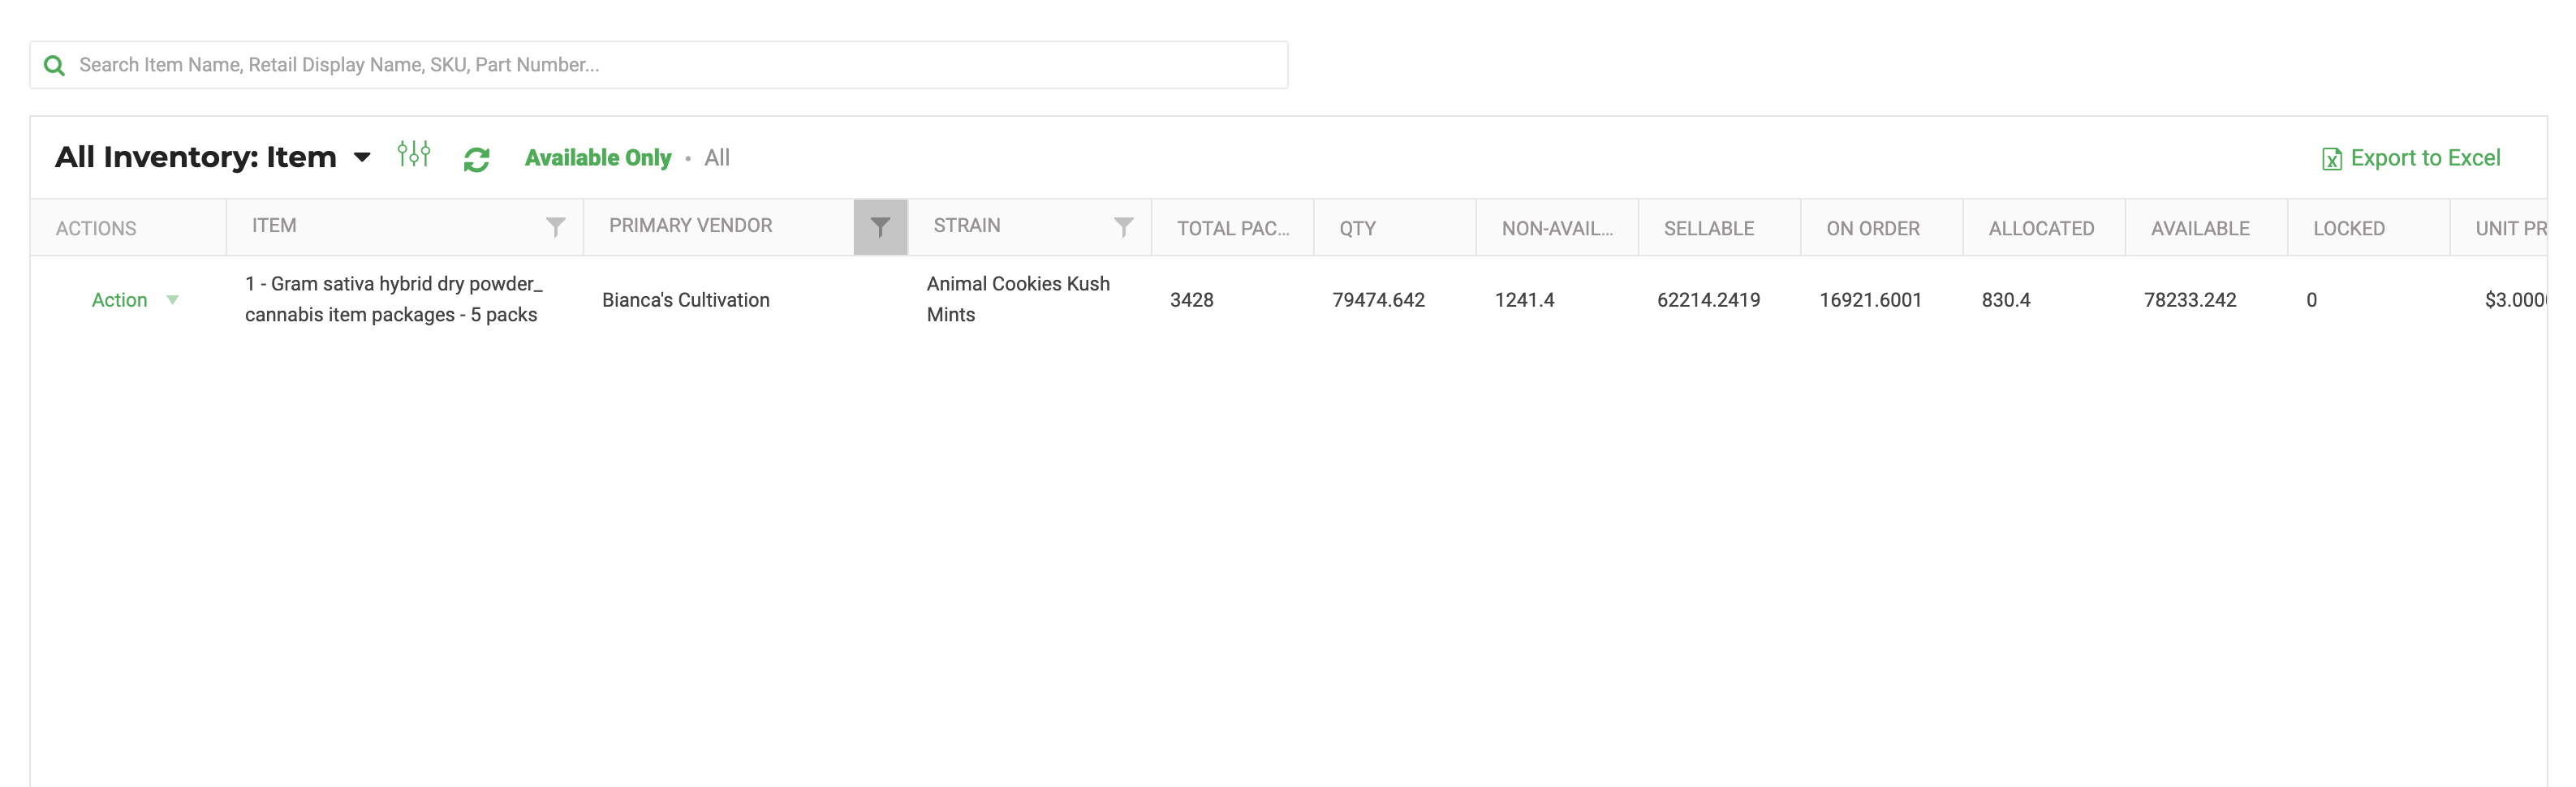
- Added Primary Vendor field to All Inventory Grid.
Now you can see the Primary Vendor for an item in the All Inventory Grid.
Toggle it ON in the view of the All Inventory: Item screen by using the radio buttons here:

To set a Primary Vendor:
- Go to Settings > Inventory.
- Click on the Item and find the Vendor Info tab.
- Add the Vendor or vendors.
- Configure the Primary Vendor for the item by clicking the Make Primary next to the Vendor name.
Inbound
- Add lot number to scan package modal when receiving
Now you can see the lot number on each package when scanning them when receiving an Inbound Purchase Order.
- Go to Inbound.
- Click on a Purchase Order ID.
- Click on the Scanner icon on the top left of the Purchase Order Grid to see the lot numbers.
Outbound
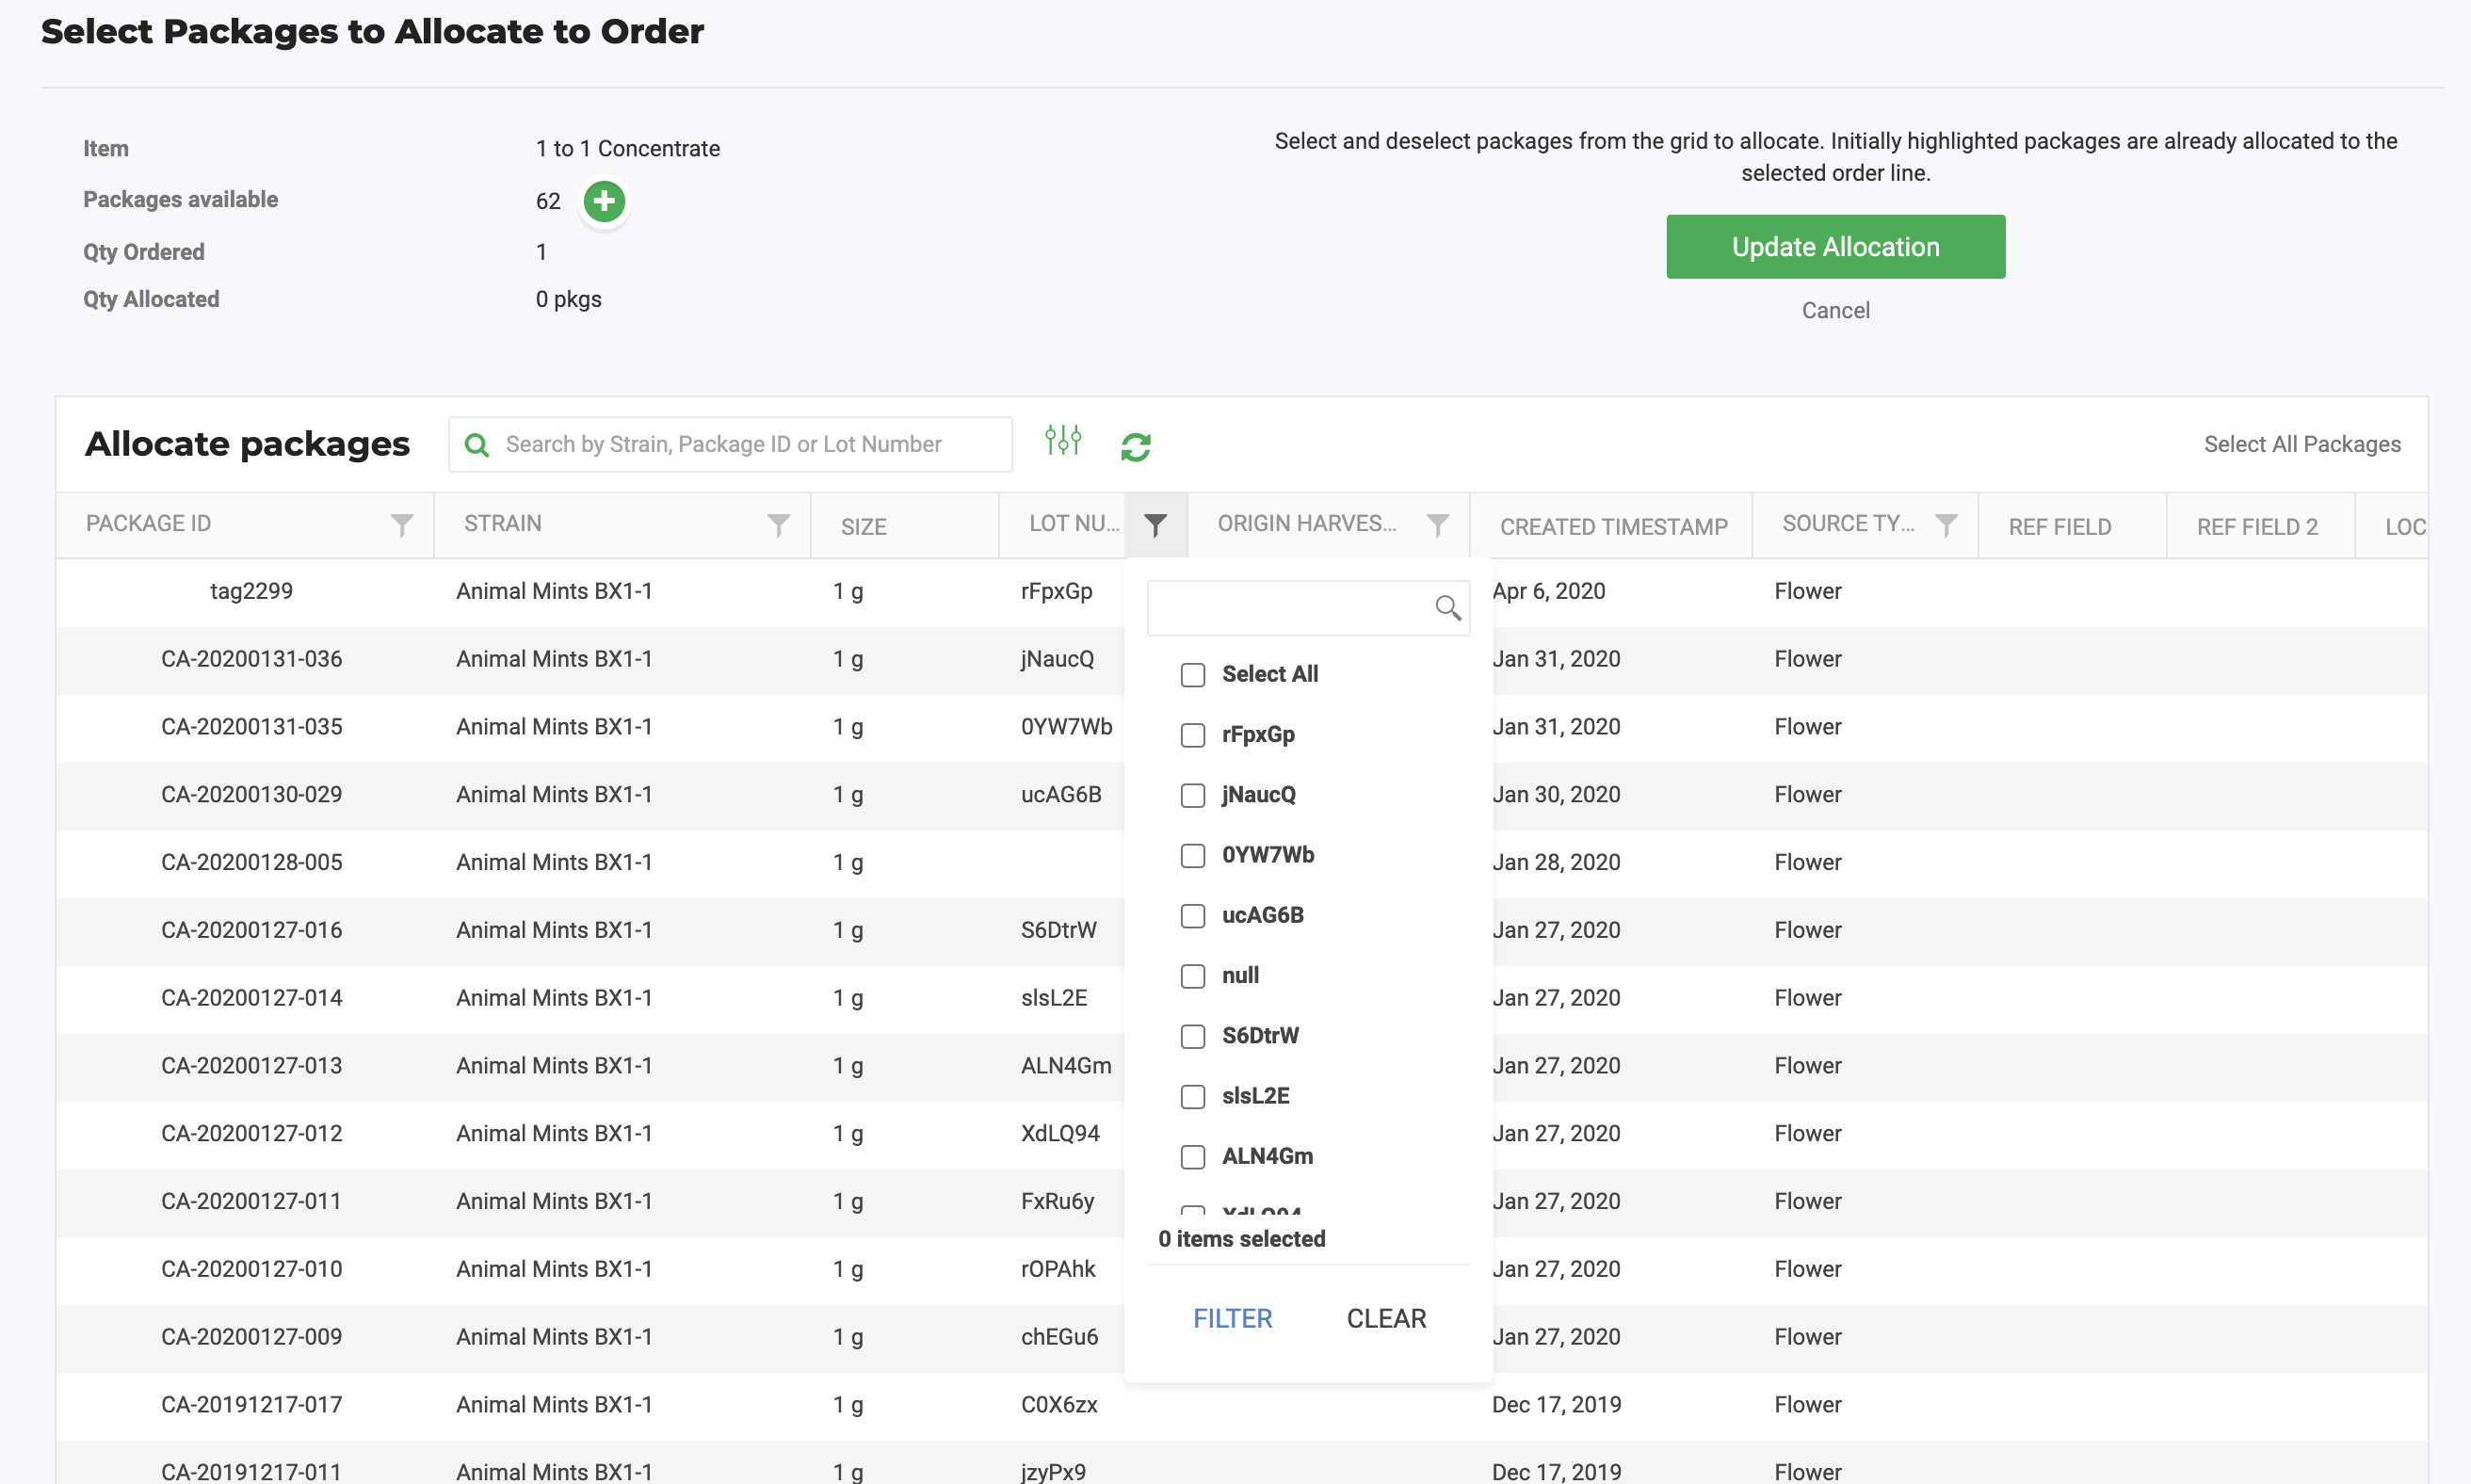
- Search by lot number in the outbound package allocation screen.
You can now search for lot numbers when allocating packages on outbound orders. Click on the Green Allocation Arrows on the order line to pop up the modal below. You can search by the Lot Number using the Global Search on top or the Lot Number column.

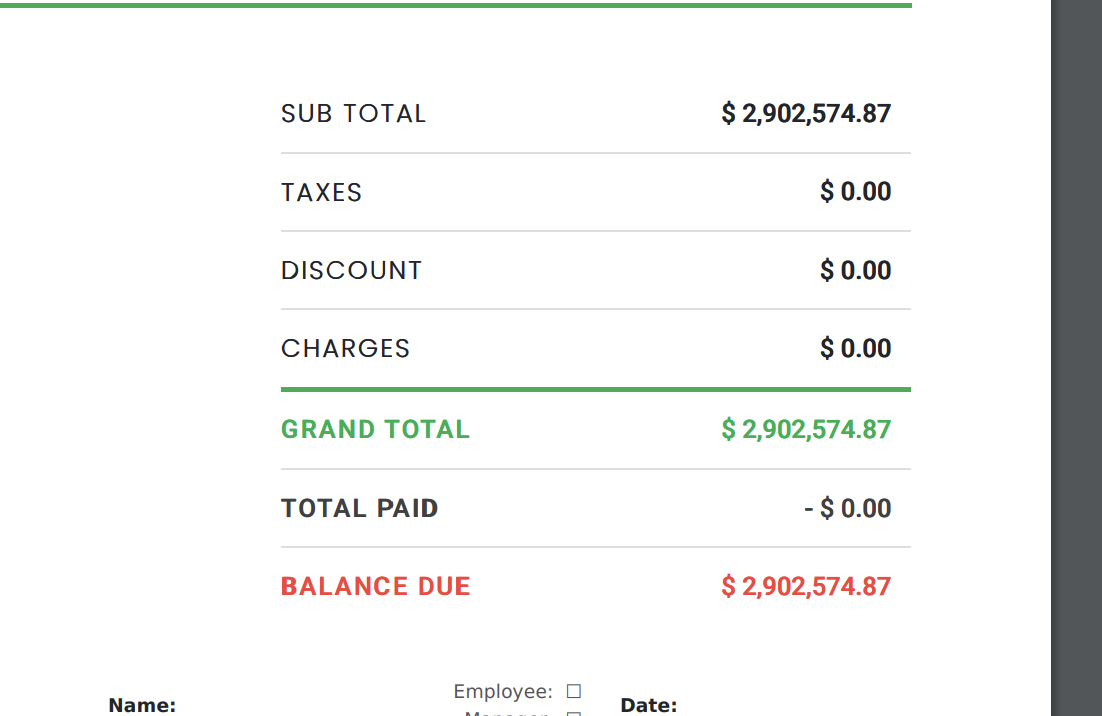
- Added Amount Paid and Balance Due to the bottom of the invoices
A popular request and we are happy to accommodate! The Amount Paid and Balance Due information is now displayed on Invoice PDFs. Click on Export Invoice PDF in an Outbound Order, and you will see the amounts there.
Integrations
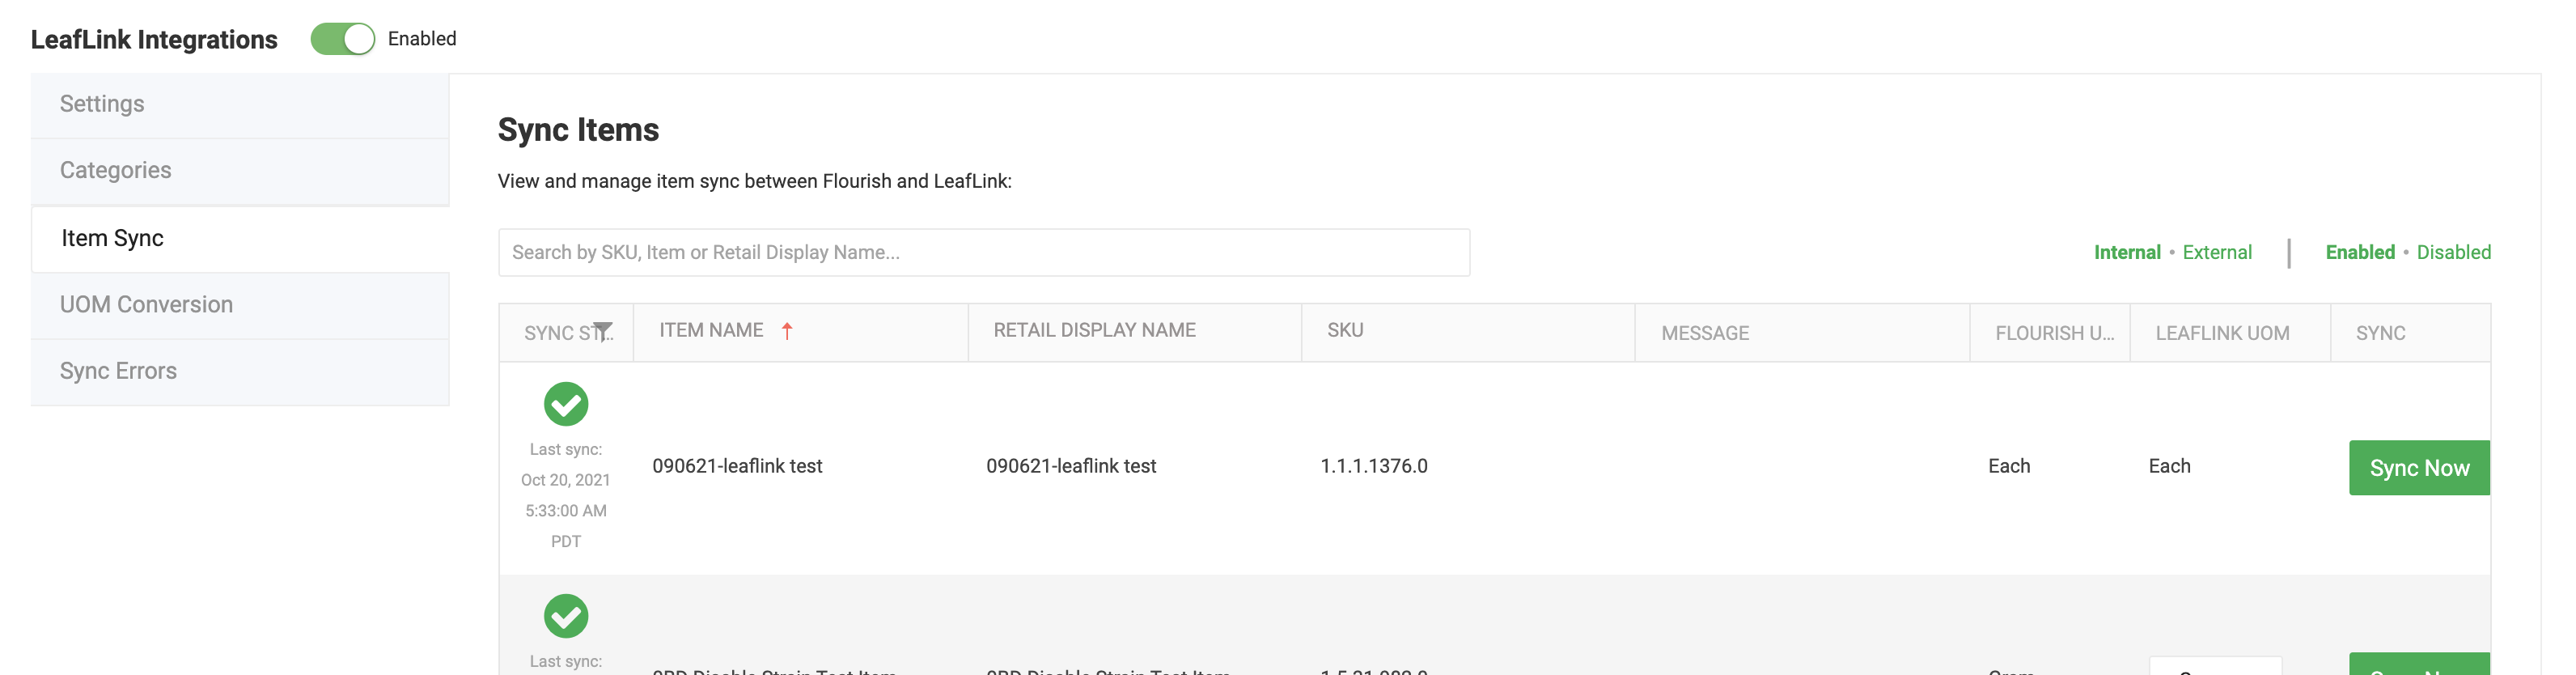
- Leaflink - Added External Items filter and removed Disabled items.
You can now filter between External/Internal and Enabled/Disabled items in the Settings > Integrations > Leaflink > Item Sync screen.
- QuickBooks Online:
- Outbound Order Notes now sync to QuickBooks Online.
All Outbound Order Notes will now sync to QBO as Order Notes.
How do the notes sync?
- Both destination and internal notes go to QBO PrivateNote, with a line break between them (Destination note comes first).
- External order notes go to QB CustomerMemo.QuickBooks Online allows for a Max of 3 notes per order so the 3 latest notes will sync every time an order is synced to QBO. - Outbound Order Payment sync updates.
Any Payments that are recorded in Flourish will now sync to QBO with the following info:- Payment Amount
- Payment Date
- Ref #
- Payment Type
- Disconnect (Un-map) Items, Destinations, and Vendors between the platforms.
If you need, for example, to disconnect a Flourish Destination from a QBO Customer, you can easily do that. Learn more here.
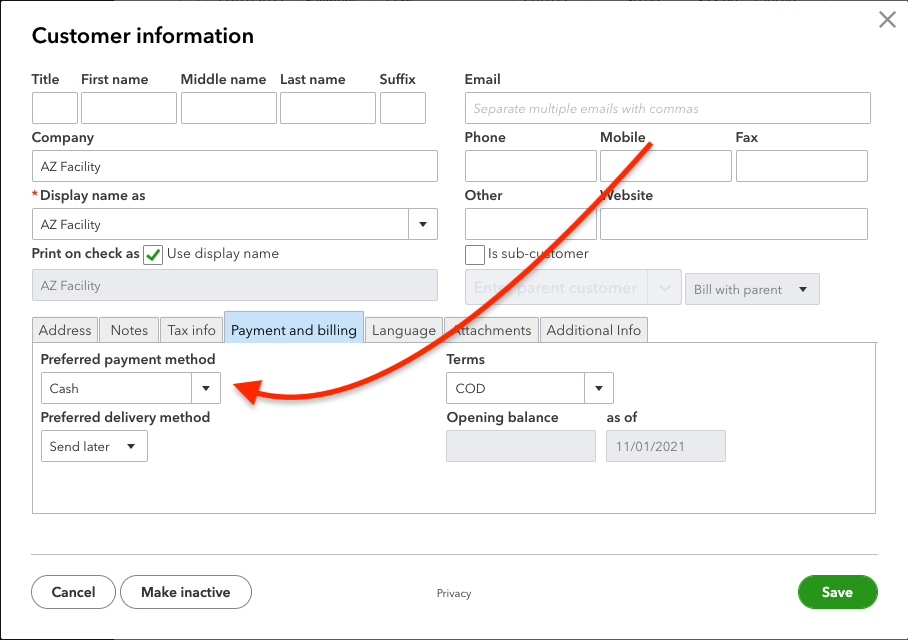
Currently, Flourish does not sync Payment Type to QBO. The Payment Type is set by default to the Preferred Payment Method set in QBO for the customer. See notes below for Payment Type integration. - Outbound Order Notes now sync to QuickBooks Online.
Set the Preferred Payment Method of the 'Customer' profile on QuickBooks Online.
How did we do?
2021.10.19 Software Release 4.46.0
2021.11.16 Software Release 4.48.0