Table of Contents
Assign Sales Reps to a Destination
When you assign Sales Reps for a destination, you will only see these reps as available selections for outbound orders to that destination. You can assign or remove sales reps from a destination at any time. You don't have to assign Sales Reps for a destination. Leaving the Sales Reps area in the Destination Details page empty populates all your Sales Reps when you create an outbound order for your destination.
When you assign Sales Reps for a destination, you will only see these reps as available selections for outbound orders to that destination. You can assign or remove sales reps from a destination at any time.
You don't have to assign Sales Reps for a destination. Leaving the Sales Reps area in the Destination Details page empty populates all your Sales Reps when you create an outbound order for your destination.
Read here or watch the video below to learn how to assign Sales Reps to a destination. You can set Sales Reps for a destination in two ways:
From the Destination Details page
- Go to Settings.
- Select Distribution. The default page is Destinations.
- Click on the name of the destination to edit it.
- Under the Sales Rep field on the right, click +Add Sales Rep.
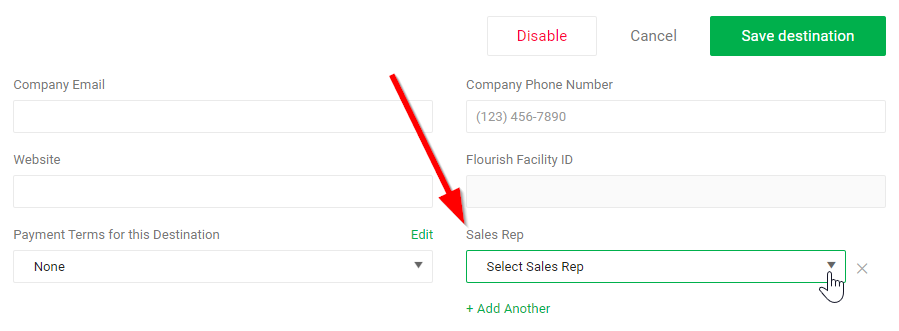
- Click the dropdown menu to select an active Sales Rep.
- After selecting a Sales Rep, you can click +Add Another if you would like to make more Sales Rep available for this destination.
- Click Save Destination.
From an outbound order
- While editing an outbound order, click the Edit button next to the Destination field.
- On the Edit Destination screen, follow steps 4 to 7 above.
Remove Sales Reps
- Use one of the ways above to edit the Destination.
- Click the X sign next to the name of the Sales Rep.
- Click Save Destination.
Video tutorial
Learn more about Managing Sales Reps
How did we do?
Managing Sales Reps
Create And Manage Drivers