Table of Contents
Import Outbound Orders with a Spreadsheet
Import an outbound order with a spreadsheet by importing a CSV to create orders in bulk.
Create outbound orders more efficiently with the Bulk Order Import tool. It reduces repetitive data entry, helps prevent errors, and provides a fast and reliable method for managing high-volume order creation.
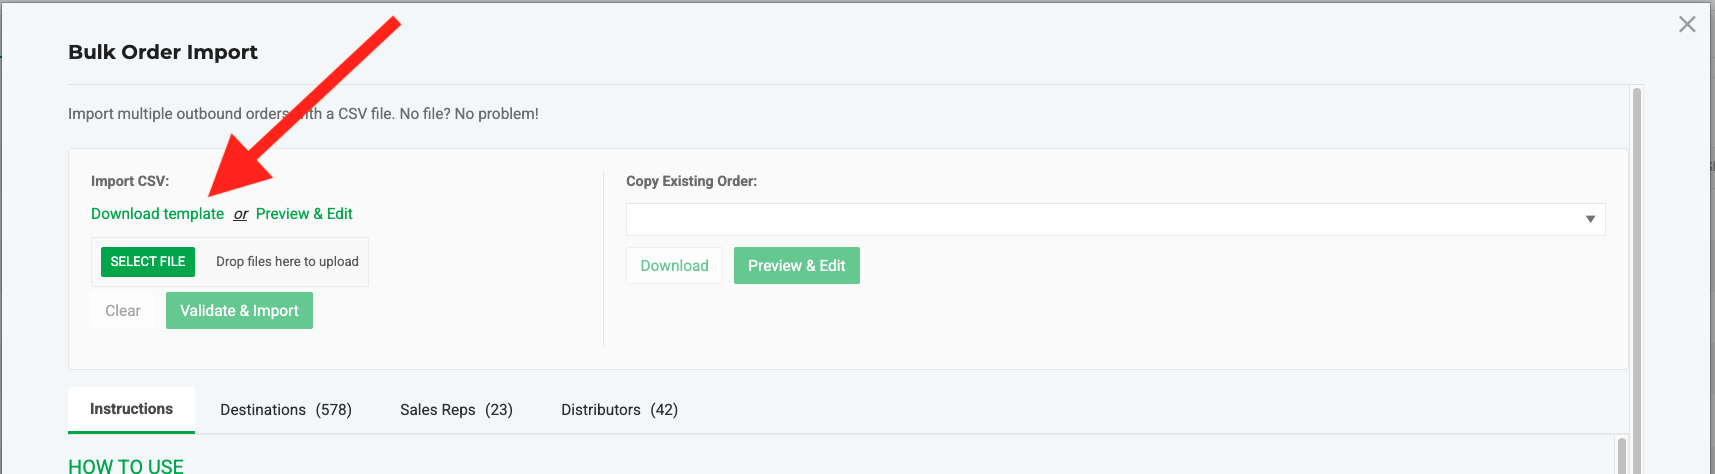
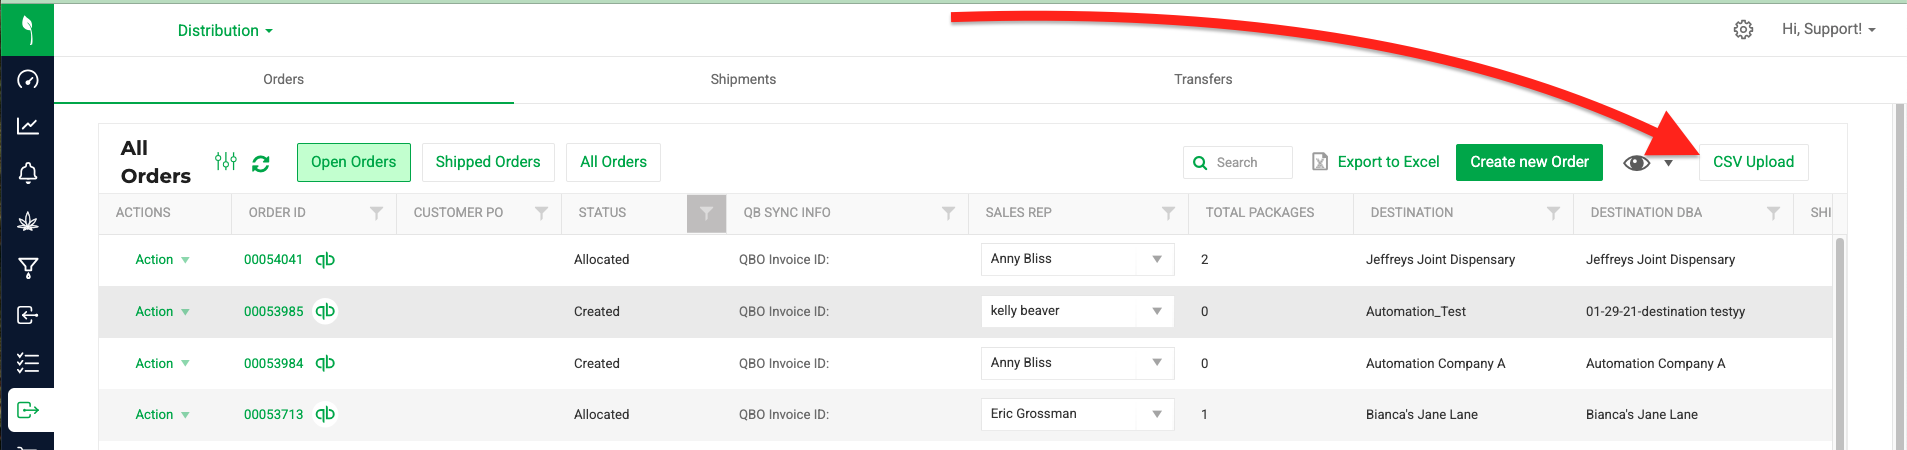
Use the Bulk Order Import tool to create multiple outbound orders at once and streamline your fulfillment workflow. In the Outbound module, click CSV Upload to open the Bulk Order Import screen.
You can build orders using two workflows:
Import a CSV File
- Go to the Outbound Module
- Click CSV Upload to open the Bulk Order Import screen.

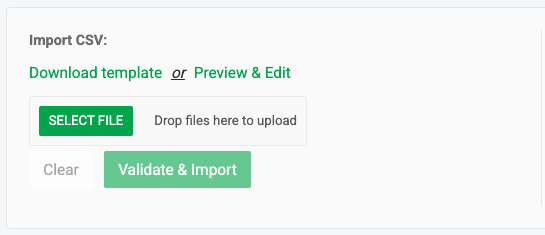
- Click Download template to get a clean CSV with the proper columns.
- Open the template and update it using the CSV Edit Notes below.
- Click SELECT FILE to upload your completed CSV.
- Click Preview & Edit to review your data and make adjustments directly in Flourish if needed.
- Use the reference tabs — "Instructions", "Preview & Edit", "Destinations", "Sales Reps", "Distributors" — to verify names, IDs, and other required values. Refer to the CSV Edit Notes Section below.Make sure the values in all four pricing fields stay aligned for each line:
* LineQty
* LineUnitPrice
* LineDiscount
* LineTotalPrice
If the math between these four fields doesn’t match, update the values before continuing with the import.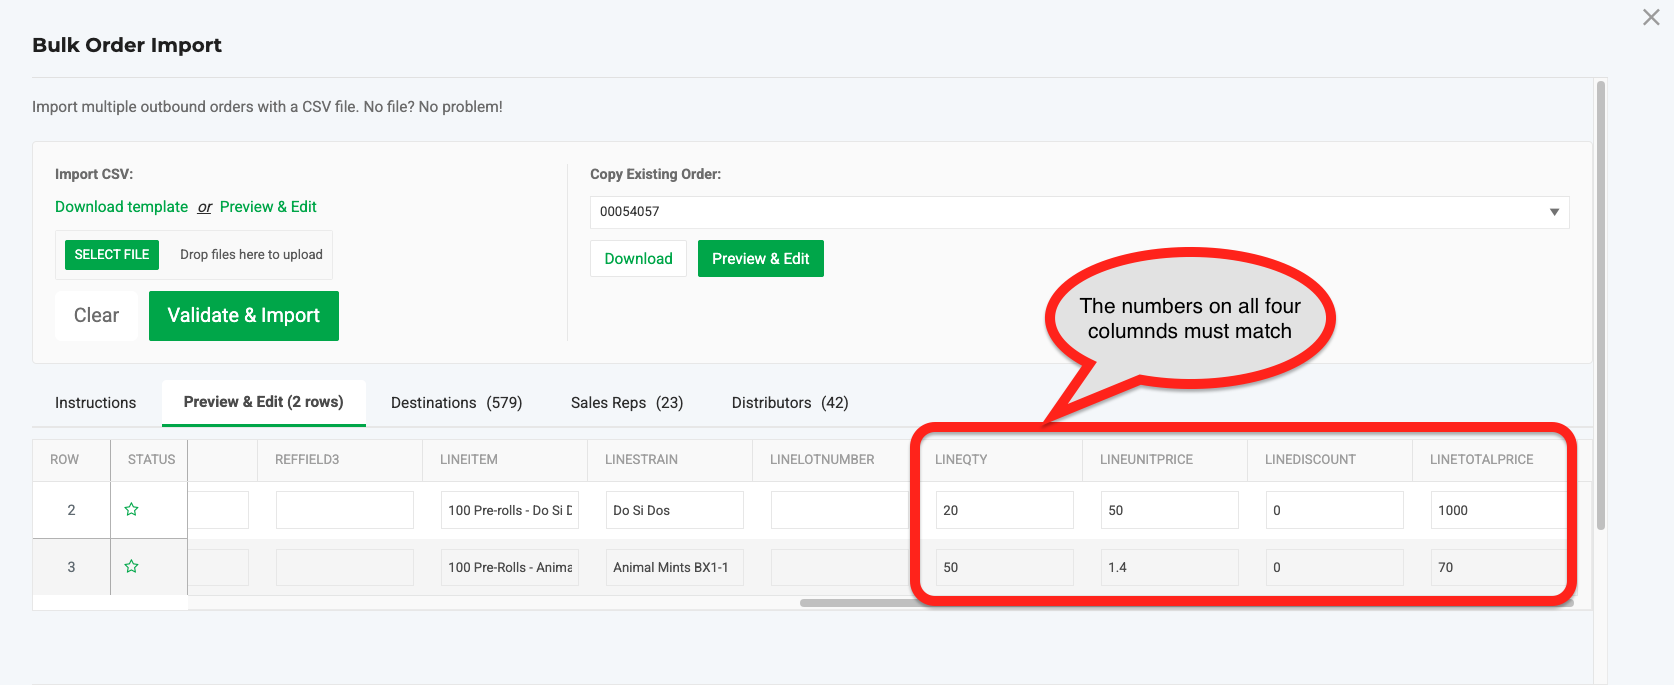
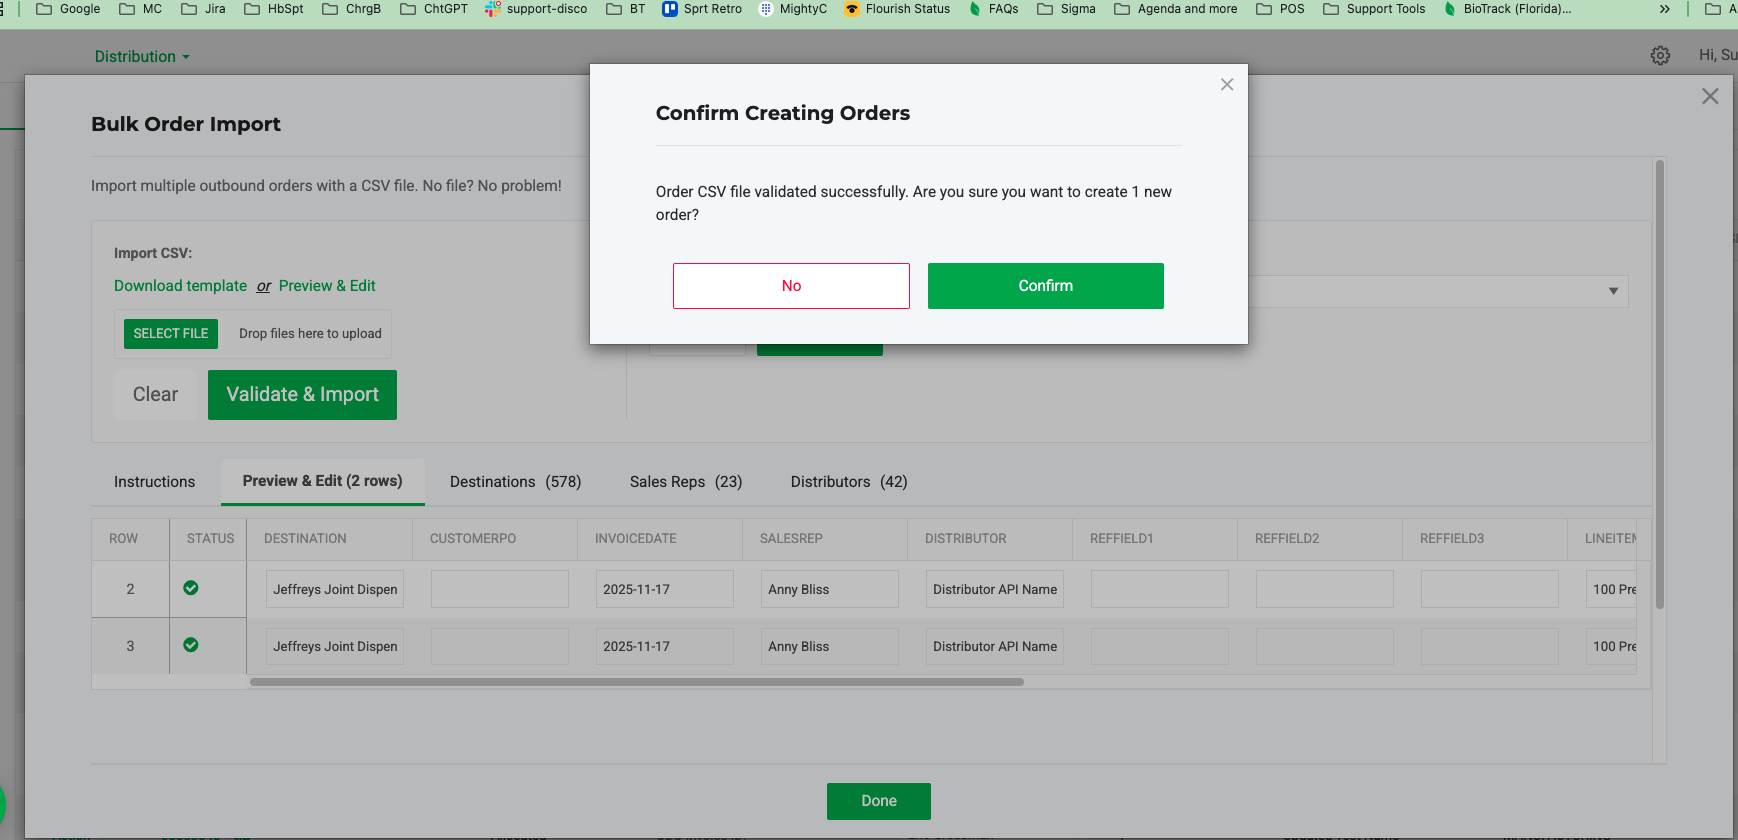
- Click Validate & Import to begin the validation process.
- Fix any errors shown, then click Validate & Import again.
See Validation Error Example. - After validation succeeds, click Confirm to create the orders.

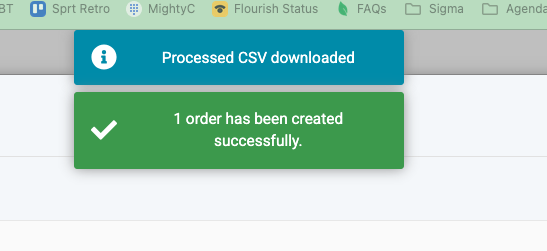
- Flourish displays a progress indicator and a final confirmation when all orders are created.
- Use Download again, Upload another, or Done, depending on what you want to do next.
Copy an Existing Order
- Go to the Outbound Module
- Click CSV Upload to open the Bulk Order Import screen.
- Use the Copy Existing Order dropdown to choose the order you want to copy.
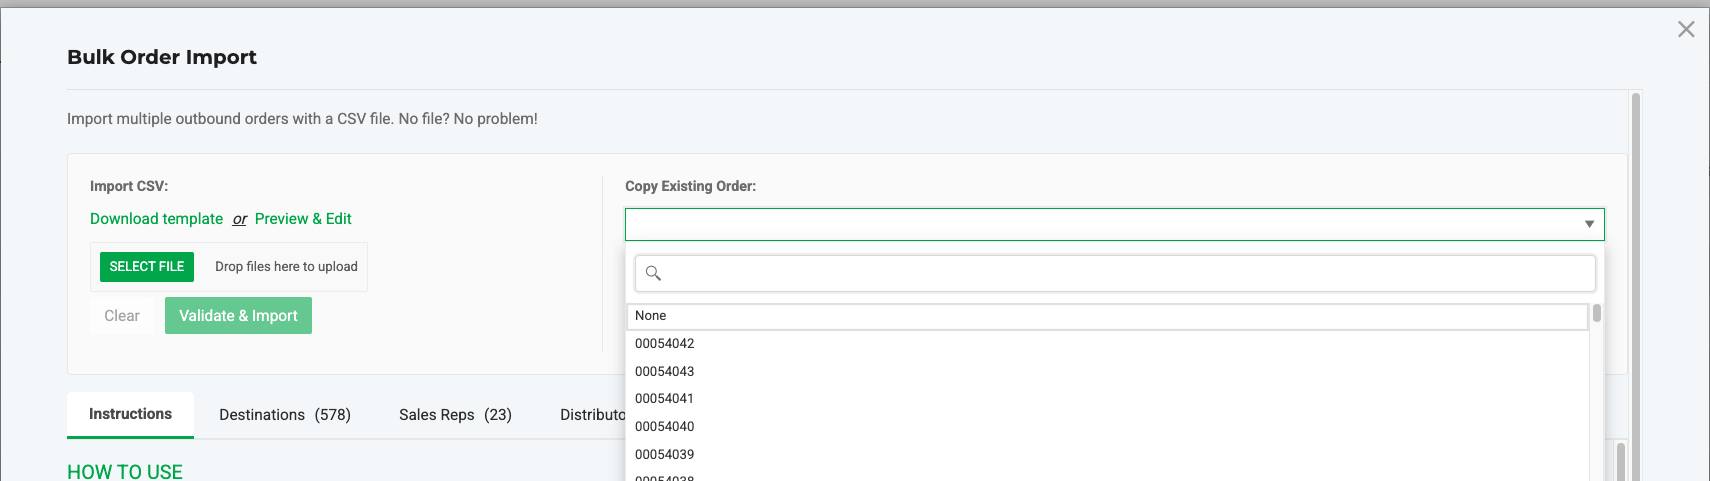
- Click the order ID to load its details into the importer.
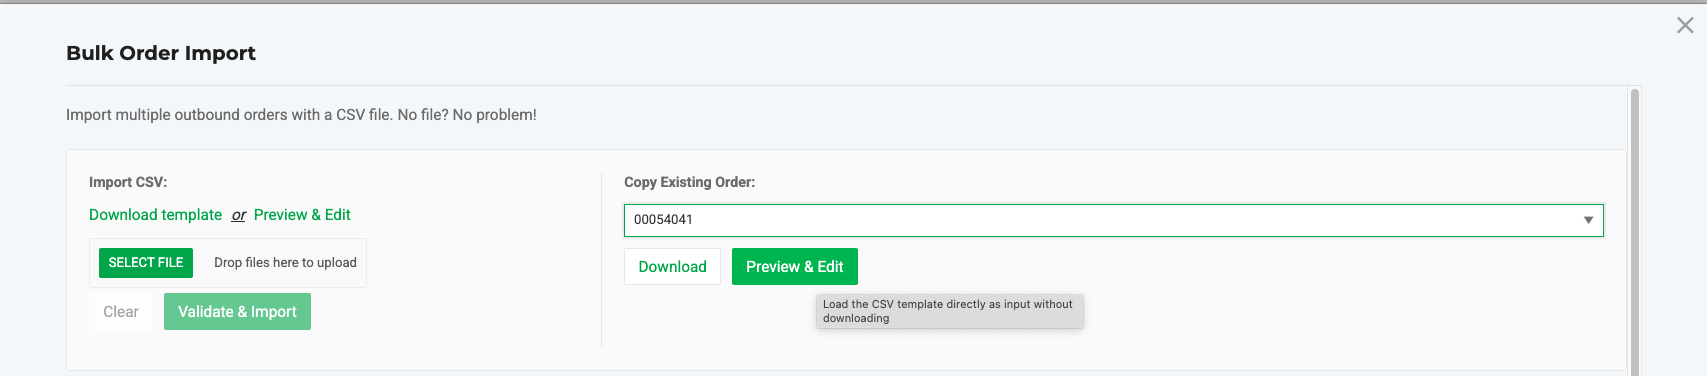
- Select how you want to proceed:
- To add or remove order lines, click Download, then open the CSV on your computer to edit it. After updating the file, please return to the Bulk Order Import screen to upload it. Refer to the Import a CSV File workflow (Step 5) for the next steps.
- Click Preview & Edit to review and adjust the copied order lines directly on-screen—no download required.Make sure the values in all four pricing fields stay aligned for each line:
* LineQty
* LineUnitPrice
* LineDiscount
* LineTotalPrice
If the math between these four fields doesn’t match, update the values before continuing with the import.
- After clicking Preview & Edit, Flourish opens the Preview & Edit tab so you can update quantities, pricing, destinations, or other line details as needed.
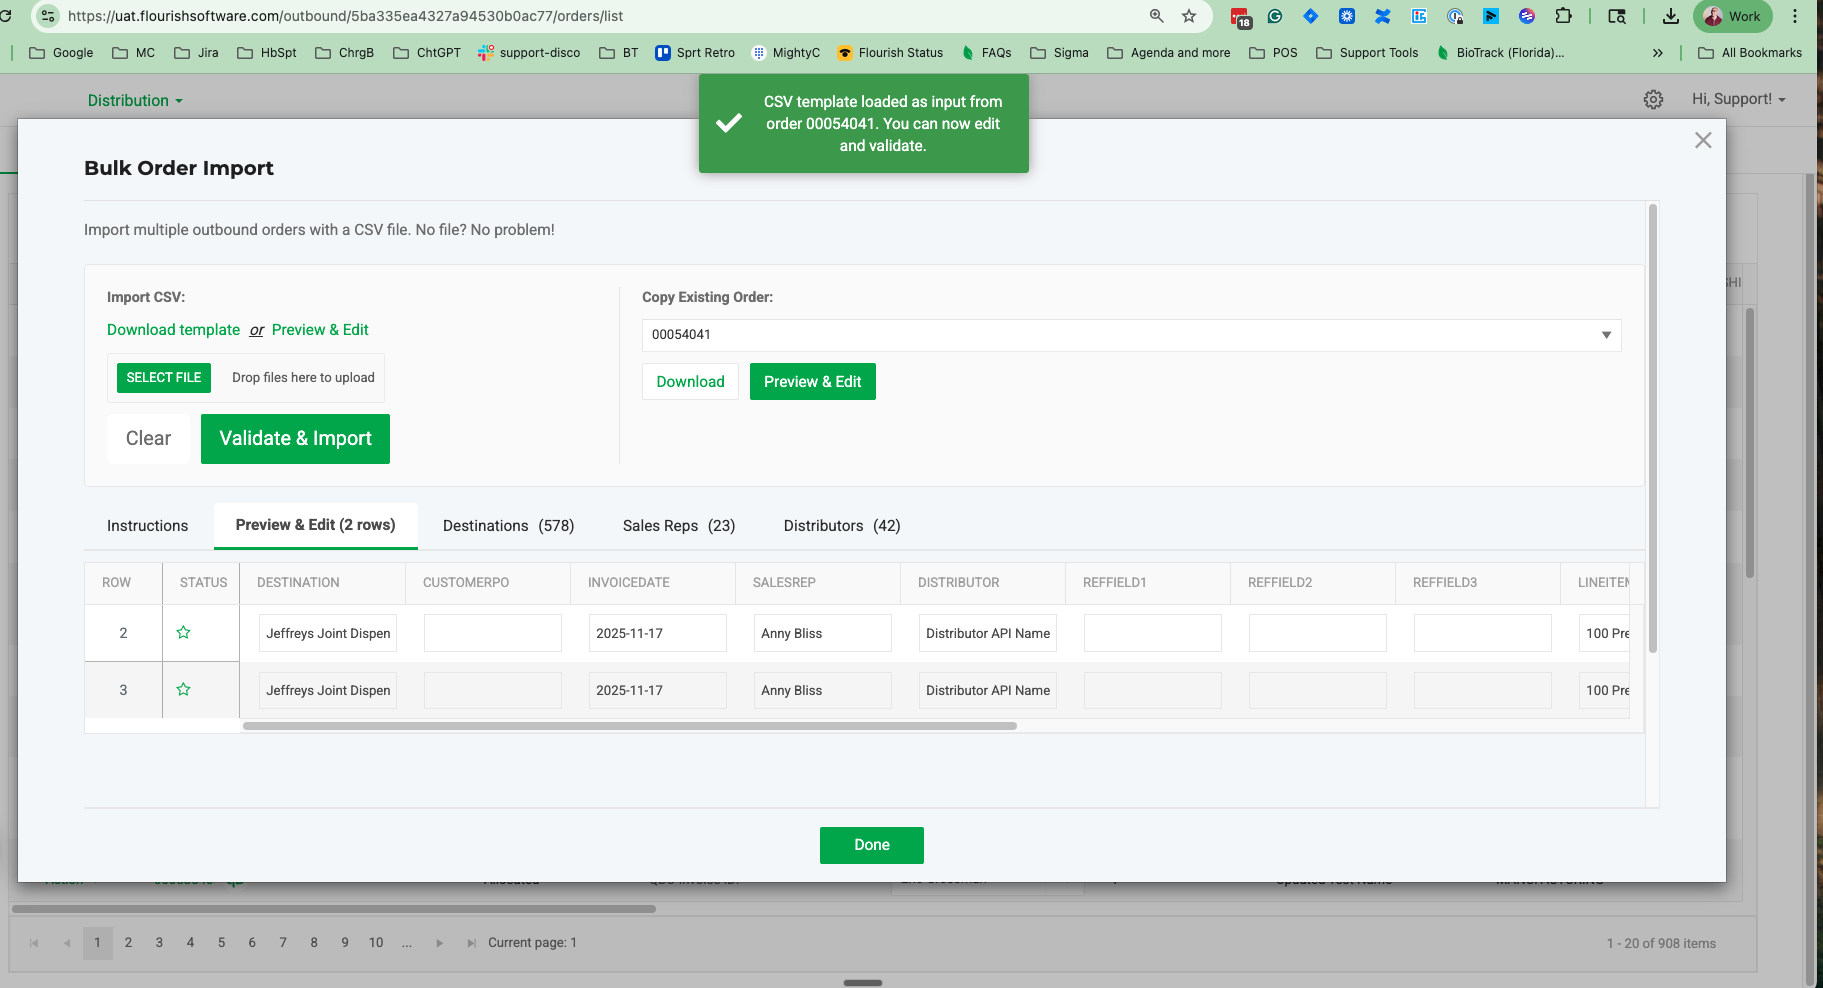
- Use the reference tabs — "Instructions", "Preview & Edit", "Destinations", "Sales Reps", "Distributors" — to confirm valid values while editing. Refer to the CSV Edit Notes Section below.
- When you’re ready, click Validate & Import.
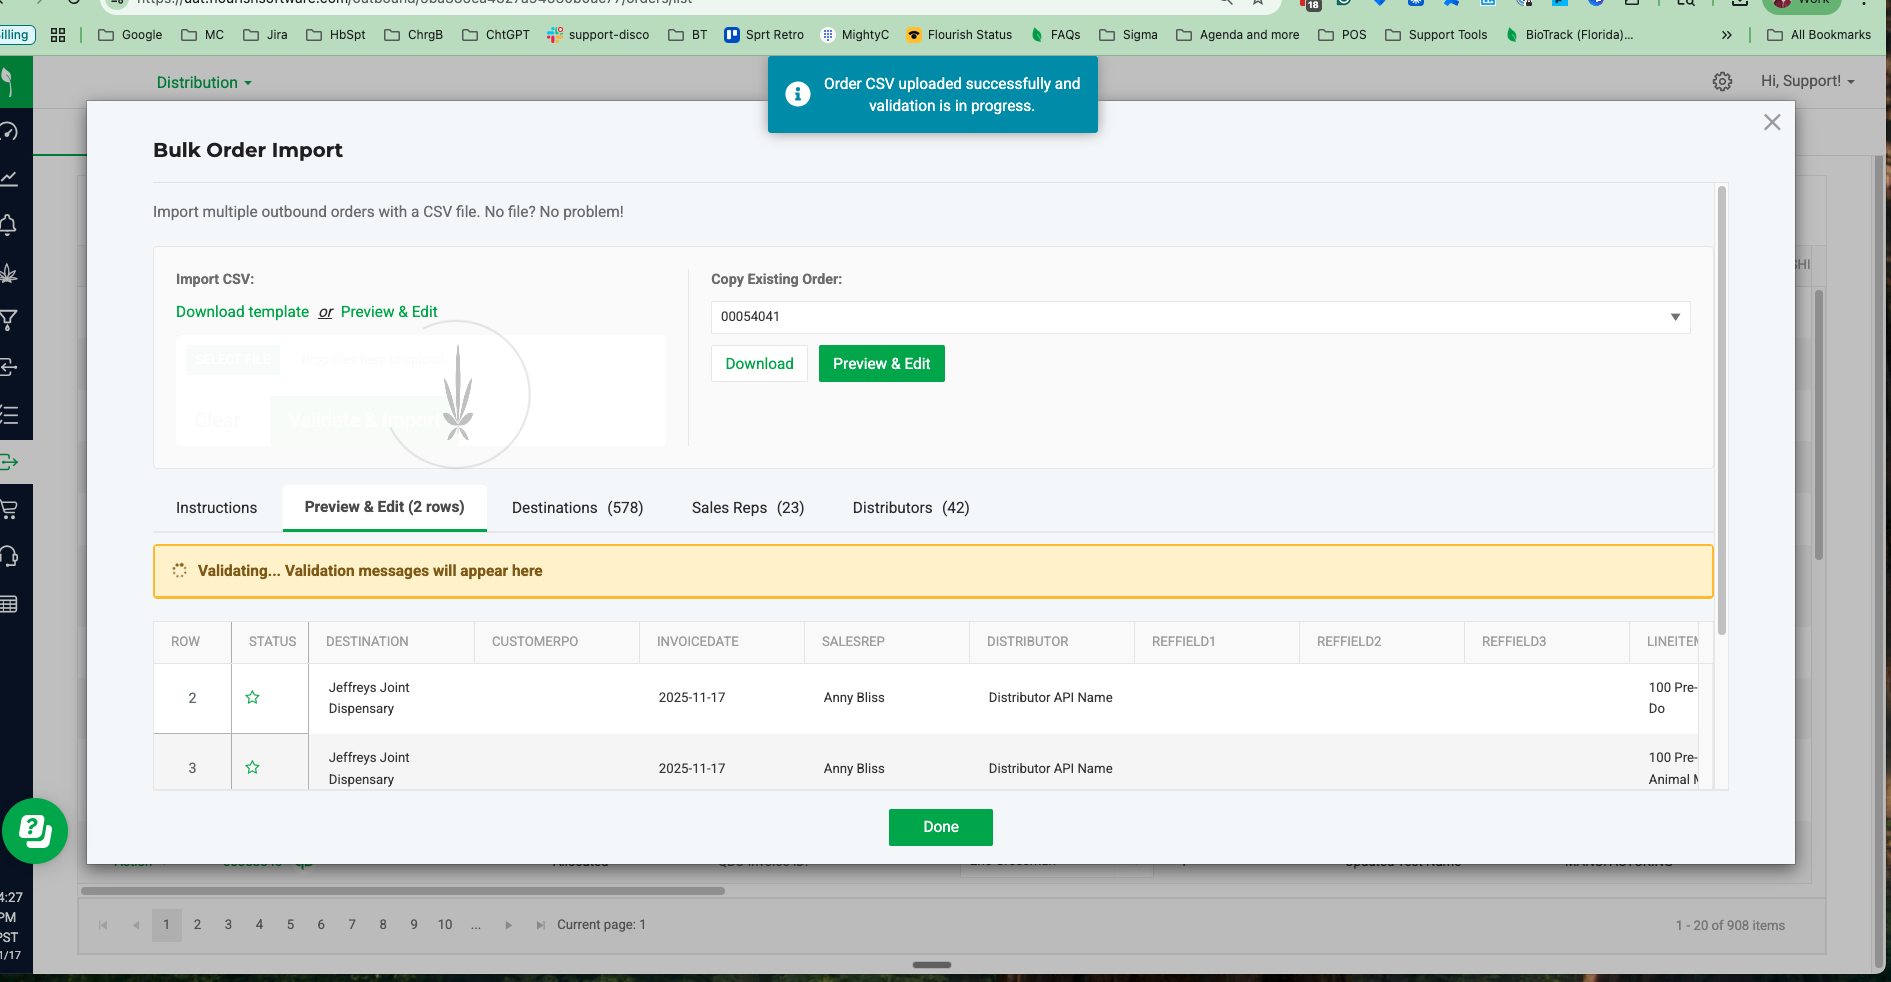
- If errors appear, correct the highlighted fields and click Validate & Import again.
See Validation Error Example. - After a successful validation, click Confirm to create your new orders.
- Flourish displays real-time progress and a success message once everything is complete.
- Use the final options:
- Download again to save the CSV you used
- Upload another to start a new import
- Done to close the window
CSV Edit Notes
• Each row represents one order line.
• All rows sharing the same Destination become a single order.
• Order-level fields (CustomerPO, InvoiceDate, SalesRep) are taken from the first row for each Destination group.
• You don’t need to repeat order-level fields across multiple rows.
• Hover over the Row column to add or remove rows.
• Hover over a cell to copy or clear its contents.
• Reference lists for Destinations, Sales Reps, and Distributors are available in the "Destinations", "Sales Reps", and "Distributors" tabs.
• CSV column definitions appear later in the article.
Tips & Best Practices
• Start with a small test file if it’s your first time using the importer.
• Match Destination names exactly with the values in the "Destinations" tab to avoid validation errors.
• If copying an existing order, double-check pricing, CustomerPO, and dates before importing.
• Use the row and cell tools in Preview & Edit to make quick adjustments without re-uploading your CSV.
• Save a customized version of the template if you frequently import similar orders.
• Use spreadsheet filters to review large files before uploading.
• Make edits directly in the importer whenever possible—it's faster and helps ensure accuracy.
• Run validation early to catch formatting issues before confirming.
• Check the "Destinations", "Sales Reps", and "Distributors" tabs whenever you see repeated validation errors.
• After a successful import, use Download again to keep a record of the processed file.
Validation Error Example
In this example, the 'Destination' is missing from line 3: 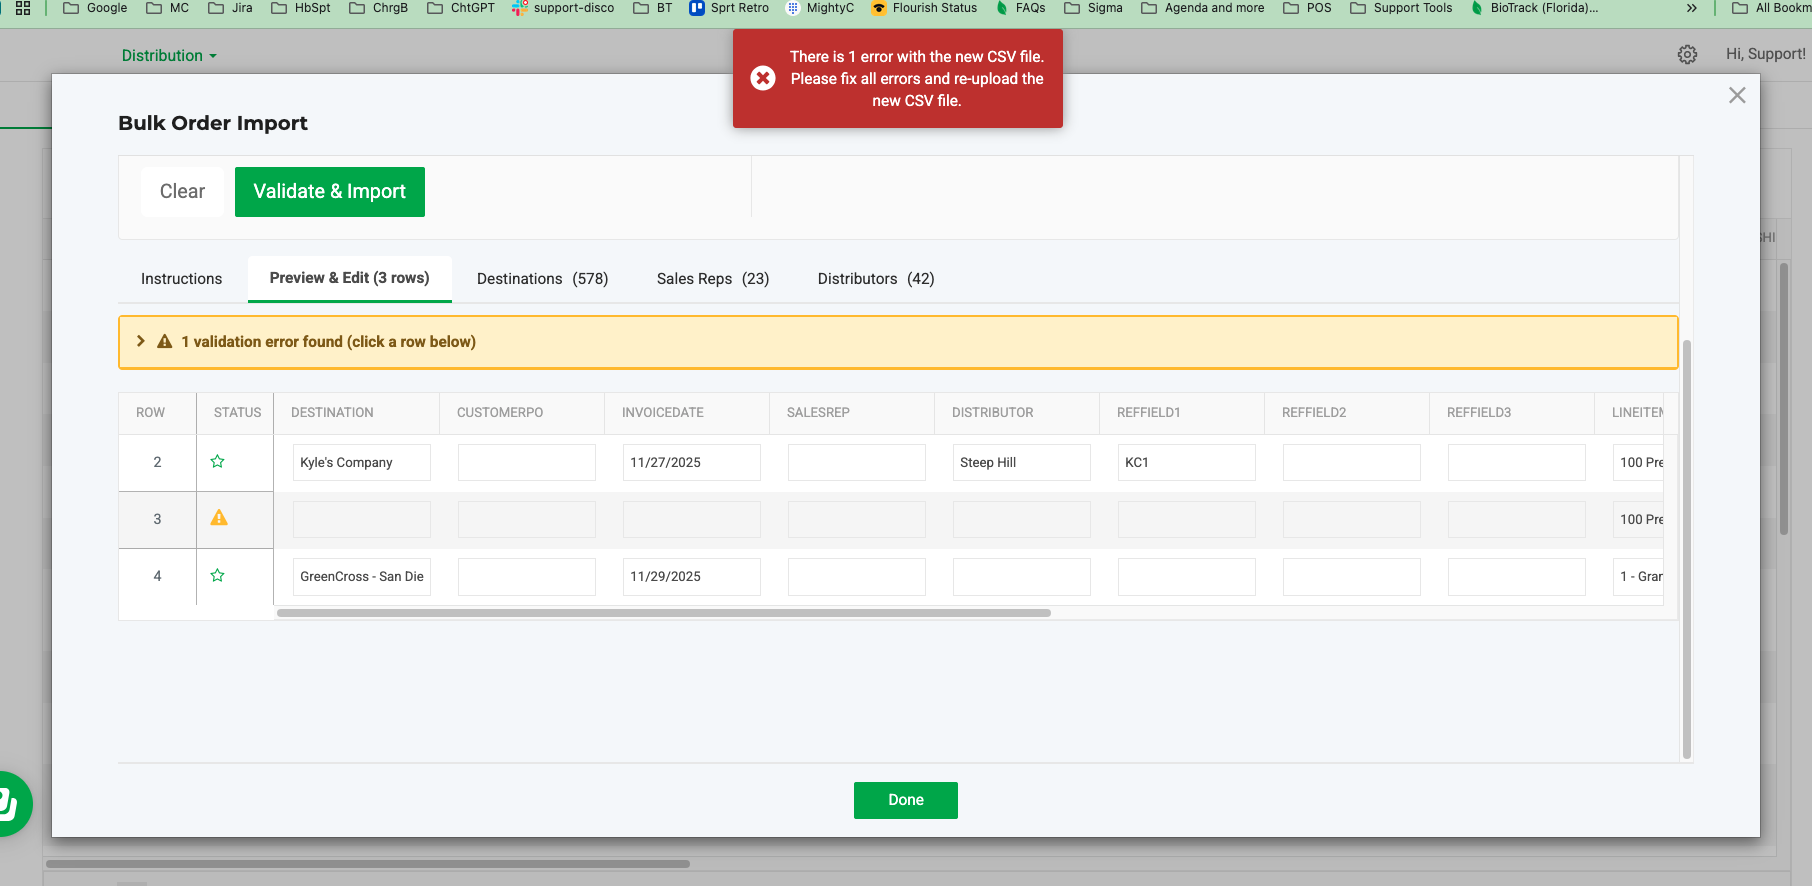 |
Click the > sign to expand and see the error 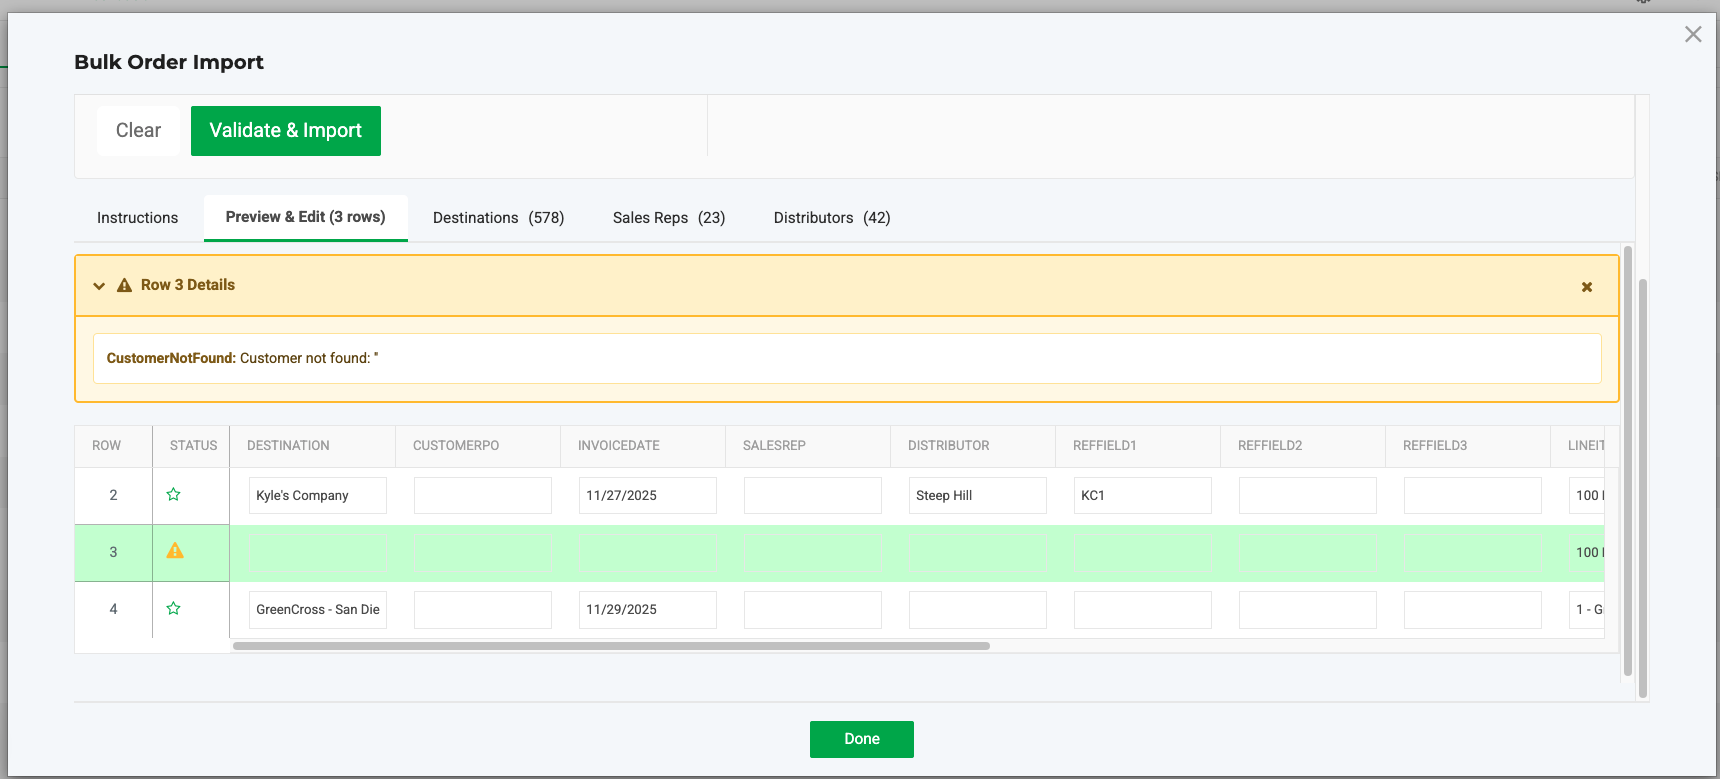 |
Video Tutorials
The Bulk Order Import Screen
* LineQty
* LineUnitPrice
* LineDiscount
* LineTotalPrice
If the math between these four fields doesn’t match, update the values before continuing with the import.
Create Outbound Orders
Import a CSV File
Copy an Existing Order
How did we do?
Outbound Order Status Fields
Create Outbound Sales Orders in Flourish